
You can maintain cooking temperatures without sun by leveraging thermal mass and insulation techniques. Start with heat-retaining materials like cast iron, ceramics, or multi-layered metals to store energy effectively. Use a haybox cooker by surrounding a hot pot with insulating materials like hay, newspaper, or rice hulls – this keeps food cooking for 8-10 hours after initial heating. Earth ovens and Dutch ovens also excel at heat retention when properly constructed and managed. For reliable results, monitor food temperatures with digital thermometers and maintain safe temperature zones. These time-tested methods will open up a world of off-grid cooking possibilities.
Essential Heat Retention Materials
When you're cooking without sunlight, choosing the right materials for heat retention can make or break your meal's success. You'll want to understand two key factors: heat retention (how well materials hold heat) and conduction (how effectively they transfer heat).
Your best options are multi-layered materials that combine different metals' strengths. While stainless steel excels at retention but struggles with conduction, aluminum offers the opposite qualities. That's why you'll find many quality cookware pieces using both – they're maximizing the benefits of each material. Anodized aluminum layers significantly improve durability while maintaining excellent thermal properties.
Thickness matters substantially in your cookware's performance. Thicker pans with high-conductivity metals like aluminum or copper will distribute heat more evenly across your cooking surface.
You'll want to avoid thin pans that create hot spots and cook unevenly. Cast iron, while excellent for retention, heats slowly and unevenly.
For ideal results without sunlight, look for quality multiclad stainless steel cookware with thick aluminum cores. You'll get the durability of stainless steel with aluminum's superior heat distribution.
Thermal Mass Cooking Principles
Understanding how thermal mass works in cooking can revolutionize your off-grid meal preparation. When you're cooking without sun, you'll need to leverage materials with high heat capacity, like cast iron, ceramics, and water. These materials store heat energy and release it gradually, helping you maintain consistent cooking temperatures with less fuel. Thicker cooking vessels provide greater thermal stability compared to thinner ones.
| Material Type | Heat Retention | Best Uses |
|---|---|---|
| Cast Iron | High | Searing, slow cooking |
| Ceramics | Medium-High | Baking, roasting |
| Water | Very High | Steam cooking, heat buffer |
You'll want to maximize thermal mass principles through three main heat transfer mechanisms. Conduction works through direct contact, like when you're cooking on a cast iron surface. Convection occurs when heat moves through air or liquid, perfect for slow cooking methods. Radiation transfers heat through electromagnetic waves, which you'll use in most enclosed cooking setups. For best results, combine these mechanisms by using thermal mass materials strategically – place water pans to store heat, wrap containers in thermal blankets to trap heat, and consider food geometry when planning cooking times. The thermal mass will continue cooking your food even after removing it from the heat source through carryover cooking.
Haybox Method Setup
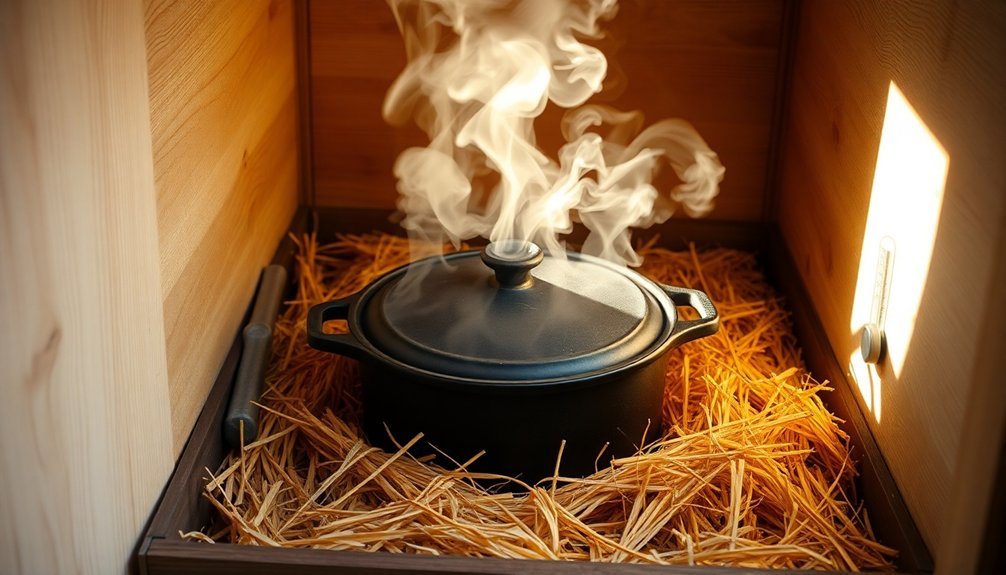
Setting up a haybox cooker is simpler than you might think. You'll need a sturdy box that's roughly 30" x 30" x 30", insulation material, and a heavy pot with a tight-fitting lid.
While wooden boxes work best, you can also use cardboard or metal containers. Line your box with heavy paper for added insulation, then create a thick base layer of your chosen insulating material. This method became especially valuable during World War II rationing, when fuel conservation was crucial.
Key materials you'll want to take into account:
- Hay, shredded newspaper, or rice hulls as your primary insulator
- A cast iron or similarly heavy pot to retain heat effectively
- Emergency blanket material for extra heat retention (optional)
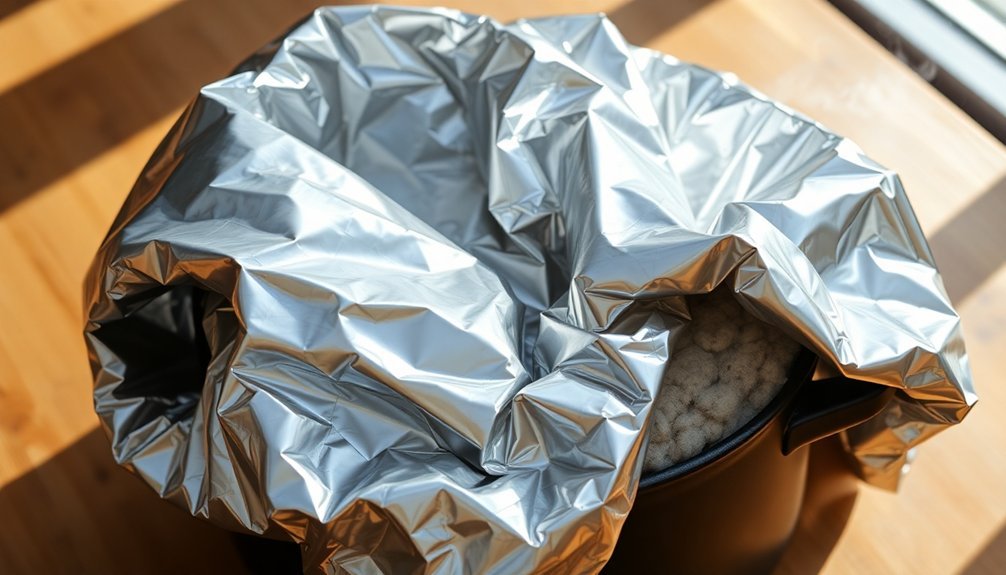
Position your pot in the center of the insulation base, making sure there's enough room to pack insulation around all sides. You'll want to surround the pot completely with your insulating material, including the top.
The goal is to create an almost airtight environment that traps heat effectively. When you're ready to use it, you'll bring your food to a vigorous boil first, then quickly transfer the pot to your haybox, where it'll continue cooking for 4-8 hours using retained heat.
Earth Oven Construction Guide
When building an earth oven, you'll need to start by selecting a level site that's protected from wind and rain, while gathering essential materials like firebrick, clay, and straw.
You'll want to lay your foundation with firebrick and sand, ensuring proper insulation through a carefully measured 4-5 inch thick clay-straw mixture. Constructing with these materials creates an oven that will retain heat efficiently for over 24 hours.
To maintain consistent cooking temperatures, you'll need to follow the critical 60-65% dome-to-mouth ratio and create a bell-shaped interior that measures roughly 20 inches in diameter.
Choosing Site and Materials
For successful earth oven construction, proper site selection and material gathering serve as your essential first steps. You'll need to locate a flat, level area that's protected from excessive wind and receives adequate sunlight. Similar to how thermal mass objects like bricks store heat, an earth oven retains warmth long after the initial firing.
The site must accommodate both your oven's footprint and provide enough workspace for comfortable cooking.
Key materials you'll need include:
- Firebrick for the floor and walls, guaranteeing proper heat retention
- All-purpose sand mixed with fire clay for the earthen construction
- Straw and newspaper for insulation and form-making
When selecting your build site, you'll want to decide between an in-ground or above-ground installation, as this choice affects your foundation requirements. Your foundation must be sturdy enough to support the oven's considerable weight and remain stable over time.
For the base, you'll need materials that provide insulation and heat retention, such as perlite and root beer bottles. Remember to think about your oven's intended dimensions when planning the base size, and make certain you've got enough space for proper compaction to prevent future shifting.
Heat Control Techniques
With your site selected and materials gathered, mastering heat control becomes your next key focus. You'll need to understand how your earth oven's design elements work together to maintain consistent cooking temperatures. The dome's height and door proportions (63% of total height) substantially impact heat retention and airflow management.
| Heat Control Element | Key Action |
|---|---|
| Insulation Layer | Pack bottles, perlite, and sand tightly to prevent heat loss |
| Thermal Mass | Apply even clay-sand mixture for stable temperature |
| Dome Shape | Maintain 60-65% dome-to-mouth ratio for ideal heat flow |
| Door Management | Monitor opening time to regulate internal temperature |
Your oven's performance depends heavily on proper insulation and thermal mass. The foundation's 1.5-foot depth with gravel creates a stable base, while the layered insulation materials prevent heat from escaping downward. When cooking, you'll notice that the thermal layer, made from clay and sand mixture, helps distribute heat evenly throughout the dome. Keep track of your oven's temperature by observing the interior color and testing with small amounts of flour – it should brown quickly when the temperature is right for baking.
Dutch Oven Heat Management
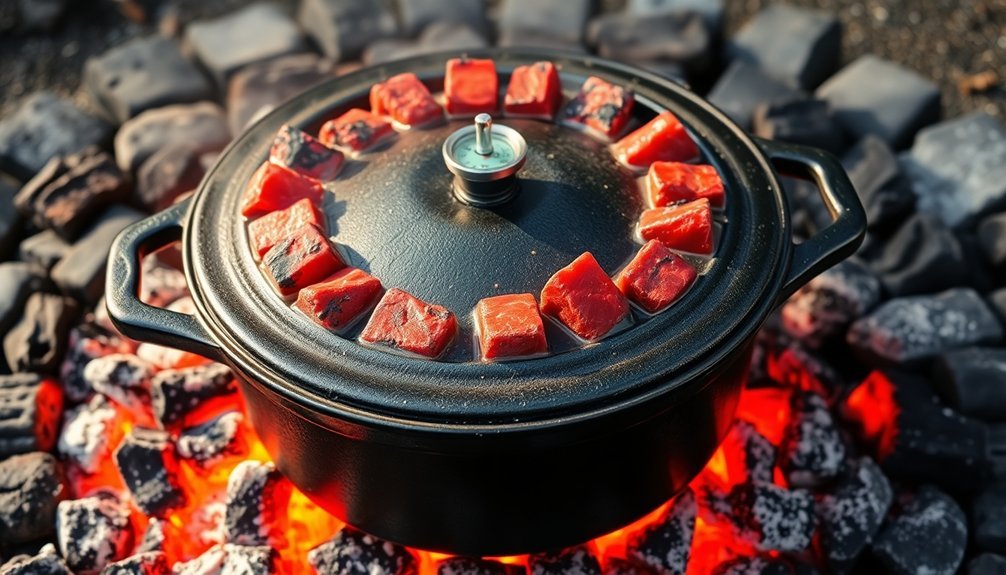
Properly managing heat in your Dutch oven relies on understanding the relationship between coal placement and cooking methods.
You'll need twice as many coals as your oven's diameter for baking and roasting, while frying and simmering require coals equal to the diameter. The key is mastering coal distribution ratios: use 3:1 (top:bottom) for baking and 1:3 for simmering or stewing.
For different cooking methods, follow these essential coal arrangements:
- Baking/Roasting: Place most coals on top to prevent bottom burning and create even heat distribution.
- Simmering/Stewing: Position majority of coals underneath for consistent low-heat cooking.
- Frying/Boiling: Set all coals beneath the oven for direct heat transfer.
Your Dutch oven's cast iron construction helps maintain steady temperatures through its high thermal mass and even heat distribution. The tight-fitting lid creates a self-basting cycle that locks in moisture and flavor.
Remember that charcoal typically lasts about 30 minutes, so you'll need to replace coals every 20 minutes to maintain your desired temperature. For precise control, add or remove one coal from the top for every 25-degree adjustment needed.
Insulation Layer Best Practices
When selecting your Dutch oven's insulating materials, you'll want to look for natural options like wool blankets, hay, or dried leaves that can trap air effectively between layers.
You can create multiple insulation zones by wrapping different thicknesses of these materials around specific areas of your Dutch oven, with extra padding at the bottom and sides where heat loss typically occurs.
Managing these zones properly lets you maintain consistent cooking temperatures longer, as each layer works together to keep the heat trapped where you need it most.
Selecting Natural Insulating Materials
In the domain of natural insulation, selecting the right materials can make or break your cooking efficiency. When you're looking for natural insulation options, olive stones stand out as a superior choice due to their exceptional thermal performance and moisture resistance.
- Olive stones naturally resist moisture absorption and maintain their insulating properties even in damp conditions
- Their granular nature allows them to fill irregular spaces completely, ensuring no heat escapes through gaps
- The cellular structure of nut and fruit shells provides excellent thermal retention, keeping your food cooking longer
You can also consider other agricultural byproducts like apricot stones and walnut shells, which offer similar benefits.
What makes these materials particularly valuable is their adjustable grain size – you can customize them to fit your specific insulation needs. They're not just effective; they're sustainable too, as they're derived from food processing waste.
For the best results, layer your insulation strategically, combining these natural materials with moisture-wicking base layers and water-repellent outer layers to maintain consistent cooking temperatures.
Managing Multiple Insulation Zones
Building on the principles of natural insulation materials, effective zone management takes your cooking setup to the next level. You'll need to create distinct temperature zones that work together, similar to how layered clothing maintains body heat. By establishing multiple zones, you can control both direct and indirect heat for superior cooking results.
| Zone Type | Purpose |
|---|---|
| Primary Heat Zone | Direct cooking, searing, and initial temperature buildup |
| Secondary Zone | Gentle cooking and temperature maintenance |
| Insulation Buffer | Prevention of heat loss between zones |
| Temperature Control | Vent management and airflow regulation |
| Moisture Barrier | Protection against condensation and heat loss |
To maximize your zones' efficiency, you'll want to maintain temperatures between 225°F and 250°F for consistent results. Think of your setup like a layered clothing system – each zone serves a specific purpose while working in harmony with the others. Set up your primary heat zone for initial searing, then use the secondary zone for gentler cooking. The insulation buffer prevents unwanted heat transfer, while your temperature control zone helps regulate airflow. Don't forget to establish a moisture barrier to maintain heat efficiency throughout your cooking process.
Food Temperature Monitoring Tips
Proper temperature monitoring stands as the cornerstone of food safety in any cooking environment. To effectively track your food's temperature, you'll need to master both basic and advanced monitoring techniques.
Using digital thermometers correctly means inserting them into the thickest part of your food and waiting for a steady reading before recording the temperature immediately.
For enhanced monitoring capabilities, you can implement wireless temperature systems that'll give you real-time data and automatic alerts when temperatures drift outside safe ranges. These systems offer cloud-based access and data logging features to help you track temperature trends over time.
Key temperature guidelines you must follow:
- Keep cold foods at or below 41°F
- Maintain hot foods at or above 135°F
- Cool foods from 135°F to 70°F within 2 hours, then to 41°F within 4 additional hours
Remember to calibrate your thermometers regularly and clean them after each use to prevent cross-contamination.
By establishing clear standard operating procedures and training your staff thoroughly, you'll create a reliable temperature monitoring system that guarantees food safety and quality.
Don't forget to document all temperature readings and take immediate corrective action when measurements fall outside safe ranges.
Alternative Heat Sources
When traditional cooking methods aren't available, you'll need reliable alternative heat sources to prepare meals safely. Portable propane heaters offer a practical solution, delivering 4,000-9,000 BTU of heat using standard 1-pound cylinders. You can extend their runtime by connecting them to larger 20-pound tanks outside using a proper hose and filter.
For indoor cooking, you've got several options. Wood-burning stoves provide consistent heat during power outages, while gas inserts can utilize existing fireplace setups.
Catalytic heaters, running on natural gas or propane, offer efficient heating through catalyst technology. If you're environmentally conscious, biofuel cans provide a non-toxic heating alternative with lower emissions.
DIY solutions can work effectively in smaller spaces. You can create a terracotta pot heater using a folding stove and canned heat, or construct a tea candle heater with basic materials.
Soapstone heaters, made from natural rock with high thermal mass, effectively store and release heat for cooking purposes.
Remember to think carefully about your fuel source. Wood pellets, propane, biofuel, and natural gas each offer different benefits regarding availability, efficiency, and environmental impact. Always guarantee proper ventilation when using any indoor heat source.
Frequently Asked Questions
How Long Can Cooked Food Stay Safe in a Haybox Cooker?
You'll need to monitor your haybox closely, as food's only safe while staying above 140°F (60°C). If it drops below this temperature, you must reheat it to boiling before eating to avoid bacterial growth.
Can These Methods Work Effectively in Freezing Temperatures?
You'll need extra insulation when using these methods in freezing temps. Try double-wrapping your slow-cooker, placing it in sheltered areas, and using higher initial temperatures to compensate for faster heat loss.
Which Foods Should Never Be Cooked Using Heat Retention Methods?
You shouldn't use heat retention cooking for delicate foods like leafy greens, tender fish, and eggs. They'll become overcooked, spongy, and lose nutrients. Vitamin-rich vegetables also degrade when exposed to prolonged heat.
What Backup Methods Work if Insulation Materials Get Wet?
You can substitute wet insulation with dry towels, blankets, or newspaper layers. Try using straw, hay, or shredded foam as alternatives. Stack multiple layers to maintain heat retention when your primary insulation fails.
How Do You Prevent Food From Overcooking During Extended Heat Retention?
You'll prevent overcooking by using insulated containers, monitoring internal temperatures regularly, and removing food once it reaches the target temp. Don't leave items in heat retention devices longer than necessary.
In Summary
You've learned multiple ways to keep cooking food without direct sun exposure. Whether you're using thermal mass principles, haybox cookers, earth ovens, or insulated Dutch ovens, maintaining consistent temperatures is key. Remember to monitor your food's internal temperature and use proper insulation layers. By mastering these heat retention techniques, you'll save fuel while still creating delicious, fully-cooked meals in any situation.


Leave a Reply