
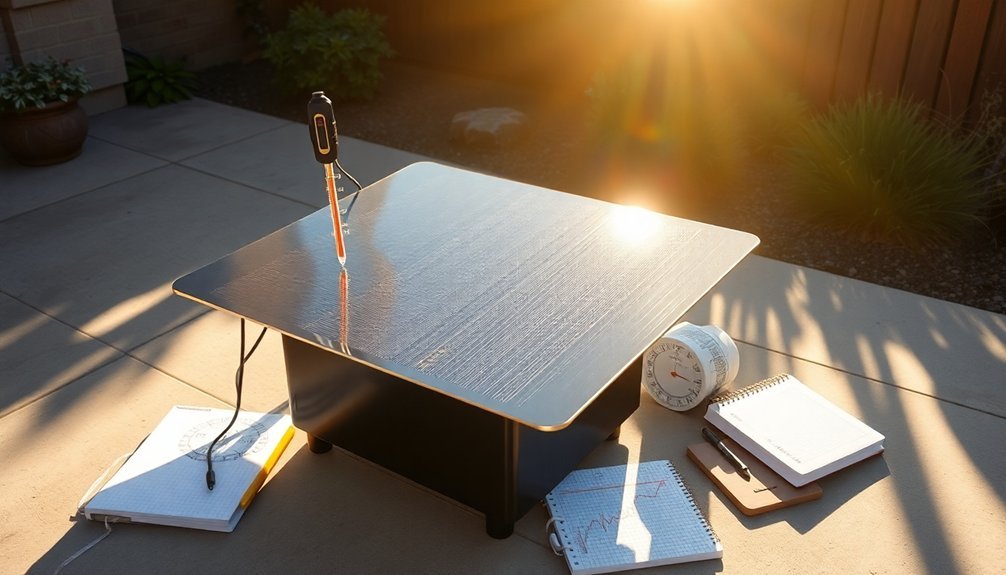
To track your solar oven's heat like a pro, you'll need a digital probe thermometer that covers -50°C to 300°C for instant, accurate readings. Place probes in key spots: the central air space, thermal mass surface, and food core. Keep food safety in mind by maintaining temperatures above 125°F, with an ideal cooking range of 150-225°F. Monitor every 15-30 minutes and adjust reflectors accordingly. Use dark, lidded cookware for best heat retention, and connect your thermometer to data logging apps like GoSun for real-time alerts and temperature graphs. The path to precision solar cooking has only just begun.
Essential Temperature Monitoring Tools
Successfully monitoring your solar oven's temperature requires a combination of digital tools and measurement devices.
You'll need both probe thermometers that can handle temperatures from -50°C to 300°C and digital thermometers with instant reading capabilities.
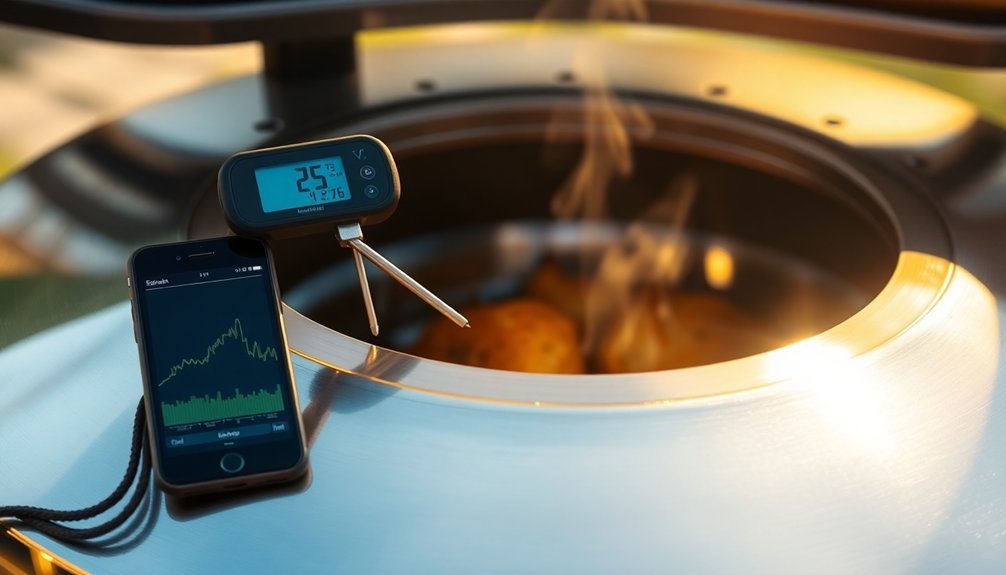
Download apps like GoSun or SolarChef to track real-time temperatures and receive customizable alerts. These apps offer recipe management and community sharing features that'll enhance your solar cooking experience.
For precise measurements, use infrared thermometers with laser pointers to check specific spots inside your oven.
Many advanced systems include speed control features to prevent dangerous overheating during operation.
Don't forget to calibrate your temperature sensors regularly to maintain accuracy.
Consider using thermocouples and data loggers if you need to track temperature changes throughout the entire cooking process.
These tools will help you achieve consistent results and perfect your solar cooking technique.
Safe Cooking Temperature Ranges
When cooking with a solar oven, you'll need to reach and maintain specific internal food temperatures to secure safety.
For poultry, ensure you reach 165°F (73.9°C) for at least 15 seconds. Fish and shellfish require 145°F (62.8°C), while beef, lamb, and pork can be served at 145°F (62.8°C) for immediate service or 160°F (71.1°C) for ground meats. To preserve food safety, use shallow storage containers when storing leftovers to ensure quick and even cooling.
Since solar ovens typically cook slower than conventional ovens and rarely exceed 200°F (93.3°C), you'll need to monitor cooking times carefully.
Keep food out of the danger zone (40°F-140°F) by cooking promptly and maintaining proper temperatures. For egg dishes, aim for 160°F (71.1°C) when holding them briefly, or 145°F (62.8°C) for immediate service.
Always use a reliable thermometer to verify these temperatures.
Digital Vs Analog Thermometers
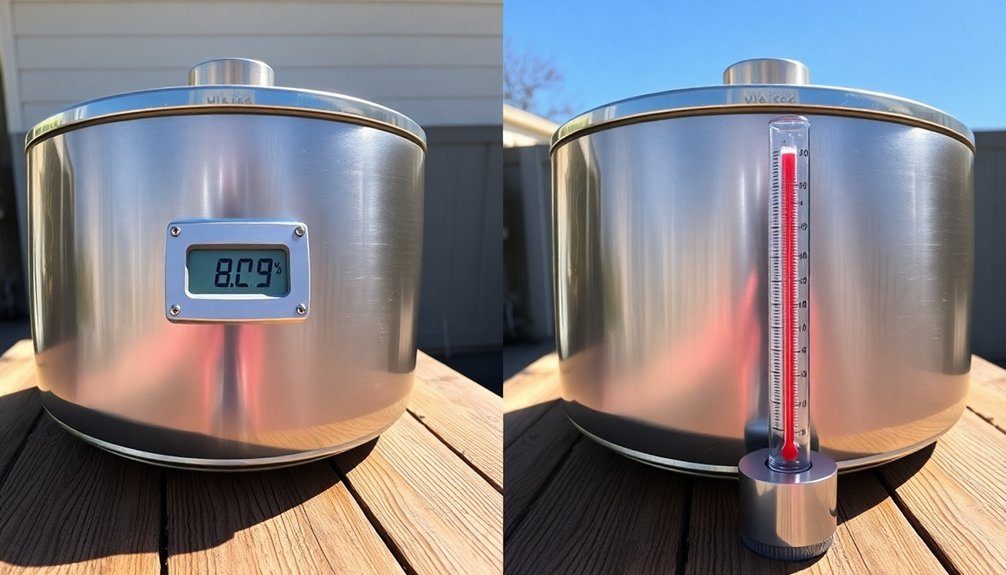
Your digital thermometer will give you far more precise readings than an analog model, often down to a tenth of a degree compared to the 1-2 degree increments of traditional mercury thermometers.
With a response time of 0.5s, digital thermometers deliver nearly instant temperature feedback for your solar cooking needs.
You'll notice the digital device responds much faster, providing readings within seconds instead of waiting for mercury to rise and stabilize.
While both types can effectively monitor your solar oven's temperature, digital thermometers offer superior accuracy and quicker response times that help you maintain ideal cooking conditions.
Accuracy Between Device Types
Though digital thermometers feature advanced technology, they don't always outperform traditional mercury thermometers in terms of measurement consistency.
Clinical studies reveal that mercury thermometers show remarkably stable readings, with only 0.6% of measurements varying by 0.5°C or more, while digital models can fluctuate between 9-23%.
When tracking your solar oven's temperature, consider these key differences:
- Digital thermometers offer wider temperature ranges and don't require calibration, making them more convenient for quick readings.
- Mercury thermometers provide more consistent repeated measurements, though they need periodic calibration.
- Digital models can be affected by battery life and electronic stability, while mercury thermometers maintain accuracy regardless of power source.
Choose based on your priority: convenience with digital or consistency with mercury – though remember mercury's environmental and safety concerns.
Temperature Response Time Differences
Beyond accuracy considerations, response time marks a significant difference between digital and analog thermometers in solar oven monitoring.
You'll get near-instant readings with digital thermometers, making them ideal for tracking rapid temperature changes in your solar oven. They'll display results within seconds, allowing you to make quick adjustments to maintain optimal cooking conditions.
In contrast, analog thermometers require patience.
You'll need to wait for the dial to stabilize before getting an accurate reading, which can be inconvenient when you're trying to enhance your solar oven's performance. While analog thermometers don't rely on batteries and offer long-term durability, their slower response time can make it challenging to monitor and adjust temperatures efficiently during critical cooking phases.
For solar oven use, digital thermometers' quick response gives you better control over the cooking process.
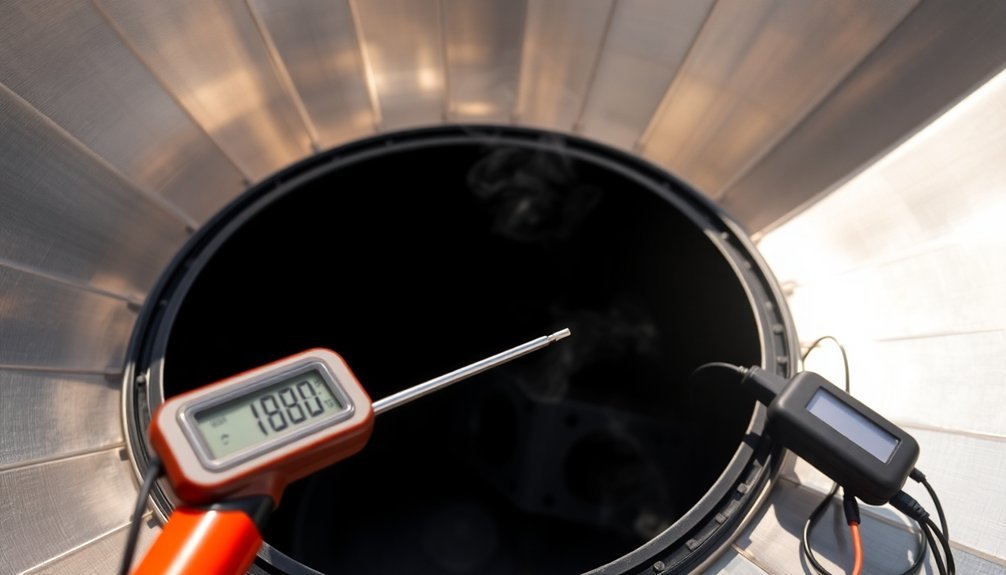
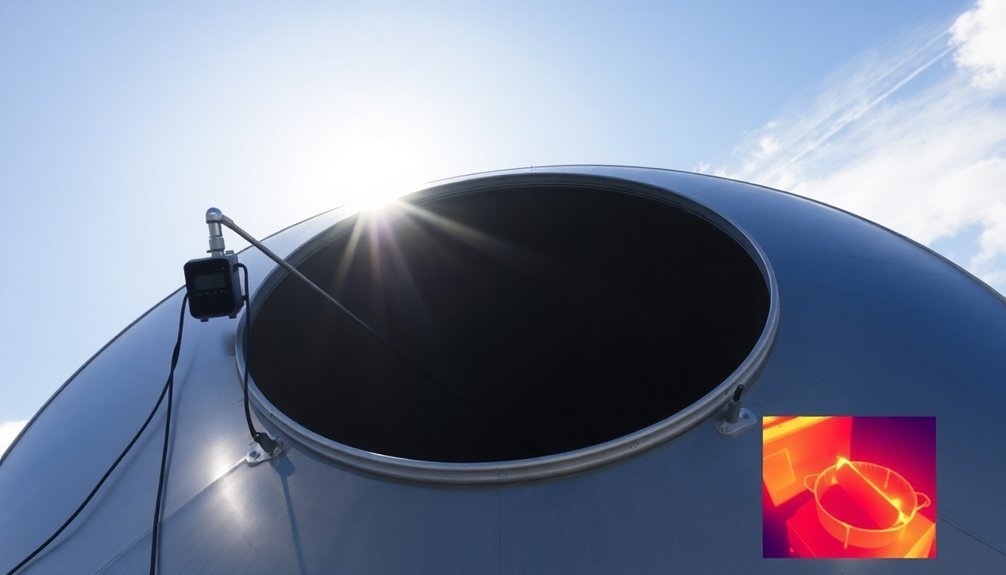
Placement of Temperature Probes
You'll want to mount temperature probes in four key locations: the central air space, thermal mass surface, interior walls, and food core to get accurate heat readings throughout your solar oven.
To detect hot spots and measure real-time temperature distribution, position the central air probe away from direct contact with surfaces while ensuring the thermal mass and wall probes make firm contact with their respective surfaces.
The food core probe should penetrate the center of your cooking vessel or food item to monitor safe cooking temperatures and adjust cooking times accordingly.
Strategic Probe Mounting Locations
To accurately track your solar oven's performance, strategic placement of temperature probes is essential at four key locations.
You'll need to mount Type K thermocouples centrally in the cooking chamber for air temperature, on thermal mass surfaces like steel plates, and within the interior walls. For food monitoring, use a probe-type thermometer inserted into your cooking vessel.
- Position your air temperature sensor away from walls and thermal mass to get uniform readings at 60-second intervals.
- Attach thermal mass probes directly to heat-storing elements to measure heat retention and release patterns.
- Install wall sensors to identify potential heat loss areas and evaluate your insulation's effectiveness.
Remember to maintain proper spacing between probes to avoid interference and guarantee you're getting accurate, independent readings from each location.
Hot Spot Detection Methods
Detecting hot spots in your solar oven requires a systematic approach to temperature probe placement and monitoring.
You'll need to position digital data loggers or slim temperature sensors at multiple points throughout your cooking chamber to create a thorough heat map.
Start by placing sensors in each corner and the center of your oven. Use temperature gradient analysis to identify areas that consistently run hotter or cooler than others.
You'll want to track these variations using cloud-based platforms that can store and analyze your temperature data over time.
Keep your sensors calibrated for accuracy, and set your data collection intervals to capture meaningful temperature changes.
Don't forget to factor in environmental conditions like wind and cloud cover when you're analyzing your hot spot data.
This information will help you adjust your reflector angles for ideal heat distribution.
Real-Time Temperature Distribution
Building on your hot spot detection strategy, proper temperature probe placement forms the backbone of real-time monitoring in your solar oven.
You'll need to install probes at key locations to track heat distribution effectively. Place a temperature probe in the central cooking chamber for air temperature readings, attach another to the thermal mass to monitor heat absorption, and mount one on the interior wall surface.
- Use Type K thermocouples for accurate measurements within ±0.75% of the reading
- Connect your probes to data loggers for continuous monitoring and precise tracking
- Calibrate your sensors against NIST-traceable references to maintain ±0.1°C accuracy
For reliable data collection, you'll want to integrate these probes with a mobile app that displays real-time temperature readings and creates historical graphs for analysis.
Time and Temperature Recording
Accurate temperature tracking forms the backbone of successful solar oven cooking. You'll need to equip yourself with buffered probe sensors and data loggers to capture precise readings throughout your cooking sessions. Don't forget to calibrate your sensors regularly for reliable results.
| Time Interval | What You'll Achieve |
|---|---|
| Every 5 mins | Catch critical temperature changes |
| Every 15 mins | Track cooking progress effectively |
| Every 30 mins | Monitor long-term performance |
Set up cloud storage for your temperature data and connect your sensors to mobile apps for real-time monitoring. You'll want to record both internal temperatures and external conditions like wind and cloud cover. Create historical graphs to analyze your oven's performance patterns – they'll help you optimize future cooking sessions. Remember to integrate your temperature tracking with solar position data to maximize your oven's efficiency.
Heat Distribution Patterns
You'll need to identify your solar oven's heat zones by tracking temperature patterns across different areas of the cooking surface.
Monitor how heat flows from reflector points to cooking areas, noting any hotspots that could cause uneven cooking times.
Heat Zones and Hotspots
Three key factors determine heat zones and hotspots in a solar oven: reflector positioning, solar radiation angles, and cookware placement.
You'll need to adjust your reflectors throughout the day to maintain ideal heat concentration, keeping within a 15° tolerance for unattended cooking periods.
Understanding solar radiation patterns is essential for maximizing your oven's efficiency. The incidence angle affects energy reception, with a 15° angle allowing 96% of radiated energy to reach the surface.
- Check your reflector angles daily, adjusting them every 15-30 minutes to prevent shadows.
- Calculate seasonal tilt based on your latitude (subtract 15° for summer, add 15° for winter).
- Position your cookware at the focal point where concentrated heat zones intersect, using black pots with covers for best results.
Temperature Flow Analysis
Understanding temperature flow patterns in your solar oven requires analyzing how heat moves through different zones and surfaces.
You'll need to track how the greenhouse effect and insulation work together to maintain thermal equilibrium throughout your cooking chamber.
Start by measuring temperatures at different points using an oven thermometer or infrared sensor. You'll notice heat concentrating around your black-painted heat sink, which absorbs and radiates energy back into the oven.
Monitor how reflective surfaces direct sunlight to create balanced heating zones. The sealed environment helps maintain steady temperatures, but you'll want to check for any cold spots where heat might escape.
Keep adjusting your reflectors every 30-60 minutes to maintain ideal heat distribution.
You can use calibrated photoresistances to measure radiative energy collection and identify areas needing adjustment.
Even Cooking Patterns
Solar ovens achieve their finest results when heat distributes evenly throughout the cooking chamber.
You'll need to position your reflectors strategically to create a concentrated heat zone where all rays converge on your cooking target. By adjusting the top reflector to direct sunlight toward the opposite side, you'll establish balanced heat distribution throughout your food.
- Track shadows every 15-30 minutes and reposition your panels within a 15° tolerance to maintain consistent heating.
- Use a seven-faced design with alternating bases to capture maximum solar energy between 10:00 a.m. and 2:00 p.m.
- Apply transparent sealing materials like plastic wrap to create a greenhouse effect that retains heat while allowing sunlight to penetrate.
Remember to clean your reflective surfaces regularly and adjust angles based on your latitude and season for ideal heat distribution patterns.
Weather Impact on Readings
Weather conditions play an essential role in your solar oven's temperature readings and overall performance.
Cloud cover directly affects cooking temperatures – while a few clouds won't cause major issues, heavy cloud cover will considerably reduce your readings. You'll notice longer cooking times even with light cloud coverage.
Wind can dramatically impact your temperature measurements, so you'll want to position your oven in a sheltered location.
For accurate readings in cold weather, guarantee your oven has proper insulation. While solar cooking is possible year-round, you'll get your best temperature readings during summer months when the sun's angle is ideal and days are longer.
Track your readings around midday for peak performance, and remember that seasonal changes will affect your measurements, especially if you're cooking in locations farther from the equator.
Temperature Zones Inside Solar Ovens
Just as outdoor conditions affect your readings, the internal environment of your solar oven creates distinct temperature zones that impact cooking performance.
You'll find that heat concentrates differently throughout your oven, with the highest temperatures typically occurring where sunlight directly hits your dark cooking vessels through the transparent cover.
To enhance your oven's heating potential:
- Position your dark cookware at the center of the shelf, where it'll benefit from both direct sunlight and reflected heat from the oven's walls.
- Keep your oven's transparent cover clean and clear to guarantee peak UV ray penetration, which converts to trapped infrared radiation.
- Use the black-painted shelf as a heat sink to help maintain consistent temperatures, even when you need to open the lid.
Understanding these temperature zones helps you place your pots strategically for the best cooking results.
Maximum Heat Retention Methods
While building an efficient solar oven requires careful design, maximizing heat retention involves four key strategies working together: multiple glazing, advanced insulation, strategic reflector placement, and thermal mass optimization.
You'll want to start with double-glazed glass panels sealed with high-temperature silicone caulk, which cuts heat loss in half. Surround your cooking cavity with effective insulators like rockwool or polystyrene sheets on all sides except the glazed top.
Position your reflectors east-to-west, using long reflectors aligned with solar declination and smaller adjustable end reflectors. Make sure they're covered with smooth, shiny aluminum foil.
Finally, incorporate about 5.0 kg of thermal mass material and coat interior surfaces with dark materials to absorb 95% of solar radiation. This combination will maintain cooking temperatures even during cloud cover.
Consistent Temperature Maintenance Tips
To maintain consistent temperatures in your solar oven, you'll need to focus on four critical elements: proper positioning, effective insulation, regular monitoring, and suitable cookware selection.
Keep your oven directly facing the sun and adjust it every 30-45 minutes to maximize heat collection. Layer your insulation materials strategically, using crumpled newspaper or dry leaves, and verify all seals are tight to prevent heat escape.
- Use a digital probe thermometer to track temperatures, keeping them above 125°F for food safety and aiming for 150-225°F for ideal cooking.
- Choose dark-colored, lidded cookware with high thermal conductivity, like black cast iron, to absorb and retain heat effectively.
- Pre-heat your oven for 20-30 minutes before cooking, and monitor the temperature regularly throughout the cooking process.
Peak Performance Hours
Understanding when your solar oven performs best can help you plan your cooking schedule more effectively.
You'll get maximum solar radiation around 1 pm PDT, but your oven's temperature will peak about four hours later, typically around 5:15 pm.
To achieve ideal temperatures, you'll need to track the sun's movement throughout the day.
Use either manual or automatic tracking mechanisms to adjust your reflectors accordingly.
While cloudy conditions can affect performance, you can still reach significant temperatures during high-light periods.
For best results, aim to maintain temperatures above 50°C for at least 90 minutes.
If you're using a SunChef oven, you can reach 200°C to 250°C within an hour.
Remember to monitor your built-in thermometer and avoid shaded areas that might interfere with sun exposure.
Temperature Reading Troubleshooting
Three common issues can affect your solar oven's temperature readings: thermometer placement, calibration problems, and environmental factors.
Position your thermometer where your cooking vessels sit, typically on the oven floor, for the most accurate readings. If you notice stuck or unchanging readings, your thermometer might need calibration or a gentle adjustment to get it working properly.
- Check if UV rays or weather conditions are affecting your readings by using multiple thermometers to verify accuracy.
- Confirm your thermometer isn't damaged and can handle high temperatures – replace it if necessary.
- Remove any aluminum foil or materials that might interfere with the thermometer's function.
For best results, use an oven thermometer or infrared thermometer with a laser pointer, and maintain your equipment regularly to prevent inaccurate measurements.
Frequently Asked Questions
Can Solar Ovens Work Effectively on Snowy Days With Bright Sunlight?
Yes, you'll find solar ovens work well on snowy days with bright sunshine. In fact, snow can reflect additional sunlight into your oven, and cold mountain air's low humidity allows for more direct, intense solar rays.
How Does Altitude Affect Cooking Times in a Solar Oven?
You'll need longer cooking times at higher altitudes since water boils at lower temperatures. While you'll get more intense UV exposure, which helps heating, you should plan for 5-10% longer cooking times per 1,000 feet elevation.
Will Reflective Paint on Exterior Surfaces Improve Heat Retention Performance?
No, you won't improve heat retention with reflective paint. It actually reflects visual energy rather than infrared heat. Instead, you should use proper insulation materials and dark surfaces to maximize heat retention in your solar oven.
Can Multiple Small Ovens Outperform One Large Solar Oven?
No, multiple small ovens won't outperform one large solar oven. While they can reach similar temperatures, you'll need their combined insolated area to match the large oven's power, making it less practical.
Do Different Types of Glass Affect UV Penetration and Heating Efficiency?
Yes, glass types greatly impact your solar oven's performance. Heat-resistant glass offers the best UV penetration and efficiency, while tempered glass provides good results at lower cost. Regular glass is less effective overall.
In Summary
You'll get the most from your solar oven by tracking temperatures consistently and accurately. Keep your thermometer calibrated, position probes correctly, and maintain detailed logs of cooking times and conditions. When you understand your oven's peak performance hours and heat retention patterns, you'll cook more efficiently and safely. Master these monitoring techniques, and you'll transform your solar cooking from guesswork to precision.


Leave a Reply