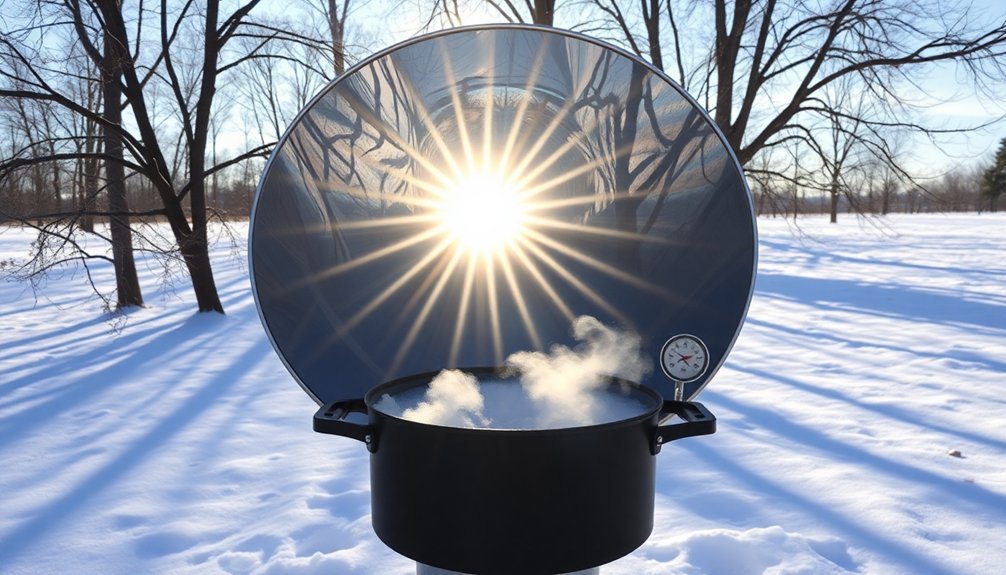
Winter sun cooking works because cold air actually has lower humidity, allowing sunlight to penetrate more effectively. You'll need to position your solar cooker at steeper angles (around 60 degrees) to capture the lower winter sun, and adjust it every 20-30 minutes to track the sun's movement. Start cooking around 10 AM, using dark cookware and proper insulation like oven bags to retain heat. Multiple reflectors and thermal mass elements like stones help maintain consistent temperatures, even in freezing conditions. With the right techniques and equipment, you can harness winter's surprisingly bright, clear days for successful solar cooking.
Winter Sunlight Quality Matters Most
Although winter brings shorter days and lower temperatures, the quality of sunlight during this season plays an essential role in solar cooking success.
You'll find that winter's cold air actually offers some unique advantages for solar cooking. The lower humidity means there are fewer water particles to scatter sunlight, resulting in more direct and concentrated rays reaching your cooker.
While winter sun spreads over a larger area due to Earth's tilt, making it less intense per square foot, you can easily overcome this challenge. Well-insulated solar cookers can effectively maintain cooking temperatures even in freezing conditions.
The clear, dry winter air allows sunlight to penetrate more effectively, and you'll often experience brighter sunny days without the interference of coastal marine layers or heat-induced humidity.
Even on days with high, thin clouds, you'll still get enough sunlight to cook certain foods effectively.
Positioning Your Solar Cooker Effectively
You'll need to monitor your solar cooker's position throughout the day, adjusting it every 20-30 minutes to follow the sun's path and maintain ideal light concentration.
Start cooking earlier in winter around 10:00 AM for optimal results.
Position your reflectors to capture maximum sunlight, keeping them angled so the cooker's shadow falls directly behind it, and clean their surfaces regularly for peak efficiency.
Set up wind barriers and use heavy stones to stabilize your cooker, creating a protected cooking environment that won't disrupt the carefully aligned reflective surfaces.
Track Sun's Daily Path
Tracking the sun's daily path is essential for successful winter solar cooking. You'll need to position your cooker at an angle equal to your location's latitude and adjust it every 20-30 minutes to maintain ideal temperatures. During winter months, start cooking earlier, around 10:00 AM, to compensate for shorter daylight hours. Using thermal mass elements like stones can help maintain consistent temperatures throughout the cooking process.
| Time of Day | Winter Position | Temperature Goal |
|---|---|---|
| 10:00 AM | Southeast angle | Warming phase |
| 12:00 PM | Direct south | Peak heat |
| 2:00 PM | Southwest angle | Heat maintenance |
Check that your cooker's shadow falls directly behind it for proper alignment. Place the unit in an obstruction-free area and use booster panels to enhance sun ray concentration. You'll need to track the sun more frequently in winter than in summer to maintain consistent cooking temperatures.
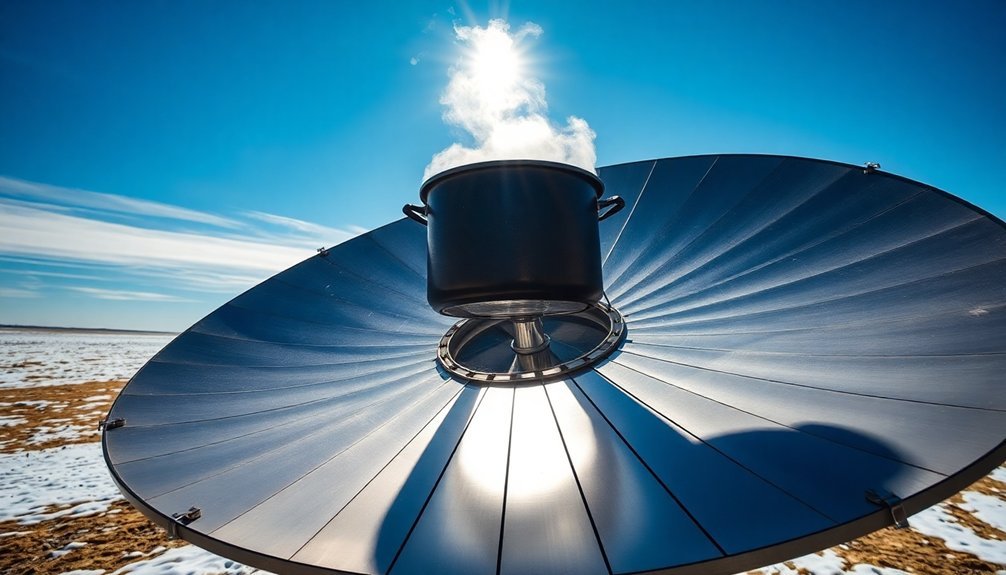
Maximize Light Reflection Angles
Beyond following the sun's path, mastering reflector angles makes the difference between lukewarm and piping-hot meals in your solar cooker.
You'll want to position your reflectors between 45 and 90 degrees, with 60 degrees being ideal for most setups. If you're using taller reflectors, aim for 20-22.5 degrees from perpendicular to the glass.
During winter months, you'll need to adjust your reflectors more frequently due to the sun's lower angle. Multiple reflectors with varying angle positions can help optimize light capture when the sun is low in the sky.
Keep your reflective surfaces clean and check that they're directing sunlight onto your cookware's focal point. For best results, adjust your reflectors every 15-30 minutes to maintain concentrated heat.
Use polished aluminum or mirrored surfaces, and remember that darker cookware absorbs reflected light more effectively.
Strategic Shelter From Wind
While winter sun presents its own challenges, protecting your solar cooker from wind is equally essential for maintaining consistent temperatures.
Position your cooker in a spot where natural barriers like rocks or hills can block harsh gusts. You'll want to place large stones or bricks along the sides for added stability.
Create a simple lean-to shelter that shields the cooker from wind while still allowing full sun exposure. Don't let your shelter cast shadows on the cooking surface.
Secure the cooker's front panel flaps with clothespins to prevent them from flapping in the breeze. If you're dealing with particularly strong winds, pile snow or sand around the base for extra stability.
Remember to check and adjust your cooker's position throughout the day to maintain ideal sun exposure while staying protected from winter winds.
Choosing The Right Cooking Time
Successful winter sun cooking depends heavily on selecting appropriate cooking times, as the sun's lower angle and reduced daylight hours require careful planning.
You'll want to focus your cooking between 10:00 AM and 2:00 PM when solar intensity is strongest, even though winter days can be surprisingly bright due to less humidity.
Plan for cooking times to be about 15 minutes longer than usual, and consider breaking larger meals into stages over multiple days.
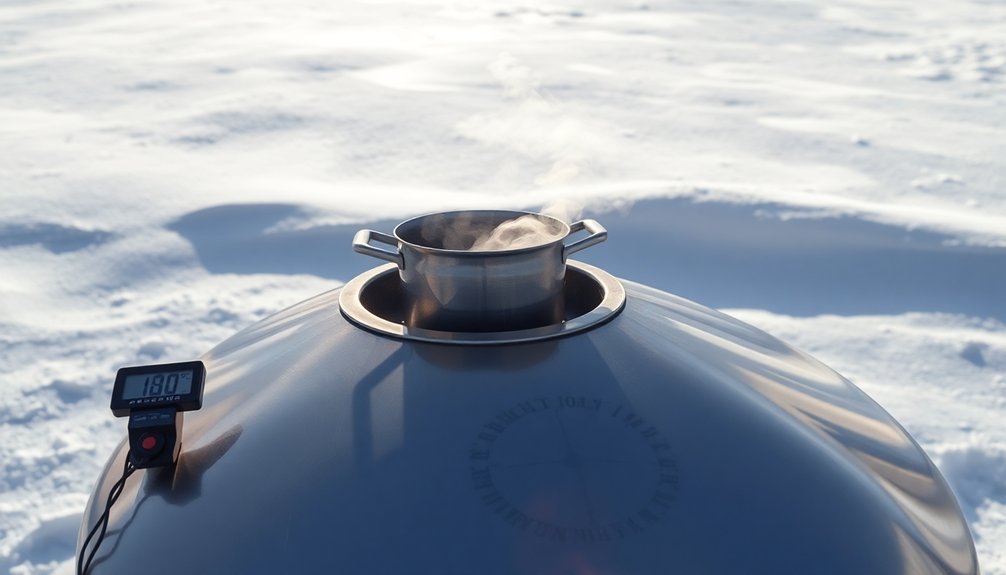
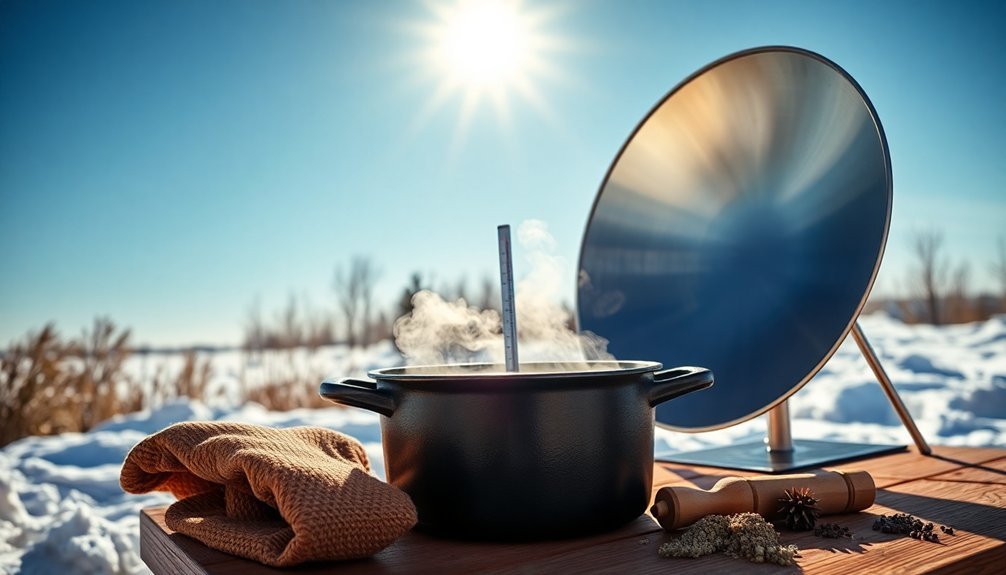
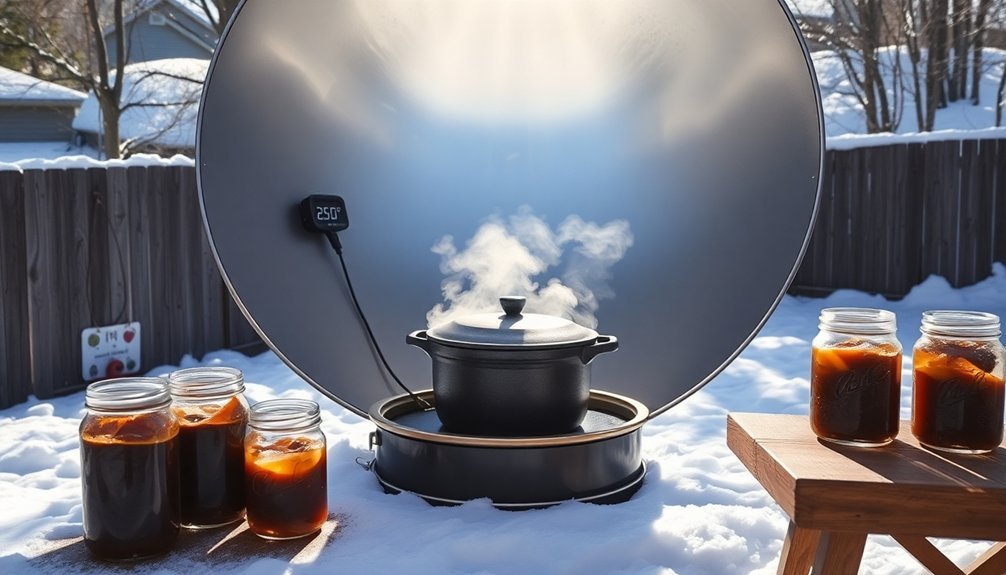
You can still achieve temperatures of 300-350°F, but you'll need to minimize opening the cooker to maintain heat.
Watch for steam as a signal that food's nearly done instead of lifting the lid.
For best results, preheat your cooker indoors and make regular adjustments to track the sun's movement throughout the cooking process.
Essential Winter Solar Cooking Equipment
You'll need proper insulation materials like vacuum tubes or oven roasting bags to maximize heat retention in your solar cooker during winter months.
Dark cookware, especially black cast iron, works best for absorbing and maintaining temperature when combined with clear plastic coverings for additional insulation.
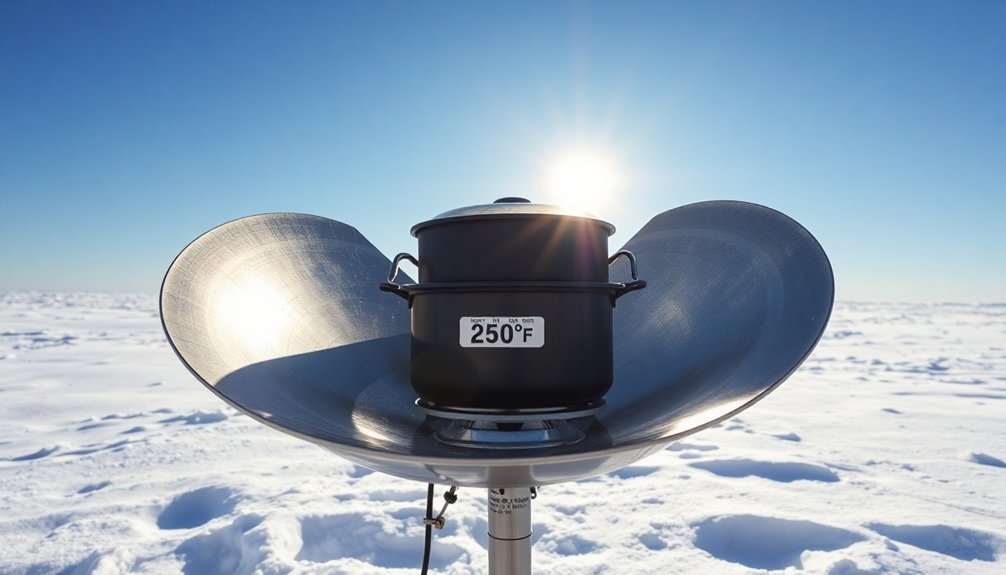
To enhance winter performance, set up your reflector panels at steeper angles – around 60 degrees for most models – and consider using additional booster panels to concentrate more sunlight into your cooking chamber.
Insulation Materials and Tools
Proper insulation stands at the heart of effective winter solar cooking, making the difference between a successful meal and a frustratingly cold dish.
You'll need rigid foam or closed-cell foam for the main insulation between your double-box setup, while newspaper or packing peanuts work well as gap fillers.
For your transparent lid, choose between glass or plexiglass – both offer excellent insulation properties while letting sunlight through.
You can enhance efficiency by using double-layered glazing. Don't forget to seal every crack and overlap your insulation pieces to create an airtight barrier.
Remember to use dark-colored cookware and paint interior surfaces black to maximize heat absorption.
Store your solar oven indoors and let it preheat before cooking to maintain ideal temperature levels in cold weather.
Reflector Panel Setup Guide
While winter solar cooking requires several components, the reflector panel setup serves as the cornerstone of effective heat collection.
You'll need to construct trapezoidal reflectors that measure 2.25 times your cook chamber's width at their widest point and 1.25 times the height.
Cover your cut panels with aluminum foil, shiny side out, securing edges with duct tape or opt for specialized materials like Shurtape AF 912.
To maximize sun exposure during winter months, you'll need to position your panels at steeper angles toward the southern horizon. For panel cookers, try flipping them on their side for better sun angles.
Add stability with wood blocks or bricks, and consider installing booster panels to enhance solar concentration.
Remember to adjust your setup throughout the day to track the sun's movement.
Adapting Traditional Recipes
Traditional winter recipes take on new life when adapted with modern ingredients and cooking methods, while still maintaining their comforting essence.
You'll find that incorporating Mediterranean-inspired ingredients like lentils and chickpeas can transform classic stews into nutrient-rich meals, perfect for solar cooking.
- Mix root vegetables like turnips, parsnips, and beets with citrus fruits to create bright, fresh flavors that complement slow-cooked dishes.
- Enhance traditional meat and potato combinations with warming spices like star anise, cumin, and ancho chili.
- Add texture and nutrition by incorporating nuts, seeds, and dried fruits into your winter recipes.
Don't forget to balance rich comfort foods with lighter elements.
Fresh herbs like thyme and rosemary, paired with garlic and onions, will deepen flavors while maintaining the traditional appeal of your winter favorites.
Temperature Control During Cold Weather
Successfully managing winter solar cooking requires diligent temperature control and monitoring, despite the season's challenging conditions.
You'll need to use a reliable digital probe thermometer to track food temperatures, keeping them above 125°F to prevent bacterial growth in the cold weather.
Even in temperatures as low as -40°F, your solar oven can perform effectively if you maintain proper insulation.
Use double-glazed ovens with reflective surfaces, and employ dark-colored cookware with tight-fitting lids. You can also use snow as a natural insulator to keep cooked food from freezing.
Position your oven to maximize sunlight exposure between 11 AM and 3 PM, and adjust it every 1-2 hours to follow the sun's path.
Remember that winter's limited sunlight means you'll typically have about 5 hours of cooking time.
Maximizing Limited Daylight Hours
During winter's shorter days, making the most of limited sunlight requires strategic planning and precise positioning of your solar cooker.
You'll need to enhance every minute of available sunshine by adjusting your cooker's angle frequently to track the sun's lower path across the horizon.
- Start cooking early in the day when the sun first appears, and prepare ingredients in advance to maximize cooking time.
- Position your cooker to capture direct sunlight, using the full extension of inclined legs or panel adjustments.
- Consider batch cooking during favorable sunlight conditions and store meals for later use.
For consistent results, you can cook in stages over multiple days, focusing on energy-efficient dishes like stews and soups.
Don't forget to use oven bags around your cooking vessel to retain precious heat during these shorter daylight hours.
Weather Patterns and Cooking Success
Understanding local weather patterns plays an essential role in winter solar cooking success.
You'll need to assess your region's typical cloud cover, as clear skies are vital for effective cooking. Areas like Southern Arizona offer better conditions than cloudy Pacific Northwest states.
You can adapt to weather challenges by making strategic adjustments.
Position your solar cooker at steeper angles to capture the winter sun's lower path, and use booster panels to concentrate available sunlight. If you're in a windy area, set up windscreens to protect your cooking space and maintain heat efficiency.
Watch out for coastal marine layers or humidity-induced haze that can diminish sunlight intensity. On particularly bright days, you'll still need to track the sun's movement frequently to maintain ideal cooking temperatures.
Multiple Day Cooking Strategies
Winter sun cooking calls for resourceful planning across multiple days to overcome shortened daylight hours.
You'll need to break down complex meals into manageable components that can be prepared separately and combined later. Store partially cooked ingredients in your refrigerator, and finish them the next day when sunlight returns.
Here's how to master multi-day cooking:
- Pre-cook beans, grains, and tough vegetables on day one when sunlight is ideal.
- Store prepped ingredients safely in the refrigerator overnight.
- Complete final cooking and assembly during the next day's peak sun hours.
This staged approach lets you work with nature's rhythm rather than against it.
Frequently Asked Questions
Can Solar Cooking Work Effectively in Snowy Conditions?
Yes, you can cook effectively in snowy conditions if there's bright sunlight. You'll actually benefit from snow's reflective properties, and with proper positioning and insulation, your solar cooker can reach high cooking temperatures.
How Does Altitude Affect Winter Solar Cooking Performance?
At higher altitudes, you'll experience less atmospheric interference and greater solar radiation flux. Your solar cooking becomes more efficient since there's less air to scatter sunlight, even during winter's lower sun angles.
What Materials Make the Best Insulation for Winter Solar Cookers?
You'll get the best winter insulation using polyisocyanurate foam board or polyester fiber. Both materials withstand high temperatures, don't sag, and maintain effectiveness when properly sealed to keep moisture out during cold weather.
Does Wind Speed Impact Solar Cooking Effectiveness in Winter?
Yes, wind will markedly affect your winter solar cooking. You'll notice reduced temperatures and longer cooking times when it's windy. If winds exceed 35 mph, you'll need windbreaks or sheltered locations to cook effectively.
Can Solar Cookers Be Used Indoors Near Windows During Winter?
Yes, you can use solar cookers indoors near windows during winter, especially by south-facing windows. You'll need good insulation and may experience longer cooking times, but it's an effective way to harness winter sunlight.
In Summary
You'll find winter sun cooking success relies on understanding and adapting to the season's unique challenges. By positioning your cooker ideally, choosing appropriate cooking times, and using proper equipment, you can harness even limited winter sunlight effectively. Don't let cold weather discourage you – with careful planning and temperature monitoring, you'll create delicious solar-cooked meals year-round. Just remember: quality sunlight matters more than quantity.


Leave a Reply