To sun-dry fresh fruit, start by selecting ripe fruits and cutting them into uniform ⅛-inch to ¼-inch slices. Pretreat your cut fruit in a solution of lemon juice and water (1:4 ratio) for 10 minutes to prevent browning. Set up your drying area using elevated trays in a spot with at least 6 hours of direct sunlight and good airflow. Cover fruit with cheesecloth to protect from insects and debris. Turn pieces daily and bring trays in at night to avoid dew. Test for dryness by checking for a leathery, pliable texture. Store fully dried fruit in airtight containers. Follow these detailed steps to guarantee perfect results every time.
Choose and Prepare Fresh Fruit
A basket of perfectly ripened fruit marks the beginning of your sun-drying adventure. You'll want to select fruits at their peak ripeness, when they're bursting with natural sugars and flavors. High-sugar fruits like apricots, grapes, and dates work especially well for sun drying. Inspect each piece carefully, discarding any with signs of decay, bruising, or mold.
Start by washing your chosen fruits thoroughly in cold or lukewarm water to remove dirt and residues. If you're working with firm-skinned fruits, you can gently scrub them, but don't damage the skin. Pat the fruits dry to remove excess moisture before moving on to preparation. Consider using ascorbic acid pretreatment to help preserve nutrients during the drying process.
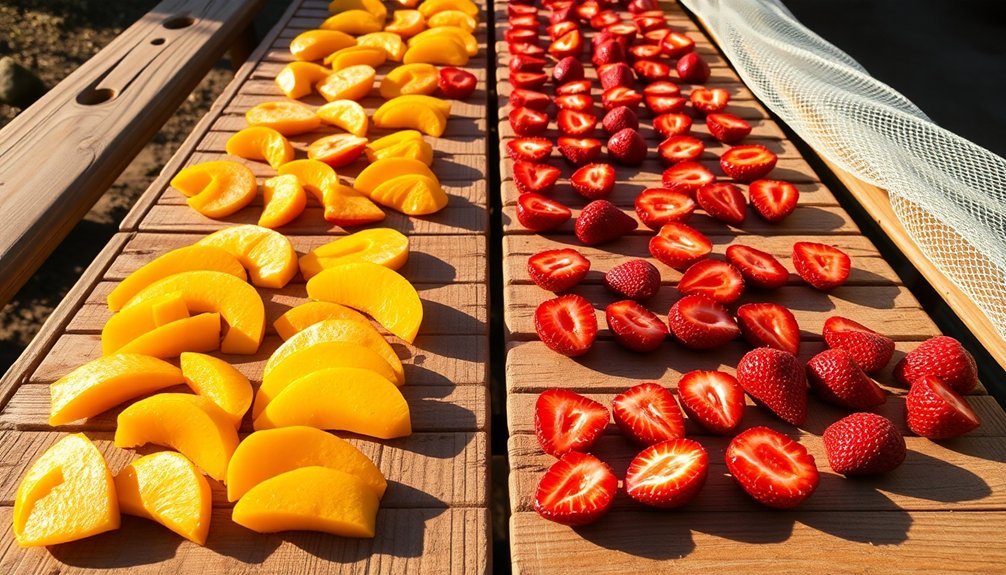
Next, cut your fruits into uniform slices between ⅛-inch and ¼-inch thick to guarantee even drying. If you're drying whole fruits, crack their skins to speed up the process. Remember to remove any seeds, pits, or cores, particularly from fruits like apples and cherries.
Sort your prepared pieces and keep different fruit types separate. Only prepare what you can dry in one session, and arrange the pieces in a single layer to maximize sun exposure. This careful preparation sets the stage for successful sun drying.
Pretreat Fruit Before Drying
Once your fruit is properly prepared, pretreating it will greatly improve the final quality of your sun-dried produce. You can choose from several effective pretreatment methods, each offering specific benefits for your fruit.
For a simple home solution, mix equal parts lemon juice and water, or use 1 cup of lemon juice with 4 cups of water. If you prefer a more precise approach, create an ascorbic acid solution by mixing 3¾ teaspoons of powder or 20 crushed vitamin C tablets in 2 cups of water. Alternatively, combine ½ teaspoon of citric acid with 2 cups of water.
Soak your cut fruit in your chosen solution for 10 minutes. These treatments will prevent browning, reduce vitamin loss, and help destroy harmful bacteria like E. coli and Salmonella. While sun drying is a traditional method, it may not be practical in regions with high humidity like Pennsylvania.
For fruits with tough skins, you might want to try syrup blanching – simmer the fruit in a mixture of 1 cup sugar, 1 cup white corn syrup, and 2 cups water for 10 minutes, then let it stand for 30 minutes. Though this method makes fruit slightly stickier, it effectively speeds up the drying process and prevents darkening.
Set Up Your Drying Area
Success in sun-drying fruit depends heavily on your drying area setup.
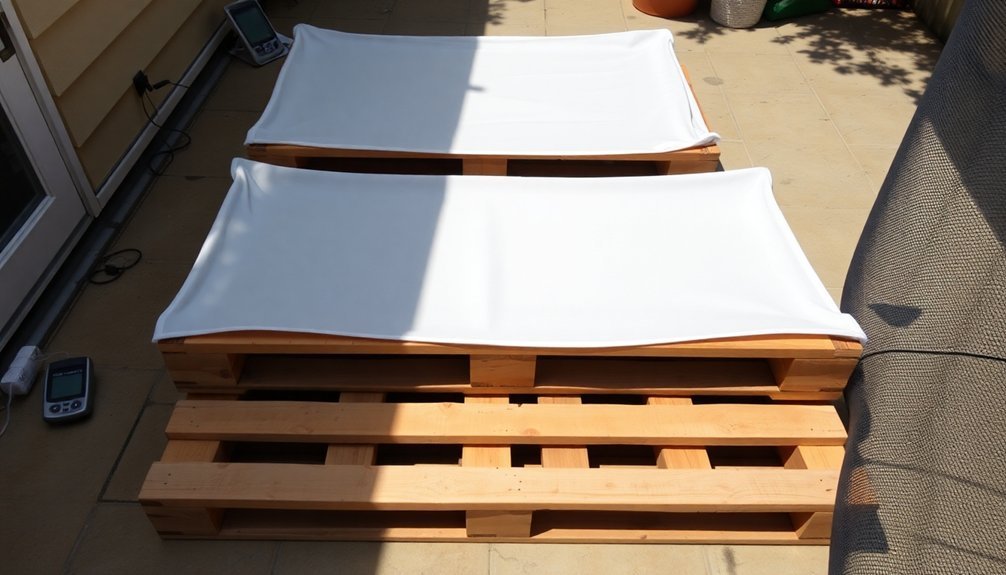
You'll need to create a flat, well-ventilated space with good sun exposure where you can place your drying trays. Choose between baking sheets or wooden frames covered with mesh-type material for your trays, or repurpose old window screens (ensure they're lead-free if pre-1978).
Elevate your trays off the ground using cement blocks, sawhorses, or stacked bricks to promote air circulation. Place aluminum or tin sheets underneath to reflect sunlight and radiate additional heat. Using a greenhouse or solarium provides an ideal protected environment for drying fruits while maintaining optimal temperature.
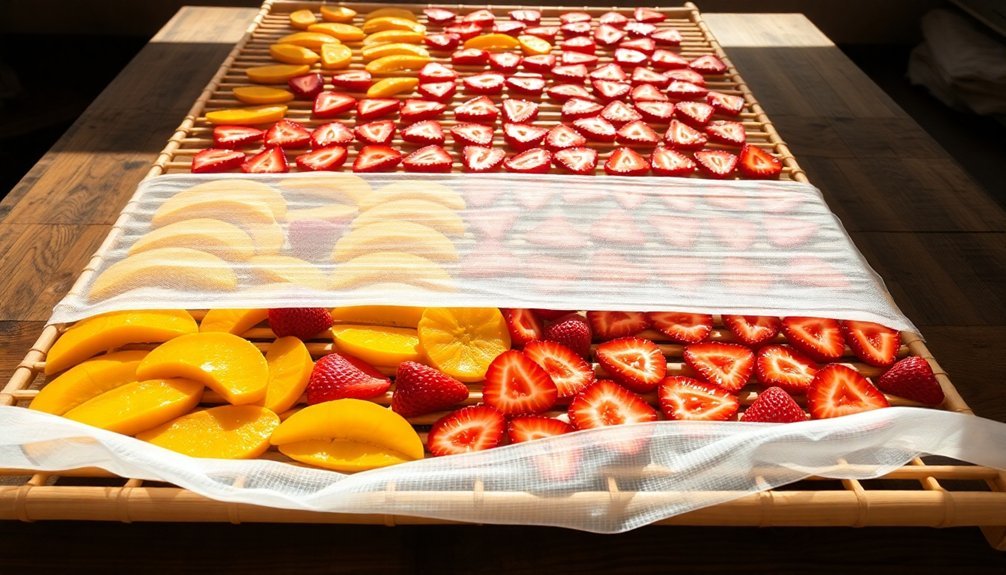
To protect your fruit from insects and dirt, cover the trays with cheesecloth, nylon netting, or food-grade mesh, making sure to secure the covering without restricting airflow.
To maximize drying efficiency, you can prop a glass pane above the tray to intensify the sun's heat, but don't forget to maintain proper ventilation.
For best results, select a location where temperatures stay above 85°F with humidity below 60%. If temperatures drop considerably at night, you'll need to bring your fruit indoors.
Consider building a chimney solar dryer to combine heat collection with continuous airflow.
Position Fruit for Sun Exposure
You'll need to carefully select a spot that receives at least 6 hours of direct sunlight daily and has good airflow for ideal fruit drying.
Position your drying trays at a slight angle facing the sun, which helps maximize sun exposure and speeds up the drying process.
If you're using a reflective surface beneath the trays, make sure it's angled to redirect sunlight onto the fruit without creating hot spots that could lead to uneven drying.
Location and Angle Matters
Finding the perfect spot for your fruit dryer plays an essential role in achieving ideal results. You'll want to position your dryer in an area that receives full southern exposure to maximize sunlight throughout the day.
Elevate your drying trays off the ground using blocks or a raised platform to prevent moisture from seeping up and affecting the drying process.
For best performance, follow these key placement strategies:
- Prop up one end of your dryer 6-8 inches to create proper airflow, allowing moist air to exit while dry air enters.
- Place a reflective surface like aluminum or tin underneath the trays to increase drying temperature through reflected sunlight.
- Position your trays in a single layer, making sure fruit pieces don't touch or overlap.
- Cover the setup with cheesecloth to protect against birds and insects while maintaining airflow.
You'll need to adjust your dryer's position throughout the day to track the sun's movement, particularly during peak drying hours between 10 a.m. and 2 p.m.
Once your fruit is no longer sticky, move it to a shaded area to prevent over-drying and browning from direct sunlight.
Direct Sun Requirements
Proper sun exposure forms the foundation of effective fruit drying. You'll need daytime temperatures of at least 90°F and relative humidity below 60% for ideal results. The best conditions are sunny, hot, and breezy days, which you'll often find in regions like the American Southwest.
Place your prepared fruit on elevated trays that allow proper ventilation. You'll want to raise these trays using cement blocks, benches, or sawhorses. Make sure you're using frames with screens or mesh that promote air circulation, and cover the fruit with cheesecloth to protect it from insects and debris.
Position your trays in direct sunlight, and turn the fruit occasionally to guarantee even drying. You can increase efficiency by using reflective surfaces like aluminum sheets or propping a glass pane above the tray – just confirm there's adequate ventilation.
Don't forget to bring your trays inside at night to prevent moisture absorption from dew.
For protection, you'll need to maintain clean trays and screens. Consider placing table legs in water-filled cans to prevent insects from climbing up.
Once dried, pasteurize the fruit to eliminate any remaining insect eggs.
Monitor Daily Drying Progress
Sun-dried produce requires daily attention to confirm ideal results. You'll need to check your drying fruits multiple times throughout the day to verify they're drying evenly and properly.
Turn each piece of fruit at least once daily to prevent rotting and maintain consistent drying on all sides. Don't forget to bring your drying racks inside at night to protect them from dew and moisture.
During your daily monitoring, follow these essential steps:
- Check that fruit pieces aren't touching or overlapping, as this can trap moisture and slow down the drying process.
- Remove any pieces that show signs of spoilage to prevent contamination of other fruits.
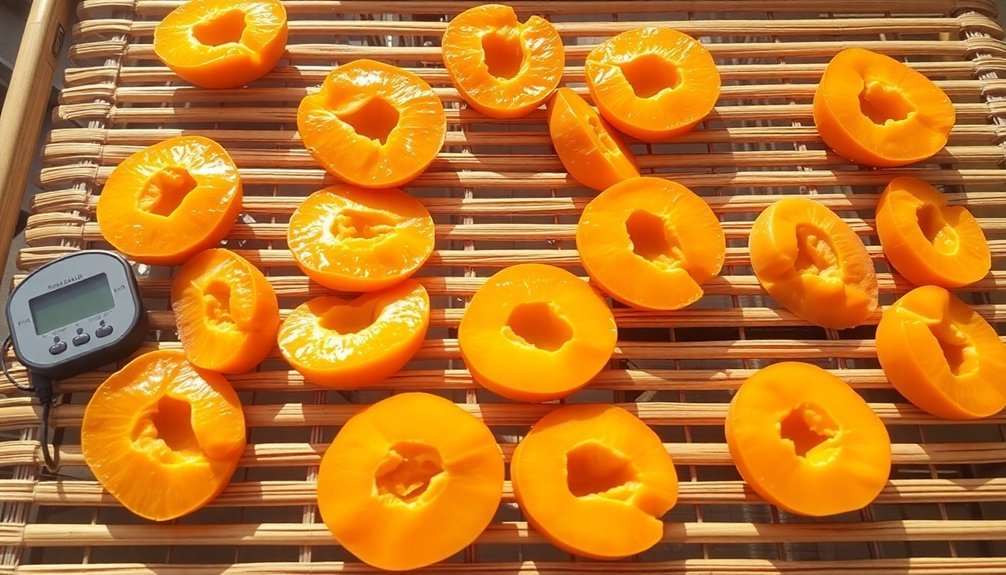
- Verify that your temperature stays around 92 degrees and humidity remains below 65%.
- Confirm your protective covering (cheesecloth or netting) hasn't been compromised by wind or wildlife.
Remember that drying times vary considerably by fruit type – apples typically take 2 days, cherries need 3 days, and tomatoes require 4 days.
You'll notice the drying process speeds up towards the end, so increase your monitoring frequency during the final stages to prevent over-drying.
Test for Complete Dryness
To check if your sun-dried fruit is ready for storage, you'll need to perform both visual and touch tests when the pieces are completely cool.
You should look for uniform texture with no visible moisture when cut, and the fruit pieces should feel leathery and pliable while springing apart easily when squeezed.
For thorough moisture testing, place the dried fruit in a sealed jar and shake it daily for 3-4 days to guarantee any remaining moisture is evenly distributed throughout the batch.
Visual and Touch Tests
When checking dried fruit for doneness, you'll need to rely on both visual cues and physical touch tests. Your dried fruit should have a characteristic color based on its type – dried apples will appear creamy white, while cherries and figs may retain some natural color. The fruit shouldn't show any visible moisture or stickiness, and berries should be hard and dry.
Perform these essential tests to confirm your fruit is properly dried:
- Squeeze several pieces together in your palm – they should fall apart when released and leave no moisture on your hand.
- Check the texture – it should be leathery and pliable, not brittle or hard, with no moist areas in the center when cut.
- Listen for a rattling sound when shaking berries on drying trays, which indicates they're sufficiently dry.
- Test fruit leather by ensuring it peels cleanly from the plastic wrap without sticking.
If your dried fruit passes these tests, it's ready for storage.
You'll want to keep it in tightly sealed containers in a cool, dry place. For extra protection against mold growth, consider vacuum packing or freezing your dried fruit.
Moisture Level Checks
Testing moisture levels in dried fruit requires precise measurement to guarantee food safety and ideal storage life. You'll need to use specific instruments and methods to ascertain your dried fruit meets proper moisture content standards.
You can use near-infrared detectors to monitor moisture content in real-time. These devices provide accurate data and help maintain favorable levels to prevent mold while preserving color, flavor, and texture.
For quick estimations, use a refractometer or digital moisture meter, such as ATAGO's PAL or PEN models, which offer temperature compensation and reliable readings when measuring the fruit's interior.
To perform an oven-dry test, weigh your sample before and after baking at 105° Celsius. Calculate the moisture percentage by subtracting the dry mass from the original mass, dividing by the original mass, and multiplying by 100.
For most dried fruits, you'll want to achieve a moisture content between 15-30%, following USDA guidelines. However, if you're freeze-drying, the moisture content shouldn't exceed 2%.
Remember that proper moisture levels are vital for preventing microbial growth and guaranteeing your dried fruit maintains its quality during storage.
Store Your Sun-Dried Fruit
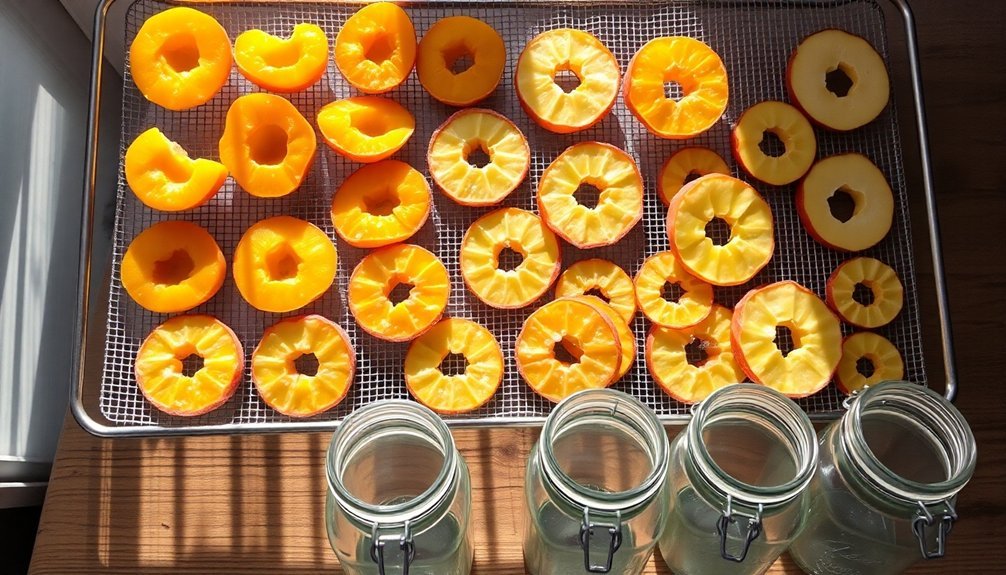
Proper storage is essential for maintaining the quality of your sun-dried fruit. Before storing, you'll need to condition your fruit by packing it loosely in glass or plastic jars for 7-10 days. During this conditioning period, shake the jars daily to separate pieces and check for any condensation. If you spot moisture, return the fruit to the dehydrator immediately.
When you're ready to package your dried fruit for long-term storage, follow these critical steps:
- Choose clean, dry, insect-proof containers like plastic freezer containers, glass jars, or freezer bags – vacuum packaging works especially well to prevent moisture reabsorption.
- Pack your fruit in portions you'll use all at once to minimize repeated exposure to air and moisture.
- Store containers in a cool, dark place where temperatures stay below 60ºF for ideal shelf life.
- Check your stored fruit regularly for signs of moisture or mold.
Remember that storage time varies with temperature – while properly stored fruit can last up to a year in cool conditions, warmer temperatures around 80ºF will reduce shelf life to about six months.
If you're using sulfured fruit, avoid metal containers as they can cause discoloration.
Frequently Asked Questions
How Long Does Fruit Take to Completely Dry in Direct Sunlight?
You'll find different fruits have varying drying times in direct sunlight: apples take 2 days, cherries and blueberries need 3 days, while tomatoes, peaches, and plums require about 4 days to dry completely.
Can You Sun-Dry Fruit in Winter Months or Cloudy Weather?
You shouldn't sun-dry fruit in winter or cloudy weather due to low temperatures, insufficient sunlight, and high humidity. Instead, use electric dehydrators or oven drying for reliable results in unfavorable conditions.
What Are Signs That Sun-Dried Fruit Has Gone Bad?
You'll know your sun-dried fruit has spoiled if you notice discoloration, mold growth, a musty or sour smell, or changes in texture. Don't eat fruit that's overly hard, slimy, or shows dark spots.
Can You Sun-Dry Frozen Fruits After Thawing Them?
You shouldn't sun-dry thawed frozen fruits. They're too soft and prone to spoilage due to damaged cell structure. You'll risk mold growth and poor results. It's better to use fresh fruits for sun-drying instead.
Should Different Types of Fruits Be Dried Separately or Together?
You'll get better results by drying fruits separately since they have different drying times and moisture levels. If you mix them, some fruits may overdry while others remain too moist, risking spoilage.
In Summary
Now that you've successfully dried your fruit in the sun, you'll have delicious, preserved treats that can last for months when stored properly. Keep them in airtight containers in a cool, dark place, and don't forget to check occasionally for any signs of moisture or mold. Your sun-dried fruit is perfect for snacking, baking, or adding to your favorite recipes.


Leave a Reply