When cooking with solar power, you'll want to cut your vegetables uniformly to guarantee even cooking. For quick recipes (30 minutes), stick to smaller ¾-inch pieces, while longer cooking times can handle 1-2 inch chunks. Use sharp knives or mandolins to achieve consistent thickness, which helps predict cooking times accurately. For solar dehydration, aim for 1/8-inch slices, and when roasting, consider larger pieces for dense vegetables and smaller cuts for softer ones. Dark cookware maximizes heat absorption, and rotating your cut vegetables every 10-15 minutes guarantees uniform results. There's much more to mastering the art of sun-based food preparation.
Preparing Vegetables for Solar Cooking

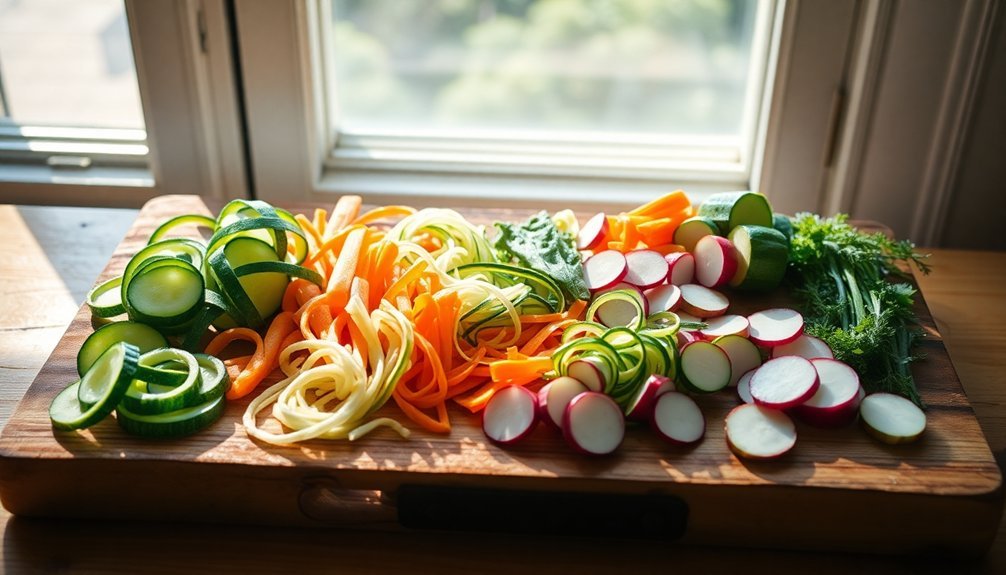
Cut your vegetables uniformly to guarantee even cooking throughout.
For dishes that need 1-2 hours of cooking time, opt for larger chunks. If you're making a quick 30-minute recipe, smaller pieces work better. Just like digital production tools have transformed modern cooking methods, proper cutting techniques ensure optimal results in solar cooking.
Remember to remove tough, fibrous parts that won't cook well. You can keep the skin on or peel it off based on your texture preference.
High-water content vegetables like cauliflower and tomatoes are excellent choices for solar cooking.
Best Cuts for Solar Dehydration
When preparing vegetables for solar dehydration, uniform thickness is essential for achieving consistent results. You'll want to slice most vegetables to 1/8-inch thickness, using a food processor or mandolin for precision. For leafy greens like kale, tear them from their stems into manageable pieces. Regular monitoring helps ensure ingredients reach the proper leathery or crisp texture.
| Vegetable | Cut Style | Thickness |
|---|---|---|
| Carrots | Rounds or strips | 1/8 inch |
| Tomatoes | Rounds or halves | 1/8-1/4 inch |
| Zucchini | Rounds or strips | 1/8 inch |
Arrange your cut vegetables in single layers on drying trays, ensuring they don't touch. For juicy items like tomatoes, line trays with parchment paper. Place items skin-side down when applicable, such as with cherry tomatoes and peppers, to prevent sticking and promote even drying.
Slicing Vegetables for Sun Ovens

Proper vegetable preparation makes all the difference in solar oven cooking. You'll want to cut your vegetables into uniform, smaller pieces to guarantee even cooking and better heat absorption. For most vegetables, aim for ¾-inch pieces – this size works particularly well for eggplant and bell peppers. A popular dish like classic Ratatouille showcases how proper vegetable cuts enhance caramelization.
Cut tomatoes slightly larger, about 1-inch pieces, while zucchini can be sliced into half moons.
When you're working with a solar oven temperature between 200°F and 250°F, you can use larger cuts for slower cooking. If your oven reaches 250°F to 300°F, opt for smaller pieces.
Remember that cooking times will be longer than conventional ovens, so you'll need to position your oven to maximize sun exposure between 11:00 am and 3:00 pm for the best results.
Solar Roasting Cut Techniques
Successful solar roasting depends heavily on mastering the right cutting techniques for your vegetables. You'll want to cut your vegetables into uniform pieces to guarantee they cook evenly in your solar oven. For dense vegetables like potatoes and artichokes, larger chunks work well, while softer vegetables should be cut smaller to match cooking times.
When you're preparing vegetables for solar cooking, create flat surfaces to prevent rolling and guarantee stability. Cut cauliflower into florets, quarter mushrooms, and slice carrots uniformly.
Remember that smaller pieces will cook faster, so adjust your cuts based on each vegetable's density. For example, you'll want to cut Brussels sprouts in half, while zucchini can be sliced into rounds.
Spreading everything in a single layer will help achieve that perfect caramelization you're looking for.
Perfect Solar Stew Cuts

The art of cutting vegetables for solar stews builds on basic roasting techniques but requires specific adjustments for slow-cooked, liquid-based dishes.
You'll want to focus on uniformity while considering how each vegetable behaves during extended cooking periods.
- Cut potatoes and carrots into similar-sized chunks (about 1-inch pieces) to guarantee they cook evenly with your stew meat.
- Dice onions uniformly to help them distribute flavor throughout the dish while maintaining their texture.
- Slice water-rich vegetables like zucchini thinner than root vegetables, as they'll cook faster and release moisture.
- Keep frozen green beans whole but add them later in the cooking process to prevent mushiness.
Remember that your cutting size directly affects cooking time – smaller pieces cook faster, while larger chunks work better for longer solar cooking sessions.
Uniform Sizing for Solar Success
Creating uniform vegetable cuts stands as a cornerstone of effective solar cooking, where precise sizing directly impacts how efficiently your food absorbs and retains heat. When you cut vegetables into consistent thicknesses and shapes, you'll guarantee even cooking throughout each piece and minimize the risk of having some portions undercooked while others are overdone.
You'll want to focus on geometric shapes that maximize surface area exposure to heat, such as slices or thin strips. These uniform cuts allow you to arrange vegetables compactly in your solar cooker, reducing air circulation and heat loss.
For best results, cut your vegetables just before cooking and avoid large chunks that cook slowly. Remember to use sharp tools for precise cuts, as this consistency will help you better predict cooking times and maintain stable temperatures in your solar cooker.
Sun Cooking Time and Size

The thickness of your vegetable cuts directly affects how quickly they'll dry in the sun, with julienne and small dice cuts offering faster results than baton-style pieces.
You'll find that thinner cuts around 1/4 inch work best for sun dehydration, allowing for consistent drying without compromising the vegetable's structural integrity.
When preparing vegetables for sun exposure, keep the length of your cuts moderate—about 1-2 inches—to guarantee even solar penetration and prevent uneven drying zones.
Thickness Affects Drying Speed
When preparing vegetables for sun drying, proper thickness plays an essential role in achieving satisfactory results.
You'll want to slice your vegetables between 1/4 to 1/2 inch thick to guarantee ideal drying. Thicker cuts can trap moisture and lead to mold, while overly thin slices might become too brittle.
- Your 1/4-inch slices will dry in 6-12 hours, while halved vegetables can take up to 36 hours.
- You'll know your vegetables are ready when they're brittle enough to shatter or leathery enough to spring back.
- Keep humidity between 30-60% for the best results.
- Move your drying vegetables to partial shade once they're no longer sticky.
Remember to maintain good air circulation and monitor UV levels throughout the process to achieve the perfect dried vegetable texture.
Optimal Cuts For Dehydration
Beyond thickness considerations, mastering specific cutting techniques will maximize your sun-drying success. You'll want to focus on uniform cuts between 1/8 to 1/4 inches to guarantee even drying across your batch. The brunoise and paysanne cuts work exceptionally well for root vegetables, while the oblique cut suits elongated vegetables like carrots and zucchinis.
For premium results, you'll need to adjust your cutting strategy based on rehydration needs. French-cut green beans rehydrate better than standard cuts, and you should snap them in half for consistent drying.
When working with broccoli, cut the florets into smaller, uniform pieces. While you're preparing vegetables, remember that larger peas perform better in the drying process, but it's best to avoid lima beans altogether as they don't rehydrate well.
Length Impacts Solar Exposure
Length and size choices can dramatically impact your solar cooking success. When preparing vegetables for solar cooking, you'll find that thinner, smaller cuts cook faster due to increased surface area and better heat distribution. Uniform cuts are essential to prevent uneven cooking, especially since solar cookers concentrate heat over a smaller area.
- Cut vegetables into thin slices or small pieces to reduce cooking time from 3-4 hours to just 1-2 hours on sunny days.
- Position your solar cooker to follow the sun's path every 20 minutes for consistent exposure.
- Use thin, shallow pans with lids and high-temperature oven bags to enhance heat retention.
- Cook between 10:00 a.m. and 2:00 p.m. when sun intensity is highest for best results.
Remember to adjust cooking times for cloudy days, often doubling the duration to guarantee thorough cooking.
Solar Box Cooker Vegetable Cuts
Proper vegetable cuts play an essential role in successful solar box cooking. You'll want to slice your vegetables thinly to guarantee even cooking and prevent waterlogging. Using a sharp knife or mandolin, you can control the thickness based on your desired results.
For vegetables that caramelize well, like cauliflower, carrots, and Brussels sprouts, thin slicing helps release moisture and promotes browning.
When steaming vegetables such as potatoes and artichokes, you'll need to adjust the size based on how tender or crunchy you want them.
Don't forget to rotate your cut vegetables every 10-15 minutes for uniform cooking, and add just a small amount of water to the bottom of your pan to assist with steaming.
The right cuts combined with proper positioning in direct sunlight will guarantee prime results.
Parabolic Solar Cooking Sizes

While solar box cookers require specific vegetable cuts, parabolic solar cookers demand careful attention to food portions and container sizes. With your parabolic cooker's five-foot diameter, you'll need to balance the load carefully to maintain stability and ideal cooking performance.
- Choose heavy-gauge steel pots that can handle up to 25 lbs of food regularly, but don't exceed 40 lbs even with extra support.
- Cut vegetables to fit deep pots with lids to prevent splattering onto the reflective panels.
- Select dark-colored cookware to maximize heat absorption at the focal point, which sits 30 inches above the parabola.
- Adjust portion sizes based on your cooking method – smaller amounts for quick-frying vegetables, larger quantities for boiling or steaming.
Watch your food carefully, as the intense heat can cook vegetables faster than traditional methods.
Heat Distribution and Cut Sizes
To maximize your solar cooking efficiency, understanding heat distribution and proper cut sizes becomes vital for success.
You'll want to focus on uniform, smaller cuts like brunoise (1/8 inch cubes) or mirepoix to guarantee even cooking throughout your vegetables.
Surface area plays a significant role in heat absorption, so consider using oblique or diagonal cuts to expose more of your ingredients to sunlight. These techniques help capture and retain solar radiation more effectively.
You'll find that smaller, consistent pieces not only cook faster but also allow you to make the most of limited sunlight hours.
Choose your cutting technique based on your recipe and solar cooker type. Brunoise and mirepoix work well for stews, while paysanne cuts excel in roasting.
Remember to cut your vegetables just before cooking to maintain peak texture.
Drying Rack Vegetable Preparation

Successfully drying vegetables starts with precise cutting techniques that maximize airflow and guarantee consistent results.
You'll want to choose cuts that expose adequate surface area while maintaining the vegetable's structural integrity during the drying process.
- Select julienne cuts for long vegetables like carrots and celery – these thin strips dry evenly and store efficiently.
- Use brunoise cuts (1/8-inch cubes) for aromatics like onions to facilitate quick, uniform drying.
- Apply paysanne cuts for root vegetables when you need quarter-sized pieces that'll rehydrate well in soups and stews.
- Choose chiffonade cuts for leafy greens and herbs, creating delicate ribbons that dry rapidly.
Remember to blanch certain vegetables like broccoli and carrots until crisp-tender before drying, while others like mushrooms and peppers can skip this step entirely.
Solar Blanching Cut Guidelines
When preparing vegetables for solar blanching, you'll want to cut them into thin, uniform slices to maximize sun exposure and guarantee even heat distribution.
Your cuts should maintain consistent dimensions across all pieces, typically ranging from 1/4 to 1/2 inch in thickness, which helps control blanching times and results.
For best results with strip-cut vegetables like carrots or squash, you can aim for lengths between 2-3 inches while keeping the width uniform throughout each piece.
Thin For Maximum Exposure
Making precise cuts is essential for effective solar blanching, since thinner slices allow for maximum heat exposure and more uniform processing.
You'll want to prepare your vegetables thoughtfully before using either water or steam blanching methods, as the thickness directly impacts the temperature and time needed for ideal results.
- Cut your vegetables into uniform, thin slices to guarantee they'll blanch evenly at 80-90°C
- Consider using a mandoline or sharp knife to achieve consistent thickness
- Keep cuts small enough to fit in your blanching basket without overcrowding
- Slice vegetables perpendicular to their fiber direction for better heat penetration
After blanching, you'll need to cool the vegetables quickly in cold water before moving them to wooden boxes for draining.
This preparation guarantees they'll dry efficiently in your solar dryer while retaining maximum nutrients.
Maintaining Uniform Size Control
Beyond thin slicing, proper size control stands as a cornerstone of effective solar blanching. You'll need to start by trimming your vegetables to equal lengths before making any detailed cuts.
Place your produce on a sturdy cutting board and remove outer layers, stems, or roots that could affect consistency. Always position cut sides down for stability as you work.
You've got two main options for achieving uniform pieces: the traditional French method or bias-cutting technique.
When you're preparing different vegetables, remember each type requires specific blanching times – green beans need 3 minutes while broccoli takes 3-5 minutes.
For ideal results, you'll want to blanch at 80-90°C, depending on the vegetable. This temperature range helps preserve nutrients while ensuring proper pre-treatment for solar drying.
Optimal Drying Strip Dimensions
Three key dimensions define successful solar blanching cuts: width, length, and thickness. You'll want to aim for strips approximately 1.5-2cm wide, with uniform thickness throughout.
When you're cutting vegetables, slice them as close to the stem as possible without compromising moisture control, and maintain consistency in your cuts to guarantee even drying times.
- Cut your vegetables into manageable quarters before slicing them into thinner strips
- Keep your slices thin enough to dry within 24-48 hours
- Guarantee uniform width across all pieces for consistent drying
- Maintain proper thickness to prevent mold growth while preserving texture
Your cuts should maximize surface area exposure to air, which speeds up the drying process.
Frequently Asked Questions
Can Vegetable Cuts From Frozen Produce Work Well in Solar Cooking Methods?
Yes, you'll find frozen vegetables work well in solar cooking if you thaw them first, pat them dry, and cut them into uniform pieces. They'll need longer cooking times due to higher moisture content.
How Do Seasoned Vegetables Affect Cooking Times When Using Different Cuts?
When you season vegetables, salt can draw out moisture, affecting cooking times. Thinner cuts will cook faster with seasonings, while heavily seasoned thick cuts may need extra time to properly caramelize and develop flavor.
Which Cuts Help Prevent Vegetables From Sticking to Solar Cooking Equipment?
You'll prevent sticking by cutting your vegetables into uniform, medium-sized pieces. Don't slice them too thin, and make sure they're slightly elevated from the pot's bottom to allow steam circulation.
Do Certain Vegetable Cuts Retain More Nutrients During Solar Cooking?
You'll retain more nutrients by cutting vegetables into uniform, medium-sized pieces. They'll cook evenly while maintaining moisture, and you won't lose as many vitamins compared to smaller cuts during solar cooking.
What Vegetable Cuts Work Best for Layering Different Ingredients Together?
You'll want to use roundels and thin slices for even layering, while julienne and matchstick cuts work well between layers. Quarter cuts and dice cuts help create stable middle layers in dishes.
In Summary
You'll find your solar cooking results improve dramatically when you match your cuts to your cooking method. For sun ovens, stick to 1-inch chunks that cook evenly. Choose thin, uniform slices for dehydrating, and larger 2-inch pieces for solar stews. When using parabolic cookers, opt for smaller, consistent cuts to guarantee thorough cooking. Remember, proper vegetable preparation is key to successful solar cuisine.


Leave a Reply