
For perfect sun-cooked soybeans, start by selecting uniform, pale yellow beans and removing any discolored ones. Soak them for 8-12 hours using a 1:4 bean-to-water ratio. Position your solar cooker in direct sunlight between 10am-2pm, using a box-style cooker with aluminum reflectors and dark cooking pots. Monitor internal temperatures, aiming for 180-200°F, and adjust the cooker's position every 30 minutes to track the sun. Keep the water-to-bean ratio consistent during cooking, and test for softness after 5-6 hours. Guarantee proper drainage and use food-safe handling practices. These fundamental steps will put you on the path to mastering solar bean cooking.
Choosing Quality Soybeans
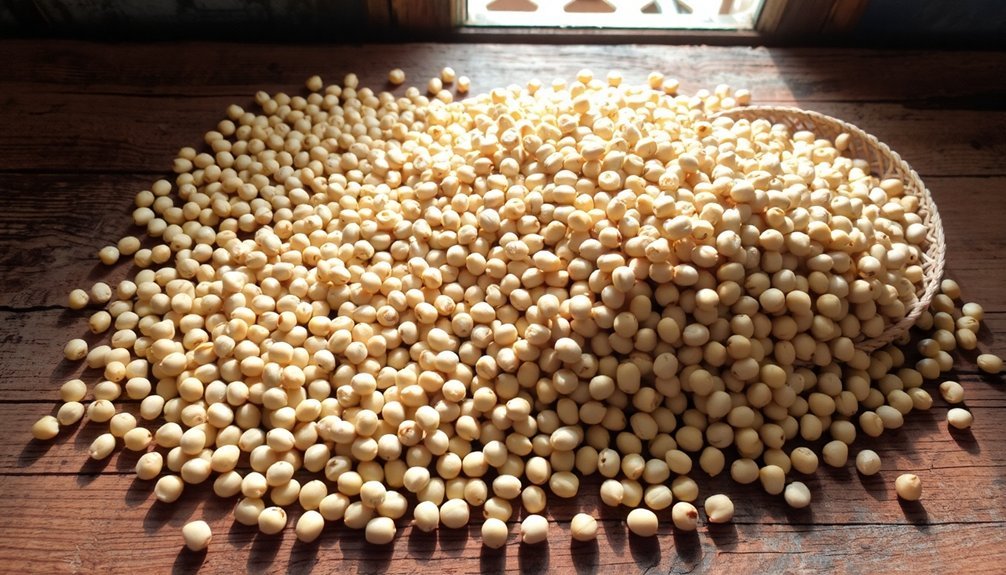
A seasoned cook knows that selecting the right soybeans makes all the difference in sun-cooking success. You'll want to focus on beans that are uniform in size and shape, roughly the size of a frozen pea.
While larger beans contain more protein and fat, don't assume extremely large ones are automatically better for your cooking needs.
Look for soybeans with a light beige or pale yellow color, and check that the hilum (the bean's "eye") is barely visible. A clear or light-colored hilum typically indicates better quality. Quality soybeans should have a sweet aroma when cooking.
You'll find that clean beans without debris will produce the best results.
You can source your soybeans from Asian markets, health food stores, or specialty grocers. If you're concerned about consistency, consider buying directly from single-source providers like Fairview Farms, which often offer non-GMO options.
When evaluating your choices, check the nutritional label for protein and fat content, as higher levels generally yield better results. If you're buying in bulk, you'll often find better prices and a wider selection.
Remember that specific varieties, like Black Jet, offer unique nutritional benefits and taste profiles that might suit your particular needs.
Proper Bean Soaking Times
Proper soaking remains essential for achieving perfectly sun-cooked soybeans. You'll need to soak your beans for at least 8 hours to facilitate adequate softening and rehydration. While this minimum time works, you might notice slightly lower fiber content and reduced extraction of fats and proteins compared to longer soaking periods.
For best results, use the traditional soaking method with a 1:4 ratio of soybeans to water. You'll want to cover your beans completely and let them soak for 8-12 hours, which allows you to easily spot and remove any defective beans while promoting even water absorption. Remember to rinse and drain thoroughly before cooking to remove any dirt or debris.
Pay close attention to your soaking temperature. While you might be tempted to use hot water to speed up the process, stick to room temperature (around 25°C) for the best outcomes. Higher temperatures can decrease your beans' nutritional content and lead to excessive loss of proteins and isoflavones.
If you're short on time, try the hot soak method. You'll need to briefly boil the beans and then soak them for 4 hours. While this requires more attention, you'll get tender beans with reduced gas-producing compounds. Don't forget to discard the soaking water before cooking.
Solar Cooking Equipment Setup

Your solar cooker setup needs a box-type cooker with several key components:
- Aluminum foil reflectors: These reflect sunlight into the oven, increasing the internal temperature. Cut a flap out of the pizza box's lid and line the underside of this flap with aluminum foil, securing it firmly with tape.
- Clear plastic wrap for heat trapping: Seal the opening of the box with plastic wrap to create a plastic "window" that allows sunlight to pass into the box while retaining heat. Line both the underside and the top of the lid's cut opening with plastic wrap, ensuring it is tightly secured with tape.
- Black construction paper at the bottom for heat absorption: Glue or tape a sheet of black construction paper to the bottom of the box. This black color absorbs the heat inside the box, acting as a heat sink.
Adding insulation materials between the box layers will help maintain consistent cooking temperatures throughout the process.
To use the solar oven effectively:
Place your cooker in direct sunlight between 11 am and 3 pm, ensuring it is on a level surface. Continuously turn the cooker to follow the sun's path to maximize heat gain.
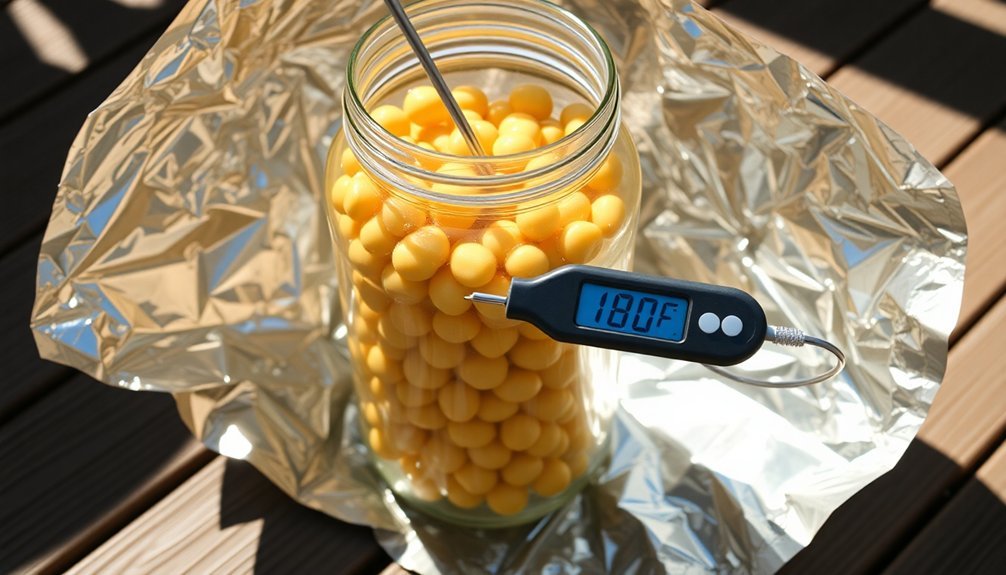
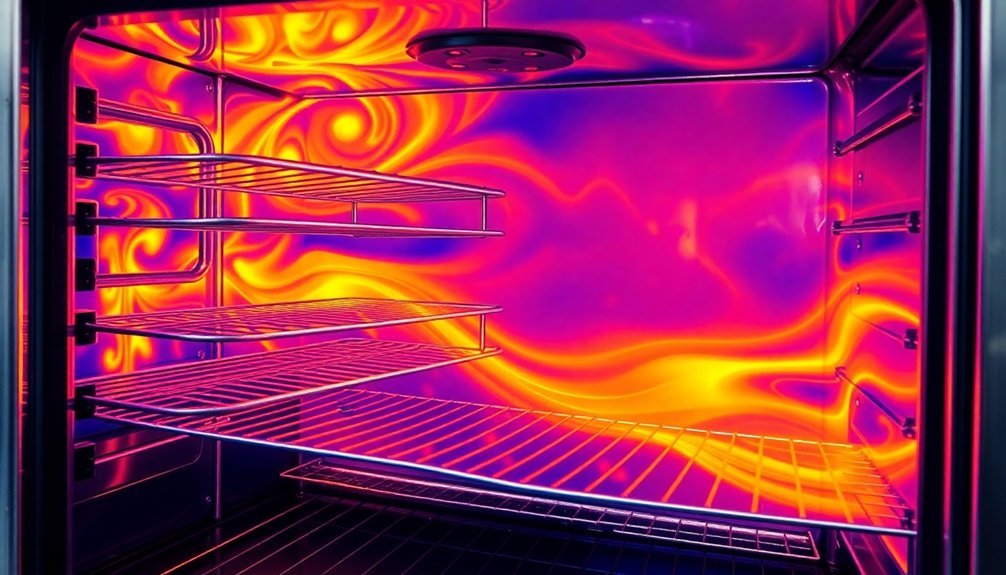
Keep a thermometer inside to monitor temperatures. The ideal temperature for cooking, such as soybeans, is around 200°F, which the solar oven can achieve on a sunny day.
Essential Solar Cooker Components
Setting up a sun-powered kitchen starts with gathering the essential components for your solar cooker. You'll need a sturdy cardboard or insulated box as your base, along with aluminum foil to create reflective surfaces that direct sunlight into the cooking chamber.
The transparent cover, whether plastic wrap or glass, is vital for trapping heat while letting sunlight through. Rolled newspaper sheets between box layers provide excellent insulation for maintaining consistent cooking temperatures.
For effective heat absorption, you'll want to line the inside of your cooker with black construction paper or paint. Don't forget insulation materials like newspaper to prevent heat loss. You'll also need dark-colored cooking pots with tight-fitting lids, as these absorb heat better than light-colored containers.
When assembling your cooker, cut a flap in the box and cover it with foil to reflect additional sunlight inside. Make sure you've sealed any gaps in the insulation and secured the transparent cover properly.
For cooking soybeans specifically, you'll need high-temperature cooking bags or containers that can withstand extended exposure to heat. Keep pot holders nearby for safe handling, as your containers will get surprisingly hot during the cooking process.
Proper Temperature Control Setup
Throughout your solar cooking journey, maintaining precise temperature control remains critical for successfully cooking soybeans.
You'll need to position your cooker on a level surface between 10:00 a.m. and 2:00 p.m., when sunlight is most intense. Utilizing specular reflection principles, modern solar cookers concentrate sunlight efficiently into the cooking area. Use a solar cooking thermometer to monitor temperatures, which should stay between 65°C and 400°C for ideal results.
Prepare your cooking pot by verifying it's matte black to maximize sun absorption. If you're using a metal pot, darken it with flat-black spray paint or black tempera paint. Place the pot in the center of your cooker and use a high-temperature baking bag to retain heat. Don't use aluminum foil, as it reflects sunlight away from your soybeans.
To maintain consistent temperatures, you'll need to reorient your cooker every couple of hours, tracking the sun's movement across the sky. Place your cooker away from potential shadows and guarantee continuous, direct sunlight throughout the cooking period.
When using parabolic cookers, wear sunglasses to protect your eyes and handle with care to prevent burns. Remember that solar-cooked soybeans may require less liquid than traditional cooking methods.
Positioning For Maximum Sunlight
Proper positioning of your solar cooker makes the difference between perfectly cooked soybeans and an unsuccessful attempt. Place your cooker in direct sunlight between 10:00 a.m. and 2:00 p.m., when the sun's rays are strongest.
Choose a location with uninterrupted sunlight and sharp shadow lines, indicating ideal cooking conditions.
Set your cooker on a dry, level surface, using stones or bricks for stability on windy days. You'll need to adjust the cooker's position every couple of hours to track the sun's movement across the sky.
Keep your reflective surfaces angled toward the sun – higher angles when the sun is overhead and lower angles during morning or late afternoon hours.
For optimal soybean cooking results, follow these essential positioning steps:
- Position your dark, thin-walled pot on an open-mesh wire stand to allow sunlight reflection underneath
- Guarantee your transparent heat trap or insulated box is properly sealed to maintain consistent temperature
- Align reflective surfaces to maximize sunlight capture on all sides of the cooking vessel
- Place wind barriers around the cooker if needed, but avoid creating shadows on the cooking area
Managing Sunlight Exposure
You'll get the best results from solar cooking soybeans during peak sun hours between 10 AM and 2 PM, when sunlight intensity is strongest.
Position your solar cooker in a south-facing spot (in the Northern Hemisphere) and adjust it every 30 minutes to track the sun's movement for maximum exposure.
Keep your cooking temperature steady by using a dark pot with a tight-fitting lid and monitoring your cooker's built-in thermometer to maintain it between 180-200°F (82-93°C).
Peak Sun Hours Matter
When cooking soybeans with solar energy, understanding peak sun hours is crucial for success. You'll need to know that peak sun hours occur when solar irradiance reaches 1000 watts per square meter, typically providing the most intense sunlight for cooking. Just like solar panels, your sun-cooking setup will perform best during these prime periods.
For successful sun-cooked soybeans, you'll want to align your cooking time with the day's strongest sunlight. Remember that soybeans are particularly sensitive to light intensity changes and can lose up to 13% of their productivity when light conditions aren't ideal.
To maximize your sun-cooking results, plan around these key timing factors:
- Start cooking when the sun reaches its peak intensity, usually between 10 AM and 2 PM
- Position your solar cooker where it'll receive 6-8 hours of direct sunlight
- Account for seasonal variations in peak sun hours
- Adjust cooking time based on your location's typical peak sun hours
Use shade cloth or adjustable positions to manage excessive heat during peak hours, especially if you're in an area with intense sunlight. This helps prevent overcooking while maintaining consistent temperatures throughout the cooking process.
Position Your Cooking Setup
Throughout the day, positioning your solar cooking setup strategically makes the difference between perfectly cooked and undercooked soybeans.
Orient your solar oven directly in line with the sun, and plan to realign it every hour to maintain optimal heat absorption. You'll want to position the cooker slightly ahead of the sun's movement to guarantee consistent temperature.
Before adding your soybeans, preheat your solar oven for 10-15 minutes to reach the ideal cooking temperature of 325-350°F.
Place your soybeans in dark-colored, covered pots using a 1:4 ratio of beans to water. If you're using a double cooker, stack your pots efficiently to maximize space and heat retention.
Keep your setup in full sunlight between 9 AM and 3 PM, when sun intensity is at its peak. Use the alignment holes on your solar oven to guarantee proper positioning, and watch for any shadows that might interfere with your cooking.
Regular monitoring is essential, but don't open the oven too frequently, as this releases valuable heat. With proper positioning and about 2½ to 3 hours of cooking time, you'll achieve perfectly cooked soybeans.
Temperature Control Techniques
Temperature management stands at the heart of successful solar soybean cooking. You'll need to maintain temperatures around 85°F for ideal results, as excessive heat can compromise your soybeans' quality and nutritional value.
When you're cooking with sunlight, it's vital to monitor and adjust your setup throughout the day to prevent overheating, which can lead to poorly developed beans and reduced protein content.
To maximize your solar cooking success, you'll want to regulate heat exposure through these essential steps:
- Position your solar cooker where it can capture morning sun but avoid intense afternoon heat
- Use a thermometer to monitor cooking temperature, aiming to stay below 86°F
- Adjust your reflector angles throughout the day to maintain consistent heat
- Create partial shade using screens when temperatures climb too high
Remember that your soybeans are most sensitive during their cooking process, similar to their growing stage sensitivity. If you notice the temperature climbing above the ideal range, you can temporarily reduce sun exposure using shade cloth or by adjusting your cooker's position.
You'll also want to guarantee proper air circulation to prevent moisture buildup and maintain even heating throughout your cooking vessel.
Temperature Control Methods
Keeping your soybeans at the right temperature calls for careful monitoring and specific control methods. You'll need to maintain different temperature ranges depending on your purpose – stick to 130°-140°F for commercial beans, while seed beans require lower temperatures of 100°-110°F.
If you're aiming for complete urease inactivation while preserving protein quality, you'll want to reach 150°C.
You've got several heating techniques at your disposal, including fluidized bed, spouted bed, and infrared methods. When selecting your equipment, make certain your high-temperature dryers have precise temperature controls, and if you're using low-temperature dryers, they should feature a full perforated floor.
Don't overlook the importance of airflow and humidity control. Install humidistats or microprocessor-based fan controllers to monitor these vital factors.
When drying, remember that soybeans need to be two points drier than corn for proper storage. Keep winter storage moisture at 13% or less, and if you're storing seed beans for more than one planting season, maintain moisture at 12% or below.
Regular temperature checks and adjustments are essential to prevent overheating and maintain quality.
Monitoring Water Levels
You'll need to maintain a precise water-to-bean ratio of about 2:1, as soybeans absorb roughly half their weight in water during the cooking process.
Check your sun-cooking container every few hours to confirm the beans aren't drying out, especially during peak sunlight hours when evaporation is highest.
Replace any lost water daily to keep your beans properly hydrated, using warm water to maintain consistent cooking temperatures.
Water-to-Bean Ratio Check
Proper water monitoring stands as a critical factor in sun-cooking soybeans successfully. You'll need to maintain specific ratios throughout the entire process, from soaking to cooking.
When you begin, cover your soybeans completely with water, keeping in mind they'll triple in size during the 6-8 hour soaking period.
During the cooking phase, follow these essential ratio guidelines:
- Fill your pot with beans to no more than 1/4 of its capacity
- Keep water level at no higher than 1/3 of the pot's height
- Monitor regularly to add water if needed
- Skim off any grey foam that forms on top
You'll know you've maintained the right water balance when your beans achieve a soft, non-crunchy texture after 5-6 hours of cooking.
When it's time to blend, add just enough water to cover the soybeans in your blender, working in batches for best results. Use a double-layered cheesecloth for straining, and don't forget to use any remaining water to rinse your blender – this guarantees you're capturing all the soybean goodness while maintaining proper consistency.
Preventing Bean Dehydration
Successful sun-cooking of soybeans hinges on preventing dehydration through constant water level monitoring.
You'll need to start by soaking your beans for 6-8 hours using a 1:4 ratio of soybeans to water. Make sure you're using a pot that's large enough to handle the beans' expansion, keeping them at no more than 1/4th of the pot's height.
During the cooking process, you'll need to check your water levels frequently. If you notice the water getting low, add more to maintain the proper ratio.
Keep an eye out for foam formation on the surface – excessive foam can indicate insufficient water or overheating. You should skim this foam off regularly to prevent water loss and remove any loose hulls that float up.
To test if your beans are properly hydrated, press one between your finger and thumb – it should feel soft, not crunchy. Watch for color changes, as these can signal overcooking.
Remember that sun-cooking takes longer than traditional methods, so you'll need to be particularly vigilant about maintaining proper water levels throughout the extended cooking time.
If you're using different cooking vessels, maintain the same 1:4 water ratio but adjust your monitoring frequency accordingly.
Daily Water Replacement Guide
Monitoring water levels during sun-cooking requires different amounts throughout the day, based on your soybeans' cooking stage. You'll need to adjust your water replacement schedule according to both the growth phase and daily temperature fluctuations.
During the early cooking stages, maintain a water level of 0.05 to 0.10 inches, gradually increasing as your beans develop.
For the best sun-cooking results, follow these daily water replacement guidelines:
- Check water levels every 2-3 hours during peak sunlight (10 AM – 4 PM) when evaporation is highest.
- Replace water more frequently during pod development stages, aiming for 0.25-0.35 inches daily.
- Maintain 70-75% moisture content during the main cooking phase for tender, evenly cooked beans.
- Reduce water levels to 0.05-0.20 inches as beans approach completion.
Keep a close eye on moisture levels during the critical cooking period, which typically requires 1.75-2.45 inches of water per week. You'll want to guarantee your beans don't dry out, especially during the peak cooking hours when water consumption is highest.
If you notice rapid evaporation, increase your monitoring frequency and maintain consistent moisture levels.
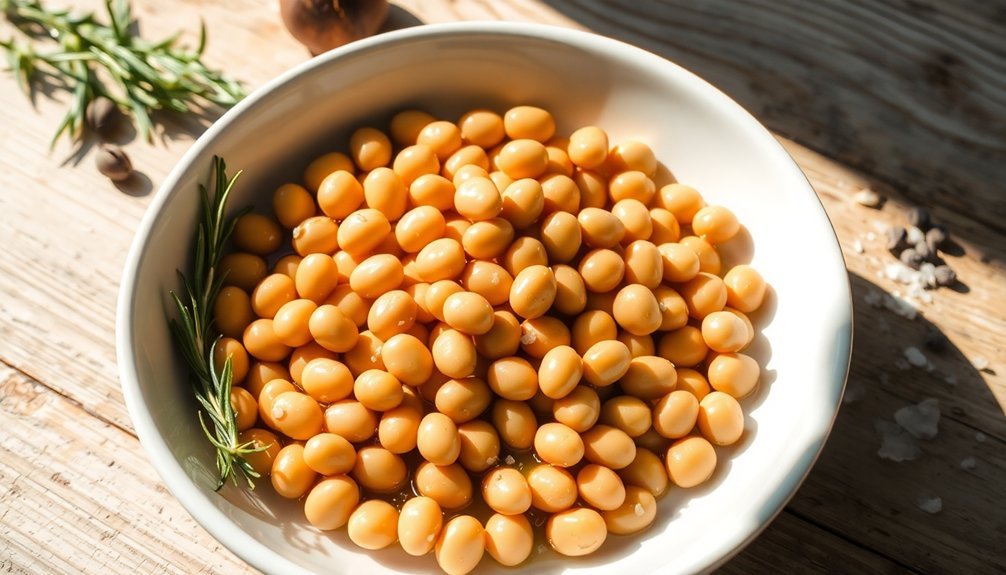
Seasoning Your Solar Soybeans
The art of seasoning sun-cooked soybeans transforms them from simple legumes into a flavorful dish worthy of any meal.
You'll want to start with the basic combination of bay leaves and salt during the cooking process, adding the bay leaves while the water's boiling for the best flavor infusion.
For a more complex taste profile, you can sauté garlic in olive oil before adding it to your soybeans. Enhance the flavor further with tamari or soy sauce, which adds a rich, savory dimension.
If you're looking for a smoky element, incorporate paprika or smoked paprika powder into your seasoning mix.
Don't forget to try nutritional yeast for a cheesy, nutty flavor that also adds nutritional benefits.
For best results, you'll want to season your soybeans after they're fully cooked, though some seasonings like bay leaves work better when added during the cooking process. Remember to stir your seasonings thoroughly to guarantee even distribution.
For extra flavor absorption, consider marinating your cooked soybeans in your chosen seasoning blend. You can create your own signature combination using Himalayan salt and garlic powder, or experiment with different ratios of the basic seasonings.
Ideal Cooking Duration
Now that your soybeans are properly seasoned, achieving the perfect texture depends on precise cooking times. While traditional cooking methods require specific durations, sun cooking typically follows similar timing principles with adjustments for solar intensity.
You'll want to monitor your soybeans carefully, as cooking times can vary substantially based on the strength of sunlight and ambient temperature.
Based on conventional cooking times, here's what you should expect when sun-cooking soybeans:
- For pre-soaked beans (6-12 hours), expect cooking times similar to a slow cooker, ranging from 6-8 hours in strong, direct sunlight
- If you're starting with unsoaked beans, you'll need to add approximately 2-3 additional hours to compensate
- Your water-to-bean ratio should remain consistent at 1:4, just like traditional methods
- You'll need to adjust cooking duration on cloudy days, potentially extending the time by 2-3 hours
Remember to skim off any grey foam that forms during cooking, just as you'd with stovetop preparation. Keep checking the water level and texture every hour, adding hot water if needed to maintain the proper ratio.
Testing Bean Softness

Properly testing bean softness involves three essential physical methods that guarantee your sun-cooked soybeans have reached the ideal texture.
First, you'll want to feel the beans with your hands, examining their firmness through gentle pressure. Next, squeeze individual beans between your thumb and forefinger over a sink – they should yield easily without being mushy.
For the most precise assessment, use a cheese slicer method. Set up your cheese slicer on a cutting board and mark the best spot for consistent pressure. Test multiple beans from different areas of your cooking vessel to verify even softening throughout. You'll find this method particularly helpful when dealing with larger batches.
Remember that several factors affect your soybeans' softening process. If you've pre-soaked your beans overnight, they'll likely soften more evenly.
Keep in mind that different soybean varieties may require varying cooking times to reach the best softness. When sampling, make sure to test at least a few beans from each batch – this helps you identify any inconsistencies in texture.
For the most accurate results, let the beans cool slightly before testing their softness.
Storing Sun-Cooked Soybeans
Successfully storing sun-cooked soybeans requires proper cooling and containment to maintain their freshness and texture. Before refrigerating, let your beans cool to room temperature to prevent unwanted condensation from forming.
Once cooled, transfer them to airtight containers or resealable plastic bags, making sure to remove as much air as possible.
You'll get the best results by following these storage guidelines:
- Store refrigerated soybeans for 3-5 days maximum
- Freeze soybeans with cooking liquid for up to 6 months
- Keep moisture content at 13% or less for ideal storage
- Maintain temperature between 35-40°F in winter and 40-60°F in summer
If you're storing larger quantities, proper ventilation becomes essential. Use aeration fans to maintain consistent airflow through your stored beans, and check regularly for signs of crusting.
Don't overload storage bins, as this can restrict proper air circulation. If you notice your beans have dried out too much, you can rehydrate them by running fans during warm, rainy weather when humidity levels are between 65-80%.
Just avoid running fans when humidity exceeds 80% to prevent condensation issues.
Weather Conditions for Success
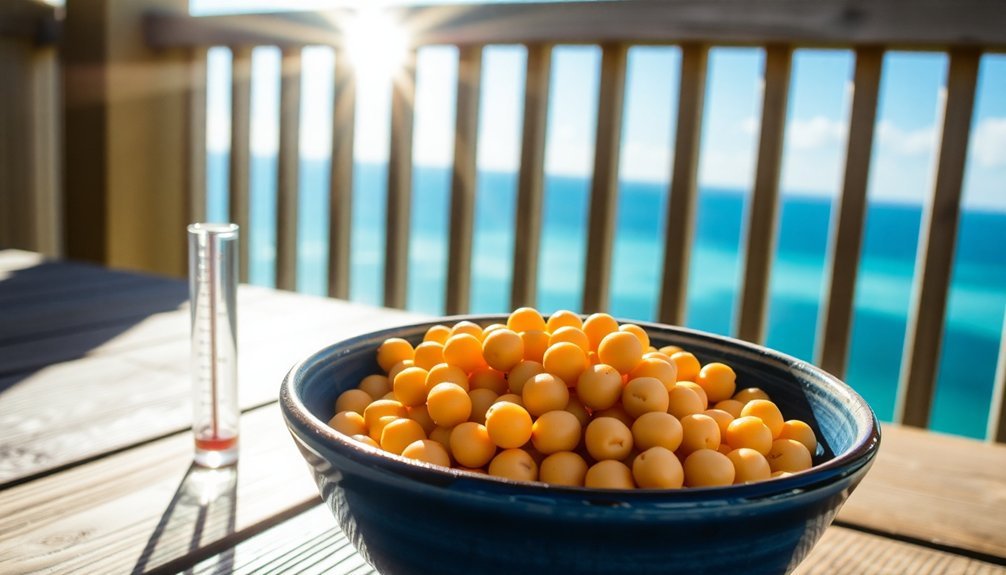
Beyond proper storage practices, achieving great results with sun-cooked soybeans depends heavily on the weather conditions during preparation.
You'll want to aim for temperatures between 72°F and 95°F (22-35°C) for ideal results, as this range promotes proper bean development without causing heat stress.
Monitor your local weather forecast carefully before starting your sun-cooking process. You'll need full sun exposure, but be cautious of temperatures exceeding 85°F (30°C), which can cause heat stress and affect the final texture of your beans.
If you're dealing with high temperatures, consider adjusting your cooking time to prevent overheating.
Don't attempt sun-cooking when temperatures drop below 50°F (10°C), as cold stress can substantially impact the beans' texture and cooking process.
You'll also want to avoid days with excessive moisture or humidity, as proper drainage is essential for successful sun-cooking.
If you're using temperature monitoring tools, pay special attention to night temperatures, as these can affect the beans' development and final texture.
For best results, choose days with consistent sunlight and stable temperatures.
You'll need at least 24-48 hours of appropriate weather conditions to complete the sun-cooking process effectively.
Safe Solar Cooking Practices
When setting out to sun-cook soybeans, mastering safe cooking practices can make or break your success. You'll need to preheat your solar oven to at least 200°F before adding your soybeans, guaranteeing food safety and accounting for heat loss when you open the oven door. Use an oven thermometer to confirm the temperature stays consistent throughout the cooking process.
To maintain proper food safety while preparing your soybeans, follow these essential steps:
- Wash your hands thoroughly and consider using single-use gloves when handling ingredients
- Position your solar oven facing south for maximum sun exposure
- Use dark-colored cookware with lids to retain heat and moisture efficiently
- Monitor internal temperatures with a cooking thermometer
You'll want to chop your soybeans into smaller, uniform pieces to guarantee even cooking. Stir occasionally to prevent any undercooked areas, and remember that cooking times will be roughly double what you'd expect in a conventional oven.
Keep reorienting your solar oven throughout the day to track the sun's movement, maintaining ideal cooking temperatures between 200°F and 300°F for thorough, safe results.
Frequently Asked Questions
Can Sun-Cooked Soybeans Be Used to Make Homemade Tofu?
You shouldn't use sun-cooked soybeans for homemade tofu. You'll need to follow the traditional method of soaking raw soybeans overnight, then blending, cooking, and adding coagulant to make proper tofu.
How Does Sun Cooking Affect the Nutritional Content Compared to Stovetop Methods?
You'll find that sun cooking preserves nutrients similarly to stovetop methods. Both approaches maintain soybean's protein, fiber, and mineral content, though there's a slight reduction in vitamin C regardless of cooking method.
Are Certain Colored Solar Cookers More Efficient for Cooking Soybeans?
You'll get the best results using a dark-colored or black pot inside your solar cooker, as it absorbs more sunlight. Pair it with reflective surfaces around the cooker to maximize heat absorption and efficiency.
Will Adding Baking Soda to Sun-Cooked Soybeans Reduce Cooking Time?
Yes, you'll find that adding baking soda to your sun-cooked soybeans will reduce cooking time. It creates an alkaline environment that breaks down pectin molecules faster, potentially cutting your cooking time in half.
Can Sprouted Soybeans Be Solar Cooked Effectively?
Yes, you'll find sprouted soybeans can be solar cooked effectively. They'll cook faster than unsprouted beans since sprouting has already softened them and reduced cooking time. Just make certain you've got consistent sunlight.
In Summary
You've now mastered the art of sun-cooking soybeans using natural solar energy. Don't forget to store your cooked beans properly in airtight containers and refrigerate them within two hours. If you've followed these tips carefully, you'll have perfectly tender, nutritious soybeans ready for your favorite recipes. With practice, you'll find solar cooking isn't just eco-friendly – it's a reliable way to prepare this protein-rich legume.
Leave a Reply