
You can easily cook dried beans using just the sun's energy and a glass jar. Start by soaking your beans overnight, then fill a clean mason jar about 1/3 full with the drained beans and fresh water. Place the sealed jar in a sunny spot or solar oven between 10am-2pm on a clear day when temperatures reach at least 85°F (29°C). Your beans will slowly simmer and become tender over 4-6 hours, depending on the variety and conditions. Add salt and seasonings only after cooking. This eco-friendly method not only saves energy but releases rich, natural flavors you'll want to explore further.
Required Equipment and Materials

For better efficiency, you'll want to add some wire stands to create an air layer under your jar.
Keep some stones or bricks handy to stabilize your setup on windy days.
Additional helpful items include binder clips or clothespins to secure your reflective materials, and aluminum duct tape to seal any gaps.
Place a dark-colored cooking pot inside the jar to maximize heat absorption and cooking effectiveness.
If you're using a more complex design, consider adding foam insulation board to enhance heat retention.
Preparing Your Solar Cooking Setup
You'll want to start by setting up your solar oven in a sunny location between 11 am and 3 pm, positioning your reflective surfaces to maximize sunlight concentration on the cooking area.
Next, make certain your cooking jar is clean and dry, then line the interior of your solar oven with aluminum foil or reflective material to direct heat toward the center where you'll place your jar.
After preheating your solar oven for about an hour, check that the temperature is adequate for cooking beans and that you've protected the setup from wind using clear oven bags or plastic wrap. Using a black cast iron pot or darkened container will help absorb heat more efficiently for better cooking results.
Essential Equipment Needs
Success in solar cooking begins with gathering the right equipment for your setup. You'll need a well-insulated box made from corrugated cardboard or foam board, lined with aluminum foil to reflect sunlight effectively. It's essential to fill all spaces with rolled-up newspapers to maximize insulation.
The box requires a transparent top made of glass or plexiglass to trap heat while allowing sunlight to enter.
For cooking beans specifically, you'll need dark-colored pots with tight-fitting lids – these absorb heat more efficiently than light-colored cookware. Consider using heat-resistant cooking bags to create an additional layer of insulation around your pots.
Don't forget to include a reliable thermometer to monitor cooking temperatures.
To guarantee your setup maintains proper heat levels, you'll need sealing materials like weather stripping or clear tape to close any gaps in your solar cooker. Add a reflective flap made from aluminum foil or another shiny material to direct more sunlight into the cooking chamber.
You might also want to include pot stands to improve air circulation and cooking efficiency. Keep basic cooking utensils handy for stirring and serving your beans once they're done.
These essential items create an effective solar cooking system that'll help you achieve consistent results.
Jar Setup Steps
Next, place your painted jar inside a large oven roasting bag. Blow air into the bag to create an insulating layer around the jar, ensuring the plastic doesn't touch the jar's surface.
Secure the bag's opening with a twist tie to trap the heat inside.
Position your jar-and-bag setup in the center of your pre-made reflector funnel, using a support container to keep the jar elevated off the bottom surface.
The reflector should be shaped from a 40" x 20" piece of aluminum foil-covered cardboard or similar reflective material, with small brad fasteners holding the funnel shape together.
You'll want to maintain adequate air space around all sides of the jar for ideal heat circulation.
The lid will function like a pressure cooker, reducing your overall cooking time.
For optimal results, do your solar cooking between 10 am and 4 pm when the sun's energy is strongest.
Choosing the Right Beans
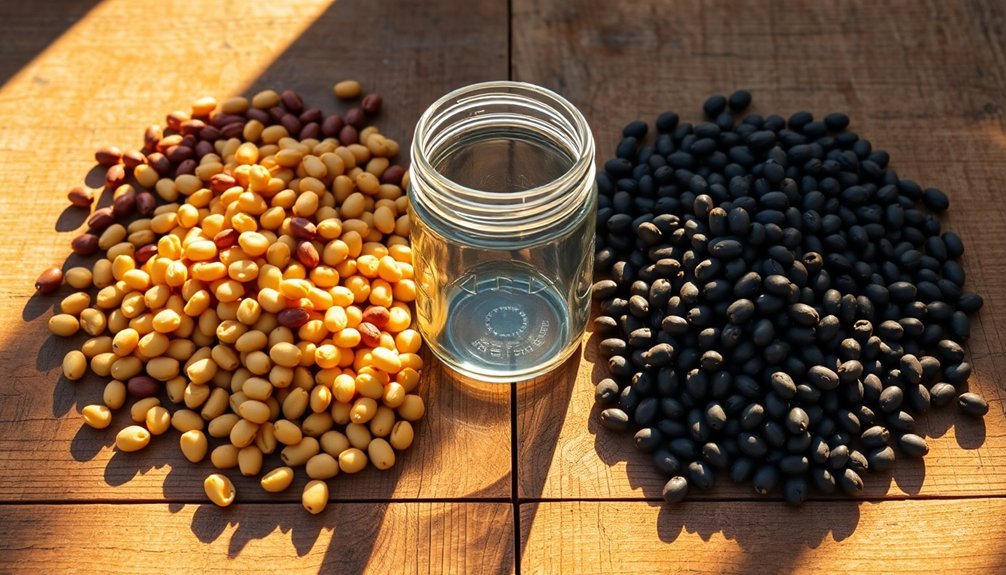
When selecting beans for solar cooking, consider both the type of bean and its potential cooking performance. Pinto beans and lima beans are excellent choices, as they cook evenly and maintain their texture well. You'll want to choose beans that aren't too old, as aging can markedly increase cooking time and affect the final texture. Similar to slow cooking methods, both solar ovens and crockpots help tenderize beans effectively.
| Bean Type | Cooking Time | Best Features |
|---|---|---|
| Pinto | 4-6 hours | Even cooking, holds shape |
| Lima | 5-7 hours | Creamy texture, high protein |
| Navy | 4-6 hours | Small size, cooks quickly |
For the best results, you'll need to account for your altitude and available sunlight. If you're cooking at higher elevations, expect longer cooking times due to lower atmospheric pressure. Your water-to-bean ratio is vital – use enough to fully cover the beans, but don't overdo it as excess water slows cooking. Using dark-colored cookware will help absorb heat more efficiently, and you'll want to adjust your solar oven's position throughout the day to maintain consistent temperature. Pre-soaking your beans can substantially reduce cooking time and guarantee more even results.
Pre-Soaking Your Beans
Pre-soaking your beans is one of the most essential steps in solar cooking. Not only does it reduce your cooking time substantially, but it also breaks down hard-to-digest sugars and enhances nutrient absorption. You'll find that pre-soaked beans cook more evenly and are less likely to split during the solar cooking process.
For the best results, you'll want to follow these critical pre-soaking steps:
- Choose your preferred soaking method – either the traditional cold soak for 8 hours, or try the quick hot soak by boiling for 2-3 minutes and letting them rest for an hour.
- Cover your beans with plenty of water, as they'll expand considerably during soaking.
- Drain and rinse the beans after soaking to remove anti-nutrients and gas-causing compounds.
- Refill with fresh water before transferring to your solar cooking jar.
If you're planning to solar cook your beans tomorrow, you can start soaking them tonight. This overnight approach saves you time and guarantees your beans will be ready for morning prep. You'll notice improved digestibility, better texture, and faster cooking times when you don't skip this important step.
Setting Up The Glass Jar
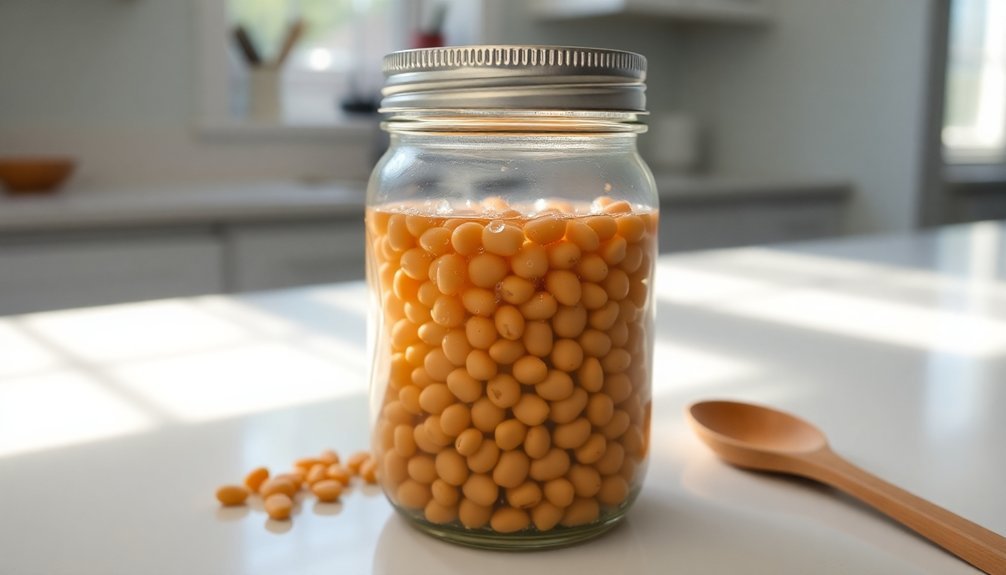
Start by selecting a dark-colored glass jar that you'll paint black to maximize heat absorption for your solar cooking setup.
You'll need to surround your jar with reflective materials like aluminum foil or mirrors, positioning them at angles that direct sunlight onto the container's surface.
Place your jar near the back of your reflective setup, and make sure it's elevated on a pot stand to improve heat efficiency.
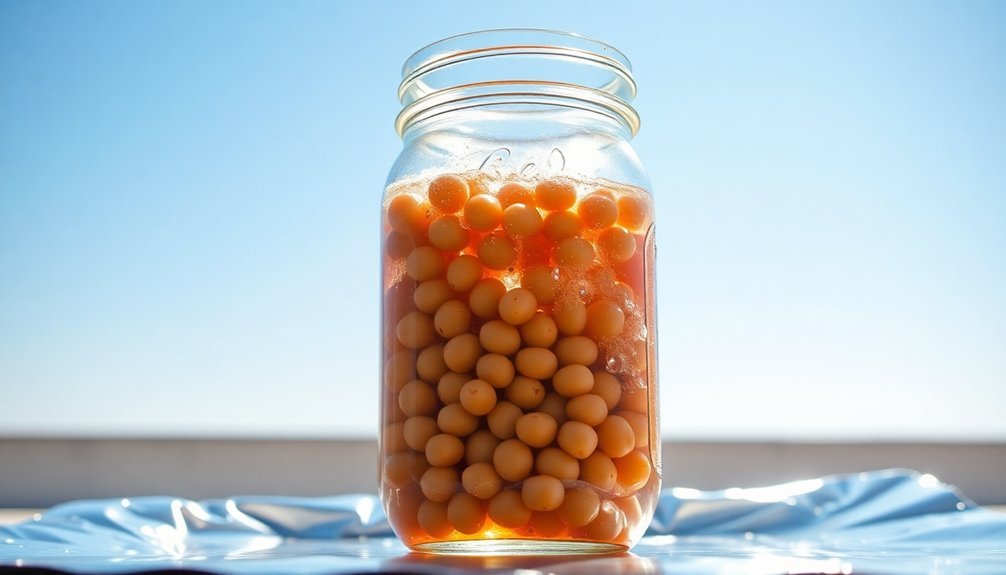
Preparing Your Glass Container
Before diving into the cooking process, you'll need to prepare a suitable glass container for your solar-cooked beans. Select a 1-quart or 2-quart glass canning jar, as these sizes provide the best heat absorption and cooking efficiency. Glass is the preferred material due to its durability and ability to withstand high temperatures while maintaining even heat distribution.
To maximize your jar's heat-absorbing potential, you'll need to apply a coat of high-heat black spray paint to both the jar and its lid. Let the paint dry completely for at least 24 hours before using the container. This black coating greatly enhances the jar's ability to capture and retain solar heat.
Follow these essential steps to prepare your jar:
- Clean your glass jar thoroughly and make certain it's completely dry before painting.
- Apply high-heat black spray paint evenly across the jar's surface and lid.
- Allow the paint to dry for a full day in a well-ventilated area.
- Test the paint's adhesion by gently scratching the surface to make certain it's fully cured.
Once your jar is properly prepared, you'll need to create an appropriate support structure to keep it elevated and stable during the cooking process.
Adding Heat-Absorption Elements
Now that your glass jar is properly painted and dried, you'll need to incorporate several heat-absorption elements to maximize your solar cooking setup.
Start by ensuring the black paint coating is evenly distributed, as this dark surface will absorb the maximum amount of solar radiation and convert it into heat energy for cooking your beans.
Place your jar on a slightly elevated surface, such as a small pot stand or heat-resistant stones, to improve air circulation and reduce direct heat loss to the cooker base.
Next, create an effective heat trap by placing your painted jar inside a clear, heat-resistant plastic bag or covering it with a transparent glass bowl. This transparent layer will let sunlight in while preventing heat from escaping.
Add insulation around the cooking area using cardboard or foam barriers to minimize heat loss to the surroundings.
Position reflective materials, such as aluminum foil or reflective panels, around your setup, angling them to direct maximum sunlight onto your jar. You'll need to adjust these reflectors throughout the cooking process as the sun's position changes to maintain ideal heat concentration on your container.
Position and Reflective Setup
Selecting the perfect position for your solar cooking setup plays a pivotal role in achieving ideal results. You'll need to find a south-facing location that receives uninterrupted sunlight throughout the day.
Position your jar slightly elevated from the ground to guarantee proper air circulation, and be prepared to make periodic adjustments as the sun moves across the sky.
Creating an effective reflective system will maximize your solar cooking potential. Choose materials like aluminum foil, Mylar, or repurposed windshield sunshades to concentrate sunlight onto your jar. Shape your reflective material into a funnel design, guaranteeing it doesn't cast shadows on the jar itself.
Here's how to secure your setup properly:
- Cut a half-circle in your reflective material's center, then shape it into a funnel that surrounds your jar
- Stabilize the reflector using brads at the bottom, and secure with weights or stakes on windy days
- Position the jar in the center, guaranteeing it's stable and slightly elevated
- Monitor the setup throughout the day, adjusting the reflector's angle to maintain the best sun exposure
Remember to use oven-safe bags around your jar to retain heat while allowing light penetration.
Positioning Your Solar Cooker
Proper positioning of your solar cooker plays a crucial role in achieving ideal cooking results. You'll need to place it in a spot with direct sunlight and minimal shadow, facing directly into the sun's path.
For stability, make certain it's on a dry, level surface, and in windy conditions, secure it with rocks or weights to prevent tipping.
For cooking beans at different times of day, you'll need to adjust your setup accordingly. If you're planning a noon meal, orient the shorter front panel easterly by 9:00 or 10:00 a.m. For evening meals, position it westerly by 1:00 or 2:00 p.m.
During all-day cooking sessions, you'll want to place it where the sun will be at noon or early afternoon.
Use the cooker's shadow as your guide for precise positioning. Check the shadow lines on the sides and adjustment arm to maintain the best orientation.
You'll need to make adjustments every 20-30 minutes as the sun moves. For enhanced performance, consider using additional reflectors to increase sunlight capture, and don't forget to wear sunglasses when working with parabolic cookers to protect your eyes.
Monitoring Cooking Progress

You'll want to check your beans' texture periodically by pressing them against the jar with a spoon, looking for a soft, uniform consistency.
Keep an eye on your jar's temperature using a thermometer, aiming for at least 82°C (180°F) for thorough cooking.
Watch for consistent steam patterns when you briefly lift the lid, as steady steam production indicates active cooking is taking place.
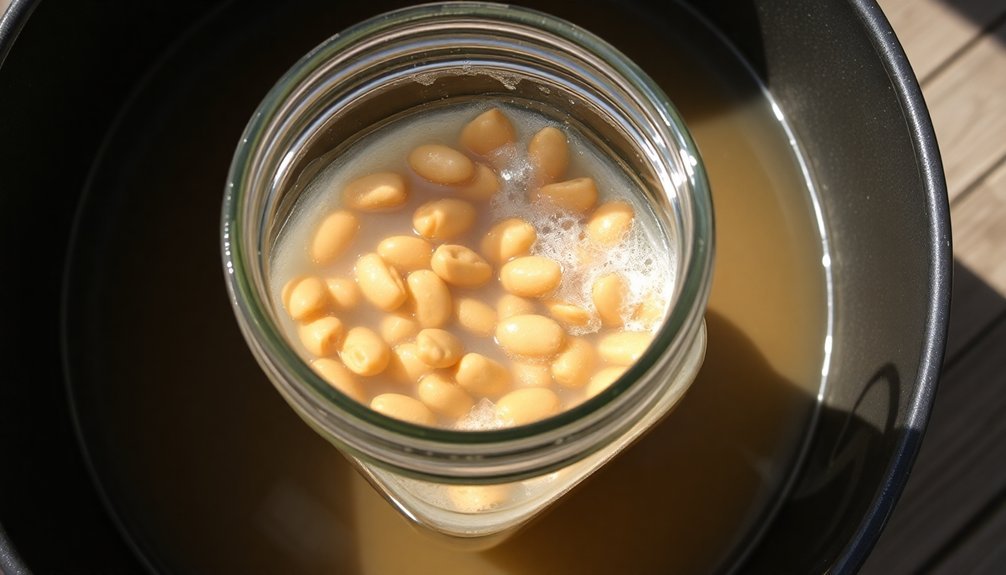
Visual Bean Texture Tests
Throughout the cooking process, you'll need to monitor your beans' texture to make certain they reach the ideal softness. You can perform simple visual inspections to gauge how your beans are progressing in your solar oven.
Well-cooked beans will appear visibly softer and slightly darker than their uncooked counterparts, while their size will noticeably reduce as they cook.
For effective texture monitoring, follow these key steps:
- Check if the beans have expanded and their seed coats appear wrinkled – this indicates they're absorbing moisture properly
- Look for beans with cracked seed coats, as these will cook faster and can serve as indicators for overall batch progress
- Remove a test bean and gently press it with a fork – properly cooked beans will yield easily without much resistance
- Compare the color to uncooked beans – fully cooked beans typically display a darker shade
Remember that altitude will affect your cooking time, so you'll need to adjust your expectations accordingly.
If you notice some beans remaining firm after extended cooking (HTC beans), you might need to add a small amount of salt to help speed up the softening process.
Jar Temperature Checkpoints
Monitoring jar temperatures at specific checkpoints guarantees your beans cook safely and thoroughly in a solar oven.
You'll need to check your jar's temperature at key intervals using a thermometer or water pasteurization indicator (WAPI) to confirm proper cooking conditions.
Start checking your jar's temperature around 10 am when the UV index typically rises above 7. Your jar should reach 82-121°C (180-250°F) for effective cooking.
If the temperature falls below 52°C (125°F), you'll need to adjust your reflectors to capture more sunlight or consider relocating your setup. Don't let your beans remain in the danger zone between 52-10°C (125-50°F) for more than four hours to prevent bacterial growth.
Monitor your jar's lid temperature separately, as it'll heat faster than the contents. You'll want to maintain consistent heat by adjusting reflectors every hour to follow the sun's path.
Keep tracking temperatures until 4 pm, when solar cooking efficiency typically decreases. Remember to use protective gear when checking hot jars, and confirm your jar has proper ventilation to prevent pressure buildup while maintaining ideal cooking temperature.
Steam Pattern Assessment
A solar cooker's steam patterns provide essential clues about your beans' cooking progress. You'll want to monitor the steam's behavior carefully throughout the cooking process to achieve optimal results.
The steam's temperature, pressure, and flow rate directly impact how effectively your beans are cooking, especially when you're using the glass jar method.
To properly assess your solar cooker's steam patterns, follow these key monitoring steps:
- Check that your solar radiation levels stay above 550 W/m2 – this guarantees sufficient steam generation and maintains consistent cooking temperatures around 400°C at the concentration point.
- Monitor the steam's flow pattern inside your jar – you should see steady condensation on the upper portion of the glass, indicating proper heat distribution.
- Watch for consistent pressure signs – slight vapor escape around the lid means you've reached proper cooking pressure.
- Observe the steam's quality through the glass – it should appear as a clear, steady flow rather than sporadic bursts.
If you notice irregular steam patterns, you'll need to adjust your solar concentrator's position or check that your jar's properly sealed. Remember, steady steam production is vital for thoroughly cooking your beans.
Safety Precautions While Solar Cooking
Safety should be your top priority when using a solar cooker, as these devices concentrate intense sunlight and generate significant heat.
You'll need to wear UV-protective sunglasses and never look directly at the concentrated light or focal area of the cooker. Keep children at a safe distance to prevent accidental exposure to the intense rays.
When you're working with your solar cooker, treat it like any other hot cooking surface. Make certain you're wearing protective clothing that covers your skin, and use proper handling techniques such as rods or wires to slide pots across the cooking surface.
You'll need to adjust parabolic cookers frequently to maintain ideal cooking temperatures, so always maintain a safe distance from the focal area.
When you're not using your solar cooker, turn the mirror upside down and secure it in that position. Consider installing fencing or barriers around your cooking area to prevent accidental exposure.
Don't forget to regularly inspect your cooker for wear or damage that could increase safety risks. Follow the manufacturer's guidelines and maintain proper food handling practices to guarantee both your safety and the quality of your meals.
Best Times for Solar Cooking
TEXT:
- Start your cooking process early in the day to maximize peak sun hours.
- Allow 2-6 hours of cooking time, depending on bean type and preparation.
- Pre-soak beans overnight to reduce overall cooking duration.
- Plan for double the conventional cooking time when using a solar cooker.
If you're cooking in an area with variable weather, keep in mind that even thin clouds will extend your cooking time.
Monitor your food's temperature regularly using a cooking thermometer to guarantee thorough cooking.
Weather and Seasonal Adjustments
Successful solar cooking demands careful attention to weather patterns and seasonal changes. You'll need to avoid heavily overcast days and choose sheltered spots that protect your cooker from strong winds while maintaining continuous sun exposure.
For best results, cook during morning or early afternoon hours when the sun's angle is most favorable.
Adjust your cooking schedule according to seasonal variations. During summer months, you'll enjoy longer prime cooking hours, while fall, winter, and spring require more careful planning due to shorter daylight periods. In the Northern Hemisphere, set your cooker at approximately 30 degrees in summer and 60 degrees in winter for best results.
Always preheat your solar oven for at least 30 minutes before cooking.
When cooking beans specifically, you'll need to plan around weather forecasts and available sunlight, as they require 3-5 hours of consistent heat. Pre-soak your beans to reduce cooking time, and consider batch cooking on ideal sunny days. You can freeze extra portions for future use.
Remember to regularly adjust your cooker's position throughout the day to follow the sun's path, ensuring steady heating and proper cooking.
Adding Flavors and Seasonings
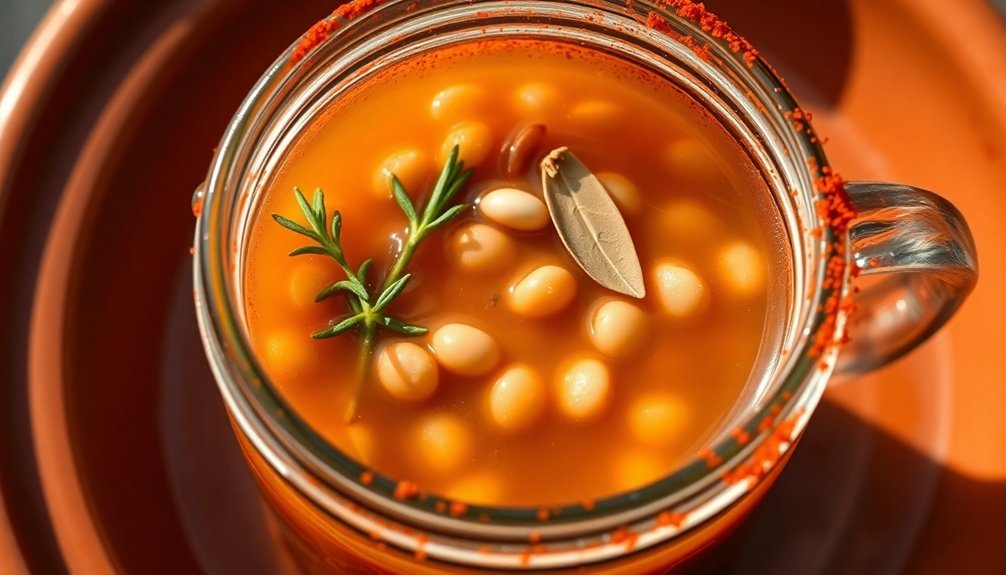
Flavor mastery makes solar-cooked beans truly delightful. Start by pre-soaking your beans and cooking them initially without seasonings to guarantee even cooking.
Once they're partially tender, you can begin layering in flavors using a combination of basic seasonings like onion, garlic, salt, and pepper.
For a well-balanced taste profile, you'll want to add seasonings in stages. Consider these essential steps:
- Start with aromatics: Sauté onions, celery, and garlic in olive oil before adding to your beans.
- Add depth with savory elements: Incorporate Worcestershire sauce, mustard powder, or bacon for richness.
- Balance with sweetness: Mix in small amounts of brown sugar or molasses to round out flavors.
- Fine-tune with tomato-based ingredients: Add tomato paste or ketchup for depth and color.
Remember to taste and adjust your seasonings throughout the cooking process. Don't overpower your beans with strong spices – you can always add more, but you can't take them away.
Consider the specific type of beans you're using when selecting seasonings, as different varieties pair better with certain flavor profiles.
Storage and Reheating Tips
Once you've perfected your solar-cooked beans, proper storage and reheating techniques will help maintain their quality and flavor. Let your beans cool completely before transferring them to airtight glass containers with their cooking liquid. You'll get the best results by storing them in the refrigerator for 3-4 days or freezing them for longer storage.
| Storage Method | Duration | Temperature |
|---|---|---|
| Refrigeration | 3-4 days | Below 40°F |
| Freezer | Up to 6 months | 0°F or below |
| Insulated Container | 4-8 hours | Above 140°F |
| Solar Reheating | Same day | 160°F minimum |
When it's time to reheat your beans, you've got several options. For eco-friendly reheating, place your container back in the solar cooker during peak sunlight hours. If you're planning to eat them later in the day, transfer warm beans to an insulated thermos in the morning. For quick results, reheat them on the stovetop by bringing them to a boil, then reducing the heat. Always make certain your beans reach at least 160°F to maintain food safety, and store them in clean, food-grade containers to prevent contamination.
Troubleshooting Common Issues
Several common challenges can arise when solar cooking beans, but most are easily preventable with the right precautions. Pay close attention to your jar's lid and seal, as these are often the source of problems.
Don't overtighten lids, as pressure buildup can cause the jar to crack or even explode. If your jar has a plastic seal, consider removing it to prevent melting and food contamination.
Water levels and cooking times need careful monitoring for successful results. Always make sure you've added enough water to your beans, as insufficient liquid can lead to steam escaping and unsafe pressure buildup.
Keep track of your cooking progress by following these key steps:
- Check that your jar is properly positioned in the solar oven and realign it with the sun every 30-60 minutes
- Monitor the water level throughout cooking, adding hot water if needed
- Watch for signs of pressure buildup, such as lid bulging or hissing sounds
- Remove the jar carefully using proper heat protection when beans are tender
If you're using alternative materials like aluminum foil as a seal, be mindful of potential food safety concerns and consider using it only for short cooking periods.
Frequently Asked Questions
Can Solar-Cooked Beans Be Safely Consumed if Cooking Is Interrupted by Nightfall?
You shouldn't consume beans if solar cooking is interrupted by nightfall. Either cool them below 50°F quickly or finish cooking with alternate fuel if they've spent over 3-4 hours in the danger zone.
How Does Altitude Affect the Cooking Time of Beans in Solar Cookers?
At higher altitudes, you'll need more time to cook beans in your solar cooker since water boils at lower temperatures. You should expect longer cooking times and plan for additional solar exposure to compensate.
Will Dark-Colored Beans Cook Faster Than Light-Colored Beans in Solar Cookers?
No, your beans' color won't affect their cooking speed in solar cookers. The cooking time depends on temperature, cookware type, food quantity, and sunlight exposure – not whether they're dark or light-colored beans.
Can Multiple Jars of Different Bean Varieties Cook Simultaneously?
Yes, you can cook different bean varieties simultaneously in your solar cooker. You'll need to stack wide-mouthed Mason jars properly and guarantee they all receive adequate sunlight. Just monitor each jar's progress carefully.
Does Solar Cooking Affect the Nutritional Value of Beans Compared to Stovetop?
You'll get more nutrients from solar-cooked beans compared to stovetop cooking since the slow, low-temperature process preserves vitamins better and doesn't require added fats or create harmful compounds from high-heat cooking methods.
In Summary
You'll find solar-cooked beans are a sustainable, cost-effective way to prepare delicious legumes using nothing but sunlight and simple materials. With proper planning around weather conditions and careful preparation, you're able to create tender, flavorful beans without using any fuel. Don't let cloudy days discourage you – once you've mastered this method, you'll wonder why you didn't try solar cooking sooner.


Leave a Reply