Solar cooking offers a sustainable, healthy way to prepare your favorite mixed grains dish. You'll need a solar oven with reflective surfaces, a transparent cover, and proper insulation to achieve temperatures up to 200°F. Start by washing your chosen grains until the water runs clear, then layer them with aromatic vegetables, proteins, and seasonings in your cooking pot. Position your solar oven in direct sunlight, adjusting the reflectors every 20-30 minutes for ideal heat. Your grains will cook naturally over 2-4 hours, preserving more nutrients than traditional cooking methods. There's much more to mastering this eco-friendly cooking technique.
Why Solar Cooking Works
Solar cooking harnesses the power of nature to revolutionize how we prepare meals while protecting our planet. When you choose to cook with solar energy, you're tapping into a free, inexhaustible resource that considerably reduces your carbon footprint and eliminates the need for traditional fuels like wood, charcoal, or gas.
You'll notice that solar cookers work similarly to slow cookers, cooking your food evenly while preserving 10-20% more protein compared to conventional methods. The thermal efficiency is particularly impressive with parabolic cookers, which can reach high temperatures perfect for various cooking techniques.
You're not just cooking; you're contributing to environmental conservation by preventing deforestation and reducing greenhouse gas emissions. These sustainable cookers can reach temperatures up to 400°F, making them remarkably versatile for outdoor cooking.
What makes solar cooking even more practical is its role in promoting better health. You won't have to worry about harmful smoke or soot that typically comes from traditional cooking fires.
Plus, you'll save money on fuel costs while helping your local economy become less dependent on external fuel sources. Whether you're cooking casseroles, vegetables, or desserts, solar cooking offers a sustainable solution that aligns with global environmental goals.
Essential Solar Oven Equipment
Your solar oven setup requires essential components including insulated cardboard boxes, reflective aluminum foil, and black-painted or paper-lined surfaces to harness the sun's energy effectively.
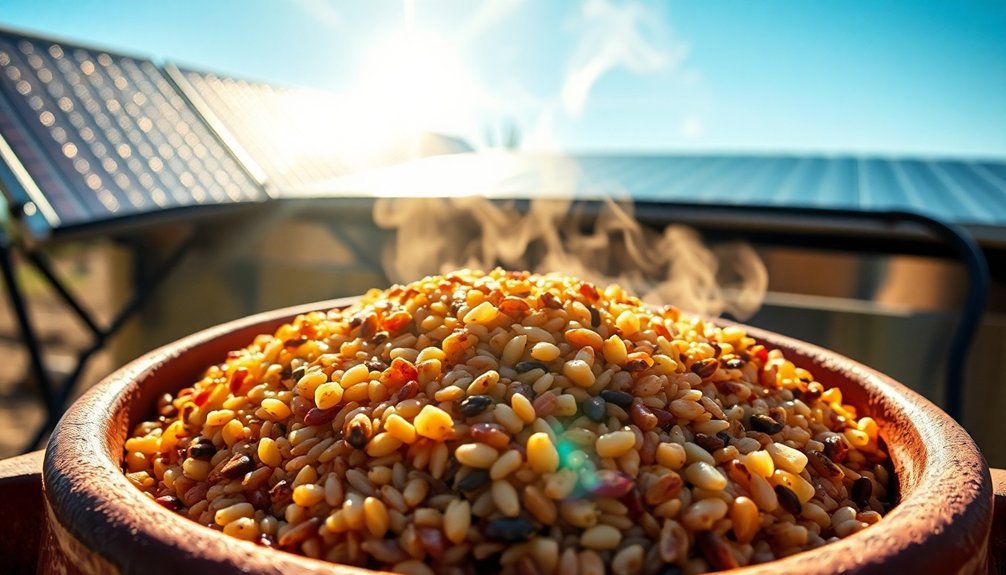
Under optimal conditions, your solar oven can reach temperatures up to 200°F while cooking your mixed grains dish.
You'll need temperature monitoring tools like a thermometer and lid props to maintain ideal cooking conditions and prevent heat loss.
For successful solar cooking, choose dark-colored, thin-walled cooking containers that can withstand high temperatures while efficiently absorbing and conducting heat to your food.
Basic Solar Oven Components
Before assembling a solar oven, understanding its four essential components guarantees successful sun-powered cooking. The core structure is the box, which you'll need to construct from wood or metal materials. You'll want to paint the interior black to maximize heat absorption and confirm proper insulation between multiple walls when building larger versions.
You'll need reflecting mirrors or aluminum foil to direct and concentrate sunlight into the cooking chamber. Position these reflective surfaces at ideal angles to capture maximum sunlight throughout the cooking process. These components can help achieve temperatures up to 400°C depending on the design and positioning.
The third crucial component is a transparent cover – either a glass sheet or plastic wrap – which you'll secure tightly over the box to create a greenhouse effect, allowing sunlight in while trapping heat inside.
Don't overlook the importance of insulation, which you'll place between the inner and outer boxes. Whether you choose foam board, newspapers, or other insulating materials, this component prevents heat loss and maintains the high temperatures needed for effective cooking.
With proper insulation, your solar oven will retain heat more efficiently, confirming your food cooks thoroughly and evenly.
Temperature Control Tools
Maintaining precise temperature control in a solar oven requires specific tools and monitoring equipment. You'll need a reliable dial thermometer that can measure temperatures between +50°C to +300°C to monitor your cooking progress. For more advanced control, consider using buffered probe sensors, which provide more accurate readings than standard air temperature measurements.
| Tool Type | Function |
|---|---|
| Temperature Apps | Real-time monitoring and alerts through platforms like GoSun and SolarChef |
| Thermometers | Dial or digital readings for direct temperature measurement |
| Sensors | Buffered probes and optical sensors for precise heat tracking |
| Data Loggers | Automated recording of temperature patterns and fluctuations |
You'll want to track solar irradiance levels and heat retention rates to optimize your cooking times. Smart solar ovens equipped with Arduino microcontrollers can automatically adjust the oven's position throughout the day, maintaining consistent temperatures. Use temperature sensors like LM135 or LM335 for precise monitoring, and don't forget to check heat distribution maps to identify any hot or cold spots in your oven. For cloudy days, you'll need to adjust your reflectors to maintain ideal cooking temperatures.
Cooking Container Selection
When selecting cooking containers for a solar oven, proper materials and designs play an essential role in heat absorption and cooking efficiency. Dark-colored vessels, especially black pots and pans, are your best choice as they maximize sunlight absorption and convert it into heat energy.
For best results, you'll want to use containers that are both durable and specifically designed for solar cooking temperatures.
Here are your essential container options for solar cooking:
- Black metal pots and dishes – These provide excellent heat absorption and distribution, making them ideal for most solar cooking applications.
- Reynolds oven cooking bags (turkey-size) – They're perfect for creating a greenhouse effect around your food and can withstand temperatures up to 400°F.
- Dark glass dishes – They retain heat well and are great for baking or slow-cooking dishes.
When cooking liquids or grains, you can use heavy-duty plastic zip-lock bags or large glass jars, but make sure they're placed in a dark container to improve heat absorption.
For added efficiency, consider using multiple smaller containers instead of one large pot, as they'll heat up faster and cook more evenly in your solar oven.
Choosing Your Grain Mix
Creating a successful grain mix starts with understanding which grains work together in your one-pot recipe. You'll want to select grains with similar cooking times to guarantee everything cooks evenly. Consider combining brown rice with wild rice and pearl barley, or try mixing quinoa with amaranth and cracked wheat for consistently tender results.
For peak nutrition, include whole grains in your mix whenever possible. Brown rice provides essential fiber and nutrients, while quinoa and amaranth offer unique flavors and exceptional nutritional benefits. You can enhance your grain mixture's texture by adding toasted seeds or nuts, which also boost protein content.
Before cooking, rinse your selected grains thoroughly and consider soaking them to reduce cooking time and improve nutrient absorption. You'll need to adjust your water ratio based on the specific grains you've chosen.
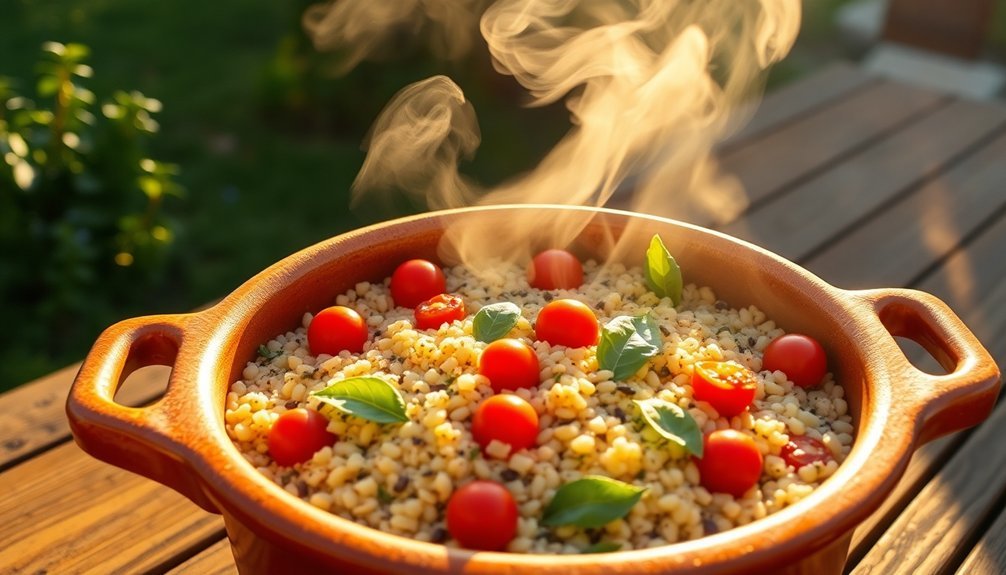
To add depth and interest to your mix, try incorporating diced vegetables, dried fruits, or aromatic spices. Don't forget that you can make extra portions and freeze them for future meals. This approach saves time while guaranteeing you always have nutritious grains ready for quick, wholesome meals.
Preparing Your Solar Workstation
A well-prepared solar workstation forms the foundation of successful one-pot solar cooking. You'll need to carefully assess your cooking area by identifying a spot that receives maximum sunlight between 9 AM and 3 PM, ensuring there aren't any trees or buildings casting shadows.
Position your cooker on a stable, flat surface and orient it properly – south-facing in the northern hemisphere or north-facing in the southern hemisphere.
Before placing your grain mix in the cooker, follow these essential preparation steps:
- Preheat your solar cooker for several minutes while you gather your ingredients.
- Set up a non-slip mat or weights to secure the cooker against unexpected movement.
- Place your dark-colored pot nearby, along with oven mitts and any necessary utensils.
Remember to prioritize safety by keeping children and pets away from your cooking area.
You'll want to minimize heat loss once you begin cooking, so arrange your workstation to allow quick and efficient access to your cooker. Keep your thermometer handy for temperature checks, and position your reflective surfaces, if you're using them, to maximize sunlight capture without creating hazardous glare.
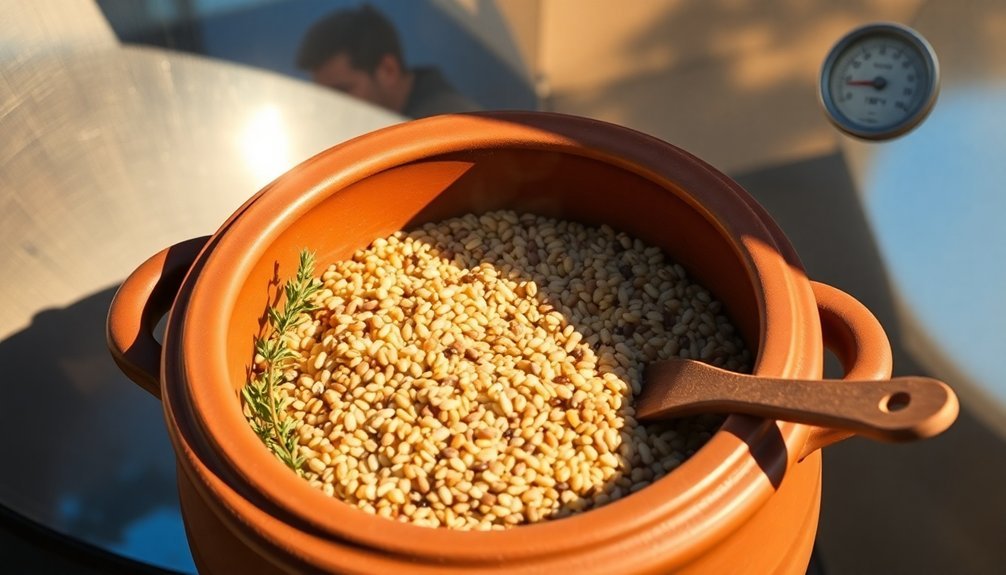
Grain Washing Techniques
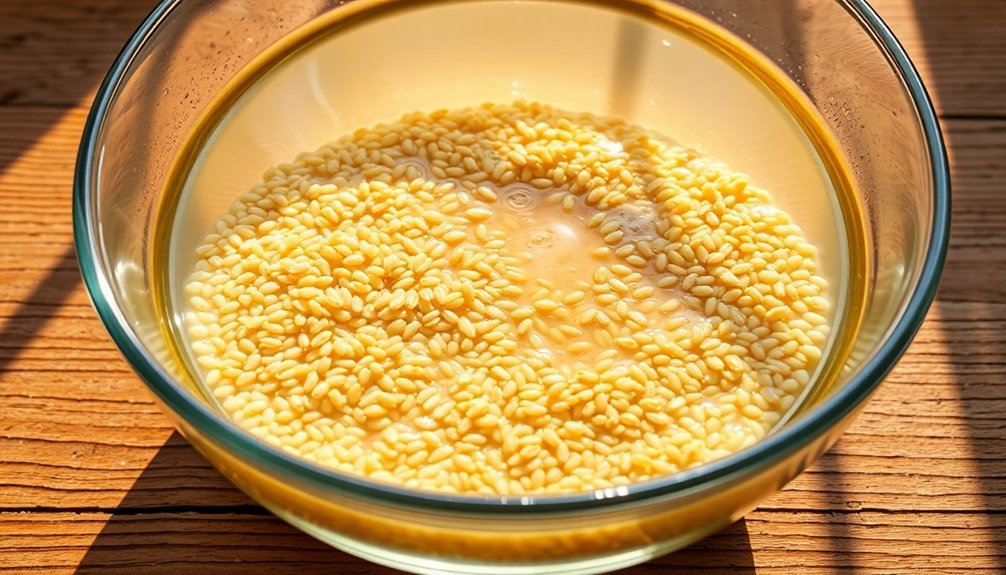
Proper grain washing serves as an essential step before solar cooking your one-pot meal. You'll need to employ both pre-cleaning and fine cleaning techniques to guarantee your grains are safe and delicious.
Start by sieving your grains to remove any visible stones, dust, or dirt. You can do this by gently shaking them in a fine-mesh strainer or specialized sieve. If you notice debris that's difficult to remove, use a gentle air stream (like a fan on low setting) to help separate unwanted materials from your grains.
For fine cleaning, place your grains in a bowl and fill it with clean water. Swirl the grains gently and you'll notice lighter impurities floating to the top. Carefully pour off this water, being mindful not to lose any grains.
Repeat this process until the water runs clear. Watch for any stones that may have settled at the bottom – you'll want to remove these carefully.
Finally, examine your cleaned grains for quality. They should be uniform in color and free from any remaining debris. Once you're satisfied with the cleanliness, drain them thoroughly before adding them to your solar cooking pot.
Layering Your Ingredients
With your grains now cleaned and ready, successful layering of ingredients will build deep, complex flavors in your one-pot meal.
Start by heating your fat or oil, then add aromatic vegetables like onions, garlic, and celery. Salt these ingredients early to help release their flavors, and incorporate herbs and spices at this stage to allow their flavors to develop fully.
Once you've established your flavor base, it's time to layer in your main ingredients in a specific order:
- Add proteins first, searing meats if needed, to develop a rich foundation.
- Incorporate vegetables and legumes based on their cooking times, starting with the firmest ones.
- Add your grains last, stirring well to coat them with the aromatic base before adding liquid.
Pour in any wine or alcohol you're using, followed by your cooking broth.
Let everything simmer together, adding delicate ingredients like fresh herbs, cream, or citrus juice in the final minutes.
You'll want to taste and adjust seasonings before serving, and don't forget you can enhance your dish with toppings like toasted nuts or dried fruits for extra texture and flavor.
Solar Cooking Time Guide
Don't worry about burning your dish – solar cooking typically prevents burning unless you're working with high-sugar ingredients.
To guarantee even cooking, use the appropriate amount of water for your grains and keep your pot's material and thickness in mind.
Remember that you can't cook early morning or after sunset, so time your meal preparation accordingly.
If you're cooking a larger portion or including dried beans, you might need up to 4 hours for complete cooking.
Temperature Control Tips
Monitor your solar cooker's temperature throughout the day using a built-in thermometer to guarantee consistent cooking conditions.
You'll need to adjust the reflector panels every 20-30 minutes as the sun moves to maintain ideal heat concentration.
Keep track of any shadows from nearby structures that might affect your cooker's performance, and reposition the reflector panels accordingly to maximize sunlight capture.
Monitoring Heat Throughout Day
Throughout the day, successful solar cooking requires careful attention to temperature control and timing. You'll need to start early morning by positioning your Sun Oven in direct sunlight, ensuring it's level and ready to capture maximum solar energy. Keep a thermometer handy to monitor internal temperatures, which should stay between 180°F and 300°F for ideal cooking.
During peak sunlight hours, you'll want to:
- Check temperatures hourly and adjust the oven's position to track the sun's movement
- Use thermal mass like bricks or stones to maintain consistent heat
- Keep the oven covered when not actively checking or stirring the grains
As afternoon approaches, you'll need to be more vigilant about temperature maintenance. Adjust the oven's position more frequently to compensate for the sun's changing angle, and consider adding insulation if temperatures begin to drop.
It's essential to time your cooking so your grains are thoroughly cooked before sunset. When your grains are done, remove them promptly and allow them to cool naturally before storing in airtight containers.
Don't forget to clean your Sun Oven and record cooking times for future reference.
Adjusting Reflector Panel Position
Mastering reflector panel adjustments can make or break your solar cooking success. You'll need to align your reflectors directly with the sun and adjust them throughout the day to maintain ideal heat for your mixed grain dish. Use a protractor to set the correct angles, keeping the top reflector steeper and bottom reflector shallower for stability when the sun is low.
| Time of Day | Reflector Position | Temperature Control Action |
|---|---|---|
| Morning | East-facing 45° | Pre-heat 15-20 minutes |
| Mid-morning | Southeast 60° | Open panels fully |
| Noon | Direct South 90° | Adjust for max exposure |
| Afternoon | Southwest 60° | Monitor heat retention |
| Evening | West-facing 45° | Close panels gradually |
For precise temperature control, you'll want to open or close your reflector panels as needed. Position your pot where you can see its reflection in the top panel when viewed from the sun's direction. Don't forget to use your pot lid strategically – keeping it closed maintains heat for slow-cooking grains, while opening it slightly helps regulate temperature if things get too hot. Add 45-degree mirror fittings around your pot to maximize heat transfer to the sides.
Weather and Timing Considerations
Successful solar cooking relies heavily on understanding weather patterns and optimal timing. You'll find the most success between 11:00 AM and 3:00 PM when the sun is directly overhead.
During summer months, you can extend your cooking window from 10:00 AM to 4:00 PM, while winter requires a shorter timeframe of 11:30 AM to 2:30 PM.
Your location plays a vital role in determining cooking effectiveness. If you're in sunny regions like Southern Arizona or Texas, you'll have more consistent results.
However, coastal areas or regions with frequent cloud cover may require additional planning and patience.
For best results, follow these essential timing tips:
- Preheat your solar cooker 30 minutes before adding ingredients to maximize efficiency
- Position your cooker to track the sun's movement, adjusting it every hour during shorter winter days
- Double your conventional cooking times, as solar cooking typically requires more time to reach proper temperatures
Remember to use a cooking thermometer to guarantee food safety, especially on partially cloudy days.
If you're cooking during fall or spring, stick to the peak hours between 11:00 AM and 3:00 PM for the best results.
Testing for Doneness
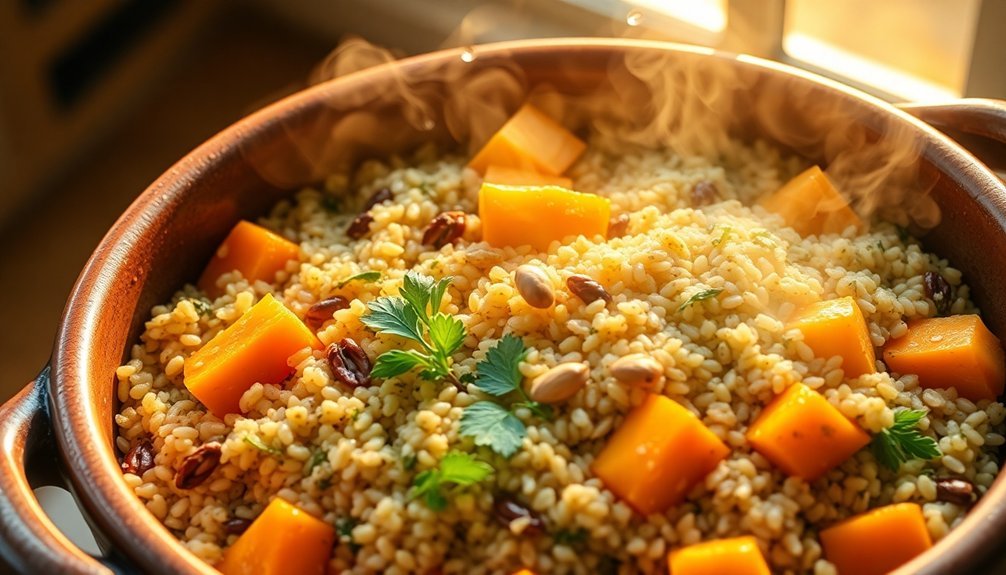
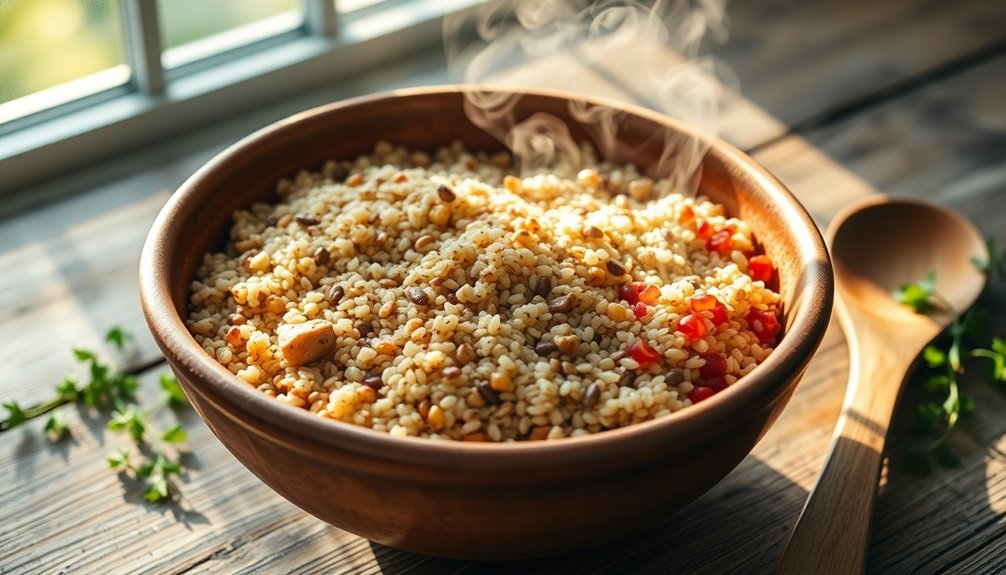
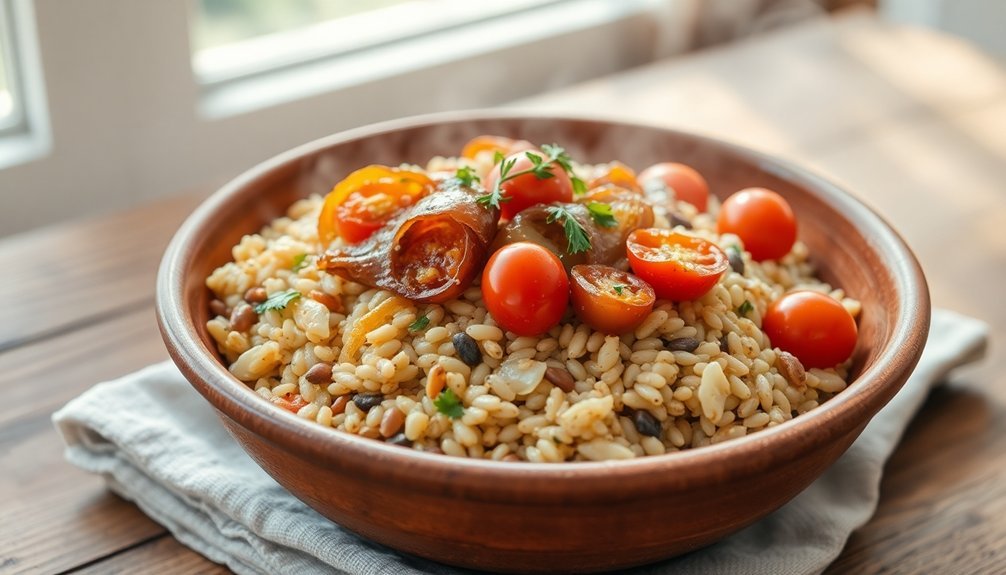
You'll know your grain dish is ready by checking for a few key visual signs, including evenly cooked, fluffy grains that have separated cleanly from one another.
Test the texture by sampling a few grains – they should be tender yet maintain their individual shape, with quinoa offering a slight crunch and heartier grains like farro remaining pleasantly chewy.
Give special attention to moisture levels, ensuring all water has been absorbed and no excess liquid remains at the bottom of your pot.
Visual Signs of Readiness
Knowing when your one-pot meal is perfectly cooked comes down to recognizing key visual indicators. You'll want to check that the liquid has been fully absorbed into the grains, with no visible pools of water remaining. The cooking liquid should be incorporated throughout the mixture, and you shouldn't see any soupy or watery consistency.
Watch for these critical signs that indicate your grains are ready:
- The water level has dropped below the surface of the grains, and they've taken on a slightly darker, more uniform color with a subtle sheen.
- Steam has reduced considerably, and the pot isn't excessively hot to handle with proper protection.
- The grains appear cohesive rather than separated, and they've lost their raw, pale appearance.
You'll also notice the texture has transformed from individual, firm kernels to a more unified mixture. If you've added herbs or spices, they should be evenly distributed throughout.
These visual cues, combined with the pleasant, nutty aroma wafting from your pot, signal that your one-pot meal has reached its ideal cooking point.
Testing Grain Texture
Testing grain texture requires both precision and practical know-how to confirm your one-pot meal reaches the ideal doneness. You'll want to employ multiple testing methods to verify your mixed grains are cooked just right.
| Testing Method | What to Look For | What It Means |
|---|---|---|
| Press Test | Grain spreads easily between surfaces | Indicates proper softness |
| Bite Test | Clean cut without resistance | Shows ideal tenderness |
| Springiness Check | Grain returns to shape after pressing | Reveals proper elasticity |
| Surface Test | Even, fluffy appearance | Confirms proper moisture |
| Spread Test | Consistent spread under pressure | Demonstrates uniform cooking |
For the most accurate results, you'll need to test different grains separately, as each type has its unique texture profile. Press a few grains between your fingers or use two clean surfaces to assess spread and resistance. If you're cooking multiple grain types, check the ones that typically take longest to cook first. When testing texture, remember that slightly firmer grains will continue to soften as they rest, so it's better to err on the side of firmness rather than overcooking.
Serving Your Solar Creation
Serving your mixed grain creation opens up a world of culinary possibilities. You'll find these versatile grains can transform into countless nutritious dishes, from hearty breakfast bowls to satisfying dinner entrées.
After reheating your grains properly in the microwave or on the stovetop, you're ready to create wholesome meals that'll impress your family and friends.
For best results when serving your solar-cooked grains, follow these essential steps:
- Reheat your grains in short intervals, stirring between each minute to guarantee even warming and preserve their texture.
- Choose your preferred serving method – whether as a simple side dish, mixed into salads, or incorporated into soups and stews.
- Add complementary ingredients like fresh vegetables, herbs, or proteins to create a complete meal.
You can elevate your grain dishes by mixing them with legumes for protein-rich meals, incorporating them into veggie burgers, or using them as a base for breakfast bowls topped with eggs and fresh fruit.
Don't forget to maintain quality by storing unused portions in airtight containers and making sure they're completely cool before freezing for future use.
Storing Leftover Solar Grains
Proper storage extends the life of your solar-cooked grains while preserving their nutritional value and taste. You'll want to let your cooked grains cool completely before transferring them to airtight containers. If you're planning to use them within three months, store them in food-grade plastic or glass containers in your pantry, keeping them away from heat sources and direct sunlight.
For longer storage, you've got two options. Your refrigerator can keep the grains fresh for up to six months, while your freezer extends their life beyond two months. If you're freezing your solar-cooked grains, portion them into practical serving sizes like 1/2 cup or 1 cup amounts. Remember that firmer grains like barley, buckwheat, and quinoa freeze better than softer varieties such as rolled oats.
Keep your storage area's temperature between 40-70 degrees Fahrenheit, and if you live in a humid climate, use a dehumidifier to maintain ideal conditions.
Don't forget to label your containers with dates and rotate your stock, using the oldest grains first. Check your stored grains regularly for any signs of spoilage to maintain their quality.
Frequently Asked Questions
Can I Add Frozen Vegetables to the Mixed Grains While Cooking?
Yes, you can add frozen vegetables to your mixed grains while cooking. Just add them during the last few minutes to avoid overcooking. They'll blend perfectly with the grains and absorb the dish's flavors.
What Happens if Clouds Appear Halfway Through the Cooking Process?
If clouds appear midway through your cooking, don't worry! Your food will continue cooking but at a slower pace. You'll need to extend your cooking time and keep the solar oven properly oriented toward the sun.
Does Altitude Affect Solar Cooking Time for Mixed Grains?
Yes, altitude affects your cooking time. You'll cook mixed grains faster at higher elevations due to more intense solar radiation and less atmospheric interference. You'll typically save 15-30 minutes compared to lower altitudes.
Can I Use Metal Containers Instead of Glass in Solar Ovens?
Yes, you can use metal containers in solar ovens, but they must be dark-colored or blackened. For best results, choose cast iron or enameled steel pots, and avoid shiny aluminum that'll reflect sunlight and reduce efficiency.
Will Spices Lose Their Potency When Cooking in Solar Ovens?
You'll find that spices retain their potency well in solar ovens due to the gentle, low-heat cooking process. The consistent temperatures and sealed environment actually help preserve the spices' flavors and aromatic compounds.
In Summary
You'll find solar-cooked mixed grains become a rewarding addition to your sustainable cooking repertoire. Don't hesitate to experiment with different grain combinations and seasonal ingredients as you master this eco-friendly cooking method. Remember to check your local weather forecast, start early in the day, and keep your solar oven well-maintained. With practice, you'll create nutritious, sun-powered meals that'll impress both your family and the planet.


Leave a Reply