To solar cook dry beans, you'll need a basic solar oven made from cardboard or wood, lined with aluminum foil and topped with clear glass. Start by soaking your chosen beans overnight, then drain and rinse them thoroughly. Place the beans in a dark pot with fresh water, aromatics, and spices, then position your solar oven to face the sun. You'll need to rotate the oven every couple hours to follow the sun's path. Most beans take 2-4 hours to cook during peak sunlight. The gentle, slow cooking process creates tender, nutrient-rich beans while using zero electricity – just one of many benefits you'll discover with this eco-friendly method.
Why Solar Cook Beans

Many home cooks are discovering that solar cooking offers a sustainable and efficient way to prepare dry beans. You'll find that this method not only saves energy by using the sun's free power but also helps preserve the nutritional value of your beans through gentle, slow cooking.
When you use a solar oven, you don't need to worry about burning your beans, as the temperature remains controlled. The process mimics traditional slow-cooking methods, breaking down anti-nutrients while enhancing digestibility and flavor. You'll appreciate how this cooking method infuses your beans with a rich, deep taste that's often missing from quicker cooking techniques. Using a dark colored pot will help maximize heat absorption from the sun's rays.
The practicality of solar cooking extends beyond its simplicity. You'll only need basic equipment, and the maintenance is minimal. While you'll need to pre-soak your beans and adjust the oven's position occasionally, the process is straightforward.
At higher altitudes, you'll just need to allow for longer cooking times.
Your environmental impact will decrease substantially when you choose solar cooking. You're reducing your carbon footprint, conserving water, and contributing to long-term sustainability. It's a method that's both eco-friendly and efficient for your bean preparation needs.
Choosing Your Solar Oven Setup
A well-designed solar oven setup starts with selecting the right materials and configuration for your cooking needs. You'll need durable materials like cardboard or wood for the outer structure, along with newspaper, hay, or sawdust for insulation.
Line the interior with reflective materials such as aluminum foil to maximize heat reflection.
For effective bean cooking, choose a setup with a clear glass or Plexiglas top that lets sunlight in while trapping heat. You'll want to include a lid and three sides to create an enclosed cooking environment.
Adding a heat-resistant cooking rack made of aluminum or stainless steel will improve airflow around your bean pot. A hybrid solar oven can provide backup heating options on cloudy days.
Use black cooking pots to absorb heat more efficiently, and consider adding reflectors made from cardboard covered in foil to direct more sunlight into your oven.
You can build a simple yet effective setup using two cardboard boxes – place the smaller one inside the larger, with insulation between them.
Remember that you'll need to adjust your oven's position periodically to track the sun, and cooking times will be longer than conventional methods, typically double the usual duration.
Bean Selection and Preparation

You'll want to select fresh, dry beans like pinto, lima, or kidney beans that are suitable for sun cooking, avoiding canned varieties that are already cooked.
Sun cooking is ideal since it provides low, even heat that gradually tenderizes the beans while preserving their nutrients.
Before cooking your beans, inspect them carefully for any debris or damaged pieces, and make certain they're properly stored in airtight containers to maintain quality.
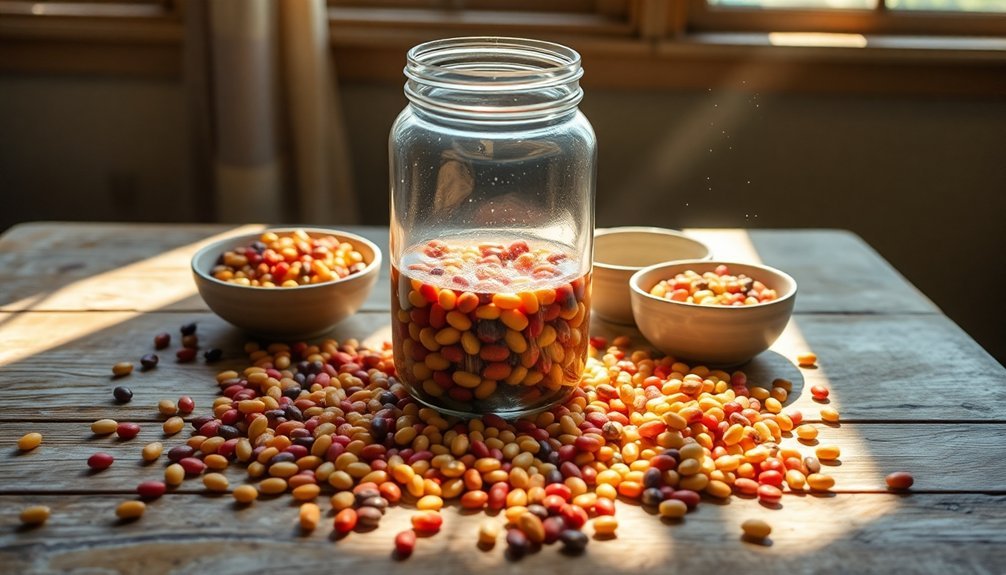
Prepare your chosen beans by soaking them overnight in cool water, making sure they're covered by at least an inch of water to allow for expansion and easier digestion.
Choosing High-Quality Beans
Selecting high-quality beans is critical for successful sun cooking, since inferior beans can lead to uneven cooking and disappointing results. You'll want to carefully inspect your beans before purchasing, looking for certified seeds that are free from bacterial blights and other defects that could compromise your cooking.
When choosing your beans, examine them for uniformity in size and color, as this guarantees even cooking. For optimal results, select beans that have been grown in well-drained soils, as this affects their overall quality and cooking performance.
You'll need to store them properly at 15-16% moisture in airtight containers to maintain their quality until you're ready to cook. Check for any damaged or discolored beans and remove them, as they won't cook properly and could affect the overall taste of your dish.
Don't forget to think about the specific characteristics of different bean varieties. Some varieties cook more evenly than others in sun cooking applications.
You'll also want to verify that your beans are clean and polished – this isn't just about appearance, it affects how well they'll absorb heat and cook.
Handle your beans gently during preparation to avoid splitting or damaging them. If you notice any beans with visible defects or signs of moisture damage, it's best to discard them before cooking.
Pre-Soak For Success
Proper pre-soaking stands as the cornerstone of successful sun-cooked beans, transforming both their texture and digestibility.
You'll need to start by cleaning and rinsing your beans thoroughly, removing any debris or damaged pieces before beginning the soaking process.
You've got several soaking methods to choose from. The traditional overnight soak works well, but if you're short on time, try the hot soak method – boil the beans for three minutes, then let them rest for at least four hours.
Whichever method you choose, it's essential to guarantee your beans are completely covered with water during the soaking process. For optimal results, use 10 cups of water per pound of dry beans.
While your beans soak, they'll release oligosaccharides that can cause digestive issues like gas and bloating. You'll also reduce antinutrients like lectins and phytic acid, making the beans more nutritious and easier to digest.
Once soaking is complete, drain and rinse them with fresh water – never use the soaking liquid for cooking.
For solar cooking specifically, pre-soaking is vital as it markedly reduces cooking time.
If you're not ready to cook immediately after soaking, store your beans in the refrigerator to prevent bacterial growth.
Natural Flavoring Methods
When sun-cooking dry beans, natural aromatics and seasonings transform simple legumes into flavorful, hearty dishes. You'll want to start with classic aromatics like onions, carrots, garlic, and celery, which create a robust flavor base.
These ingredients work together to develop deep, complex tastes during the slow cooking process.
For the best results, you can add your aromatics about 30 minutes into the cooking time. Don't forget to include hardy herbs like rosemary, sage, and thyme, which complement the beans' natural earthiness.
You'll find that cooking with the lid off helps concentrate these flavors in the broth.
- Use a tea infuser or cheesecloth bundle to contain herbs and spices for easy removal
- Add onions during the final 30 minutes if you're seeking a stronger flavor profile
- Incorporate bay leaves and peppercorns to enhance the cooking liquid
- Save vegetable scraps like scallion tops and herb stems to boost flavor
Remember to hold off on adding acidic ingredients until your beans are fully cooked, as acids can toughen the beans.
For additional depth, consider including fennel bulb or fronds as alternative aromatics in your sun-cooking process.
Positioning for Maximum Sun Exposure

You'll need to track the sun's path throughout the day to guarantee your solar cooker captures maximum heat for your beans.
Position your cooker every two hours to match the sun's movement across the sky, keeping the reflective surfaces directed at the strongest rays.
Remember to adjust the tilt angle based on the season, as the sun's height changes from summer to winter, affecting how you'll need to position your cooker for best exposure.
Track Sun's Daily Path
Successfully tracking the sun's daily path directly impacts your ability to maximize sun exposure for dry bean cooking. You'll need to understand how the sun moves across the sky throughout the day to position your solar cooker effectively.
Using tracking tools like Sun Tracker AR, you can visualize the sun's position and predict shadow patterns that might affect your cooking setup.
To maintain the best exposure as the sun moves, you'll want to think about using a simple tracking system. While professional solar installations use complex dual-axis systems, you can achieve good results with manual adjustments every 30-60 minutes during cooking.
- Position your cooker facing east in the morning, and gradually rotate it westward as the day progresses
- Use the shadow cast by a vertical stick to gauge the sun's position and adjust accordingly
- Monitor the brightness of sunlight hitting your reflectors – if they're not gleaming brightly, you need to reposition
- Think about seasonal variations in the sun's path when planning your cooking schedule
Adjust Every Two Hours
Throughout the day, maintaining ideal sun exposure requires repositioning your solar oven every two hours to match the sun's movement. You'll need to align your oven directly with the sun's position to achieve maximum heating efficiency, similar to how you'd adjust solar panels for maximum energy capture.
When you pre-plan your oven's position, you can get about three hours of effective heating without constant adjustments. However, for the best results across a full 6-8 hour cooking period, you'll want to make these periodic adjustments. This is particularly important when cooking beans, which benefit from extended cooking times.
To maximize your solar cooking success, position your oven in a south-facing location with minimal obstructions from trees, buildings, or other structures. You'll find this especially helpful when cooking items like pre-soaked beans, which require several hours of consistent heat.
While your solar oven works like a slow cooker and won't burn your food, maintaining proper sun alignment guarantees steady cooking temperatures. By following the sun's path and making timely adjustments, you'll achieve the most efficient cooking results throughout the day.
Seasonal Angle Considerations
Seasonal changes substantially impact your solar cooking setup, building on the importance of regular oven adjustments. During summer months, you'll benefit from longer periods of direct sunlight, allowing for more consistent cooking temperatures.
However, winter's shorter days and lower sun angles require you to be more strategic with your positioning to maximize exposure.
To optimize your solar cooking throughout the year, consider these essential seasonal adjustments:
- Angle your oven to match the sun's current declination, which varies markedly between seasons
- Position reflectors strategically during winter months to capture and redirect more sunlight
- Choose cooking locations that avoid seasonal shade patterns from trees or buildings
- Monitor cooking temperatures more frequently during seasons with variable weather conditions
Understanding seasonal variations helps you maintain efficient cooking temperatures year-round. You'll need to adjust your setup more frequently during winter months when the sun's path is lower and daylight hours are limited.
Keep your thermometer handy to track temperature changes, and don't forget to insulate your oven properly, especially during cooler seasons. By adapting your positioning techniques to seasonal patterns, you'll achieve consistent cooking results regardless of the time of year.
Time and Temperature Guidelines
When cooking dried beans, understanding precise timing and temperature requirements is essential for achieving perfectly tender results.
While traditional cooking methods require temperatures between 180-212°F (82-100°C), sun cooking temperatures typically range from 150-200°F (65-93°C), meaning you'll need to adjust your cooking times accordingly.
For medium-sized beans like black beans or pintos that normally take 45-60 minutes on the stovetop, you'll need to allow 2-3 hours in a solar cooker during peak sunlight hours.
Large beans such as chickpeas, which typically require 60-75 minutes of stovetop cooking, will need 3-4 hours in your solar cooker.
You'll want to pre-soak your beans using either the hot soak method (2-3 minutes of boiling followed by 4 hours of soaking) or the traditional overnight method with 10 cups of cold water per 2 cups of beans.
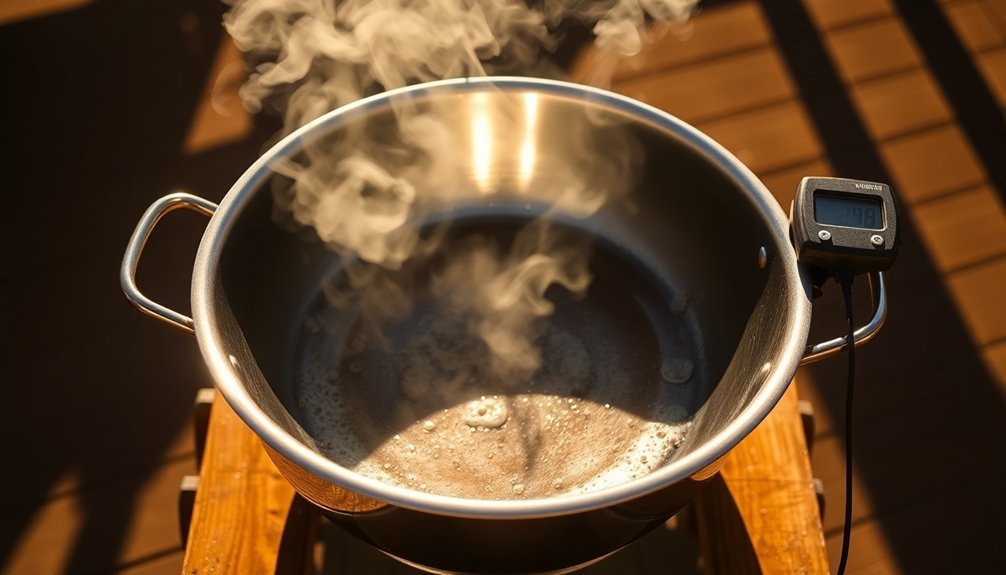
Monitor your solar cooker's temperature using a thermometer, aiming to maintain at least 150°F (65°C). If temperatures drop below this threshold, you'll need to extend cooking times or consider alternative cooking methods to guarantee food safety.
Testing Bean Doneness

Testing your sun-cooked beans for doneness requires multiple checks to confirm they've reached the perfect texture. Your beans should be tender but not mushy, maintaining their shape while being easily mashable between your fingers.
You'll want to perform several tests throughout the cooking process to verify you've achieved the ideal consistency.
- Take a few beans and bite into them – they shouldn't be hard or chalky in the center
- Blow on a spoonful of beans – if the skins peel back, you're nearly there
- Check for even color and consistent texture throughout each bean
- Try mashing a bean between your fingers – it should yield easily without crumbling
To avoid common pitfalls, keep your beans at a gentle simmer and stir regularly. You'll need to maintain proper water coverage throughout the cooking process, adding more hot water if needed.
Don't forget to check your beans frequently, as cooking times can vary from 30 minutes to 2 hours depending on the variety. If you're new to sun cooking beans, start checking for doneness earlier rather than later – you can always cook them longer, but you can't fix overcooked, mushy beans.
Storage and Preservation Tips
You'll want to store your cooked sun-dried beans in a cool, dark place that stays between 50-70°F to maintain their freshness and prevent premature spoilage.
To maximize shelf life, transfer your beans to airtight glass or plastic containers, which protect against moisture, insects, and unwanted odors.
Regularly check your stored beans for signs of mold or unusual smells, and always label containers with the storage date to guarantee you're using them within the recommended six-month timeframe.
Cool Storage Solutions
Proper storage makes all the difference between beans that last for years and those that spoil within months. You'll want to keep your beans in a cool environment, ideally below 70°F, with relative humidity under 15%.
A dark, dry location away from direct sunlight will protect your beans' nutritional value and prevent quality degradation.
For the best results, you've got several reliable storage container options:
- Mason jars with airtight seals work perfectly for smaller quantities and provide excellent protection against moisture
- Food-grade buckets with gamma seal lids offer larger storage capacity while keeping bugs and dampness out
- Mylar bags combined with oxygen absorbers create an ideal environment for long-term storage
- Vacuum-sealed bags can preserve beans for up to five years when properly sealed
Don't forget to add oxygen absorbers or desiccant packs to your storage containers, especially if you live in a humid climate.
For extra protection against pests, freeze your beans for 1-2 weeks before long-term storage.
While properly stored beans can last 10+ years, you'll get the best quality if you use them within the first year of storage.
Airtight Container Benefits
Through the right airtight containers, you'll maximize your dry beans' shelf life and protect their nutritional value for years to come. Glass jars, food-grade plastic containers, and metal tins with tight-fitting lids offer reliable storage options, with Mason jars being particularly effective due to their excellent seal quality.
You'll want to store your beans in a cool, dry environment between 50-70°F, away from direct sunlight and heat sources. If you're dealing with humid conditions, use air conditioning or dehumidifiers to maintain ideal storage conditions.
| Storage Method | Shelf Life | Best Practices |
|---|---|---|
| Basic Airtight | 2-3 years | Cool, dry place |
| Vacuum Sealed | 5+ years | Add oxygen absorbers |
| Freezer Storage | Indefinite | Maintain constant temp |
| Mylar Bags | 10+ years | Include desiccants |
| Bulk Buckets | 3-5 years | Use gamma seal lids |
For maximum preservation, consider combining storage methods. You can vacuum seal beans before freezing them, or add natural pest deterrents like bay leaves to your airtight containers. Remember to label and date your stored beans, ensuring you'll use older stocks first.
Spoilage Prevention Methods
Building on smart container choices, preventing spoilage requires a holistic strategy that goes beyond just proper storage vessels. You'll need to focus on creating an environment that protects your beans from their primary threats: moisture, heat, light, and pests.
Store your beans in a cool, dark place where temperatures stay between 50-70°F (10-21°C), and keep humidity levels low to prevent mold growth.
For maximum protection against spoilage, you'll want to implement these essential prevention methods:
- Use vacuum sealing or mylar bags with oxygen absorbers to create an oxygen-free environment that can extend shelf life up to 10 years
- Add natural pest deterrents like bay leaves or diatomaceous earth to your storage containers
- Conduct regular inspections for signs of pest activity, including small holes, eggs, or insect droppings
- Freeze newly purchased beans for 72 hours to eliminate any potential pest problems before long-term storage
If you're storing beans in a basement, you'll need to monitor humidity levels carefully and use a dehumidifier if necessary. Don't forget to rotate your stock regularly, using older beans first to maintain freshness throughout your supply.
Health Benefits of Solar Beans

Solar-dried beans stand out as a nutritional powerhouse, offering an impressive array of health benefits that make them an excellent addition to your diet. You'll get a substantial protein boost while consuming less saturated fat compared to animal-based proteins, making them perfect if you're following a plant-based diet or looking to reduce meat consumption.
When you incorporate solar-dried beans into your meals, you're supporting your heart health by reducing cholesterol levels and improving cardiovascular function. The high fiber content works to regulate your blood glucose levels and promote a healthy gut microbiome.
You'll also benefit from essential minerals like iron, zinc, and manganese, along with vital vitamins, particularly folate.
To maximize these health benefits, you'll need to prepare your beans properly. Start by soaking and thoroughly cooking them to reduce lectin content and enhance digestibility. If you're new to eating beans, introduce them gradually to allow your digestive system to adjust.
Different varieties offer unique benefits – black beans provide powerful antioxidants, while soybeans contain beneficial isoflavones. Whether you choose kidney, navy, or other bean varieties, you're investing in your long-term health with every serving.
Environmental Impact and Savings
Beyond their nutritional advantages, cooking dried beans with solar energy creates a remarkable environmental impact while offering substantial cost benefits. When you choose dried beans over canned ones and cook them using solar methods, you're markedly reducing your carbon footprint.
Dried beans require less energy to transport and produce, making them a more sustainable choice from farm to table.
By adopting solar cooking methods for your beans, you'll contribute to preventing millions of metric tons of CO2 emissions while saving on utility bills. The environmental benefits are even more substantial when you cook in larger batches, which can decrease environmental impact by up to 87%.
- You'll reduce your annual energy costs substantially while helping to conserve natural resources
- Your carbon footprint shrinks dramatically, as solar cooking prevents the equivalent of burning over 3 trillion rupees of coal
- You'll support global sustainability goals by reducing CO2 emissions, with potential worldwide savings of up to $1.3 billion USD
- Your cooking method becomes more efficient and versatile, as solar cookers can be used anywhere while consuming zero fossil fuels
Frequently Asked Questions
Can I Solar Cook Beans on a Partly Cloudy Day?
You can solar cook on partly cloudy days, but you'll need to allow extra time and monitor closely. It's best to pre-soak your beans overnight and use dark pots to absorb more diffused sunlight.
What Happens if I Forget to Reposition My Solar Oven?
If you don't reposition your solar oven, you'll experience lower cooking temperatures, longer cooking times, and reduced efficiency. The sun's movement means you won't capture maximum solar energy without regular adjustments to maintain performance.
Do Beans Cooked in a Solar Oven Have a Different Texture?
Yes, you'll notice your solar-cooked beans are generally softer than conventionally cooked ones. They'll have a tender, moist texture because the slow, even heating and steam retention in solar ovens naturally tenderizes them.
Can I Add Ingredients Halfway Through the Solar Cooking Process?
Yes, you can add ingredients halfway through solar cooking, but you'll need to monitor temperature changes and cooking times carefully. Opening the cooker will release heat, so plan your additions strategically.
Is It Safe to Leave My Solar Oven Outdoors Overnight?
No, you shouldn't leave your solar oven outside overnight. It's unsafe as temperatures can drop into the danger zone (40-140°F), potentially causing food spoilage and bacterial growth. Take your food inside instead.
In Summary
You've learned how to harness the sun's power to cook delicious, eco-friendly beans. By following these solar cooking methods, you'll save energy costs while preserving nutrients and natural flavors. Don't forget to position your solar oven correctly and test for doneness. Whether you're living off-grid or simply want to reduce your carbon footprint, solar-cooked beans offer a sustainable, healthy alternative to conventional cooking methods.


Leave a Reply