
To make delicious sun-cooked beans at your campsite, you'll need to start by soaking your beans overnight and cleaning them thoroughly. Using a dark-colored Dutch oven or heavy pot, combine your pre-soaked beans with aromatics like onions, garlic, and your favorite seasonings. Place the pot in a solar cooker equipped with reflective panels positioned at 60-degree angles to maximize sun exposure. You'll want to monitor and adjust the cooker's position every 30 minutes, maintaining temperatures between 180-250°F for consistent cooking. With proper setup and timing, you're well on your way to mastering the art of sustainable camp cooking.
Essential Bean Preparation Steps
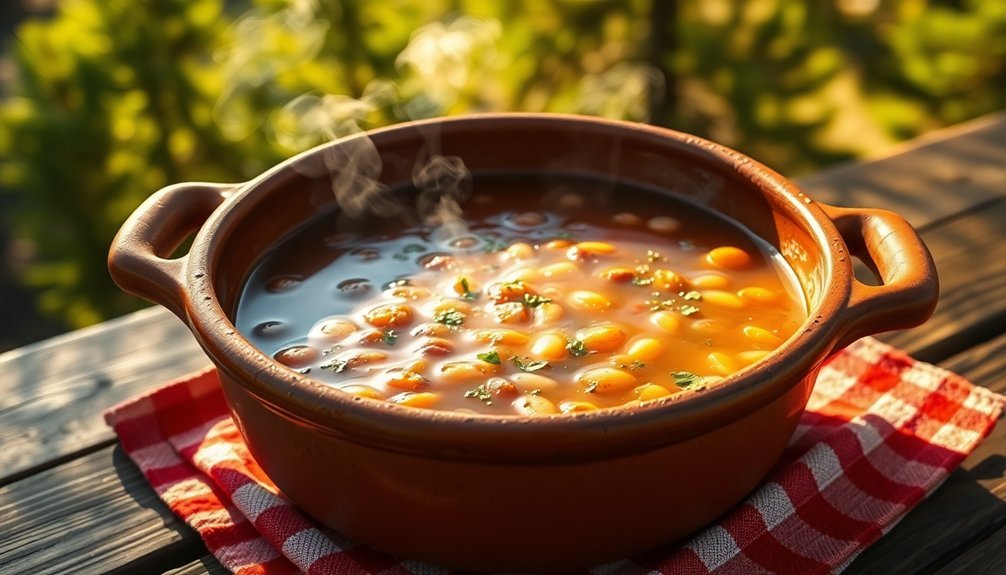
The essential steps for preparing camp-style sun-cooked beans begin with proper pre-soaking and basic setup.
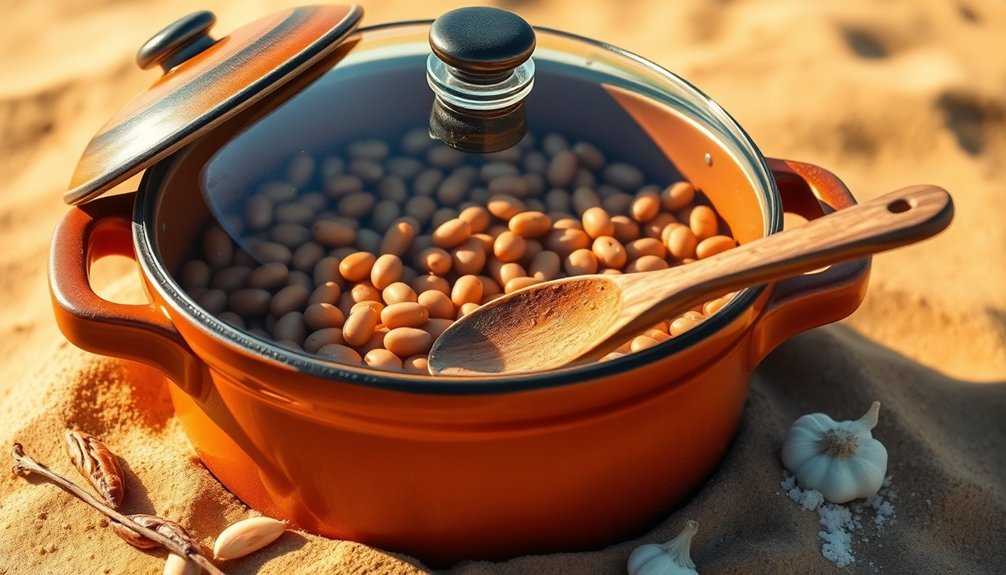
You'll need to soak your beans overnight or for at least 8 hours in clean water, which helps reduce cooking time and guarantees even cooking.
Once they've finished soaking, drain and thoroughly rinse the beans to remove any impurities that may affect their flavor.
Next, you'll want to select a heavy-bottomed pot or Dutch oven that's appropriate for solar cooking. Add your freshly rinsed beans and maintain the proper water ratio – about 8 cups of water for each pound of beans you're preparing. This makes certain you'll have enough liquid throughout the cooking process. Adding kidney beans works especially well for this recipe, as they hold their shape during long cooking times.
Before placing your pot in the solar oven, enhance your beans' flavor profile by adding aromatics. You can't go wrong with classic additions like diced onions, minced garlic, and bay leaves.
These ingredients will infuse your beans with depth and complexity as they slowly cook in the sun. Remember to check that you have all necessary equipment ready before you begin the solar cooking process.
Solar Cooking Equipment Guide
Your basic solar cooker setup needs three essential components: a well-insulated box with a glass lid, reflective panels to direct sunlight, and dark-colored cookware to absorb heat efficiently.
You'll get the best results by positioning your reflectors at a 60-degree angle and keeping them clean of dust and debris to maintain ideal sun reflection. Based on historical testing by scientist Horace-Bénédict de Saussure, these setups can reach 212 degrees Fahrenheit with proper insulation.
Managing temperature is straightforward with adjustable reflector panels and a good thermometer, while adding thermal mass like bricks can help stabilize cooking temperatures throughout the day.
Essential Solar Oven Components
Building an effective solar oven requires five essential components that work together to harness and maintain the sun's energy.
You'll need a sturdy box structure made of wood or metal to serve as your cooking chamber, along with proper insulation to retain heat.
A transparent cover, such as glass or plastic, lets sunlight in while trapping heat inside, working alongside reflective surfaces that direct additional sunlight into the oven.
For maximum heat absorption, you'll want to paint the interior black or use dark materials. When selecting your materials, opt for aluminum foil tape, Mylar, or reflective plastic sheets for the reflective surfaces.
Your insulation can be Styrofoam, foam board, or specialized insulators, while your cooking vessels should be dark-colored pots or pans. These components can help achieve cooking temperatures up to 400°C depending on the design.
You can choose from several solar oven designs, including box cookers, parabolic cookers, or tube cookers like the GoSun Stove.
If you're building a DIY version, focus on creating airtight seals to prevent heat loss, and verify your reflective surfaces are positioned to maximize sunlight concentration.
The design should be straightforward enough for you to construct while maintaining efficient cooking capabilities.
Reflector Setup and Maintenance
Proper reflector setup and adjustment form the cornerstone of effective solar cooking. You'll need to position your top reflector at a steep angle and the bottom one at a shallow angle when the sun sits low in the sky. Use a protractor to verify sun rays reflect accurately, with the top reflector's rays hitting the opposite side of your cooking target. Applying twine to a rope cleat helps maintain the reflector's position throughout cooking sessions.
| Component | Maintenance Task | Frequency |
|---|---|---|
| Reflective Surface | Clean with water and cloth | Weekly |
| Mirror Attachments | Check adhesion and repair | Monthly |
| Support Structure | Inspect screws and joints | Seasonally |
For peak performance, apply mirror card to your ribs using construction adhesive, verifying a smooth 1-meter radius curve for the parabolic dish. You'll want to use 6mm MDF for the base and 3mm MDF for the ribs to maintain structural integrity. Keep your reflectors clean and replace damaged parts promptly, including screws, insulation, and rubber gaskets. Don't forget to position your black cooking pot precisely at the focal point, and always use pot holders – these setups can generate intense heat. Avoid using aluminum foil covers, as they'll reflect precious sunlight away from your food.
Temperature Control Methods
Beyond reflector setup, mastering temperature control determines your solar cooking success. The type of solar cooker you're using will dictate your temperature management approach and cooking capabilities for your beans.
If you're using a box cooker, you'll achieve temperatures up to 165°C (325°F), which is ideal for slow-cooking beans. For maximum efficiency, using crumpled newspaper insulation in the sides helps maintain consistent cooking temperatures. You'll need to make periodic adjustments to track the sun, and verify you're using matte black pots to maximize heat absorption.
For panel cookers, expect temperatures between 82-121°C (180-250°F), requiring 1-2 hours for cooking. You'll want to position your CooKit or similar panel design for maximum sun exposure.
Parabolic cookers offer the highest temperatures, reaching 400°C (750°F), but they demand constant attention and frequent adjustments. While they're powerful, they're often unnecessary for bean cooking.
If you've opted for a vacuum tube cooker, you can achieve temperatures above 250°C (482°F) with excellent insulation properties. These work well even in light overcast conditions, though you'll need to handle them carefully to prevent damage to the vacuum seal.
Seasoning Your Camp Beans
Your sun-cooked camp beans will come alive with a mix of essential base seasonings like garlic, onion, and celery, which create a solid foundation for flavor.
You'll want to build layers of taste by combining spice blends that include smoked paprika, cumin, and Cajun seasonings, adding them at different stages of the cooking process.
To develop complex flavor profiles, you can experiment with aromatics early in the cooking process, then finish with fresh herbs and a touch of olive oil just before serving.
Spice Blends For Success
Seasoning camp beans transforms them from a basic protein source into a flavorful outdoor feast. You'll want to start with aromatic foundations like the "Holy Trinity" – a mixture of green peppers, onions, and celery – which creates a deep, complex base for your beans.
For digestive support and enhanced flavor, add bay leaves while cooking, and consider including ginger or allspice to reduce flatulence.
You can't go wrong with classic additions like whole garlic cloves, diced onions, and ground black pepper. For a smoky kick, incorporate smoked paprika or Cajun seasoning blend.
If you're looking to create specific regional flavors, try a Mexican-style spice blend with cumin and chili powder, or go for a Cajun profile using your preferred seasoning mix.
Don't forget about flavor enhancers – a pat of butter adds richness, while citrus zest and juice bring brightness to your beans.
For added dimension, consider incorporating fermented ingredients like sauerkraut or balance flavors with a touch of honey or maple syrup.
When making bean salads, a simple vinaigrette can elevate the dish while complementing your chosen spice blend.
Essential Base Seasonings
When preparing camp-style sun-cooked beans, mastering the essential base seasonings will set you up for success. You'll want to start with salt and black pepper as your foundation, then build layers of flavor using trusted combinations that have proven effective for camp cooking.
For a reliable seasoning base, you can use Fiesta Brand Pinto Bean Seasoning or Jim's Seasoning as your primary blend. If you prefer to create your own mix, combine garlic, chili powder, and cumin for a classic profile. Don't forget that salt pork or ham adds both seasoning and texture to your beans.
Here are the four essential seasoning steps for perfect camp beans:
- Add salt pork or ham with chopped onions and garlic at the beginning
- Mix in your chosen seasoning blend (store-bought or homemade) with the cooking liquid
- Balance flavors with a touch of cider vinegar or grade B maple syrup
- Adjust salt and pepper to taste near the end of cooking
Remember that soaking your beans overnight will help seasonings penetrate more effectively. You can always fine-tune the flavor by adding hot sauce or additional spices as needed.
Layering Complex Flavor Profiles
To elevate sun-cooked beans beyond basic campfire fare, layering complex flavors creates a gourmet experience even in the wilderness.
Start by building a savory foundation with umami-rich ingredients like soy sauce and Worcestershire sauce. Add whole garlic cloves and onions, then incorporate herbs like thyme and oregano for earthy depth.
Balance the savory elements with strategic sweetness using honey or molasses, which provide floral notes and smoky undertones. For brightness, add apple cider vinegar or citrus juice. Tomato paste brings both acidity and richness to your beans.
You'll want to develop a smoky profile using ancho and guajillo peppers, along with smoked paprika. Control heat levels by incorporating chili powder, fresh jalapeños, or red pepper flakes according to your preference. For tang, mix in Dijon or yellow mustard.
Get creative with fusion elements by adding unexpected ingredients like pineapple chunks or a spoonful of peanut butter. If you're serving the beans with grilled meats, consider incorporating liquid smoke to complement the barbecue flavors.
Include roasted vegetables like sweet potatoes or bell peppers for natural sweetness and added texture.
Monitoring The Cooking Process
Successful sun-cooked beans require careful monitoring throughout the cooking process to achieve the perfect texture. You'll need to check your beans periodically by tasting them or testing with a fork to confirm they're becoming tender but not mushy.
Since sun cooking relies on natural heat, it's vital to maintain proper moisture levels and prevent overcooking.
Keep track of your beans' progress with these essential monitoring steps:
- Check water levels every 30-60 minutes, adding hot water if needed to keep beans submerged
- Test bean tenderness by pressing with a fork or sampling a few beans
- Stir gently to prevent sticking and confirm even cooking
- Adjust your solar cooker's position to maintain ideal sun exposure
Watch for signs that might indicate problems with your cooking process. If beans start losing their shape or becoming mushy, you'll need to reduce exposure time or adjust your setup.
Remember to partially cover your cooking vessel to prevent excessive evaporation while allowing steam to escape. As your beans near completion, increase your monitoring frequency to prevent overcooking.
You'll know they're done when they're tender but still maintain their shape.
Perfect Solar Temperature Control
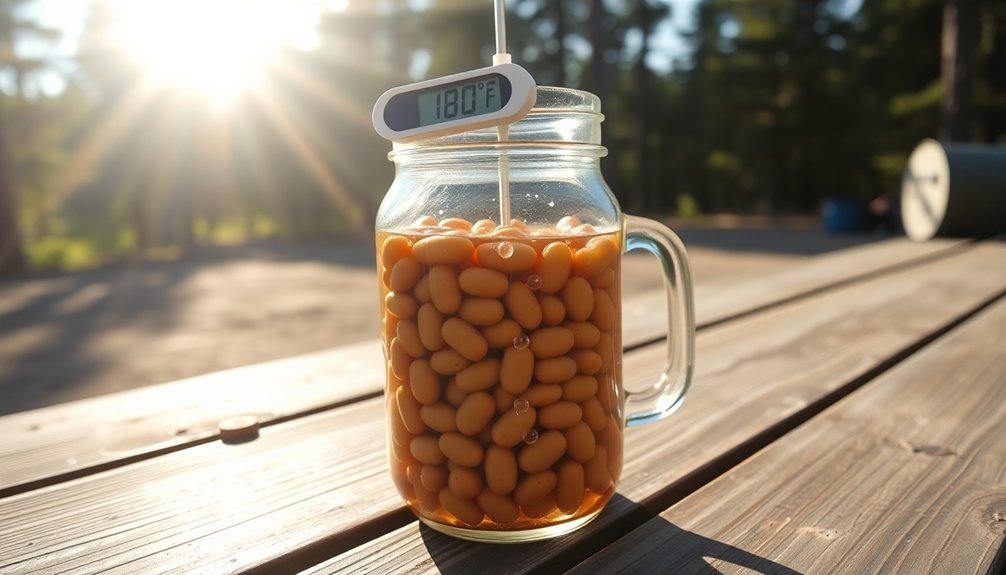
Maintaining perfect temperature control lies at the heart of successful solar bean cooking. For your beans to cook evenly, you'll need to achieve and maintain temperatures between 300-400°F, depending on your cooker type. If you're using a parabolic cooker, you can reach higher temperatures ideal for faster cooking, while panel or box cookers work well for slower, steady cooking.
Start by preheating your solar cooker for 15-30 minutes before adding your bean pot. Use dark-colored cookware with tight-fitting lids to maximize heat absorption and retention.
You'll need to adjust your cooker's position every 30 minutes to track the sun's movement, ensuring consistent temperature throughout the cooking process.
Monitor weather conditions carefully, as cloud cover will affect your cooking time. Peak sunlight hours, typically between 10 AM and 2 PM, offer the most efficient cooking conditions.
If you notice temperature fluctuations, extend your cooking time accordingly. Keep your cooker well-insulated and protected from wind, as environmental conditions can substantially impact performance.
Remember that solar cooking requires patience – your beans may take longer to cook than with conventional methods, but the results are worth the wait.
Serving And Storage Methods
After your solar-cooked beans are ready, proper serving and storage methods become essential for maximizing their shelf life and enjoyment. You can serve your beans hot or at room temperature, garnished with fresh herbs or your favorite seasonings.
For communal camping meals, consider serving them in decorative bowls as a hearty side dish or incorporating them into stews and salads.
For storage, you'll want to follow these vital guidelines:
- Let your sun-cooked beans cool completely before transferring them to clean, airtight containers.
- Store leftovers in your camping cooler or refrigerator for up to 5 days.
- If you're planning for longer trips, freeze portions in sealed containers for up to 6 months.
- Label your containers with cooking dates to track freshness.
If you're working with unused ingredients, store dry beans in airtight containers away from moisture and sunlight. They'll keep for up to a year at room temperature.
For canned beans, keep them in a cool, dry place and always check for damage or bulging before use. Remember to rotate your bean stock, using older supplies first to maintain freshness throughout your camping season.
Frequently Asked Questions
Can I Use Canned Beans if There's Limited Sunlight?
Yes, you can use canned beans when sunlight's limited. They're already cooked and ready to eat, so you just need to heat them up. If sodium's a concern, you can rinse them first.
What Backup Cooking Method Works Best on Cloudy Days?
For cloudy days, you'll find a camping stove's your best backup option. It's efficient, easy to use, and works in any weather. Just keep propane/butane on hand and guarantee proper ventilation.
How Do Camping Elevation Changes Affect Solar Cooking Times?
You'll need to add 10-20% more cooking time for every 1,000 feet of elevation gain. At higher altitudes, you're dealing with lower temperatures, less air pressure, and longer heating times.
Will Smoke From Campfires Affect the Solar Cooking Process?
Yes, nearby campfire smoke can hinder your solar cooking by blocking sunlight and potentially contaminating your food. You'll want to position your solar cooker upwind and a good distance from any smoke sources.
Can I Mix Different Types of Beans in One Solar Cooking Batch?
You can mix different beans in one batch if they have similar cooking times. Don't combine varieties with markedly different cooking requirements, or you'll end up with some beans overcooked and others undercooked.
In Summary
You've now mastered the art of solar-cooked beans at camp! Remember to keep your beans at a consistent 180-200°F, check moisture levels regularly, and store leftovers in airtight containers. Don't forget that elevation and weather conditions will affect cooking times. With practice, you'll perfect this sustainable cooking method that saves fuel and delivers delicious, tender beans every time you're out in nature.


Leave a Reply