Start your solar bean cooking between 11 AM and 3 PM when sunlight is strongest. You'll want to pre-soak your beans overnight to reduce cooking time and guarantee even results. Choose a black-bottomed Dutch oven and line it with aluminum foil for maximum heat absorption and easy cleanup. Keep temperatures steady between 300-375° by realigning your oven with the sun every 30 minutes. Test your beans' tenderness by checking for a soft, plump texture and even color throughout – they should be tender but maintain a slight firmness. With these fundamentals covered, you're ready to explore the finer points of solar cooking mastery.
Selecting Your Solar Cooking Time
For successful solar bean cooking, selecting the right cooking time depends on several critical factors. Since dried beans typically require 4-7 hours of solar cooking time, you'll need to carefully consider both environmental conditions and timing to achieve the best results.
Start by checking your location and the season, as these substantially impact cooking duration. If you're closer to the Equator or it's summertime, you'll have more sunlight hours to work with.
Plan to begin your bean cooking between 11:00 a.m. and 3:00 p.m., when solar intensity is at its peak. During winter months, you'll need to add extra time and make more frequent adjustments to track the sun.
To optimize your cooking time, preheat your solar dutch oven and choose a wind-protected spot. You'll want to position your oven where it can receive maximum sunlight exposure throughout the cooking period. Similar to the Perfect Baked Beans recipe, you should soak the beans overnight to reduce overall cooking time.
Remember that different solar oven designs have varying heating efficiencies, so you may need to adjust these general time guidelines based on your specific model. Monitor the temperature regularly and be prepared to extend cooking time if clouds appear or temperatures fluctuate.
Bean Preparation Before Solar Cooking
Proper bean preparation plays a vital role in successful solar cooking. You'll need to start by pre-soaking your dry beans overnight in water, as this substantially reduces cooking time and guarantees even cooking in your solar Dutch oven.
Make sure you're covering the beans with 1 to 2 inches of water during the soaking process, as proper water levels are essential for best results.
When you're ready to cook, transfer your pre-soaked beans to a dark-colored pot with a tight-fitting lid. This type of pot is ideal for solar cooking as it maximizes heat absorption and retention. The pot should be placed in a solar oven with reflectors to ensure optimal heat concentration.
You'll want to maintain the right water-to-bean ratio by using the same amount of water you'd use in traditional cooking methods. If you're unsure, it's better to add slightly more water than too little, as undercooked beans can't be salvaged easily.
You can add your preferred spices and seasonings at this stage. If you're planning ahead, consider cooking larger batches of beans that you can freeze for future use.
Remember that different bean varieties may require varying cooking times, so adjust accordingly based on what you're preparing.
Setting Up The Dutch Oven
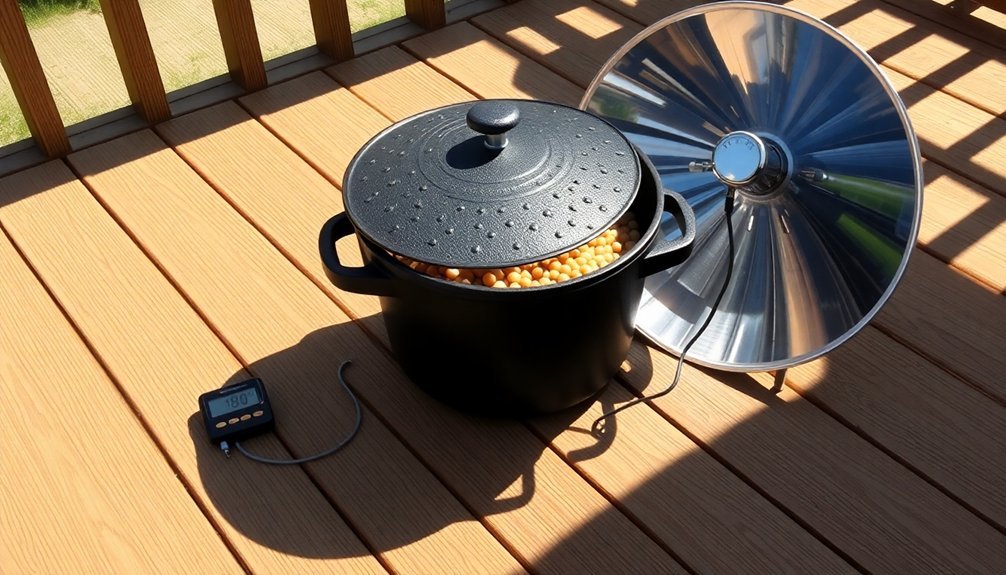
Inside your solar cooking setup, the Dutch oven serves as the cornerstone of successful bean preparation. You'll need to guarantee your oven has a black bottom to maximize heat absorption and proper insulation to maintain cooking temperatures.
Select a heavy cast iron Dutch oven with a fitted lid and handles for easy manipulation during the cooking process. Pack rolled-up newspapers around the cooking vessel to provide additional insulation for heat retention.
Line your Dutch oven with aluminum foil or parchment for simple cleanup, and position it on a stable, heat-insulating surface.
You'll need to create an effective solar collection system by surrounding the oven with reflective materials like aluminum foil or Reflectix. Cover the top with clear plastic wrap or a glass lid to trap heat while allowing sunlight to penetrate.
Position your Dutch oven to directly face the sun, tilting it slightly to capture maximum sunlight. You'll want to adjust the reflective materials around the oven to direct additional sunlight onto the cooking vessel.
Throughout the cooking process, you'll need to reposition the oven every 30-60 minutes to follow the sun's path. Consider using a turntable or pivot system to make these adjustments easier and more precise.
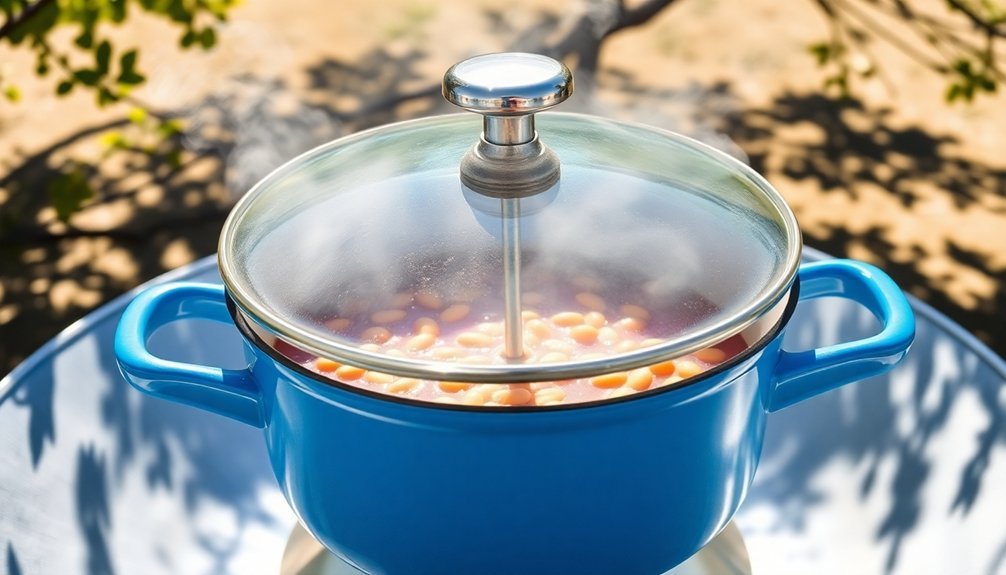
Temperature Control During Cooking
Temperature control stands as the essential element in successful solar Dutch oven cooking. You'll need to align your oven with the sun every 30 minutes using the E-Z Sun-track indicators to maintain temperatures between 300° and 375°. This consistent realignment guarantees your beans cook evenly, as 60% of the heat comes from direct sunlight through the glass door, while 40% reflects off the mirrors.
On windy days, don't forget to secure your setup with the wind-resistant alignment leg and stakes, which work effectively in winds up to 35 MPH. Using thick fiberglass insulation helps maintain steady cooking temperatures even in challenging conditions.
You'll find that solar ovens rarely overcook food, but you should use a meat thermometer to check your beans' doneness, especially on cloudy days.
For winter cooking, adjust your oven position to maximize morning and evening sunlight. If you're cooking on partially cloudy days, you'll need to extend your cooking time. Remember to use dark-colored pots to enhance heat absorption, and keep in mind that you'll need less liquid than traditional recipes require.
While your solar oven can reach 400° on clear days, maintaining a steady temperature through proper alignment is key to perfectly cooked beans.
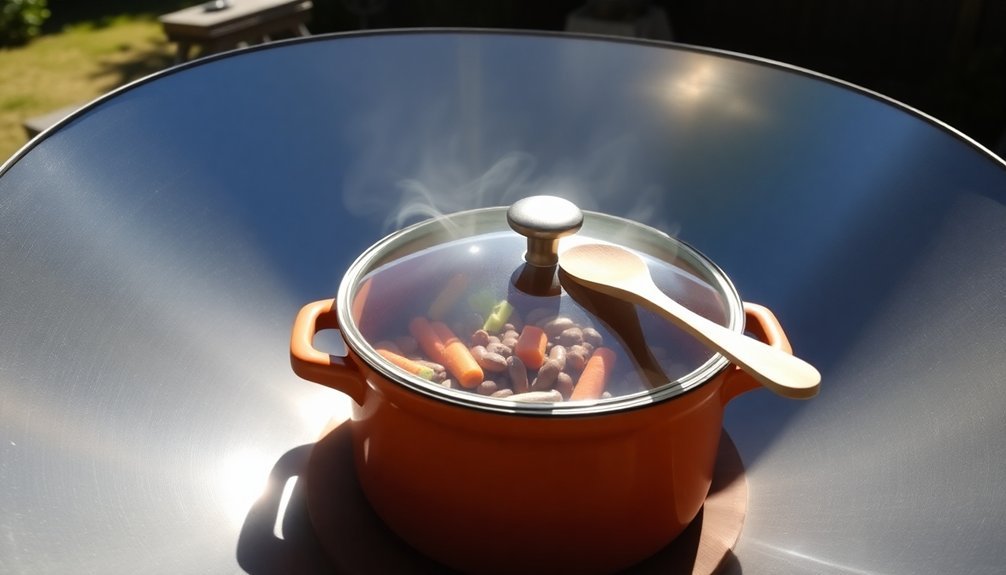
Testing Bean Tenderness
Testing your beans for proper tenderness requires three key indicators – texture, appearance, and bite. When cooking in your solar Dutch oven, you'll want to check that your beans are soft and plump, showing an even color without split skins.
They should be tender when bitten but maintain a slight firmness – never mushy.
Since solar cooking times can vary based on environmental factors, you'll need to monitor your beans regularly. Adding 1-2% salt to the cooking water can help achieve more even cooking and better texture. If they're not tender after the initial cooking period, continue cooking and retest every 10-15 minutes. Remember to keep the beans covered with warm water throughout the process to prevent drying.
Here's how to guarantee perfectly tender beans in your solar Dutch oven:
- Start with a hot soak method – boil for 3 minutes, then soak for 4+ hours before solar cooking
- Check tenderness by sampling beans from different areas of the pot
- Stir occasionally to promote even cooking and prevent sticking
- Drain immediately once they've reached desired tenderness
If you're cooking at high altitude or using hard water, you may need to extend cooking times. Different bean varieties also require varying cooking durations, so adjust accordingly.
Frequently Asked Questions
Can I Add Tomatoes or Acidic Ingredients While Solar Cooking Beans?
You shouldn't add tomatoes or acidic ingredients while your beans are cooking. Instead, wait until the final 20-30 minutes of cooking time to add these items, as they'll prevent your beans from becoming tender.
What Happens if Clouds Appear Halfway Through Cooking the Beans?
If clouds appear halfway through, your cooking time will increase. You'll need to extend cooking by 1-2 hours, monitor temperature closely, and keep the oven well-insulated to maintain heat until the sun returns.
Are Ceramic-Coated Dutch Ovens Better Than Cast Iron for Solar Cooking?
You'll find ceramic-coated Dutch ovens are great for solar cooking because they heat quickly and distribute heat evenly. However, they're more fragile and expensive than cast iron, so your choice depends on your specific needs.
How Do Different Colored Beans Affect Solar Cooking Time?
You won't notice significant cooking time differences between light or dark beans in solar cooking. While darker beans may absorb heat slightly better, factors like sunlight intensity and pot type matter much more.
Can I Stack Multiple Dutch Ovens in the Solar Oven Simultaneously?
You'll find it's challenging to stack Dutch ovens in a solar oven, as each needs direct sunlight. Instead, consider placing them side by side or using multiple solar ovens for simultaneous cooking.
In Summary
Now you're ready to enjoy delicious solar-cooked beans using your Dutch oven. You'll find this method saves energy while producing perfectly tender beans every time. Don't forget to monitor the sun's position throughout cooking and adjust your oven accordingly. Once you've mastered these basics, you'll be able to experiment with different bean varieties and seasonings in your solar cooking adventures.


Leave a Reply