To prevent browning while sun-drying fruits, you'll need effective pre-treatment methods. Try soaking your fruit in a citrus solution made with lemon juice and water, or use a salt water bath with 1/2 teaspoon salt per cup of water. A honey dip mixture can protect color for up to 24 hours, while natural antioxidant powders like Vitamin C provide excellent browning prevention. Maintain temperatures between 85-100°F, guarantee proper air circulation with elevated trays, and time your drying between 10 a.m. and 2 p.m. for best results. These proven techniques will help you master the art of preserving vibrant, appetizing dried fruits.
Pre-Treating With Citrus Solutions
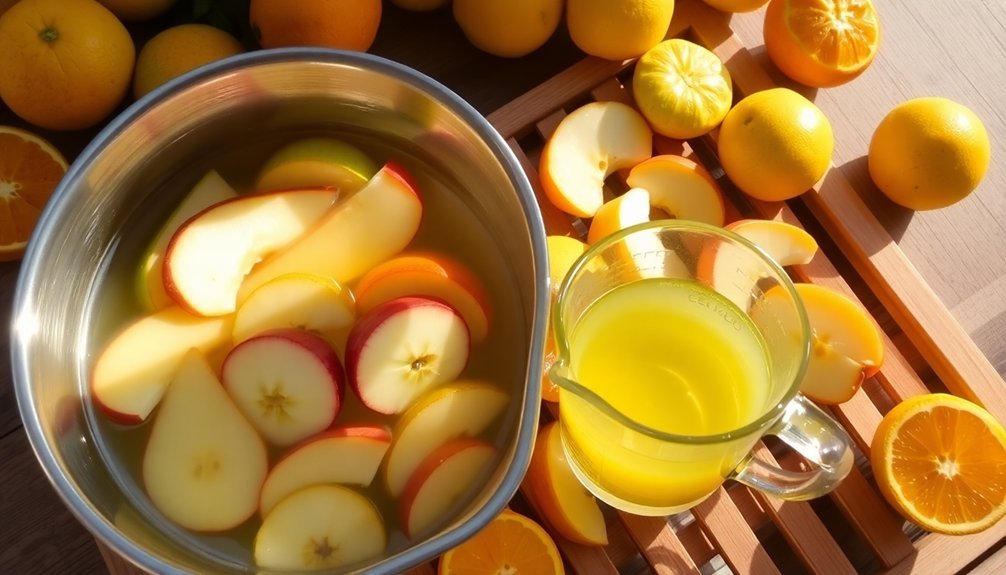
When it comes to preventing fruit from browning, citrus solutions offer a reliable and simple method. You'll find several effective options, from pure citric acid to various fruit juices that can keep your produce looking fresh. Enzymatic browning occurs naturally when fruits are cut and exposed to air.
If you're looking for a solution without added flavors, mix half a teaspoon of citric acid with 1-2 teaspoons of water for every two apples you're treating.
For a more natural approach, you can use citrus juices like lemon, lime, orange, or even pineapple juice. Mix 3 tablespoons of lemon juice with 1 quart of water, and soak your fruit for 3-5 minutes.
You'll notice that while these juices work well, they might slightly alter the fruit's flavor, so you'll want to dilute them appropriately.
You can also create custom combinations to enhance effectiveness while managing taste. Try mixing pineapple juice with lemon juice, or combine apple cider with lemon juice to maintain the apple's natural flavor.
After treating your fruit, you'll need to store it in an airtight container in the refrigerator, where it'll stay fresh for three to four days.
Salt Water Bath Method
You'll want to mix between 1/8 to 1/2 teaspoon of salt per cup of cold water to create an effective anti-browning solution for your fruit.
This simple salt water bath can prevent browning while maintaining the fruit's natural texture, though you may need to rinse the fruit after soaking to remove any residual salty taste. When moving on to sun drying, ensure you choose days with humidity below 60% for optimal results.
For the best results, soak your fruit slices in the solution for 5 minutes before storing them in the refrigerator, where they'll stay fresh for several days.
Ratio Guidelines For Salt
Several fruits can be protected from browning with a simple saltwater bath using the right measurements.
You'll need to mix 1/2 teaspoon of salt for every cup of water to create the ideal solution. This ratio guarantees you're getting enough salt to prevent enzymatic browning without affecting the fruit's taste.
When you're preparing your fruits for sun drying, soak them in this saltwater solution for about 5 minutes. Salt helps create an inhospitable environment for microorganisms that could spoil your fruit during the drying process.
After soaking, don't forget to rinse them with fresh water to remove any excess salt. This method works particularly well for apples, pears, and avocados.
To guarantee the best results during sun drying, lay your treated fruits in a single layer after the saltwater bath.
You'll want to make sure they dry evenly to prevent any moisture-related issues. Once they're completely dried, store them in airtight containers.
Remember that while this method is effective, it's temporary.
If you're planning to expose the fruits to air for extended periods, you might need to reapply the treatment.
The salt solution won't affect the fruit's moisture content but will effectively prevent those unwanted browning reactions.
Benefits Of Pre-Treatment Soaking
Pre-treating fruits with a saltwater bath offers four essential benefits for food preservation. You'll notice significant improvements in both the drying process and final product quality when you take time for this important step.
The saltwater solution effectively reduces microbial loads on fruit surfaces, killing harmful bacteria and fungi that cause spoilage. This is particularly beneficial for delicate fruits like berries, which can quickly develop mold. You'll find that pre-treated fruits maintain their freshness longer and remain safer to eat.
Here's what you can expect from saltwater pre-treatment:
- Prevents enzymatic browning in cut fruits like apples and pears, maintaining their natural color
- Draws out excess moisture, making the drying process more efficient and reducing spoilage risk
- Enhances storage quality, allowing fruits to stay fresh for months when properly stored
- Improves overall cleanliness while maintaining the fruit's natural flavor
When you're working with tough-skinned fruits like grapes or cherries, you'll find this method particularly effective.
Remember to give your fruits a quick rinse after soaking to remove any residual salt taste before proceeding with the drying process.
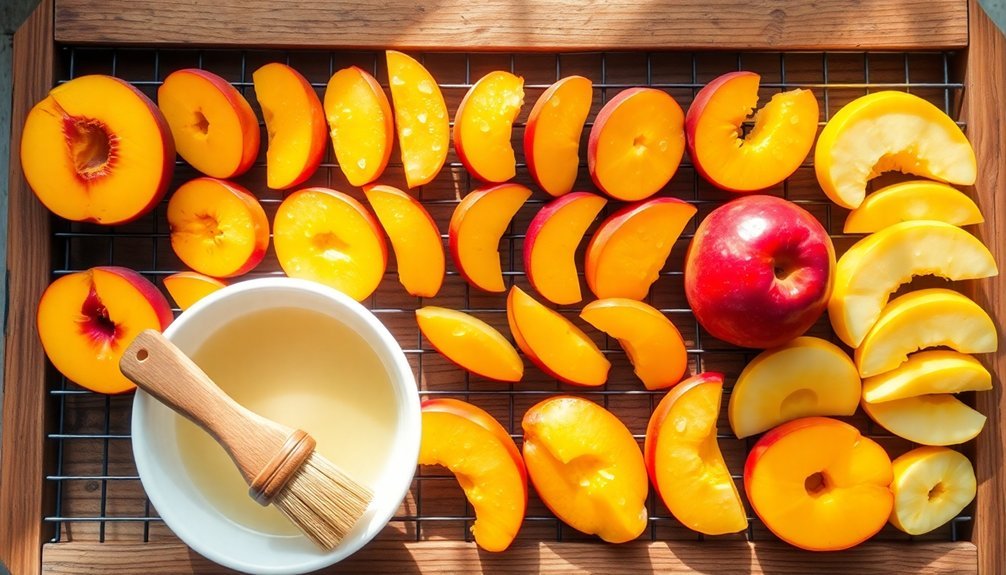
Honey Dip Before Drying
You'll want to start by mixing 1/2 cup honey with 1 1/2 cups boiling water and 1/2 cup sugar to create the perfect dipping solution for your fruits.
To prevent browning effectively, submerge your fruit slices completely in this honey mixture for 3-5 minutes, guaranteeing each piece is fully coated.
After dipping, let the excess solution drain off before arranging the fruit pieces on your drying trays with space between them to prevent sticking and guarantee even drying.
Proper Honey-Water Mixing Ratios
Creating an effective honey-water solution requires precise measurements to prevent fruit browning. For a standard mixture, combine 2 tablespoons of honey per cup of warm water. If you're looking for a more concentrated solution, mix half a cup each of honey and sugar with 1.5 cups of boiling water.
To achieve the best results with your honey-water solution, follow these essential guidelines:
- Use pure, raw honey rather than processed varieties to maximize the natural enzyme benefits.
- Confirm the water is warm or slightly hot to help the honey dissolve completely.
- Stir thoroughly until you've achieved a consistent mixture without any honey settling at the bottom.
- Prepare the solution fresh, just before you're ready to treat your fruit.
When properly mixed, the honey solution works by inhibiting polyphenol oxidase, the enzyme responsible for browning. You'll notice that treated fruits maintain their natural color for up to 24 hours.
The solution is particularly effective on apples, pears, bananas, and stone fruits. While the honey might add a subtle sweetness, it won't appreciably alter the fruit's natural flavor, especially if you rinse and dry the fruit after treatment.
Best Dipping Time Duration
Getting the dipping duration right makes all the difference when preparing fruit for dehydration. To achieve ideal results, you'll want to soak your prepared fruit pieces in the honey solution for 3 to 5 minutes. This timeframe guarantees proper coating while preventing over-saturation that could lead to longer drying times.
During the dipping process, you'll need to make certain each piece of fruit is completely submerged in the honey mixture. As you dip the fruit, handle it carefully to avoid any damage that could affect the final dried product.
Once the dipping time is complete, remove the fruit pieces gently and allow excess solution to drain thoroughly.
After dipping, you'll place the treated fruit on your dryer trays, making sure the pieces don't touch or overlap. If you're concerned about sticking, spray the trays with nonstick cooking spray before arranging the fruit.
This preparation step is vital for achieving evenly dried fruit that won't clump together during the drying process. Remember that proper dipping time combined with correct placement on drying trays sets the foundation for successfully dried fruit that resists browning.
Fruit Coverage Techniques
Mastering proper coverage techniques guarantees your honey-dipped fruit retains its quality throughout the drying process.
After you've applied the honey dip solution, you'll need to protect your fruit from environmental elements while guaranteeing proper airflow for effective drying.
Choose a lightweight covering material that won't compromise the drying process. You'll find several effective options:
- Cheesecloth – provides excellent protection while maintaining ideal air circulation
- Nylon netting – offers durability and easy cleaning between uses
- Protective screens – keeps insects and birds away effectively
- Elevated coverings – prevents direct contact with drying fruit
When setting up your covering, make sure it's wide enough to fully protect your drying trays.
Don't let the material touch the fruit directly – prop it up to maintain space between the covering and your produce. This spacing guarantees proper air movement and prevents the covering from sticking to your honey-dipped fruit.
Remember to clean and dry your covering materials thoroughly after each use.
This maintenance step prevents contamination and extends the life of your covering materials, guaranteeing you'll have reliable protection for future drying sessions.
Natural Antioxidant Powder Applications
Several natural antioxidant powders offer effective solutions to prevent fruit browning, and you'll find them readily available in both commercial and household settings.
Vitamin C powder, or ascorbic acid, stands out as one of the most effective options. You can create a simple solution by dissolving it in water and soaking your fruits before drying them.
If you don't have vitamin C powder, you can opt for citric acid, which works well when combined with lemon juice. While it's not as effective as ascorbic acid, it still provides reliable browning protection.
Commercial products like Fruit-Fresh® combine both acids for enhanced results.
For a more natural approach, you'll find rosemary extract powder particularly useful, as it remains stable at high temperatures and delivers powerful antioxidant properties.
Acerola cherry extract offers another excellent option, rich in natural vitamin C. You can also consider anthocyanin-rich powders derived from berries and pomegranates, which not only prevent browning but add nutritional benefits to your dried fruits.
When applying these powders, make sure you create a uniform coating before starting the drying process.
Temperature Control During Processing
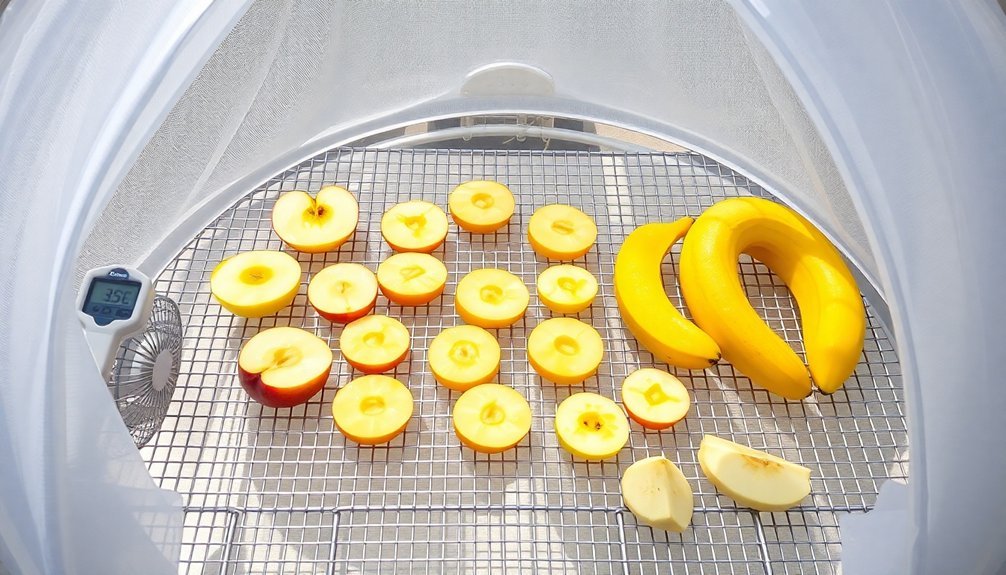
The scorching sun plays an essential role in properly drying your fruits, but you'll need to maintain specific temperature ranges throughout the process. For successful sun-drying, keep temperatures between 85-100°F (29-38°C). If temperatures dip below 85°F, you'll risk spoilage due to slow drying, while exceeding 100°F might cook your fruits instead of drying them.
You'll need to bring your fruits indoors during nighttime to prevent moisture from condensing on their surface. Don't let nighttime temperatures drop more than 20 degrees below daytime temperatures, and remember to return your fruits to the sun the next morning to maintain continuous drying.
To guarantee proper temperature control during processing, consider these essential tools:
- Solar dehydrators with built-in fans for controlled airflow
- Accurate thermometers to monitor temperature fluctuations
- Electric dehydrators set at 140°F as a backup option
- Conventional ovens with low-temperature settings around 140°F
Monitor temperatures consistently throughout the drying process, as higher temperatures will speed up moisture evaporation. If you're using traditional sun-drying methods, you'll need to be especially vigilant about temperature changes to prevent mold growth and guarantee even drying.
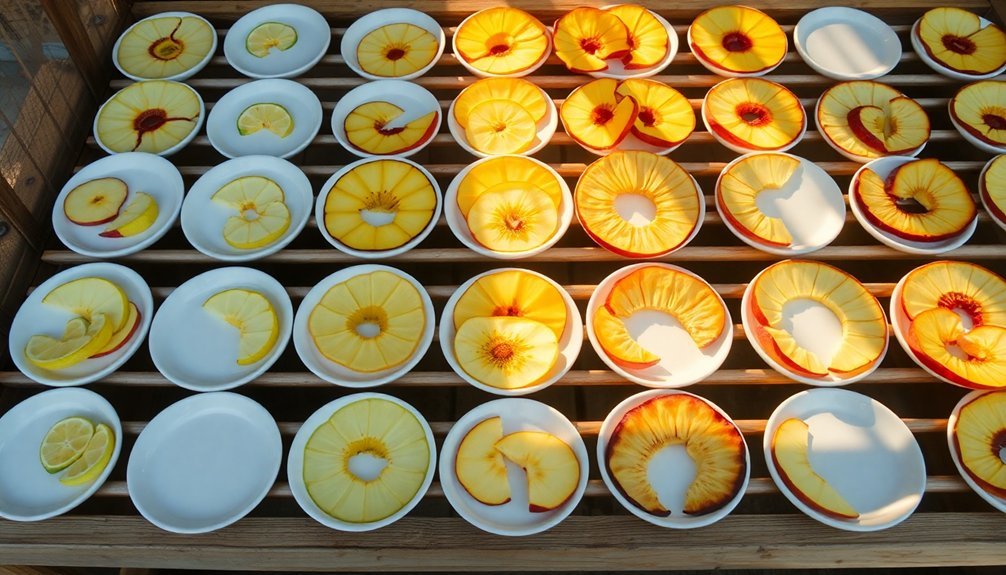
Proper Air Circulation Techniques
Proper air circulation serves as the cornerstone of successful fruit drying. You'll need to guarantee air flows both above and below your fruit to prevent browning and achieve ideal results. Start by elevating your drying trays on blocks or tables, keeping them away from direct ground contact where moisture can accumulate.
Position your setup on a concrete driveway or reflective surface like aluminum, which will enhance both heat reflection and air movement. Cover your fruit with cheesecloth or a light screen that's elevated above the produce – this protects against insects while maintaining vital airflow.
Don't forget to turn your fruit occasionally for even drying. You'll want to place your drying station in a sunny spot with good natural air movement. If possible, use a fan to boost circulation.
When your fruit is about two-thirds dry, move the trays to a shaded area while maintaining good airflow. Don't leave your fruit out overnight – bring it inside to prevent moisture condensation from the cool air.
Keep all your drying surfaces and tools completely dry to avoid introducing additional moisture that could lead to browning.
Timing Your Solar Drying
Successful solar drying depends heavily on selecting ideal weather conditions and timing. You'll want to start early in the morning when temperatures range between 70-90°F, with clear skies and low humidity being essential for excellent results. The most effective drying typically occurs between 10 a.m. and 2 p.m., when the sun's rays are strongest.
To maximize your solar drying success, follow these key timing considerations:
- Monitor weather forecasts before starting, ensuring you'll have consecutive clear days.
- Position your dryer to follow the sun's path, adjusting it throughout the day.
- Remove produce overnight to prevent moisture absorption from dew.
- Return items early the next morning if additional drying is needed.
When your fruit reaches about two-thirds dryness, move it to a shaded area with good airflow to complete the process. This prevents over-drying while maintaining proper dehydration.
Remember that thicker slices may require a second full day of sun exposure. During the entire process, keep your produce protected with cheesecloth or screening to prevent insect contamination while maintaining essential airflow.
Once fully dried, store your fruits in airtight containers in a cool, dry place.
Frequently Asked Questions
Can I Mix Different Fruits While Sun-Drying Without Affecting Their Browning Rates?
You shouldn't mix different fruits while sun-drying, as they have varying drying and browning rates. It's best to lay them separately on drying racks to guarantee even exposure and prevent moisture issues.
Does Fruit Size Affect How Long Anti-Browning Treatments Remain Effective During Drying?
Yes, your fruit's size affects treatment longevity. Larger pieces need stronger or longer treatments since they've got more surface area, while smaller pieces dry faster but may need more frequent applications to maintain effectiveness.
Will Storing Treated Fruits Overnight Before Sun-Drying Impact Their Browning Resistance?
Yes, overnight storage can affect your treated fruits' browning resistance. You'll need to keep them in a dry, well-ventilated area and re-apply treatments the next day to maintain effectiveness during drying.
How Does Altitude Affect the Effectiveness of Anti-Browning Treatments During Sun-Drying?
At higher altitudes, you'll find your anti-browning treatments are less necessary due to fruits' natural UV adaptations. However, you'll need to monitor drying carefully as intense solar radiation can affect treatment effectiveness.
Can I Reuse Anti-Browning Solutions for Multiple Batches of Fruits?
You shouldn't reuse anti-browning solutions for multiple batches. They'll lose effectiveness after first use and can harbor bacteria. Whether it's ascorbic acid, citric acid, or fruit juice, always use fresh solutions.
In Summary
You've now got all the tools needed to prevent fruit browning during sun-drying. Whether you choose the citrus solution, salt water bath, or honey dip method, you'll see better results in your dried fruits. Remember to control temperature, maintain proper airflow, and time your drying sessions wisely. Don't forget to experiment with natural antioxidant powders for even better preservation results.


Leave a Reply