You'll find several effective natural methods to preserve your fresh herbs while maintaining their potency. Air drying in small bundles hung upside down offers a traditional approach, while solar dehydrators provide controlled outdoor drying. You can spread herbs on trays in a warm, dark space, or create herb bundles for vertical drying. Natural sun exposure works well when herbs are laid flat on drying racks, while slow temperature methods in covered areas guarantee gentle preservation. Consider using dry heat curing in controlled environments, or try the hanging method in your laundry room. Each technique brings its own advantages for preserving your herb's flavors and medicinal properties.
Air Drying for Maximum Potency
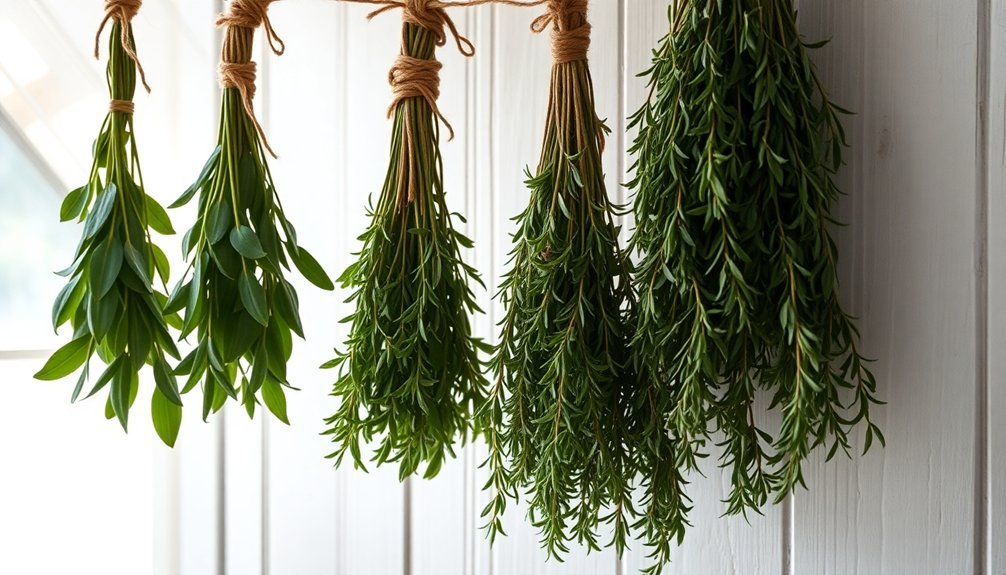
When preserving fresh herbs, air drying stands out as one of the most effective and traditional methods for maintaining their potency.
You'll want to start by harvesting your herbs in the morning after the dew has dried, particularly selecting perennial varieties just before they flower.
Begin by washing your herbs thoroughly to remove any dirt, then let them dry completely on a tea towel. This initial drying step is vital to prevent mold growth during the preservation process.
Once they're surface-dry, create small bundles and secure them with twine or rubber bands. Hang these bundles upside down in a well-ventilated, dark area where they won't touch each other. This positioning allows essential oils to concentrate in the leaves while proper spacing guarantees even drying. Choosing areas like a cool laundry room provides ideal conditions for the drying process.
The process typically takes 2-3 weeks.
Solar Dehydrator Preservation
You'll find that building a solar dehydrator is surprisingly straightforward using PVC hoops, greenhouse plastic, and 85% shade cloth for a basic hoop house design.
Your herbs will dry efficiently using the sun's natural heat, with proper airflow from strategically placed windows and a door frame ensuring even drying throughout the structure.
To maximize preservation, position your dehydrator in a warm, sunny spot and lay out herbs in a single layer on collapsible drying racks, allowing nature's energy to do the work while maintaining the herbs' nutritional value. The affordable landscape fabric sides provide additional structural support while maintaining proper ventilation.
Building Simple Solar Units
Building a solar dehydrator offers an eco-friendly and cost-effective way to preserve herbs using natural sunlight.
You'll need exterior-grade plywood, FRP glazing, metal screening, and clear silicone caulk, which can cost around $300 if using new materials. You can reduce expenses by recycling supplies.
To construct your unit, create a downdraft design with a south-facing solar collector painted black for maximum heat absorption. While this method can work, direct sun drying is generally discouraged since it can significantly degrade the herbs' quality.
Install food-safe screen material on the drying trays and guarantee proper sealing of all seams with silicone caulk.
The design relies on natural air flow: warm air rises through the dehydration chamber while moisture-laden air sinks and exits through the false-wall chimney.
You'll need 20-40 hours for construction, depending on your woodworking skills.
Regular maintenance of seals and weatherstripping guarantees peak performance.
Natural Heat Preservation Tips
To maximize your solar dehydrator's efficiency, understanding the fundamental heat preservation principles is vital. The process starts when sunlight penetrates the clear cover and heats the dark mesh screen inside.
As air enters through the bottom intake, it's warmed by the heated screen and rises naturally through the drying chamber.
You'll achieve better results by placing your dehydrator in a fully sunlit area on level ground. For higher temperatures, consider using double glazing rather than single-glazed covers.
You'll need to maintain your unit regularly by cleaning it to prevent bacteria and guarantee proper airflow.
Before drying your herbs, you can prevent discoloration by blanching or sulfuring to deactivate enzymes. When properly dried, your herbs will retain their flavors and nutritional value for extended storage periods.
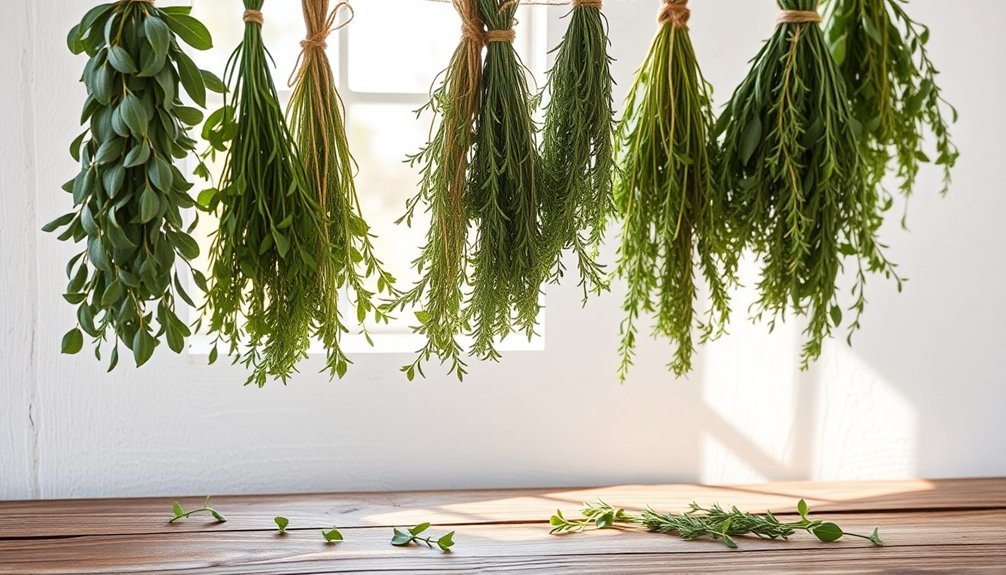
Traditional Hanging Methods

You'll find hanging herbs in bundles to be one of the most straightforward and time-tested methods for preservation.
While outdoor drying can work in arid climates, indoor hanging offers better control over temperature, humidity, and protection from direct sunlight.
Creating small, tight bundles with cleaned stems lets you maximize your drying space while ensuring proper airflow around each cluster.
Simple Bundle Technique
The traditional art of bundle-drying herbs remains one of the most reliable and cost-effective preservation methods available. You'll find this simple technique preserves both flavor and medicinal properties when done correctly.
| Step | Action | Key Point |
|---|---|---|
| 1. Prep | Gather and tie stems | Don't make bundles too dense |
| 2. Location | Choose dark, dry spot | Avoid direct sunlight |
| 3. Hanging | Position upside down | Allow gravity to aid oil distribution |
| 4. Storage | Use airtight containers | Label with date and contents |
Start by gathering fresh stems and securing them with twine or rubber bands, leaving enough length to hang. You'll want to position your bundles in a well-ventilated, dust-free area away from direct light. The herbs are ready when they crumble easily at your touch, typically taking several days to weeks depending on humidity levels.
Indoor Vs Outdoor Drying
While indoor herb drying offers superior control over environmental conditions, outdoor drying presents significant challenges that can compromise your harvest.
You'll find that indoor spaces like basements, attics, or closets provide ideal environments with consistent temperature and humidity levels. These controlled settings protect your herbs from dust, pests, and weather damage.
For indoor drying, you can hang herb bundles upside down using twine, or lay them on drying racks. You'll need 7-14 days for complete drying, depending on your local humidity.
Once dried, you'll want to store your herbs in airtight containers like Mason jars.
If you're considering outdoor drying, it's best to reconsider – the risks of mold, weather damage, and inconsistent drying conditions make it an unreliable method that could waste your carefully grown herbs.
Dry Heat Curing
Modern dry heat curing offers several reliable methods for preserving fresh herbs while maintaining their essential oils and flavors. You'll find that using your oven, dehydrator, or microwave provides controlled environments for drying herbs efficiently.
| Method | Temperature | Duration |
|---|---|---|
| Oven | 170-180°F | 1-2 hours |
| Dehydrator | 95°F | 2-4 hours |
| Microwave | Variable | 2-3 minutes |
When using the oven, you'll want to keep the door slightly ajar to release moisture while maintaining a consistent temperature. If you're using a dehydrator, spread your herbs in a single layer to guarantee even drying. For quick results, your microwave can dry herbs in short intervals, but you'll need to monitor them closely to prevent burning. Remember to let your herbs cool completely before storing them in airtight containers.
Natural Sun Exposure

Contrary to popular belief, natural sun exposure isn't recommended for drying herbs, as it can greatly diminish their quality and potency. Direct sunlight damages the herbs' natural oils, causing them to lose their flavor, color, and medicinal properties.
Instead, you'll want to dry your herbs in well-ventilated, dark areas like basements, attics, or closets. These locations offer stable temperatures and lower humidity, which are ideal for preserving herb quality.
To protect your herbs, tie them in small bundles no thicker than one inch and hang them upside down in a shaded area. For tender-leaf varieties, use paper bags with holes to guarantee proper airflow while shielding them from light.
Remember to check your herbs regularly for mold and store them in airtight containers away from sunlight once they're completely dry.
Herb Bundle Storage
Proper storage of dried herb bundles starts with careful preparation.
You'll want to guarantee your herbs are completely dry, with leaves that crumble easily to the touch, before moving them to storage containers. Remove the dried leaves from their stems to preserve maximum flavor.
Transfer your dried herbs to airtight containers like Mason jars or small bottles. You'll find they maintain their potency best when stored in a cool, dark cupboard where temperatures stay between 60 and 70° F.
Don't forget to label each container with the herb name and drying date. If you prefer ground herbs, use a mortar and pestle or coffee grinder before storage.
Slow Temperature Methods
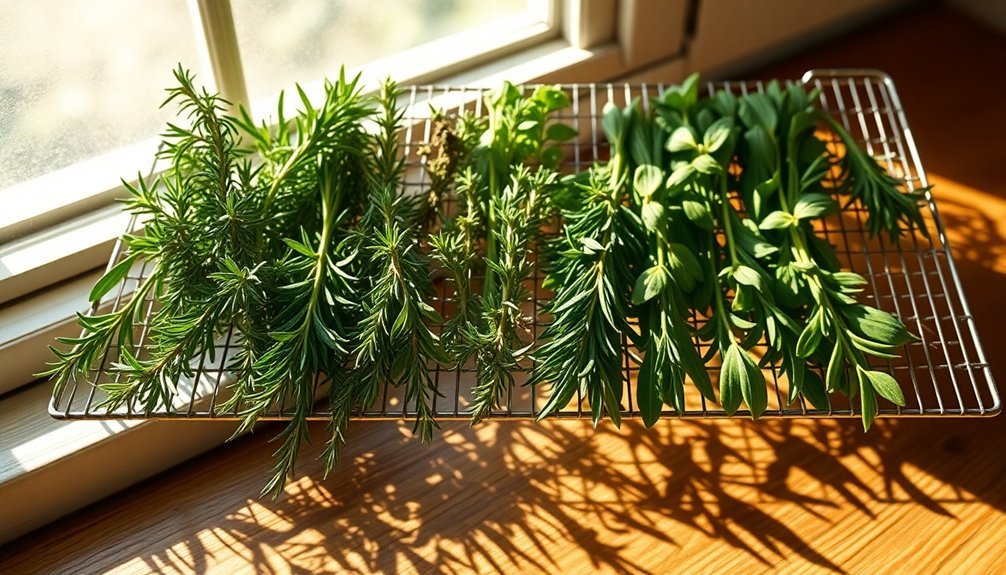
When preserving fresh herbs through slow temperature methods, you'll find several reliable techniques that protect their essential oils and flavors.
Tray drying offers a simple approach – just lay your herbs in a single layer on racks, cover them with paper towels, and place them in a warm, dark space with good airflow.
For oven drying, you'll want to line a baking sheet with muslin or silicone mats and set your oven to its lowest temperature, around 180°F. Keep the door slightly open and check periodically during the 1-2 hour process.
Alternatively, you can use just the oven light overnight for gentler drying. A food dehydrator provides the most control, operating at 95-115°F for 1-4 hours while maintaining consistent airflow and temperature for ideal results.
Frequently Asked Questions
Can I Dry Different Types of Herbs Together in the Same Bundle?
It's best if you don't mix different herb types in one bundle. Stick to grouping herbs with similar moisture content together – hearty herbs with hearty ones, and tender herbs with tender ones.
How Can I Tell if Dried Herbs Have Gone Bad?
You'll know your dried herbs are bad if they've lost their scent, appear moldy, form clumps, or have faded colors. Also check for brittle texture and musty smells. Throw them out if you're unsure.
What's the Best Season or Weather Conditions for Drying Herbs Naturally?
You'll have the best results drying herbs during warm, dry days with low humidity. Late summer and early fall are ideal seasons. Make sure you're getting good air circulation and avoid moisture-prone areas.
Should I Remove Flowers From Herbs Before Drying Them?
Yes, you'll want to remove flowers from herbs before drying them. It'll preserve more flavor, speed up drying time, and give you more consistent results. You can dry the flowers separately if desired.
Can I Reuse the Same Drying Space Multiple Times Throughout the Season?
Yes, you can reuse your drying space multiple times. Just clean the area thoroughly between batches, guarantee proper ventilation, and check for any moisture or mold. You'll get the most from your drying space.
In Summary
You've now learned multiple ways to preserve your fresh herbs naturally while maintaining their flavor and medicinal properties. Whether you're hanging bundles in your kitchen, using a solar dehydrator, or carefully sun-drying your harvest, these methods will help you enjoy your herbs year-round. Pick the technique that works best for your climate and space, and you'll always have flavorful dried herbs at your fingertips.


Leave a Reply