
Your DIY solar oven can reach impressive temperatures, typically between 150°F (66°C) and 400°F (204°C), depending on your design and materials. Well-insulated models with reflective panels will hit the higher end of this range, while basic designs stay closer to the lower temperatures. If you're using advanced parabolic designs or vacuum tube technology, you can push temperatures even further – up to 800°F (427°C). Dark surfaces, proper insulation, and strategic positioning toward the sun all play vital roles in maximizing heat. The right combination of these elements, along with careful monitoring, will release your solar oven's full heating potential.
Maximum Heat Solar Ovens Reach
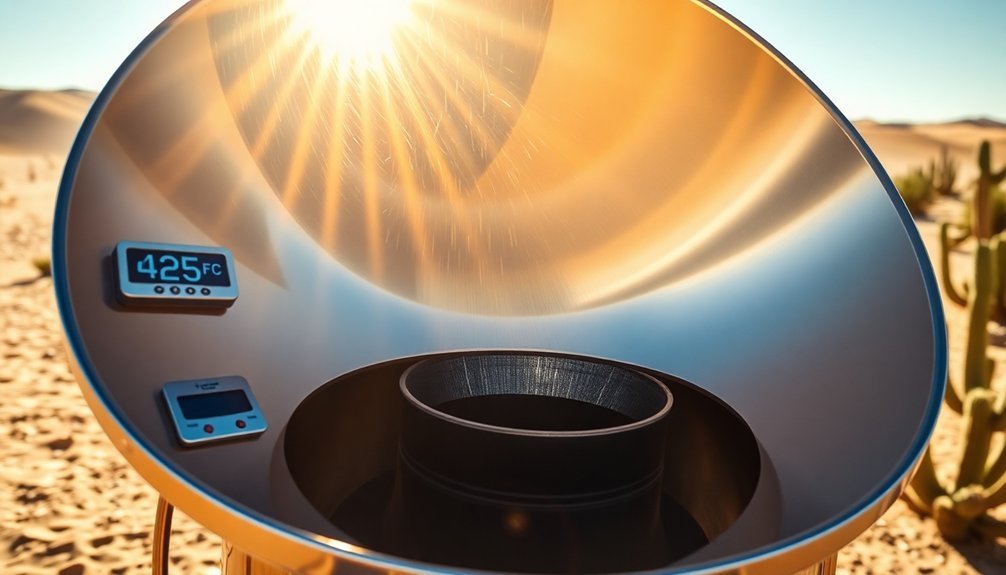
Solar ovens can harness the sun's energy to reach impressive temperatures between 150°F (66°C) and 400°F (204°C), depending on their design and construction.
On a typical sunny day, you'll find that your solar oven can achieve around 200°F (93°C), which is sufficient for most cooking needs. If you're using a well-insulated model with reflector panels, you can expect even higher temperatures.
The minimum temperature you'll need for effective cooking is approximately 180°F (82°C). If you're investing in a high-end solar oven, you can reach temperatures up to 240°C (464°F), rivaling conventional ovens.
Your DIY solar oven will likely perform in the range of 160-200°F (71-93°C), making it ideal for slow cooking and reheating meals. Advanced parabolic solar designs can achieve temperatures exceeding 800°F (427°C).
To maximize your oven's heat potential, you'll need to focus on key factors like insulation quality and sealing any gaps or holes. Using dark-colored cookware will help absorb more concentrated solar energy.
You'll also want to position your reflectors at the best angles and maintain proper orientation toward the sun, adjusting periodically as needed to capture maximum sunlight throughout the cooking process.
Solar Box Temperature Variables
Your solar box oven's temperature depends heavily on how well your chosen materials absorb and retain heat, with darker surfaces and proper insulation making a significant difference in cooking performance.
The quality and thickness of insulating materials between your inner and outer boxes will directly impact how effectively your oven maintains its internal temperature. Advanced DIY solar ovens can achieve over 300 degrees Fahrenheit under optimal conditions.
The angle at which sunlight hits your oven's surface plays a vital role, so you'll need to adjust your box's position throughout the day to maintain ideal heat absorption.
Material Heat Absorption Properties
When building a DIY solar oven, understanding material heat absorption properties becomes essential for maximizing temperature potential. Your choice of materials directly impacts how effectively your oven can convert sunlight into usable heat.
Dark-colored and black surfaces are your best options for the cooking chamber, as they're highly efficient at absorbing solar radiation and converting it to heat energy. Similar to traditional ovens that require proper air circulation, maintaining adequate spacing between materials is crucial for optimal heat distribution.
You'll want to focus on both absorptive and conductive properties in your material selection. While metallic surfaces might seem counterintuitive due to their reflective nature, they can actually enhance internal heating when positioned at specific angles.
You can improve heat retention by incorporating materials with high thermal mass, which will help stabilize your oven's temperature throughout the cooking process.
Consider adding specialized absorptive coatings to boost efficiency, and don't forget about thermal conductivity when selecting your materials. The thickness of your chosen materials will affect heat distribution, so you'll need to balance this with your oven's design.
Remember that environmental conditions, like direct sunlight and ambient temperature, will ultimately influence how hot your materials can get, regardless of their absorption properties.
Insulation Impact on Temperature
Beyond material selection, proper insulation plays a central role in determining how hot your DIY oven can get. If you're aiming for ideal temperatures, you'll need to focus on trapping heat effectively using materials like Ceramic Fiber Blanket, which can handle temperatures up to 1300°F.
The key is creating trapped air spaces and using lightweight materials that prevent heat from escaping. Wearing protective clothing and goggles is essential when handling insulation materials to ensure safe installation.
You'll achieve the highest plateau temperatures by combining proper insulation with reflective surfaces. When you're constructing your oven, consider layering Ceramic Fiber Blanket over the dome and incorporating materials like newspaper for additional insulation.
While cast iron and dense metals will conduct heat well, they won't help with insulation – instead, focus on materials that keep heat contained.
You can test your insulation's effectiveness by monitoring internal temperatures with an oven thermometer. If you notice the outer surface staying cool while internal temperatures rise, you've achieved good insulation.
Remember that weather conditions will affect your oven's performance, so you'll want to guarantee your insulation strategy is robust enough to maintain consistent temperatures regardless of external factors.
Sunlight Angle Effects
The angle of sunlight striking your DIY solar box oven substantially impacts its maximum temperature potential. To maximize your oven's performance, you'll need to adjust its position throughout the day and seasons to capture ideal sunlight exposure.
The key is ensuring direct sunlight hits both the oven's window and reflectors at the most effective angles. Higher elevations tend to offer more intense UV rays due to reduced atmospheric filtering.
You'll find that your oven reaches its peak temperature when the energy flowing in equals the energy flowing out. To achieve this thermal equilibrium, you must tilt your oven to compensate for varying sun angles, especially during winter months when the sun sits lower in the sky.
The window angle (β) is particularly essential – you can adjust it to maximize the solar energy entering your oven.
Be aware that extreme angles can create practical challenges. If you're using a panel or funnel cooker, you might face difficulties during winter months when steeper angles are needed.
Some innovative designs, like seven-faced ovens with fixed mirrors, can help you overcome these limitations. Remember to regularly realign your oven with the sun's movement to maintain consistent internal temperatures throughout your cooking session.
Optimal Cooking Times and Heat
Most successful DIY ovens operate best within specific temperature ranges for different cooking methods. You'll want to understand the relationship between temperature and cooking time to achieve ideal results.
For slow-cooking dishes, aim for temperatures around 200°F, which mimics a slow cooker's gentle heat. At 300°F, you're in the sweet spot for slow roasting most meats to tender perfection.
If you're baking or doing general roasting, set your DIY oven to around 350°F – this moderate temperature works well for most standard recipes.
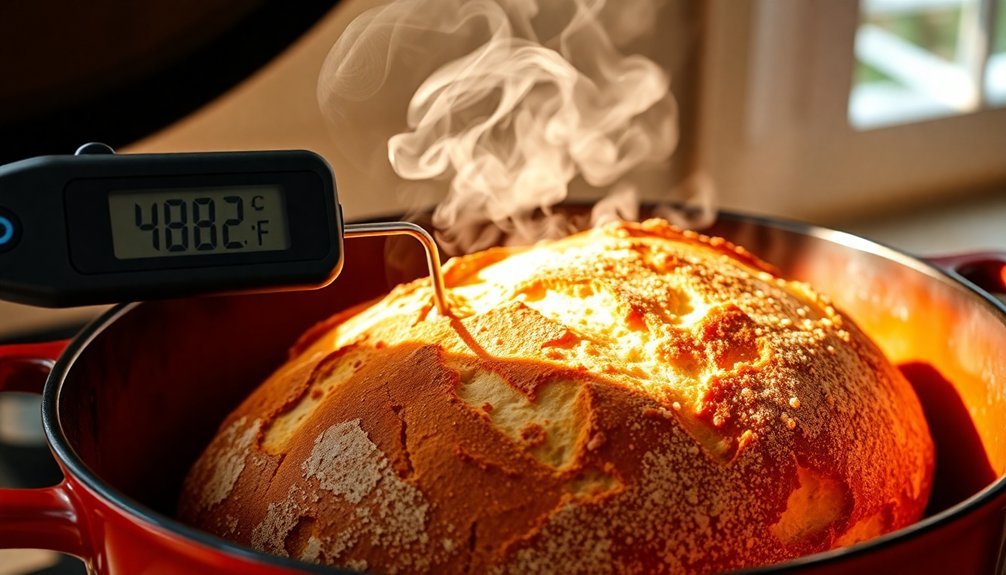
When you need faster cooking, 400°F is your go-to temperature for roasting vegetables and meats quickly while maintaining moisture. For high-heat cooking like pizza-making, you'll want to push your oven to around 480°F.
Remember to adjust your cooking times based on your oven's actual temperature capabilities. If you can't reach these exact temperatures, you can compensate by adjusting cooking duration – use the percentage difference method to calculate new cooking times.
Keep the food well-spaced for even heating, and avoid opening the oven door frequently, as this will extend your cooking time substantially.
Weather Impact on Performance
Your DIY oven's performance will change substantially with outdoor temperatures, as colder weather forces heating elements to work harder and increases heat loss when you open the door.
Humidity plays a vital role in heat transfer, affecting both your oven's perceived temperature and its actual cooking effectiveness.
You'll need to adjust your cooking times and preheating duration to accommodate these weather variations, especially during extreme temperature swings or particularly humid days.
Outdoor Temperature Effects
Weather conditions play three critical roles in determining your DIY oven's maximum temperature potential. When moisture seeps into your oven's insulation, it'll substantially reduce its thermal efficiency, making it harder to reach and maintain high temperatures. You'll notice longer heating times and faster heat loss when your oven's materials have absorbed water from rain or high humidity.
1. Moisture penetration through the dome and insulation
Moisture penetration through the dome and insulation creates thermal bridges that leak heat, reducing your oven's maximum temperature.
2. Freeze-thaw cycles
Freeze-thaw cycles can damage your oven's structure if water has infiltrated the materials, compromising its heat retention capabilities.
3. High humidity levels
High humidity levels in the surrounding air can affect how efficiently your oven maintains its target temperature.
4. Soil moisture
Soil moisture beneath your oven can influence local temperature variations and heat distribution.
To protect your oven's performance, you'll need to implement proper weather protection strategies. Installing your oven under cover, using effective sealing methods, and maintaining a good water barrier system will help maximize its temperature potential.
Don't forget to cover your oven when it's not in use to prevent moisture absorption.
Humidity and Heat Transfer
Humidity levels dramatically influence how effectively your DIY oven transfers and retains heat. When you're operating your DIY oven in humid conditions, you'll notice that moisture in the air affects both heat transfer and insulation performance. Higher humidity increases the air's specific heat capacity, which can enhance natural convection but might also compromise your oven's insulation.
| Humidity Level | Heat Transfer Effect | Required Action |
|---|---|---|
| Low (0-30%) | Standard heat transfer | Normal operation |
| Medium (30-60%) | Enhanced convection | Monitor insulation |
| High (60-80%) | Reduced insulation effectiveness | Add moisture barriers |
| Very High (>80%) | Significant performance drop | Protect from dampness |
You'll need to protect your DIY oven from rain and excessive moisture, as damp insulation can seriously hurt its performance. In high-humidity environments, you might notice longer heating times and faster heat loss. To maintain ideal performance, regularly check your insulation for moisture absorption and consider adding protective barriers. If you're building your oven in a typically humid climate, choose moisture-resistant materials and include proper ventilation to manage condensation buildup.
Insulation and Temperature Control
Building an effective DIY oven requires careful attention to insulation and temperature control systems. You'll need to select between high-temperature options like rockwool and vermiculite, or lower-temperature materials like EPS foam for ovens operating under 150°F.
For traditional clay ovens, a mix of straw and clay provides excellent breathability that's perfect for bread baking.
Your insulation choice will directly impact your oven's maximum temperature and efficiency.
Here's what you'll need to think about for ideal temperature control:
- Install a PID controller with thermocouples near the cooking surface to maintain precise temperature readings
- Add relay systems to manage heating elements based on your temperature requirements
- Incorporate fans for even heat distribution throughout the cooking chamber
- Layer your insulation materials properly using wire mesh or forms for secure placement
You'll find that vermiculite mixed with Portland cement offers excellent heat retention for high-temperature applications, while EPS foam provides a cost-effective solution for lower-temperature needs.
Whatever material you choose, guarantee proper installation around vents and chimneys, as these areas are common sources of heat loss that can substantially impact your oven's performance.
Temperature Monitoring Methods
A reliable temperature monitoring system serves as the backbone of any DIY oven's performance. You'll find traditional methods using thermocouple and digital thermometers offer a straightforward approach.
By placing a leave-in probe thermometer like the ThermoPro in your oven's center rack, you can track temperature variations and adjust settings accordingly.
Understanding your oven's thermostat cycling is critical. Your oven naturally fluctuates between temperature points, so you'll need to monitor and average readings over time. Tools like the ChefAlarm can help you track these temperature waves, giving you a clearer picture of your oven's actual performance.
For more advanced monitoring, you can build custom thermometers using type-K thermocouples and Arduino microcontrollers. These DIY solutions offer greater control and precision, though they require technical knowledge to implement.
Alternatively, you might consider non-contact temperature sensors like the Melexis MLX90614. These infrared sensors can measure temperature without physical contact, making them ideal for monitoring moving objects in your oven.
When integrated with microcontrollers, they provide reliable, continuous temperature readings that help you maintain essential cooking conditions.
Heat Distribution Patterns

Proper heat distribution patterns form the cornerstone of successful DIY oven performance. You'll need to master consistent briquette placement and understand how heat moves through your oven space to achieve optimal cooking results.
When you're setting up your DIY oven, remember that each briquette adds approximately 20°F to the overall temperature.
To guarantee even heat distribution, you'll want to follow these essential patterns:
- Position briquettes in a consistent geometric pattern, using formulas like "3 up, 3 down" to achieve specific temperatures (325°F).
- Create windbreaks to prevent heat loss and maintain temperature stability, especially in outdoor settings.
- Adjust your briquette count based on your oven's size, with larger ovens requiring more fuel sources.
- Rotate your cooking vessels halfway through the cooking process to counteract any hot spots.
Don't forget that thermal mass plays a vital role in heat distribution. You can improve your oven's performance by adding baking stones or steel plates, which help moderate temperature variations.
Just make sure you're not restricting airflow with aluminum foil or overcrowding, as this can lead to uneven heating patterns.
Design Elements Affecting Heat
Throughout your DIY oven construction, several key design elements will determine how effectively your oven generates and maintains heat. You'll need to focus on wall thickness and insulation quality, as these components are vital for heat retention.
The materials you choose for your oven walls will substantially impact temperature consistency and energy efficiency.
Your heating element selection and placement will affect how heat circulates throughout the oven cavity. Whether you're using electric coils or gas burners, you'll want to position them strategically to guarantee even cooking. If you're incorporating a convection fan, make sure it's properly placed to distribute heat uniformly across your cooking space.
The size and shape of your oven cavity deserve careful consideration, as they'll influence how effectively heat reaches your food. You'll want to include adequate rack positioning options and guarantee your oven door seals tightly to prevent heat loss.
Don't forget to install reliable temperature sensors and controls – they're essential for maintaining precise cooking temperatures. Consider adding an oven thermometer for accuracy, as built-in temperature indicators can sometimes be unreliable in DIY setups.
Frequently Asked Questions
Can I Safely Use My DIY Oven Indoors During Winter Months?
You shouldn't use DIY ovens indoors for heating during winter – it's dangerous and risks carbon monoxide poisoning. Instead, use proper heating methods like space heaters or contact your utility company for heating assistance.
What Materials Should I Avoid Using That Might Release Toxic Fumes?
You'll need to avoid plastics, synthetic fibers, treated wood, and painted materials in your oven. These can release dangerous toxins like VOCs, formaldehyde, and cyanide gas when heated at high temperatures.
How Long Does a DIY Oven Typically Last Before Needing Repairs?
You'll typically need to inspect your DIY oven every 3-6 months and expect repairs within the first year. Without proper maintenance and quality materials, it won't match a commercial oven's 15-20 year lifespan.
Will Painting the Oven's Exterior Affect Its Heating Capabilities?
No, painting your oven's exterior won't affect its heating capabilities. The internal temperature control and heating elements operate independently of exterior finishes. Just make certain you're using appropriate paint that can withstand normal operating temperatures.
Can I Connect Multiple DIY Ovens to Create Higher Temperatures?
You shouldn't connect multiple DIY ovens to increase temperature – it's dangerous and risks overloading your circuit. Instead, work within your oven's safe temperature limits and use proper cooking techniques for best results.
In Summary
You'll find your DIY solar oven can typically reach temperatures between 250-350°F on a clear day, though conditions will substantially affect performance. Proper insulation, dark interior surfaces, and reflective panels make a huge difference in heat retention. Remember to use an oven thermometer for accurate monitoring, and don't expect consistent temperatures like a conventional oven – you'll need to adjust cooking times accordingly.

Leave a Reply