
You'll find multiple effective methods to preserve your sun-prepared meals long-term. Vacuum sealing can extend shelf life up to 5 times longer, while dehydrating vegetables in mesh screens keeps them fresh for up to 25 years when stored in Mylar bags. Solar food freeze-drying offers excellent preservation with proper power management, and fermentation works well in cold temperatures between 32-50°F. Oil preservation, though risky, can work for specific foods like sun-dried tomatoes. Cold storage, salt curing, and Mason jar canning provide additional options. Traditional techniques combined with modern storage solutions will help you master the art of food preservation.
Vacuum Sealing Solar Cooked Foods

When preserving solar-cooked meals for long-term storage, vacuum sealing offers an effective solution that can extend shelf life up to five times longer than conventional storage methods.
Before you begin, let your sun-cooked dishes cool completely to room temperature to prevent moisture buildup and bacterial growth.
You'll need high-quality, BPA-free vacuum sealer bags and a reliable vacuum sealer. Portion your meals into serving sizes that fit your needs, then remove all air to create an airtight seal.
For sauces and liquids from your solar cooking, freeze them first to avoid messy sealing. Don't forget to label each package with the meal name, date, and reheating instructions.
Store your sealed meals vertically in freezer-safe containers or bins for maximum space efficiency, and they'll stay fresh for up to three years.
Dehydrating Sun-Prepared Vegetables
You'll need a proper setup of mesh screens and protective covers to successfully dehydrate vegetables in the sun, ensuring adequate air circulation while keeping pests away.
Aim to maintain a temperature of at least 86°F/30°C when sun drying vegetables for optimal results.
Before placing vegetables on drying racks, it's crucial to clean them thoroughly and treat them with acidic solutions like lemon juice or vinegar to prevent browning.
Once your vegetables are fully dried and cooled, store them in Mylar bags with oxygen absorbers or airtight containers, keeping them in a cool, dark place for ideal long-term preservation.
Solar Drying Equipment Setup
To set up effective solar drying equipment, proper construction and placement are essential for ideal dehydration results. You'll need to build a frame using 2×2's or hollow pipes, then cover it with protective screening. Make sure you angle the structure so rainwater runs off easily. Maintaining proper airflow and ventilation helps prevent food spoilage during the drying process.
| Component | Specification |
|---|---|
| Frame | 2×2's or hollow pipes |
| Cover | Screen, nylon, or plastic |
| Base | Perforated trays/plates |
| Temperature | 120-140 degrees |
| Location | Full sun exposure |
Position your dryer at a 90° angle to the sun's path, ensuring it's on level ground away from shade-casting objects. Install black polyethylene covers or painted corrugated iron to maximize heat absorption. Don't forget to add a separate screen door for easy access to the trays. If you're using solar panels, place them facing the sun and adjust throughout the day for best performance.
Best Vegetable Prep Methods
Successful vegetable dehydration starts with proper preparation of your produce. You'll need to select fresh, ripe vegetables and avoid any that show signs of bruising or decay.
Thoroughly wash your produce under running water, then slice them into uniform pieces about 1/8 to 1/4 inch thick for even drying.
Before dehydrating, you'll want to blanch your vegetables by briefly submerging them in boiling water, then immediately transferring them to an ice bath. This step helps preserve color and nutrients.
After blanching, drain and blot the vegetables dry with paper towels to remove excess moisture.
For best results, arrange your prepared vegetables in a single layer on dehydrator trays or baking sheets, making sure pieces don't overlap. This spacing allows proper airflow and guarantees even drying throughout the process.
Optimal Storage After Dehydration
After completing the dehydration process, proper storage becomes essential for maintaining the quality and shelf life of your sun-dried vegetables.
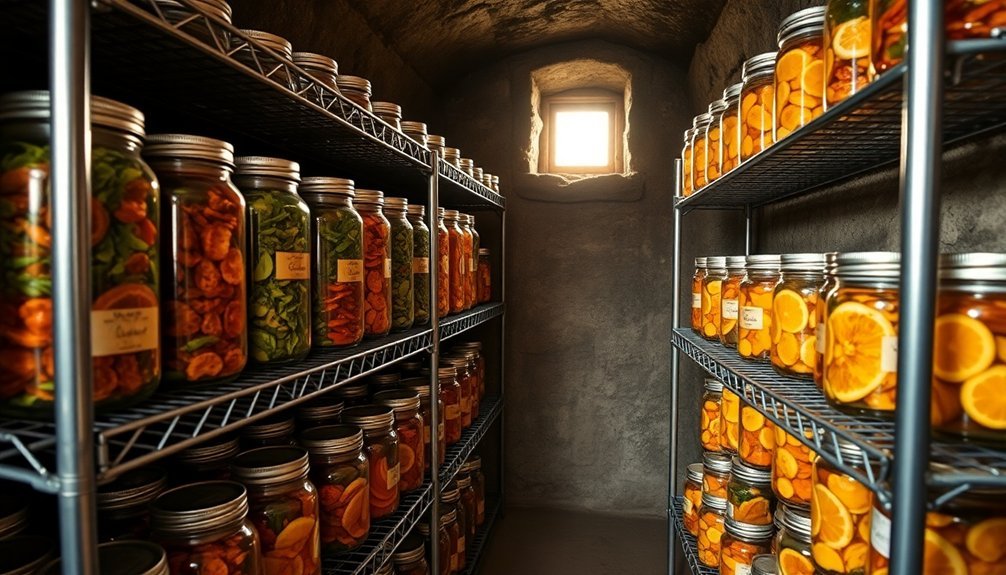
Store them in airtight containers, preferably dark glass jars or vacuum-sealed Mylar bags without windows. For best results, add oxygen absorbers and desiccants to minimize moisture and air exposure.
Keep your dried vegetables in a cool, dark place between 50°F-70°F. Your pantry or covered cabinet works well, but avoid damp basements or humid areas.
When stored correctly, your vegetables can last up to two years, and with Mylar bags and oxygen absorbers, they might even stay fresh for 25 years or more. Properly stored vegetables contain 3.5 times more fiber than their fresh counterparts.
Don't forget to check for signs of spoilage before consuming. If you live in a humid climate, consider freezer storage as an alternative preservation method.
Solar Food Freeze Drying

Your solar-powered freeze dryer needs careful timing to align with peak sunlight hours, requiring between 812 to 1560 Watts during the critical drying phase.
You'll start by setting up the vacuum chamber early in the morning, where your frozen food items will undergo sublimation as water transforms directly from ice to vapor.
Once your food is completely freeze-dried, you'll want to immediately transfer it to either Mylar bags or glass jars with oxygen absorbers for ideal long-term preservation.
Solar-Powered Freeze Drying Units
Operating a solar-powered freeze dryer requires careful planning of your power system to secure consistent performance.
You'll need a robust setup that includes a 2000-watt inverter (minimum), 12 kilowatt hours of usable battery capacity, and multiple solar panels totaling around 8.8 kilowatts. If you're using flooded lead acid batteries, plan for double the capacity.
To maximize your unit's efficiency, start batches early in the day when sunlight is abundant.
You'll want to monitor power consumption through different cycles, as your freeze dryer can draw anywhere from 30 to 1400 watts.
Keep a transfer switch handy to seamlessly shift between solar and grid power during low sunlight periods. This guarantees your food processing won't be interrupted during critical drying phases.
Vacuum Chamber Setup Process
Setting up a vacuum chamber for solar-powered freeze drying involves four key preparation steps.
First, you'll need to position your freeze dryer on a stable surface in a cool, dry area. Plan to load the machine early in the day to maximize sunlight exposure, and prepare your items the night before.
Next, connect the vacuum pump to your freeze dryer using the provided hose, ensuring there aren't any leaks that could compromise the pressure.
Then, install your trays by spacing them evenly in the chamber. Load different foods like strawberries, apples, or shredded cheese uniformly across multiple trays.
Finally, power up the control panel to calibrate the machine's settings based on your environment and food types. You'll need to monitor power cycles, including precooling, freezing, vacuum freezing, and drying phases.
Long-Term Storage Solutions
After setting up your solar-powered freeze dryer, proper storage becomes the next key focus.
You'll want to store your freeze-dried foods in either Mylar bags with oxygen absorbers or airtight glass jars to maintain maximum freshness.
Keep your stored items in a cool place between 50-70°F, away from sunlight and heat sources. Every 8°F cooler can extend shelf life by 1.4 times.
Don't use regular freezer bags, as they won't protect against oxygen and moisture. Instead, opt for Mylar bags, which provide superior protection against these elements.
Maintain consistent temperatures and low humidity levels in your storage area.
When you're ready to open your stored foods, minimize air exposure to preserve freshness.
With proper storage methods, your sun-dried meals will retain their taste, nutrients, and quality for years to come.
Oil Preservation Method
While preserving sun-dried tomatoes in oil offers a traditional method, it requires careful attention to safety protocols due to botulism risks. You'll need to fully dry your tomatoes at 250°F until they're pliable but not brittle, then let them cool completely before storage.
| Storage Method | Duration | Safety Level |
|---|---|---|
| Room Temp Oil | Not Recommended | High Risk |
| Refrigerated Oil | Up to 2 months | Medium Risk |
| No Oil Storage | 6-12 months | Low Risk |
When using oil preservation, pack your cooled tomatoes in clean mason jars and cover them completely with high-quality olive oil. You can add dried herbs for flavoring, but avoid fresh ingredients. For the safest approach, consider storing your sun-dried tomatoes without oil or limiting oil storage to one week. The flavored oil makes an excellent addition to dressings and marinades.
Fermentation for Long Term Storage

Beyond oil preservation, fermentation provides a robust method for extending the life of your sun-prepared meals.
You'll need to store your fermented foods in cold conditions between 32-50°F, with 39°F being ideal for maximum preservation. When properly stored, these foods can last up to two years.
- Transfer your fermented items to airtight containers and keep them in a refrigerator, cold basement, or wine cellar.
- Use plastic lids instead of metal ones to prevent rust from salt exposure.
- Consider vacuum sealing in canning jars for an extra layer of protection.
- Monitor your ferments closely and consume fruits within a month, while vegetables can last a year or longer.
Remember to sterilize all containers and utensils before use, and minimize jar opening to prevent contamination from unwanted bacteria.
Mason Jar Canning Solutions
You'll want to start your mason jar canning with acidic foods like tomatoes and fruits, as they're safest for water bath processing.
When using the water bath method, make sure your jars are completely submerged in boiling water and processed for the recommended time based on your altitude and recipe.
Keep a close eye on the temperature throughout the process, ensuring the water maintains a rolling boil to properly seal and sterilize your jars.
Processing Acidic Foods First
Since acidic foods have a natural barrier against harmful bacteria, they're the ideal starting point for home canning beginners. These foods, with pH levels of 4.6 or lower, work perfectly with boiling water bath canning, making the process simpler and safer for newcomers.
- Start with naturally acidic fruits like berries, apples, or peaches, which don't need additional acid for safe preservation.
- When canning tomatoes, add bottled lemon juice or citric acid to guarantee proper acidity levels.
- Pre-heat your jars to 180°F and leave appropriate headspace to prevent jar breakage.
- Process your jars in boiling water, ensuring they're covered by 1-2 inches of water, then let them rest for 5 minutes before removing.
Remember to store your sealed jars in a cool, dark place and always check for proper sealing by pressing the center of the lid.
Safe Water Bath Methods
After mastering acidic foods, proper water bath canning techniques become your next key to successful preservation.
You'll need to start with heat-proof Mason or Kilner jars and essential tools like canning tongs, a water bath canner, and a jar rack to prevent breakage.
Before you begin, sterilize all your equipment in hot, soapy water and keep your jars warm in boiling water.
Fill hot jars with hot food, leaving proper headspace, and remove air bubbles with a wooden skewer. Always use new lids with intact rubber seals, and tighten them securely.
Process your jars in boiling water, ensuring they're covered by at least an inch of water.
Don't forget to adjust your processing time based on your altitude.
Once complete, let the jars cool naturally and verify their seals before storage.
Cold Storage Techniques
Maintaining proper cold storage techniques is essential for preserving sun-prepared meals safely. You'll need to keep your food at 41°F or lower to prevent harmful bacteria growth.
Start by layering your cooler correctly, using block ice at the bottom and placing frozen items next, followed by refrigerated foods and less perishable items on top.
- Cool hot foods quickly using an ice bath or shallow containers before storing them in your cooler.
- Store your cooler in a shaded area and minimize opening it to maintain consistent temperatures.
- Use stainless steel containers instead of plastic for faster cooling.
- Layer your foods properly, keeping raw items below cooked ones to prevent cross-contamination.
Don't forget to fill any empty space with a thick towel for extra insulation, and always check use-by dates regularly to guarantee food safety.
Mylar Bag Storage System
While proper cold storage helps preserve meals short-term, Mylar bags offer an excellent long-term storage solution for your sun-prepared foods.
You'll need to select thick bags (5 mils) made from polyester and aluminum, which provide essential protection against oxygen, moisture, and light.
Before storing your sun-dried foods, verify they're completely dry and free from spoilage. Remove excess air, add oxygen absorbers, and seal the bags using a heat sealer.
You'll get the best results with dry, low-fat ingredients like grains, dehydrated fruits, and vegetables. However, avoid storing foods high in fat or moisture.
Store your sealed Mylar bags in food-grade containers, keeping them in a cool, dark place.
Remember to label each bag with contents and packaging dates, and check them periodically to verify everything stays fresh.
Solar Food Drying Chamber

A solar food drying chamber stands at the heart of efficient sun-based food preservation. You'll find this ingenious system uses natural convection to move heated air through multiple layers of mesh trays, effectively removing moisture from your food without electricity or fuel costs.
- Your chamber's tilted solar collector captures and concentrates the sun's heat, warming the air before it flows through your drying trays.
- You can dry up to 300 pounds of food monthly in a small setup, or scale up to 10,000 pounds with larger systems.
- The indirect drying method keeps your food protected from direct sunlight, preserving essential nutrients and vitamins.
- You'll get faster, safer results than traditional sun drying, with less risk of spoilage or contamination.
Wood, glass, and net cloth construction makes this an affordable, sustainable preservation solution.
Preservation With Salt Curing
Since ancient times, salt curing has proven to be one of the most effective methods for long-term food preservation. You'll find that salt works by drawing water out of food and bacterial cells through osmosis, creating an environment where harmful microorganisms can't survive.
| Food Type | Salt Method | Storage Time |
|---|---|---|
| Meats | Dry Rub | 3-6 months |
| Fish | Brine Soak | 2-3 months |
| Vegetables | Pickling | 6-12 months |
| Fermented Foods | Mixed Salt | 3-12 months |
To cure your sun-dried foods, you'll need to follow tested recipes carefully to guarantee proper preservation. When you combine salt curing with solar drying, you're creating multiple barriers against spoilage. The salt enhances flavor while weakening muscle fibers in meats, and it's particularly effective for preserving vegetables through fermentation processes like sauerkraut and pickles.
Frequently Asked Questions
Can Sun-Prepared Meals Be Safely Stored at Varying Altitudes Above Sea Level?
You can safely store food at any altitude if you maintain proper temperature (50-60°F), control humidity (below 60%), and use airtight containers with oxygen absorbers. Higher altitudes' cooler temperatures may even help preservation.
How Do Electromagnetic Fields Affect the Longevity of Stored Sun-Prepared Foods?
You'll find electromagnetic fields can extend your sun-prepared food's shelf life by slowing cell metabolism, reducing water loss, and inhibiting microbial growth. They'll also help maintain nutritional content during long-term storage.
What Role Does Ambient Humidity Play During the Solar Cooking Process?
Ambient humidity greatly impacts your solar cooking process. You'll notice slower cooking times and lower temperatures on humid days, while dry conditions give you faster results and better efficiency in your solar cooker.
Are Recycled Storage Containers Safe for Long-Term Sun-Prepared Meal Preservation?
You shouldn't use recycled containers for food storage, as they may have degraded plastic integrity. Stick to new, food-grade containers with codes 2, 4, or 5 for safe long-term food preservation.
Do Different Types of Salt Affect Preservation Quality of Sun-Cooked Meals?
Yes, your choice of salt matters. You'll get better preservation using table or curing salt versus sea salt, as they're drier and more consistent. Kosher salt's coarse texture helps draw out moisture effectively.
In Summary
You've now learned multiple ways to preserve your sun-cooked meals for extended periods. Whether you're vacuum sealing, dehydrating, freeze-drying, or using traditional methods like fermentation and salt curing, you'll be able to enjoy your solar-prepared foods long after they're made. By combining these preservation techniques with proper storage conditions, you can maintain your food's nutritional value and flavor while building a sustainable food storage system.


Leave a Reply