To preheat your parabolic solar cooker effectively, start by positioning it on level ground and aligning the reflector directly at the sun. You'll want to choose a clear, cloudless day and set up wind barriers if needed. Clean all reflective surfaces thoroughly with a microfiber cloth to maximize heat concentration. Don your protective gear, including sunglasses and heat-resistant gloves, then identify the focal point using a small test item like a marshmallow. Test the heat by placing a black pot with water at the focal point, adjusting every 10-15 minutes. With temperatures potentially reaching 500°F, proper preheating sets the stage for successful solar cooking techniques.
Position Your Cooker First

Before starting any solar cooking, you'll need to properly position your parabolic cooker to harness maximum sunlight.
Face the reflector directly at the sun, ensuring the umbrella or dish is perfectly aligned with the sun's rays for best heat concentration.
Position your cooker on level ground and secure it firmly to prevent any movement during cooking.
Mark the spot where the sun's reflection is strongest using a stick or handle – this will help you identify the ideal focal point.
You'll want to place something sturdy behind the cooker to maintain its orientation toward the sun.
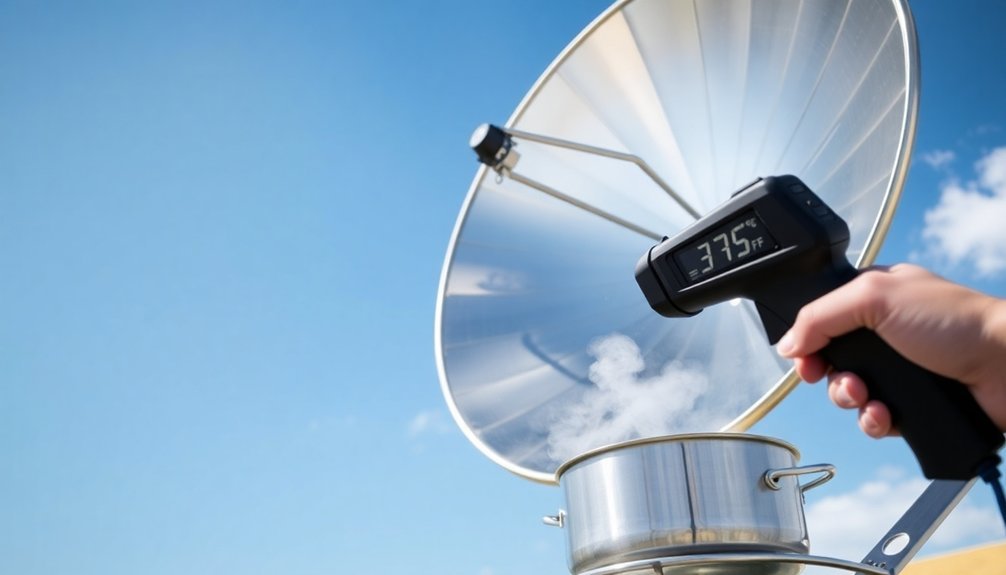
These high-efficiency cookers can reach up to 500°F when properly positioned at their focal point.
Check Weather and Sun Position
You'll need cloudless skies to achieve ideal temperatures with your parabolic cooker, as cloud cover drastically reduces solar energy collection.
Position your cooker at a 90-degree angle to the sun's rays for maximum reflection, adjusting throughout the day to maintain this ideal angle.
Keep track of the sun's movement patterns in your location, which will help you anticipate the best cooking times and necessary angle adjustments for sustained heat.
Consider setting up wind protection barriers around your parabolic cooker, as high winds can significantly reduce cooking temperatures and affect performance.
Clear Skies Matter Most
Since successful parabolic cooking depends entirely on direct sunlight, checking weather conditions and sun position is your most critical first step.
You'll want clear skies throughout your cooking time, as clouds can drastically reduce your cooker's efficiency. Even light cloud cover will greatly impact your cooking results.
- Monitor weather forecasts before planning your solar cooking session – you can't cook effectively on cloudy or rainy days.
- Time your cooking around solar noon (when the sun is highest) for best results, especially within two hours before or after.
- Position your cooker's parabolic reflector directly toward the sun to maximize heat concentration.
- Set up wind barriers if needed, as breezes can quickly cool your cooking equipment and extend cooking time.
Parabolic solar cookers can achieve temperatures above 290°C, making them just as effective as traditional grills when conditions are optimal.
Best Angles for Reflection
Achieving ideal cooking temperatures requires precise positioning of your parabolic reflector at a 45-degree angle from the optical axis at the rim.
You'll want to maintain a ±15° angular tolerance to guarantee uninterrupted cooking for up to two hours without constant adjustments.
For peak performance, position your cookware at the focal point where the rim's reflection converges.
The most forgiving setup occurs when the focal height is one-fourth of the reflector's diameter.
While your cooker can function at angles slightly below 90°, you'll get the best results when the sun's rays hit the reflector at a perpendicular angle.
Mark your cookware's handle at the point of maximum reflection to help maintain proper alignment, and check periodically as the sun moves to guarantee your food continues cooking efficiently.
Track Solar Movement Patterns
Successful parabolic cooking relies on proper sun tracking throughout the day, with peak efficiency occurring between 11:00 am and 3:00 pm.
You'll need to adjust your cooker every 10-20 minutes to maintain ideal temperature, using a marked stick to track the sun's reflection. Weather conditions greatly impact cooking times, so choose wind-protected spots and add insulation when needed.
- Monitor seasonal changes – winter requires more frequent angle adjustments due to lower sun paths, while summer allows for longer intervals between repositioning.
- Preheat your cooker before use, especially on cloudy days.
- Use south-facing positions during winter months to maximize exposure.
- Consider installing a mechanical tracking system for automated adjustments, ensuring your cooking pot stays at the focus point.
Clean Reflective Surfaces Thoroughly

Maintaining spotless reflective surfaces is essential for ideal parabolic cooking performance.
You'll want to start by dusting loose particles with a dry microfiber cloth before moving on to wet cleaning. Use plain tap water or a mixture of rubbing alcohol, dishwashing soap, and ammonia for stubborn spots.
Spray your cleaning solution directly onto the reflective surface or cloth, then wipe in a zigzag motion from top to bottom. Work in small sections to prevent streaking, and use fresh portions of your cloth as you move along.
Don't apply excessive pressure, as this can scratch the surface. For final touches, buff gently with a dry cloth to achieve a streak-free shine.
Remember to avoid cleaning in direct sunlight, and maintain regular cleaning schedules to prevent dirt buildup.
Set Up Safety Equipment
Before operating a parabolic cooker, proper safety equipment must be in place to protect yourself from intense concentrated sunlight and heat.
You'll need several essential safety items to handle the cooker and prevent injury from the powerful solar concentration.
- Wear protective sunglasses to shield your eyes from concentrated sunlight and reflections when adjusting the cooker's position.
- Keep heat-resistant gloves or thick dry cloths nearby for handling hot cookware and metal components.
- Place sturdy pot holders within arm's reach to safely move pots and pans during cooking.
- Set up a clear, level cooking area away from flammable materials and guarantee there's enough space to work safely.
Remember to keep children at a safe distance and maintain awareness of the hot focal area throughout the cooking process.
Align Focal Point Correctly

To locate your solar cooker's ideal focal point, test different positions using a piece of paper to find where the sunlight concentrates most intensely.
You'll need to adjust your stand's height until the cooking container aligns precisely with this focal point, typically 1-1.5 feet above the vertex.
Once you've found the sweet spot, check that your stand provides stable support for the cooking container, as any movement can disrupt the cooking process.
Find Sun's Sweet Spot
Success with parabolic cooking depends heavily on finding the precise focal point where sunlight converges.
You'll need to tilt your parabolic dish to align perfectly with the sun's position, ensuring all incoming rays reflect onto your cooking vessel. The best cooking times are between 10:00 and 2:00 when the sun's energy is strongest.
- Place your cooking vessel at the calculated focus point, which should be approximately one-fourth of your dish's aperture length.
- Adjust your parabola's angle using spacers or an adjustable stand until you see maximum light concentration.
- Watch for the brightest spot of reflected light – that's your sweet spot for placing cookware.
- Keep monitoring and readjusting as the sun moves to maintain ideal heat concentration.
Test Focus With Paper
Now that you've located the general sweet spot, testing with paper provides a precise way to confirm and mark your focal point.
Place a black sheet of construction paper at your calculated focal point, using the formula f = x²/4a, where x is your radius and a is the depth of your parabola.
Position your cooker in the sunny spot you've identified and watch where the reflected light concentrates on the paper.
Use a white crayon to mark this exact point. You'll know you're on target when the reflected sunlight forms a bright, concentrated spot.
To verify you've found the true focal point, briefly test the temperature with a thermometer or observe if small items like marshmallows begin to melt.
Make adjustments until you achieve the highest temperature reading.
Check Stand Height Stability
Proper stand stability forms the foundation for effective parabolic cooking. You'll need to verify your cooker is level and secure before proceeding with any cooking tasks. Use a level tool to check the stand's position and adjust the legs as needed on firm, flat ground. For added convenience, consider using castor wheels on hard surfaces.
- Position your parabola at the ideal angle using the adjustment mechanism, making sure it's locked securely to prevent unwanted movement.
- Rotate the unit to track the sun's position, keeping the center post screw loose for smooth adjustments.
- Check that the pot receptacle is firmly attached and properly counterbalanced for heavier cookware.
- Reinforce the cooking platform if needed, and use deep pots with lids to maintain cleanliness and safety.
Test Heat Using Water
Testing your parabolic cooker with water provides essential baseline performance data before actual cooking. Fill a black pot with exactly 1 kg of water and position it at the focal point.
You'll want to measure the water temperature every 10 minutes using a non-mercury thermometer. Track how long it takes your water to reach boiling point (369K), which typically occurs within 75 minutes under ideal conditions.
Record the beam radiation and wind speed during your test – aim for clear skies with radiation around 626.9 W/m2 and minimal wind (0.5 m/s). If you're not reaching target temperatures, check your pot's position and consider adding insulation to reduce heat loss.
Remember to test on different days to account for varying weather conditions and establish consistent performance benchmarks.
Maintain Temperature Before Cooking

Once you've confirmed your cooker's performance with water testing, maintaining consistent heat becomes your next focus.
You'll need to adjust the cooker's position every 10-15 minutes to track the sun's movement and keep temperatures stable. Make certain your cooking pot stays centered at the focal point to maximize heat absorption.
- Keep the reflective surfaces spotlessly clean and check for any damage that could reduce efficiency.
- Don't open the pot lid unnecessarily, as this will cause significant heat loss.
- Position your cooker away from any flammable materials and make sure it's on stable ground.
- Use blackened or dark-colored cooking pots to enhance heat absorption – avoid aluminum foil wrapping as it reflects sunlight away.
Remember to wear protective eyewear while working with your parabolic cooker, as the concentrated sunlight can be harmful.
Frequently Asked Questions
Can Parabolic Cookers Be Used Effectively on Sand or Uneven Surfaces?
You'll face challenges using parabolic cookers on sand or uneven surfaces. You'll need sturdy supports and frequent adjustments to maintain alignment. It's possible but less efficient than on flat, stable ground.
How Long Should I Let My Pot Sit Empty During Preheating?
You'll want to preheat your empty pot for 15-30 minutes, depending on weather conditions. Keep an eye on your thermometer and adjust the time based on your environment's temperature and sun intensity.
Does Wind Speed Affect the Preheating Time of Parabolic Cookers?
Yes, wind speed greatly affects your preheating time. You'll need longer to preheat in windy conditions since high winds increase heat loss. Your cooker's temperature can drop dramatically, even with strong sunlight.
Should Different Colored Pots Have Different Preheating Times?
Yes, you'll notice different preheating times based on pot color. Dark pots, especially black ones, heat up faster because they absorb more sunlight. Light-colored or reflective pots will take longer to reach cooking temperature.
Can I Use Multiple Smaller Pots Instead of One Large Pot?
Yes, you can use multiple smaller pots instead of one large pot. You'll get more even heating, easier handling, and the ability to cook different dishes simultaneously. Just make certain they don't exceed your cooker's weight limit.
In Summary
You've now learned the essential preheating steps for your parabolic cooker. By following these guidelines, you'll achieve ideal cooking temperatures and safer operation. Remember to regularly check your cooker's alignment throughout use, as the sun's position changes. Don't skip any of these preparatory steps – they're vital for consistent results. With practice, you'll master this eco-friendly cooking method and enjoy perfectly prepared solar meals.


Leave a Reply