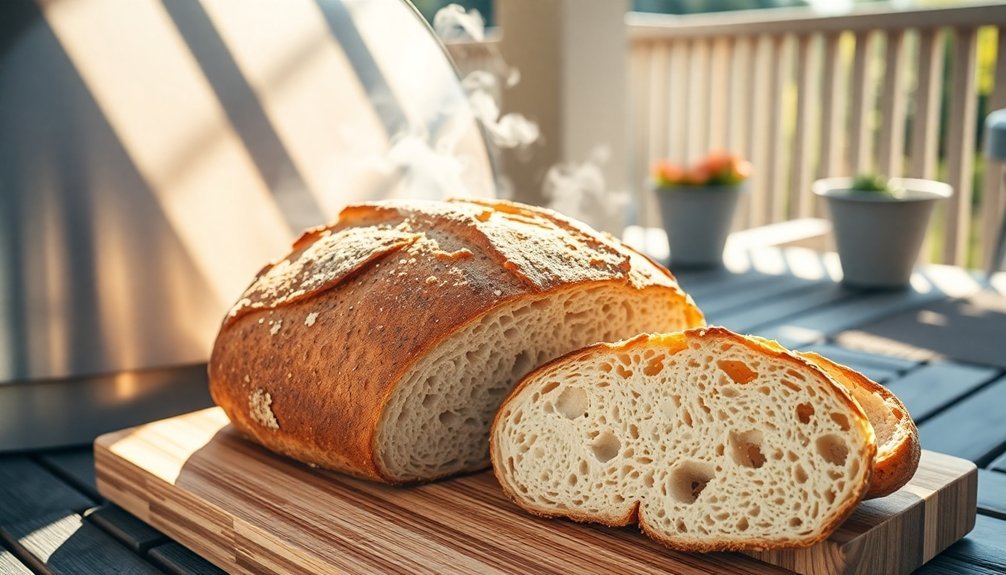
You can bake fresh bread using only natural sunlight with a solar oven, which harnesses the sun's heat to reach temperatures of 325-350°F. Start by positioning your solar oven in direct sunlight and preheating it for 30 minutes. Mix your basic ingredients: flour, salt, water, and yeast, then knead the dough for 5 minutes until smooth. Let it rise for 2 hours before placing it in your preheated solar oven. Baking typically takes 1-2.5 hours, with repositioning every 30 minutes to maintain sun exposure. Tap the bottom of your finished loaf for a hollow sound to confirm it's done. Master these basics, and you'll reveal a world of solar bread variations.
Getting Started With Solar Bread

How would you like to harness the sun's energy to create fresh, homemade bread? With a solar oven, you'll be able to bake delicious bread using nothing but natural sunlight.
To get started, you'll need to position your solar oven in direct sunlight and verify it's properly focused to maximize sun exposure. Box, panel, or parabolic cookers are all suitable options for baking bread.
For ideal results, use a high-quality solar oven like the SunOven brand, which offers superior heat retention. If you're using a standard bread tin, paint its exterior black to increase solar heat absorption.
While you're preparing your dough, let the oven preheat in direct sunlight, making sure there aren't any objects casting shadows on it.
You'll need to be strategic about when you bake. Choose a clear, sunny day since cloudy conditions will greatly extend your baking time. Keep in mind that solar baking typically takes 2-3 hours longer than conventional oven baking.
During winter months, expect even longer baking times due to reduced sunlight intensity. Throughout the baking process, you'll want to periodically adjust the oven's position to maintain consistent sun exposure and rotate your bread for even cooking.
Basic Solar Bread Recipe
You'll need basic bread ingredients like flour, salt, water, and baker's yeast to start your solar bread journey.
To create your dough, mix the dry ingredients first, then gradually add warm water with dissolved yeast, kneading for about 5 minutes until smooth.
Let the dough rise for 2 full hours before placing it in your solar oven's baking pan.
The bread will take between 1-2.5 hours to bake in your solar oven, depending on your specific setup and temperature, with the loaf being done when it sounds hollow when tapped.
Essential Ingredients Needed
To make delicious solar-baked bread, you'll need several key ingredients that fall into four main categories: liquid ingredients, dry ingredients, leavening agents, and additional mix-ins.
For your liquid base, you can use buttermilk, water, whey, or milk, typically ranging from 1/4 cup to 2 cups depending on your recipe. These liquids should be warm when combining with yeast. You can easily make a buttermilk substitute by adding vinegar or lemon juice to regular milk.
Your dry ingredients will primarily consist of different types of flour. You'll need either white bread flour (2 1/4 to 3 cups), whole wheat bread flour (1/2 to 1 cup), organic multigrain flour, or all-purpose flour (3 cups).
For leavening, you'll need either rapid-rise yeast (1 teaspoon) or regular baking yeast (1 tablespoon or 1 sachet). You can also use sourdough starter made from white and whole wheat flour if you prefer a more traditional approach.
Don't forget the additional ingredients that enhance flavor and texture: honey or sugar (1-2 tablespoons) for feeding the yeast, vegetable oil or soft butter (1 tablespoon to 1/2 cup) for tenderness, and salt (1 1/2 teaspoons to 2 tablespoons) to control yeast growth and add taste.
Mixing The Perfect Dough
Creating the perfect bread dough starts with proper mixing technique and timing. You'll want to begin by combining your liquid ingredients in your mixing bowl – the buttermilk, water, honey, and oil.
Next, add your dry ingredients on top, keeping the yeast separate from the liquids initially to prevent premature activation.
Mix these ingredients thoroughly until your dough starts forming. You can use a bread machine, but hands or a fork work just as well. Make sure your mixture stays at room temperature for best results.
Once combined, cover your dough with plastic wrap or a damp kitchen towel and let it rest for 30-60 minutes. This autolyse period allows the flour to hydrate properly.
After resting, knead your dough for about 10 minutes until it becomes smooth and elastic. This develops the gluten structure that's essential for proper rising.
Shape your dough and place it in a lightly oiled loaf pan, as this will be ideal for solar baking. Cover it again and let it rise until doubled in size, which typically takes 1-2 hours. The dough's now ready for your solar oven.
Sun Baking Time Guidelines
Now that your dough is properly mixed and ready, successful sun baking depends on timing, temperature, and solar conditions.
You'll need to preheat your solar oven for at least 30 minutes in direct sunlight, aiming for an ideal temperature of 350°F, though temperatures between 150-200°F can still work effectively.
Position your solar oven away from shadows and verify all seals and locks are clean and secure.
You'll want to bake your bread for approximately 40 minutes in a preheated Global Sun Oven, though baking times can extend to 2.5 hours for organic bread in a parabolic cooker.
Check your bread every 30 minutes, repositioning the oven to maintain direct sunlight exposure.
To determine if your bread is done, tap the bottom – it should sound hollow. For sourdough, the internal temperature should reach 200°F.
Once baked, let your bread cool for two hours before storing.
Don't worry about constant monitoring; your bread will bake successfully with periodic checks.
Remember to handle the finished loaf with a spatula and store it properly to maintain freshness.
Setting Up Your Sun Oven

A successful sun-baked bread starts with proper oven setup. First, remove the protective film from your reflectors and position the oven directly facing the sun. Secure the glass door by turning both latches over it, then let it preheat for 25-30 minutes before you begin baking.
You'll need to clean your Sun Oven thoroughly before its first use. Place a pot with 2 cups of water and several drops of dish soap inside the preheated oven. Let it steam for 90-120 minutes, making sure to realign the oven every half hour. Use this hot soapy water to clean the chamber's interior and glass door, paying special attention to where the glass meets the black gasket.
To maintain ideal temperature throughout baking, realign your oven every 30 minutes to track the sun's movement. Position it at an angle that maximizes sun exposure, and verify all reflective surfaces are properly directed.
Keep the glass door clear and check that nothing obstructs direct sunlight. For better efficiency, you can line the interior with heat-absorbing black materials and confirm that all seals are airtight to prevent heat loss.
Time and Temperature Management
With your Sun Oven properly set up, mastering time and temperature control becomes your next challenge.
You'll need to understand that solar ovens typically reach temperatures between 120°C to 150°C, and these temperatures can fluctuate throughout the day depending on weather conditions and sun position.
You'll want to adjust your baking times accordingly. At ideal temperatures around 148°C (300°F), expect your bread to bake for about 2.5 hours, though it might take up to 3 hours on cooler days.
Use an instant-read thermometer to verify your bread reaches an internal temperature of 85°C for complete baking.
For proofing, you'll need to be flexible with your timing. Higher temperatures will speed up the rise, while cooler temperatures slow it down.
You can control this by proofing at room temperature or in a cooler spot.
Don't worry if you can't create steam like in conventional ovens – covering your baking pot will help trap moisture and support crust development.
Monitor your dough's condition throughout the process and adjust proofing times based on how it responds to the temperature variations.
Alternative Solar Bread Variations

You can adapt gluten-free flours like rice, quinoa, or amaranth for solar baking by adding xanthan gum and adjusting liquid ratios to maintain proper texture.
For sourdough enthusiasts, your wild yeast starter will work effectively in a solar oven, though you'll need to monitor fermentation times more closely due to temperature variations.
Your gluten-free and sourdough variations may require longer baking times in the solar oven, so it's best to start early in the day when sunlight is strongest.
Gluten-Free Recipe Adaptations
Making gluten-free solar bread opens up exciting possibilities for those with dietary restrictions or anyone seeking healthier alternatives. You'll need to replace traditional wheat flour with a blend of gluten-free options like rice flour, quinoa flour, and steel cut oats flour. These alternatives work wonderfully in solar ovens while providing diverse nutritional benefits.
To bind your gluten-free dough effectively, you'll want to incorporate ground flaxseed and chia seeds. These ingredients not only replace conventional yeast but also add valuable nutrients and texture.
Mix your dry ingredients thoroughly in one bowl, and combine your wet ingredients, including olive oil, in another. Let the mixture rest so the seeds can absorb the liquid and create a proper binding effect.
When you're ready to bake, line your solar oven with parchment paper and position it in direct sunlight. Your gluten-free bread will typically need 2-3 hours to bake completely, depending on your solar oven's efficiency.
Test for doneness using a toothpick – it should come out clean. Once cooled, store your bread in the refrigerator for up to a week, or freeze it for extended freshness.
Sourdough Solar Success
The art of sourdough solar baking brings a delightful twist to traditional bread making while harnessing natural energy. You'll need to start with a robust sourdough starter, which you can create using either whole wheat and white flour combination or a potato-based mixture with sugar and dry yeast.
| Process Step | Time Required | Key Tips |
|---|---|---|
| Starter Prep | 5-7 days | Feed regularly with sugar & water |
| Initial Proof | 6-12 hours | Use oiled bowl to prevent sticking |
| Final Shape | 15-20 min | Handle dough gently to retain air |
| Second Proof | 1 hour | Cover and keep warm |
| Solar Bake | 1.5-3 hours | Monitor internal temp to 93°C |
Your solar-baked sourdough will develop best in a black-painted tin that absorbs maximum heat. Position your solar oven to reach temperatures between 120-150°C, rotating the bread periodically for even baking. You'll know your loaf is ready when it reaches an internal temperature of 93°C and develops a golden crust. Don't worry if baking takes longer in winter months – the slower process often results in deeper flavors.
Solar Bread Baking Tips
Successful solar bread baking requires attention to several key factors. You'll need to position your solar oven to maximize sunlight exposure and maintain consistent temperatures between 325-350°F.
Keep in mind that weather conditions will affect your baking time, which typically ranges from 1-2 hours.
Start with warm water to activate your yeast properly, and consider using organic or whole wheat flour for healthier results. You can enhance your bread's texture by incorporating buttermilk or adding oils like olive or coconut oil.
When your dough is ready, let it rise in a warm spot until it doubles in size, then shape it and allow for a second rise.
While baking, monitor your bread's progress carefully. You won't get the same browning as in a conventional oven, so rely on other indicators of doneness. Test the internal temperature – it should reach 190°F (88°C), and tap the bottom – it should sound hollow.
Consider using a bread machine for mixing and kneading to simplify the process. Keep your solar oven clean and well-maintained for the best results, and always be prepared to adjust baking times based on available sunlight.
Frequently Asked Questions
Can I Bake Bread in a Solar Oven During Winter Months?
Yes, you can bake bread in winter using a solar oven. As long as there's bright, direct sunlight, the outside temperature doesn't matter much. Your bread will bake successfully, though it might take longer.
What Happens if Clouds Appear Halfway Through Baking?
If clouds appear midway through your baking, you'll experience longer cooking times and temperature drops. You can either wait it out with extended baking time or transfer your bread to a conventional oven to finish.
How Long Does a Typical Solar Oven Last With Regular Use?
You'll get about 15+ years from a well-maintained solar oven with regular use. If you protect it from harsh weather and keep it clean, your solar oven can serve you for even longer.
Can I Use Metal Baking Pans in a Solar Oven?
Yes, you can use metal baking pans in your solar oven. For best results, choose dark-colored, thin metal pans as they absorb heat efficiently. You'll get even better performance if you use pans with lids.
Does Altitude Affect Solar Bread Baking Times and Temperatures?
Yes, at higher altitudes you'll need longer baking times in your solar oven since atmospheric pressure is lower. You should also expect lower maximum temperatures and may need to adjust your dough's moisture content accordingly.
In Summary
You'll find solar bread baking to be a rewarding way to harness nature's power while creating delicious homemade loaves. By following proper temperature monitoring, timing, and setup techniques, you're able to consistently produce fresh bread using only the sun's energy. Don't let cloudy days discourage you – with practice and patience, you'll master this eco-friendly baking method and enjoy the unique satisfaction of solar-baked bread.


Leave a Reply