To build a parabolic food heater, you'll need MDF board, reflective materials, and basic tools to complete seven essential steps. Start by cutting an 820mm square MDF base and creating a grid pattern for your parabolic shape. Next, attach reflective segments like aluminum foil or anodized sheets to your base structure. Build a sturdy T-shaped support frame using 2×4 lumber and install safety barriers to protect against concentrated sunlight. Add a secure pot stand at the focal point, then test heat concentration using a thermometer. Position your heater facing the sun and adjust every few hours. The following steps will transform your DIY project into an efficient solar cooking station.
Gathering Your Materials and Tools
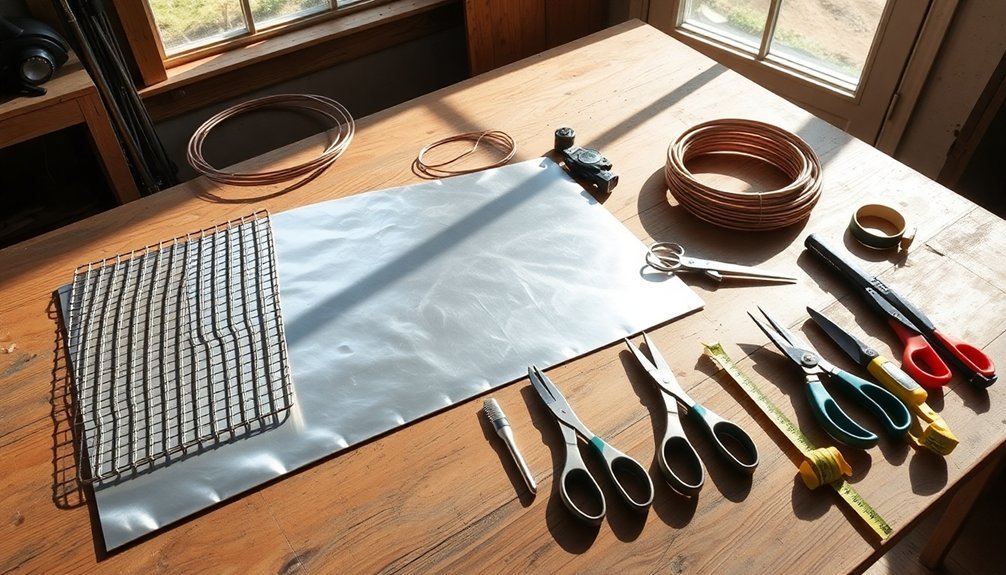
Before starting your DIY parabolic food heater project, you'll need to gather several essential materials and tools.
For the reflective surface, choose either aluminum foil, anodized aluminum sheets, or recycled printing plates from local printers. You can also use car windshield reflectors as an alternative reflective material.
For insulation, collect newspaper, cardboard, cloth, or natural materials like straw and hay.
Your structural framework will require cardboard or poster board, plus nuts and bolts to secure the parabolic shape. These materials can help achieve up to 500°C when properly constructed.
Don't forget to obtain a dark-colored cooking vessel – either a thin aluminum pot or black cast iron Dutch oven works well.
You'll also need black paint to coat surfaces, a sturdy pot stand, and a non-mercury thermometer to monitor cooking temperatures.
Creating The Parabolic Base
To build an effective parabolic food heater, you'll need to start with a sturdy base that's precisely measured and marked. Cut an 820mm x 820mm square from 6mm MDF for ideal durability. Using vertical list formatting will help you track each component during assembly.
Draw diagonals across the base and mark the midpoints to create your grid pattern.
Next, install a 100mm pipe flange at the center point where your grid lines intersect. You'll need to drill bolt holes and secure it firmly.
Create a template for your ribs, measuring 220mm at the highest point and 50mm at the lowest, with a length of 570mm. Cut your ribs carefully using a saw or band saw, then position them over the flange according to your grid markings.
Remember to cut notches at the bottom of each rib to fit securely over the flange.
Cutting Reflective Material Segments
You'll need a reliable laser cutter or high-speed mill to precisely cut your reflective metal segments, following proper safety protocols for handling reflective materials.
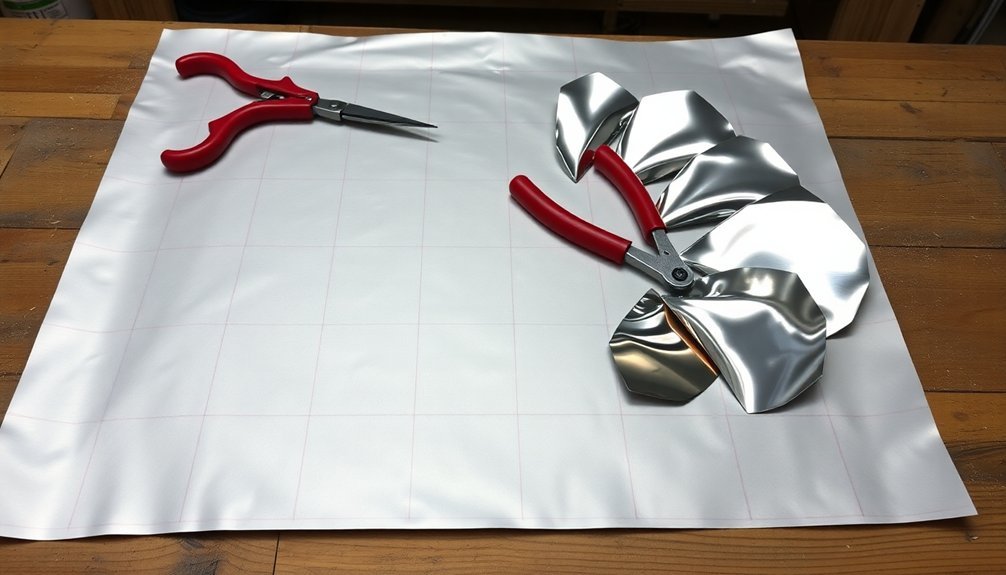
When creating your triangular segments, guarantee they're sized according to your parabolic base measurements and maintain consistent dimensions for proper assembly.
Use locating pins or alignment tools to mark your cutting lines, ensuring each segment will fit perfectly into your planned overlapping pattern.
Start with slow cutting speeds to achieve stable and precise cuts before gradually increasing to optimal speeds for the remaining segments.
Essential Cutting Tools Required
When cutting reflective materials for your parabolic heater, selecting the right laser technology stands as your most critical decision.
You'll need a fiber laser system, as it's specifically designed for reflective metals with its shorter wavelength of 1.07 µm. This technology guarantees better absorption and reduces the risk of damage from reflected energy.
- Choose a modern fiber laser machine with built-in failsafe features that automatically shut down if radiation levels become too high.
- Set up your auxiliary gas system – you'll want oxygen for copper cutting to create a protective oxide layer, or nitrogen for brass to maintain clean edges.
- Adjust your cutting parameters carefully – position the focal point close to the material surface and reduce cutting speed by 10-15% from maximum capacity for best results.
Triangle Size and Alignment
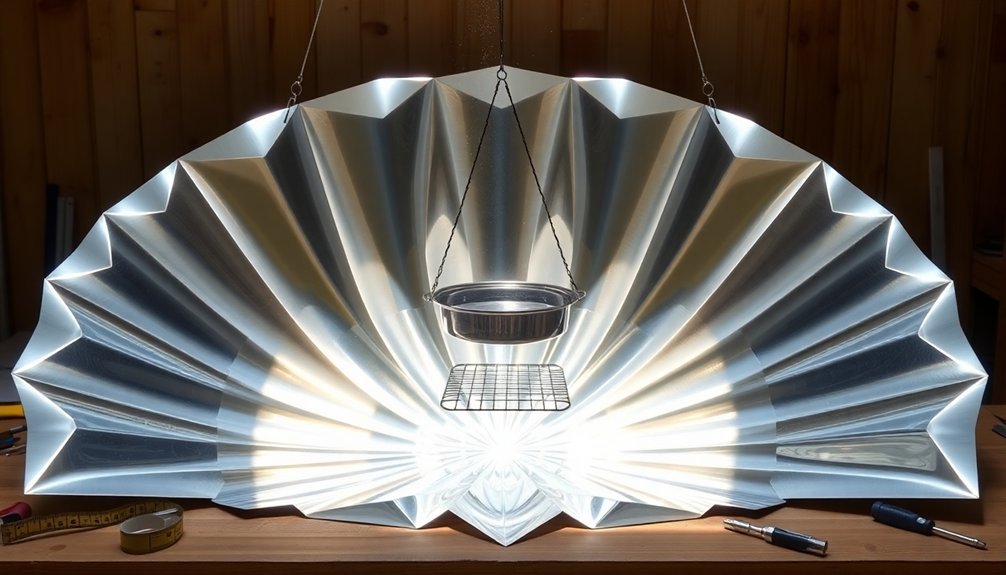
Precise triangle sizing and alignment form the foundation of an effective parabolic heater design. You'll need to cut spiral segments from your reflective material, starting from the circumference, with a top diameter of 31 1/2 inches and a height of 48 inches.
When cutting your segments, guarantee they're tangential to the circular base for accurate alignment. You'll want to bend each piece upward to create a bowl-like shape, overlapping the front edge of one segment with the back edge of the next.
Position fasteners strategically to secure the segments while maintaining the parabolic curve. Remember to scale your measurements proportionally, keeping the focus point at 6.5 cm from the top when working with the scaled model.
Test your alignment using a laser spot to verify all segments direct light to a single focal point.
Building Support Structure
For your support structure, you'll need sturdy 2×4 lumber to build a T-shaped frame that can withstand outdoor conditions and hold your reflector securely.
When assembling welding rods, space them evenly across the frame and secure them with 1/4-20 carriage bolts at the mounting points.
You can fine-tune the height using adjustable clamps on the uprights, ensuring your cooking grate sits precisely at the focal point for maximum heating efficiency.
Choosing Support Materials
Selecting appropriate support materials stands as an essential first step in building your parabolic food heater's framework.
You'll want to choose materials that offer both durability and practicality while staying within your budget. Aluminum makes an excellent primary choice due to its lightweight nature, affordability, and resistance to corrosion.
- Consider using hollow steel bars for vertical support – they're robust enough to handle the dish's weight while maintaining structural integrity against common winds.
- Combine angle and flat steel bars for the base structure to create a rigid foundation that won't wobble or shift.
- If portability is your priority, opt for materials like plastic or reconstituted wood, but confirm they're weather-resistant and can withstand high temperatures.
Welding Rod Assembly Tips
When constructing the support structure for your parabolic food heater, proper welding rod assembly becomes essential for long-term stability and safety. You'll need to prepare your welding rods by heating them to 250-300°F to remove moisture, guaranteeing stronger welds and better structural integrity.
| Rod Type | Storage Method | Temperature |
|---|---|---|
| 60 Series | Airtight Container | 250°F |
| 70 Series | Vacuum-Sealed | 275°F |
| Universal | Heat Box | 300°F |
Before welding, place your rods in a DIY rod oven made from a repurposed appliance. Install a 150-watt heat lamp and thermostat for consistent temperature control. Remember to separate different rod types and maintain proper insulation. Once heated, store your rods in sealed containers until you're ready to weld the support structure. This preparation guarantees your parabolic heater's framework will be solid and durable.
Height Adjustment Mechanisms
To achieve ideal solar cooking performance, your parabolic heater requires a robust height adjustment system that accommodates various sun angles throughout the day.
Using DAR pine (42mm x 19mm), you'll create adjustable stands with pre-drilled holes that allow for height modifications using twine as a securing mechanism. Complement this with an aluminum welding rod setup to maintain precise dish angles.
- Mount your parabolic dish on a beam shaft with hinges, connecting it to a vertical-axis steel bar for stability and movement control.
- Install Ø100 mm wheels at the base for easy repositioning as you track the sun's path from east to west.
- Add a SuperJack linear actuator if you want automatic tracking, or stick with manual adjustment using the pre-drilled holes and twine system.
Adding Safety Features

Safety features are essential for any DIY parabolic food heater since concentrated sunlight can cause severe eye damage or blindness.
You'll need to install protective barriers around your cooker to prevent accidental exposure to intensified rays. Create a wall or curtain that extends from the dish's rim, making it at least twice the height of the focal point.
Install a sliding rod or swing-arm mechanism for safe pot placement and retrieval. Add a mesh across the top of your barrier to prevent face-down exposure.
For extra protection, build a "sunken" design with a side access hole for handling the pot safely. When operating the cooker, always approach it so your shadow blocks the sunlight, and turn the entire unit away from the sun when making adjustments.
Testing Heat Focus Points
Testing your parabolic heater's focus points requires careful measurement and monitoring of key parameters.
You'll need to track temperatures at different points, with focal points reaching up to 500°C and pot temperatures ranging from 94.5°C to 97.08°C when loaded. For ideal performance, maintain wind speeds below 1 m/s and guarantee solar radiation falls between 450-1100 W/m².
- Check and adjust your heater's position every 10-20 minutes to maintain proper sun alignment.
- Monitor key measurements at 30-minute intervals: solar insolation, ambient temperature, pot temperature, and wind velocity.
- Use mirror-type reflectors instead of aluminum sheets to boost efficiency by 10-15%.
Remember to handle the pot with proper holders, as temperatures get extremely high.
Regular alignment checks and adjustments will help maintain maximum sunlight concentration throughout the day.
Positioning Your Solar Kitchen

Proper positioning of your solar kitchen stands as the cornerstone of efficient solar cooking.
You'll need to face your cooker directly at the sun and adjust its angle to maximize sunlight capture at the focal point.
Choose a dry, level surface away from potential shadows, and secure your cooker with weights if it's windy.
For lunch preparation, orient the front panel toward the easterly sun, and for dinner, face it westerly. During all-day cooking, you'll want to reposition every couple of hours.
Make sure to use supporting structures or twine to maintain the correct angle, and check that the shadow falls directly behind the cooker.
When placing your pot, position it precisely at the reflector's focal point to achieve maximum heating efficiency.
Frequently Asked Questions
How Long Does It Typically Take for Water to Boil?
You'll typically wait 8-10 minutes for a quart of water to boil at sea level using a standard stove. However, your timing can vary based on heat source, altitude, starting temperature, and pot size.
Can the Cooker Work Effectively on Cloudy or Partly Cloudy Days?
Your solar cooker's performance drops considerably on cloudy days. You'll experience longer cooking times and lower temperatures. While it'll still work, you may need twice the time or should consider using it as a retained-heat cooker.
What Is the Maximum Temperature the Parabolic Cooker Can Achieve?
You'll find that a well-designed parabolic cooker can reach temperatures up to 500°C (932°F) at its focal point. That's as hot as your electric stovetop, making it powerful enough for most cooking needs.
How Many Years Will the Reflective Material Maintain Its Effectiveness?
Your reflective material will typically last 2-4 years with regular use, but you'll get longer life if you keep it covered and protected. With proper care and maintenance, you can maximize its effectiveness.
Can the Cooker Be Used Safely in Windy Conditions?
You can use your solar cooker in windy conditions, but you'll need to secure it properly with anchor points and create windbreaks. For safety, make certain it's stable and consider using a lower focal point design.
In Summary
Now that you've built your DIY parabolic food heater, you'll find it's an efficient way to harness solar power for cooking. Remember to recheck all safety features before each use and adjust the focus point based on sun position. You'll get the best results between 10 AM and 2 PM on clear days. Keep your heater covered when not in use to protect the reflective surface.


Leave a Reply