Solar dehydration lets you preserve fresh food off-grid using just the sun's energy. You'll need a solar dehydrator with three key components: a solar collector, drying chamber, and ventilation system. Cut your produce into uniform, thin pieces and arrange them on screened trays in single layers. Keep temperatures between 90-115°F and humidity below 60% for ideal results. Different foods require specific temperatures: herbs at 95°F, vegetables at 125°F, fruits at 135°F, and meats at 145-165°F. Store your dried goods in airtight containers with oxygen absorbers for up to 5-10 years. The journey to food independence starts with understanding these essential basics.
Understanding Solar Dehydration
While many modern food preservation methods rely on electricity, solar dehydration offers a sustainable and cost-effective alternative that's perfect for off-grid living.
You'll harness the sun's free energy to preserve food without ongoing operation costs, and your dried foods can last up to five years for fruits and over a decade for vegetables when properly stored.
Solar dehydration works by exposing food to controlled heat and airflow, reducing moisture content while maintaining food safety through naturally low pH levels and antimicrobial properties.
You can choose between direct methods, where food is exposed to sunlight, or indirect methods using specially designed dehydrators that protect against UV damage. This protection is crucial as solar dryers shield UV rays to maintain high levels of nutrients, particularly Vitamin C.
For best results, you'll need temperatures of at least 86°F and relative humidity of 60% or less, ensuring your food dries efficiently while preserving its nutritional value.
Planning Your Food Preservation
You'll want to start your off-grid food dehydration journey by selecting fruits, vegetables, and herbs that naturally lend themselves to preservation, such as apples, carrots, and basil.
Your storage containers must be completely airtight and moisture-resistant, with canning jars and vacuum-sealed bags being excellent choices for long-term preservation. Mastering primitive techniques like dehydration is essential for building self-reliance in wilderness settings.
Planning your dehydration schedule around seasonal harvests helps you maximize fresh produce when it's most abundant and affordable, ensuring you'll have preserved foods available throughout the year.
Food Selection Guidelines
Before starting your dehydration project, selecting the right foods will greatly impact your success and storage outcomes. Choose fresh, ripe produce without blemishes or signs of spoilage. Avoid high-fat foods like nut butters and avocados since they have a high risk of spoilage.
You'll want to focus on four main categories: herbs (95°F), vegetables (125°F), fruits (135°F), and meats (145-165°F).
For vegetables, you'll need to blanch most varieties before drying to preserve color and reduce enzyme activity. Cut all foods into uniform, thin pieces to guarantee even drying.
Fruits are excellent starter items since they're naturally sweet and forgiving during the process. If you're planning to dehydrate meats, remember that raw cuts require higher temperatures than pre-cooked ones, and poultry needs the highest setting at 165°F for safety.
Storage Container Requirements
Since proper storage containers directly impact the longevity of your dehydrated foods, selecting the right vessels is essential for successful preservation.
You'll want to choose airtight, food-grade containers that resist moisture – Mason jars work well for smaller amounts, while two or five-gallon buckets with gamma-seal lids are perfect for larger quantities.
Before storing your dehydrated foods, thoroughly clean and dry your containers, ensuring they're completely cool and free from moisture or odors.
Once packed, seal them properly with vacuum seals or locking lids, and label each container clearly with the product name and date.
Store your sealed containers in a cool, dry place away from direct sunlight.
You'll need to maintain consistent temperatures and good air circulation while regularly checking for any signs of spoilage.
Seasonal Planning Strategy
A successful off-grid food preservation strategy relies heavily on understanding and planning around seasonal harvests.
You'll need to align your dehydrating schedule with nature's timing, starting with spring's tender herbs and greens, moving through summer's berries and vegetables, and finishing with fall's abundant produce.
Create a monthly calendar to track when different crops typically mature in your area.
Schedule your dehydrating sessions accordingly, setting aside specific days for processing each type of food.
During spring, focus on herbs and early vegetables.
Summer brings opportunities to dehydrate berries, cherries, and garden vegetables.
Fall is your busiest season, with fruits, tomatoes, and root vegetables ready for preservation.
Make weekly garden checks to monitor crop readiness and adjust your schedule based on actual harvest times.
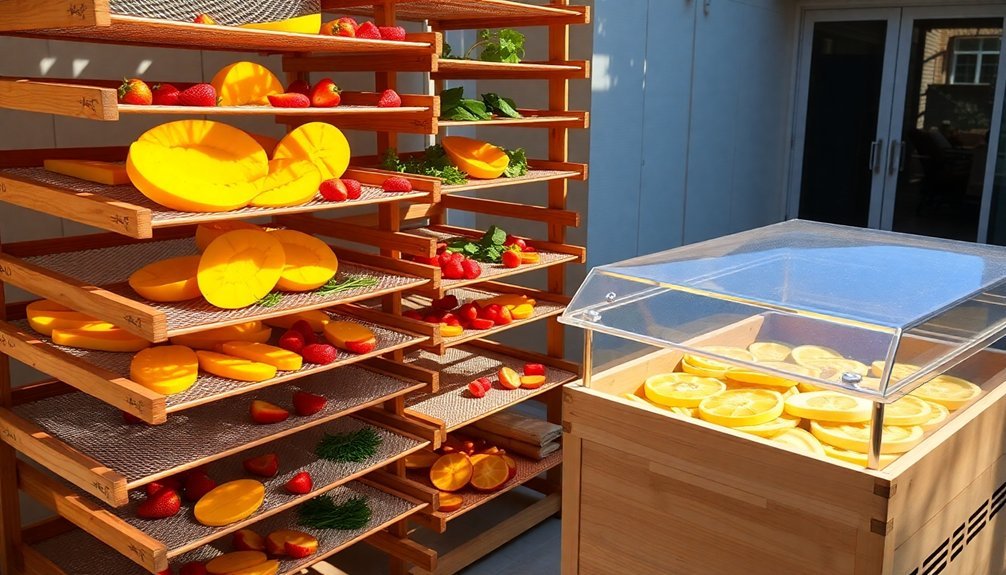
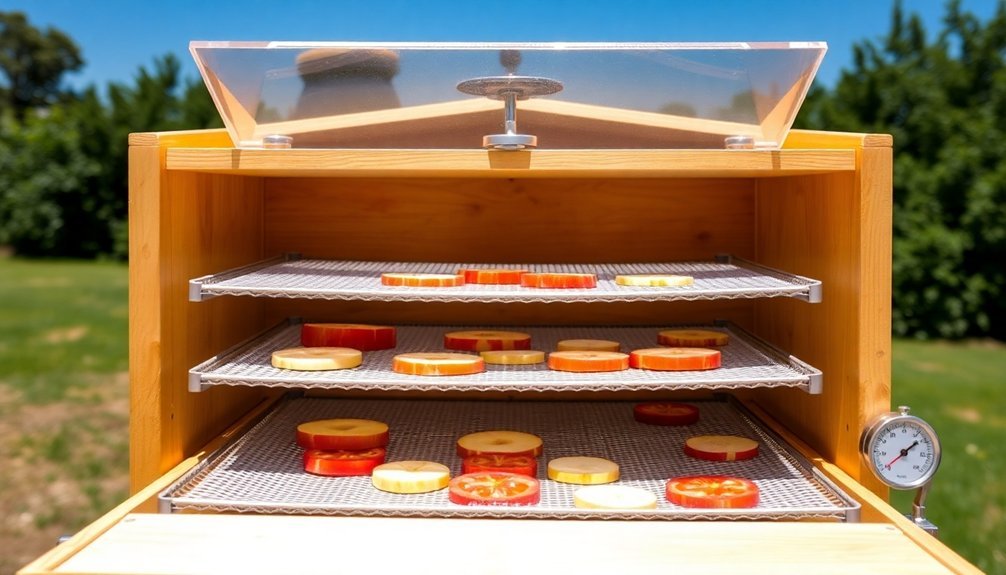
Building Your Solar Dehydrator
While building a solar dehydrator might seem intimidating, you'll need just three main components: a solar energy collector, a drying chamber, and a heat circulation system. Start by creating your collector using dark-colored metal or glass covered with transparent material to trap heat. Position it at the ideal angle for your location using an online solar calculator.
| Component | Key Feature | Safety Tip |
|---|---|---|
| Collector | Dark surface with glass cover | Use heat-resistant materials |
| Chamber | Food-safe screens for shelves | Guarantee proper ventilation |
| Heat System | Sealed pathways for airflow | Check seals regularly |
Construct your drying chamber with food-safe materials and multiple shelves for even air circulation. Install proper sealing to maintain temperature and add wheels for mobility if needed. Remember to sanitize all components before use and maintain regular cleaning schedules to guarantee food safety.
Essential Tools and Materials
Now that you understand the basic construction of a solar dehydrator, gathering the right tools and materials will set you up for success.
You'll need construction tools like saws, drills, and screwdrivers to assemble the frame and base. Essential materials include hardwood timber planks, galvanized corrugated iron, flyscreen for drying racks, and fasteners to secure everything together.
Don't forget your food preparation equipment: sharp knives, cutting boards, and containers for processing. You might want to include a food processor or blender for more versatile preparation options.
For storage, invest in airtight containers, vacuum seals, and proper labeling supplies. If you're planning to make your dehydrator mobile, consider adding wheels and an axle to the design.
Choosing Foods To Dehydrate
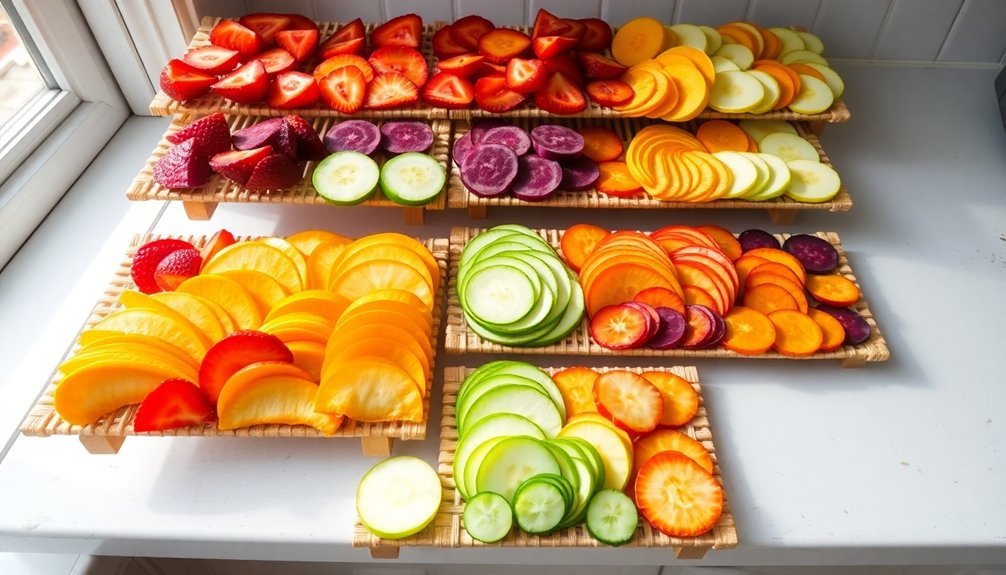
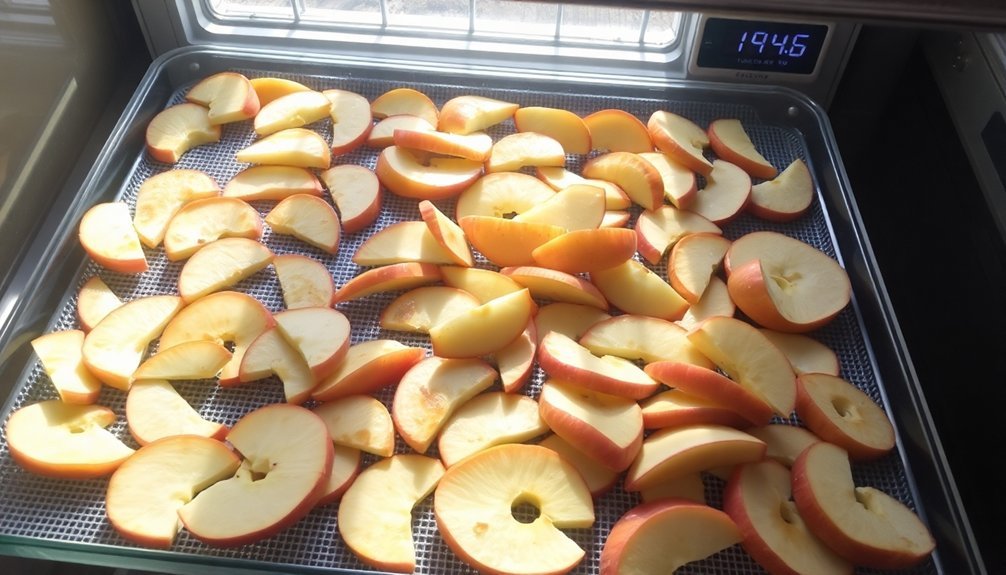
Since successful dehydration depends on proper food selection, you'll want to start with ingredients that have high moisture content and natural preservation potential. Fruits like apples, bananas, and berries are excellent choices – just remember to pretreat apples with lemon juice to prevent browning.
Most vegetables work well too, with tomatoes, carrots, and potatoes being popular options.
For proteins, stick to lean meats and seafood, making sure to trim away excess fat. You'll need to maintain specific temperatures: 160-165°F for beef jerky and 165°F for poultry.
Herbs are simple to dehydrate at lower temperatures between 95-110°F. While most foods can be dehydrated, avoid dairy products unless you're using commercial alternatives.
Legumes, grains, and fat-free sauces are also good candidates for dehydration.
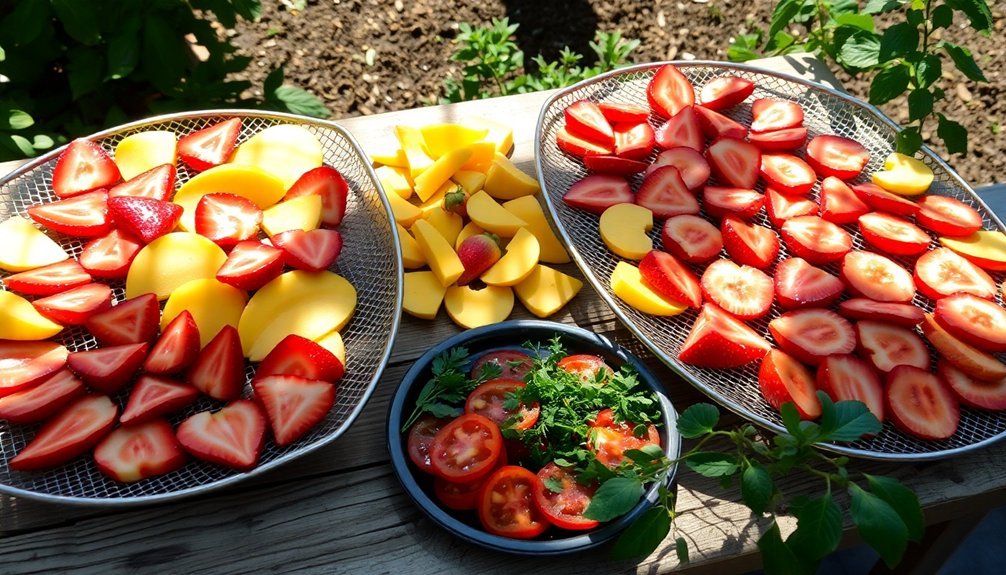
Preparing Food For Drying
Proper food preparation makes the difference between successful dehydration and wasted time. Start by thoroughly cleaning your work station, equipment, and hands to prevent contamination.
You'll need to cut your food into thin, uniform slices to guarantee even drying. For fruits, soak them in lemon juice or ascorbic acid to prevent browning. If you're working with tough vegetables, blanch or steam them first.
When preparing meats, choose lean cuts and consider adding breadcrumbs to ground varieties for better rehydration. For pasta, cook it al dente and arrange it in spiral shapes.
Always arrange your food in single layers on the dehydrator trays, and don't forget to stir periodically to prevent clumping. Let everything cool completely before storing to maintain quality and prevent spoilage.
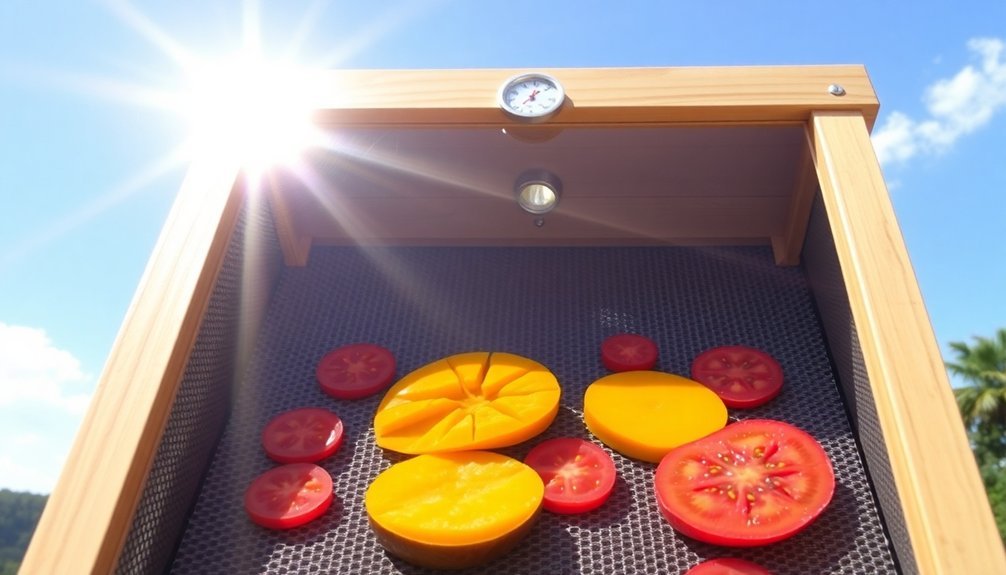
Operating The Solar Dehydrator
Successfully operating a solar dehydrator requires strategic placement and setup before loading your food. Position your dehydrator in a spot with maximum sunlight exposure and angle the solar collector to capture the most rays. You'll need to use a solar angle calculator to get this right.
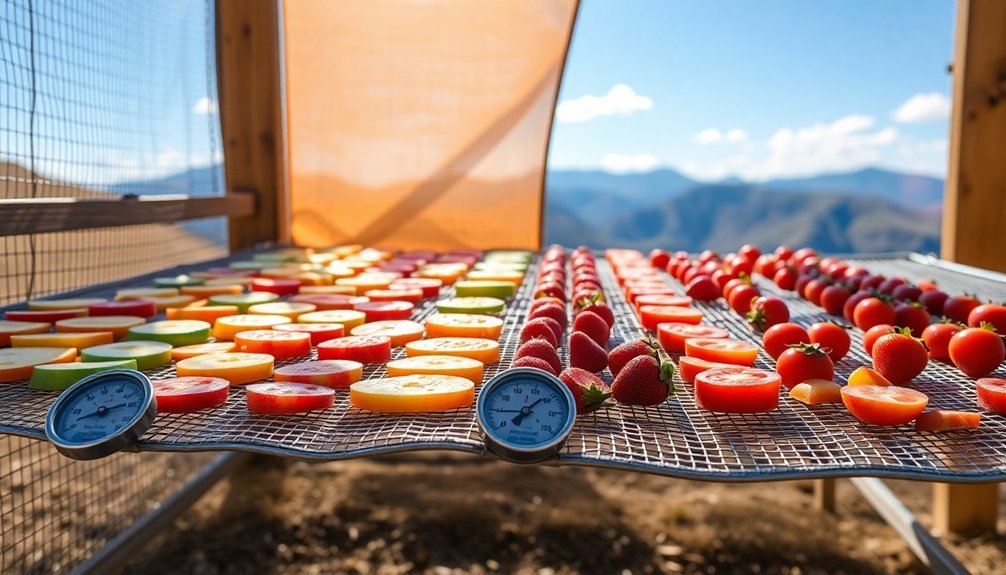
When loading food, place items in a single layer on screened trays, keeping different foods separate to prevent cross-contamination. Line the bottom of the box to catch any drips from messy items like cherries.
Guarantee proper airflow by maintaining clear vents and air intakes. Keep an eye on performance and adapt as needed. In cloudy conditions, you can add supplemental heat sources like light bulbs.
Monitor temperature, airflow, and humidity levels regularly, making adjustments to maintain ideal drying conditions.
Monitoring Temperature and Airflow
You'll need a reliable thermometer to monitor your solar dehydrator's temperature, with an oven thermometer or probe thermometer being ideal choices for tracking the 90°F-115°F range needed for most foods.
To maintain proper temperatures, you can adjust the dehydrator's ventilation flaps and position relative to the sun throughout the day.
Natural airflow relies on hot air rising through your dehydrator's vents, so you'll want to keep all air passages clear and position the unit to catch prevailing breezes when possible.
Temperature Management Methods
Monitoring temperature and airflow plays an essential role in achieving ideal food dehydration results, regardless of your chosen method.
When using an electric dehydrator, you'll benefit from built-in temperature controls and fans that guarantee even drying across all trays.
If you're using your oven, set it to the lowest temperature (around 140°F) and prop the door open with an external fan for better circulation.
For solar drying, you'll need to place food in direct sunlight using vented boxes with reflective surfaces, but don't forget to bring your trays in at night to prevent moisture reabsorption.
While freeze-drying requires specialized equipment and extremely low temperatures below -40°F, it offers superior preservation through ice sublimation in a vacuum chamber.
Natural Airflow Control Tips
When setting up your natural food dehydration system, proper airflow management stands as the cornerstone of effective preservation.
Arrange your food in a single layer on mesh screens or non-galvanized racks, making sure there's enough space between pieces to allow air circulation. You'll want to hang items like garlic and onions upside down using braids or strings.
Place your drying setup near a sunny windowsill or covered porch where natural air currents flow freely. To protect your food from insects while maintaining airflow, cover it with a second screen.
Remember to position your racks in an area with consistent air movement and low humidity. For indoor drying, utilize your home's rafters or lofts, which naturally provide good ventilation.
If you're using an oven, keep the door slightly open to let moisture escape.
Common Mistakes To Avoid
Learning from others' mistakes can save precious time and resources when dehydrating food off-grid. You'll need to avoid common pitfalls that can ruin your preservation efforts and waste valuable food.
| Mistake | Consequence | Solution |
|---|---|---|
| Overloaded trays | Uneven drying | Leave space between items |
| Wrong temperature | Case hardening | Use recommended settings |
| Rushed drying | Hidden moisture | Be patient, test thoroughly |
| Poor food choice | Spoilage risk | Select appropriate items |
| Improper prep | Inconsistent results | Slice uniformly, prep well |
Don't rush the process by overcrowding trays or using excessive heat. You'll want to maintain proper spacing between food items and use appropriate temperatures for each type. Remember that fatty foods and dairy products aren't suitable for dehydration. Always check for complete dryness before storage, and condition your dried foods to verify no moisture remains.
Storage Methods and Tips
Proper storage makes all the difference between successfully preserved food and wasted effort.
You'll want to use mylar bags or mason jars with oxygen absorbers for long-term storage, while tupperware works well for shorter periods. Never rely on regular ziploc bags, as they're not airtight enough.
Keep your dehydrated foods in a cool, dark place and always use airtight containers. Add silica gel packs to control moisture and protect against spoilage.
Don't forget to label everything with dates and contents – you'll thank yourself later when managing your inventory. Store containers in sealed buckets to guard against rodents and potential flooding.
Remember to rotate your stock regularly, using older items first. For maximum shelf life, consider vacuum sealing your mylar bags and including both oxygen absorbers and moisture control packets.
Alternative Drying Techniques
While electric dehydrators offer convenience, several alternative drying methods can preserve your food without relying on power.
Sun drying works well in Mediterranean climates where temperatures reach at least 86°F with 60% humidity. You'll need to protect your food with screens and expect several days for thorough drying.
If you're drying herbs and spices, air drying is your best option. Simply hang them in a well-ventilated space, but avoid this method for moisture-rich foods.
For a more controlled approach, try oven drying at 140-170°F with the door slightly ajar. While it uses more energy, it's faster than other methods.
Solar drying combines traditional methods with modern efficiency. Using a tabletop greenhouse design, you'll get better air circulation and protection from insects while harnessing the sun's power.
Seasonal Dehydration Guide
Successful food dehydration depends heavily on understanding seasonal patterns and produce availability. Each season offers unique produce and requires specific drying conditions to achieve ideal results.
| Season | Best Foods | Ideal Temperature | Key Tips | Preparation |
|---|---|---|---|---|
| Spring | Leafy greens, herbs, early vegetables | 60-70°F | Use shade, monitor pollen | Blanch vegetables, thin slice |
| Summer | Fruits, tomatoes, zucchini | 85-95°F | High air circulation, solar drying | Check fruits, remove seeds |
| Fall | Root vegetables, squash, grapes | 50-70°F | Monitor frost, indoor methods | Puree fruits, slice thinly |
| Winter | Stored produce, legumes | 135-155°F | Electric dehydrators, longer times | Thaw frozen items first |
Remember to adjust your techniques based on humidity levels and available equipment. While spring and summer allow for outdoor drying, fall and winter typically require indoor methods for successful preservation.
Frequently Asked Questions
Can I Dehydrate Food During Rainy Seasons Using a Solar Dehydrator?
You can use a solar dehydrator during rainy seasons, but it'll take longer and be less efficient. For better results, you'll need a well-insulated dryer with proper ventilation and moisture control.
What Happens if Animals or Insects Get Into My Solar Dehydrator?
You'll face serious food contamination and safety risks if animals or insects invade your solar dehydrator. They'll spoil your food, spread bacteria, and compromise the drying process. Always use screens and covers for protection.
How Long Can I Keep Using the Same Dehydrator Before Replacing Parts?
You'll typically get several years from your dehydrator before needing replacements. Check trays annually and watch for worn seals, faulty heating elements, or inconsistent temperatures – these are signs it's time to replace parts.
Will Dehydrating Strong-Smelling Foods Leave Permanent Odors in the Dehydrator?
No, strong food odors won't permanently stay in your dehydrator. You can remove them with proper cleaning using vinegar or baking soda solutions. Regular maintenance and thorough cleaning after each use prevent lingering smells.
Can Medications or Herbs Be Safely Dried in a Solar Dehydrator?
Yes, you can safely dry herbs in a solar dehydrator at 95-105°F. For medicinal herbs, you'll need to monitor them closely to preserve potency. Just make sure they're placed in single layers and protected from contaminants.
In Summary
You've now got the essential knowledge to start your off-grid food dehydration journey. Whether you're using a DIY solar dehydrator or alternative methods, you'll save money and preserve your harvest naturally. Remember to properly prepare your foods, maintain ideal drying conditions, and store your dehydrated goods correctly. Start with simple fruits or vegetables, and you'll soon be confidently preserving food without relying on electricity.


Leave a Reply