
Discover seven incredible sun-baked biscuit recipes that'll revolutionize your outdoor cooking game. You'll love the Classic Southern Solar Biscuits with their perfect flakiness, or try the sweet Honey Butter Sun-Baked Treats drizzled with golden goodness. The Herb-Infused Drop Biscuits pack a flavorful punch, while the Flaky Layered version delivers buttery heaven in every bite. Don't miss the Quick No-Knead option for busy days, traditional Buttermilk classics, or hearty Whole Wheat Solar Biscuits. These eco-friendly recipes combine sustainable cooking with mouthwatering results, and you're just moments away from mastering the art of solar biscuit perfection.
Classic Southern Solar Biscuits
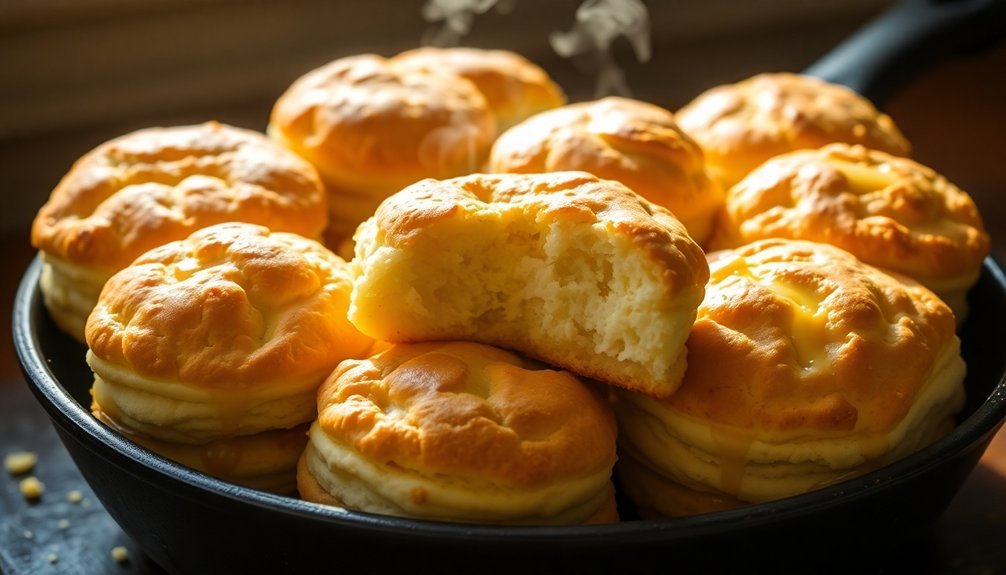
When you're ready to bake, place your skillet in a preheated solar oven.
To achieve perfect flakiness, make sure to fold dough multiple times during preparation.
You'll know they're done when a knife inserted into the center comes out clean.
Brush the tops with melted butter and serve them hot with gravy, jelly, or honey.
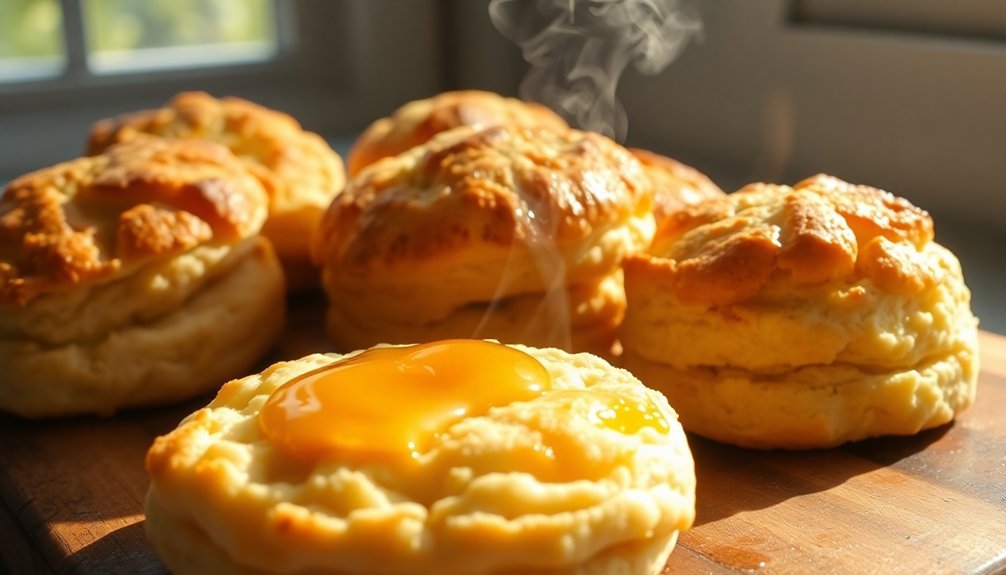
Honey Butter Sun-Baked Treats
These sun-baked honey butter biscuits stand out from the crowd with their rich, golden-brown tops and tender, flaky layers inside.
To achieve this perfection, you'll start by mixing 2-3.5 cups of all-purpose flour with 1-2 tablespoons of baking powder in a large bowl. Cut in 5-7.5 tablespoons of cold butter until your mixture resembles coarse crumbs.
Next, you'll combine one cup of cold buttermilk with 2-3 tablespoons of honey, stirring them into your flour mixture until just moistened. Remember to avoid over-mixing dough to maintain the perfect texture. Knead the dough 5-6 times on a floured surface, then roll it to about 1-inch thickness. Using a 2-3 inch cutter, shape your biscuits and place them on your sun-warmed baking sheet, leaving an inch between each one.
Before exposing them to the sun's heat, brush the tops with a honey-butter mixture. You'll know they're done when they've turned a beautiful golden brown.
For the perfect finish, brush them again with honey butter while they're still warm. You'll want to serve these treats immediately, but if you need to store them, they'll keep fresh for up to two days in an airtight container.
Herb-Infused Solar Drop Biscuits
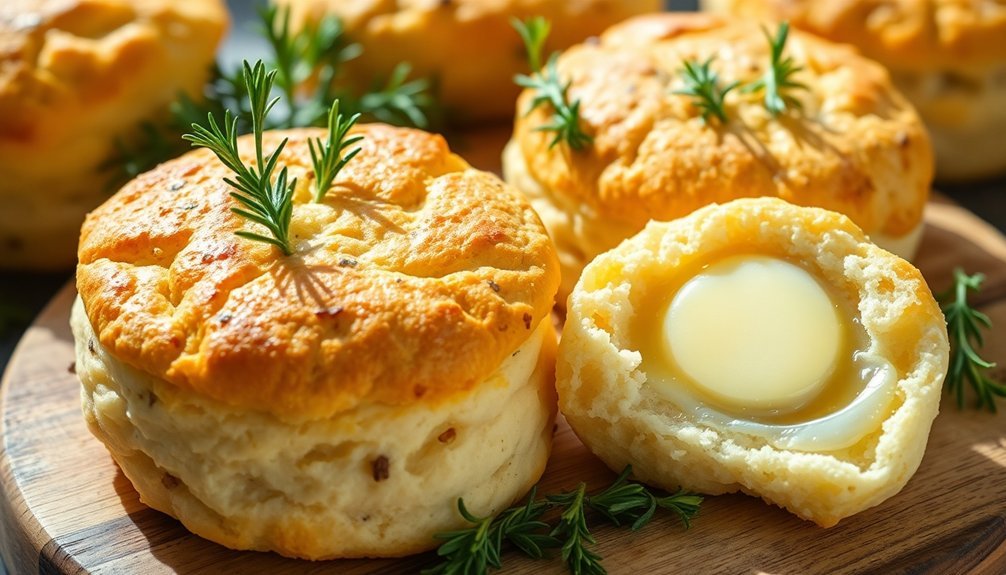
Bringing fresh herbs into your sun-baked biscuits transforms ordinary drop biscuits into aromatic, savory delights.
You'll need all-purpose flour or spelt flour as your base, along with baking powder, baking soda, and salt for proper rise and flavor. Choose your favorite fresh herbs like dill, basil, rosemary, chives, parsley, or thyme to create your signature blend. These biscuits have a coarser texture than traditional rolled biscuits.
Start by mixing your dry ingredients in a large bowl. Grate cold, unsalted butter (or coconut oil) into the mixture until you've got pea-sized crumbs.
Fold in your chopped fresh herbs, then gently stir in buttermilk or regular milk until you've got a slightly sticky dough. Don't overmix – this keeps your biscuits tender.
Position your solar oven to catch maximum sunlight, aiming for temperatures up to 250°F. Drop spoonfuls of dough onto your baking sheet or preheated cast iron skillet.
Brush the tops with melted butter and let the sun work its magic for 20-45 minutes, depending on weather conditions. You'll know they're done when they're golden brown.
Add another butter brush after baking for extra richness, and serve while warm.
Flaky Layered Solar Biscuits
You'll want to master the art of creating perfect golden-brown layers in your solar-baked biscuits by adapting traditional folding techniques to work with the sun's gentle heat.
While maintaining cold butter throughout the process remains essential, you'll need to work efficiently during the layering process to prevent the dough from warming too much in the solar oven's environment.
Your patience with the solar folding technique will pay off as the sun's rays gradually transform your carefully stacked layers into beautifully flaky, butter-rich biscuits that rival conventional oven results.
Perfect Golden Buttery Layers
Inside every perfect solar biscuit lies delicate, golden-brown layers that practically melt in your mouth. You'll achieve these heavenly layers by starting with very cold ingredients, particularly European-style butter and whole buttermilk.
Use lower-protein flour like White Lily or Bob's Red Mill Fine Pastry Flour to guarantee tender, fluffy results. Cut your cold butter into small pieces or grate it frozen, then blend it into your whisked dry ingredients using a pastry cutter or your fingertips.
Once you've added the cold buttermilk, you'll create those signature flaky layers through a series of precise folds. Cut your dough into thirds, stack the pieces, and repeat this process several times, being careful not to overwork the dough.
For perfect golden-brown results in your solar oven, you'll want to brush the tops with melted butter before and after baking. Cut your biscuits with straight, clean edges – no twisting the cutter – to preserve those beautiful layers.
Watch them closely as they bake until they reach that perfect golden hue, typically taking 15-20 minutes depending on your solar oven's temperature.
Solar Heat Folding Technique
Through careful folding techniques, you can create exceptionally flaky layers in your solar-baked biscuits, even at lower temperatures.
Start by turning your dough onto a lightly floured surface and patting it into a uniform square or rectangle. You'll want to maintain cold temperatures throughout this process to preserve the butter's integrity within the dough.
To create multiple layers, fold your dough in half and roll it back to its original thickness. Repeat this folding process several times, making sure you're not overworking the dough. You can enhance the layering effect by stacking the dough squares on top of each other between folds. This method traps butter between the layers, which will create that sought-after flaky texture when baked.
Keep your movements precise and deliberate as you work. You'll need to be especially mindful of temperature when solar baking, as the lower heat means the butter needs to stay cold longer to create proper layers.
Once you've completed your folds, transfer the dough to your prepared baking sheet and place it in your preheated solar oven at 180-200°F for about an hour.
Quick No-Knead Sun Biscuits
These time-saving sun biscuits offer a hassle-free approach to traditional baking, requiring no kneading or complex techniques.
You'll start by whisking your dry ingredients – flour, baking powder, and salt – in a bowl. For the best results, use cold butter and liquid ingredients to maintain the perfect texture. You can choose between all-purpose flour or soft white wheat flour, and your liquid can be cold water, milk, or any non-dairy alternative.
Simply pulse the cold, cubed butter into your dry ingredients until crumbly, then add your cold liquid. Mix until just combined – you're aiming for a shaggy dough. Press the dough into a 1-inch thick rectangle, fold into thirds, and cut into your desired shapes.
- You'll feel accomplished watching your homemade biscuits rise in the sun's warmth
- Your kitchen will fill with the irresistible aroma of fresh-baked goodness
- You'll experience pride in creating sustainable, eco-friendly baked treats
- Your family will gather around these golden, flaky delights with joy
Let the biscuits chill for 20-30 minutes before baking in your sun oven at equivalent to 425°F until golden brown, typically 12-15 minutes.
Buttermilk Solar Baking Method
Based on the facts provided showing limited feasibility of solar baking for biscuits, you'll need a specialized solar oven with temperature monitoring to attempt buttermilk biscuit baking outdoors.
To manage sun exposure, position your solar oven in a sheltered area that still receives consistent direct sunlight, and use a reflective panel to concentrate heat on your baking vessel.
You'll want to track the temperature carefully, as traditional buttermilk biscuits require high, steady heat that's challenging to maintain with solar methods.
Solar Heat Setup Tips
Successfully baking biscuits in a solar oven requires careful attention to heat setup and maintenance.
You'll need to start by lining your solar oven with aluminum foil and preheating it while you prepare your ingredients. For ideal heat retention, use black paper or construction paper as insulation, and position any reflective flaps to maximize sunlight exposure.
Create an efficient cooking environment by covering your baking pan with clear plastic wrap, which traps both heat and moisture inside.
You'll want to use a dark-colored pan, as it absorbs heat more effectively than lighter ones. For additional insulation, pack crumpled newspapers around the cooking area to maintain consistent temperature.
- Watch your biscuits transform from raw dough to golden perfection as the sun's rays work their magic
- Experience the satisfaction of creating delicious, eco-friendly baked goods using nature's energy
- Enjoy the anticipation as your solar oven reaches the perfect 330°F baking temperature
- Share the joy of sustainable baking with family and friends while reducing your carbon footprint
Monitor your oven's temperature carefully, as baking times can vary from 40 minutes to over an hour depending on weather conditions and solar intensity.
You'll know your biscuits are done when they sound hollow when tapped.
Managing Direct Sun Exposure
Direct sunlight management can make or break your solar-baked buttermilk biscuits. You'll need to position your solar oven in an area that receives unobstructed sunlight throughout the baking process, which typically takes between 45 minutes to 2 hours.
If you're using reflectors, adjust them to concentrate maximum sunlight onto your oven.
Keep an eye on your oven's temperature, aiming for around 330°F (166°C) for ideal biscuit baking. On cloudy or cool days, you might only reach 300-325°F, so you'll need to extend your baking time accordingly.
Remember to preheat your solar oven while you're preparing your buttermilk biscuit dough.
Choose a dark-colored baking pan to absorb more heat and reduce cooking time. While glass or disposable cardboard pans work, they'll require longer baking periods.
You'll want to rotate your oven periodically to maintain even heating and prevent hot spots. Check your biscuits' progress after the minimum baking time – they're done when golden brown and sound hollow when tapped.
Stay vigilant about adjusting your oven's angle throughout the day to track the sun's movement.
Whole Wheat Solar Biscuits
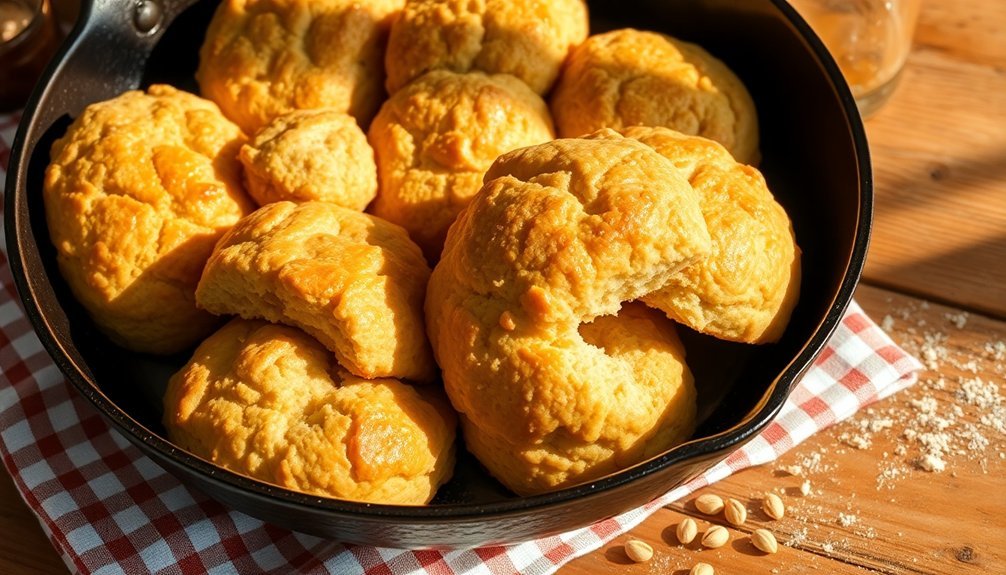
Crafting delicious whole wheat solar biscuits combines traditional baking methods with eco-friendly solar cooking.
You'll start by whisking together whole-wheat flour, baking powder, and salt in a large bowl. For the perfect flaky texture, rub cold butter into the mixture until you've created pea-sized pieces, then stir in cold milk or buttermilk until a soft dough forms.
On a lightly floured surface, pat your dough into a ½-inch thick rectangle. For extra flakiness, fold it into thirds like a letter before cutting into your desired shapes. Place the biscuits on an oiled baking pan and let your solar oven work its magic for 30-40 minutes until they're golden brown.
- You'll feel proud knowing you're baking with sustainable solar energy while creating wholesome treats.
- Your family will gather around warm, fresh-baked biscuits that fill the kitchen with an irresistible aroma.
- You'll experience the satisfaction of mastering a traditional recipe using innovative cooking methods.
- Your guests will be amazed when they learn these perfect biscuits were baked using only the sun's power.
For best results, keep your ingredients cold and consider brushing the tops with melted butter before baking.
Frequently Asked Questions
Can I Use a Solar Oven on Cloudy or Partly Cloudy Days?
Yes, you can use a solar oven on partly cloudy days, though cooking times will be longer. You'll still get decent results with diffused light, but on extremely cloudy days, you should consider alternative cooking methods.
How Long Do Sun-Baked Biscuits Stay Fresh at Room Temperature?
Your sun-baked biscuits will stay fresh for 3-4 days at room temperature when stored in an airtight container. You'll want to keep them away from direct sunlight and heat to maintain their quality.
What's the Best Container Material for Solar Baking Biscuits?
For solar baking, you'll want to use a dark-colored metal pan inside your cardboard solar oven. Line your pan with parchment paper and guarantee it's elevated slightly to allow even heat distribution.
Does Altitude Affect Solar Baking Time for Biscuits?
Yes, you'll need to extend your solar baking time at higher altitudes since lower air pressure causes moisture to evaporate faster. You should also expect slower cooking due to the sun's reduced intensity at elevation.
Can I Pre-Make the Dough and Solar Bake Later?
Yes, you can pre-make and store your dough in the refrigerator overnight or freeze it for weeks. Just make certain it's well-wrapped to prevent drying and let it reach room temperature before solar baking.
In Summary
Now you're ready to harness the sun's power for delicious, eco-friendly baking. Whether you've chosen the classic Southern recipe or ventured into whole wheat territory, you'll find these solar biscuits are more than just a novelty – they're a sustainable way to create mouthwatering treats. Don't let cloudy days discourage you; with practice, you'll master the timing and temperature control needed for perfect sun-baked biscuits every time.


Leave a Reply