During winter's low sun angle, you'll need to position your solar cooker at 60 degrees to maximize sunlight capture in the Northern Hemisphere. Place your setup directly facing south-facing windows, with reflectors angled at 90 degrees to catch those low rays. For best results, cook between 10 AM and 2 PM, and rotate your oven every 30 minutes to track the sun's path. Using dark cookware and aluminum foil can help maintain essential heat absorption when temperatures drop. Snow can actually work to your advantage as a natural reflector. These fundamentals just scratch the surface of winter solar cooking mastery.
Solar Cooking During Winter Months
While many assume solar cooking is limited to warm summer days, you can actually harness the sun's power for cooking throughout the winter months. Cold winter air with lower humidity allows for more direct sunlight penetration, which can lead to surprisingly fast cook times in well-insulated solar cookers.
You'll need to track the sun more carefully during winter due to its lower position in the sky. Place your cooker near a south-facing window for indoor cooking, or use snow as a natural reflector to maximize sunlight. Heat-retained baskets can help maintain temperatures when clouds occasionally block the sun.
To maintain efficiency, minimize opening the cooker and watch for steam as a cooking indicator. Consider using thermal mass like a brick to improve heat retention.
Even at temperatures below 10°F, quality solar cookers can prepare hot meals effectively when you follow these adaptations.
Optimal Sun Angles for Cooking
Achieving the best results with solar cooking requires understanding the sun's position and ideal cooking angles throughout the year.
In the Northern Hemisphere, you'll need to adjust your solar cooker to about 30 degrees in summer and 60 degrees in winter, while these angles reverse in the Southern Hemisphere.
Your cooking setup should match your latitude and season. Box cookers work well with steeper winter angles, while panel cookers perform better during summer months. Areas near the equatorial latitudes experience more efficient solar cooking due to more direct sun rays year-round.
If you're using a parabolic cooker, you'll need to make frequent adjustments every 20-30 minutes to track the sun.
For peak performance, preheat your cooker for 30 minutes and consider adding thermal mass like rocks or bricks.
You can boost efficiency by using reflective materials and black paint in your cooker's interior.
Adjusting Reflector Positions

You'll want to position your reflector at a steeper angle during winter months to capture the maximum amount of sunlight when the sun sits lower in the sky.
To optimize your cooking setup, tilt the reflector between 30-45 degrees and adjust it every few days to maintain proper alignment with the changing sun path. The transition between in-plane and out-of-plane solar movement occurs at 41.5 degrees which affects reflector positioning.
For the best heat retention, schedule your cooking between 10 AM and 2 PM when the sun's intensity peaks, even during winter's shorter days.
Optimal Light Capture Times
To create stunning winter food photography, mastering the timing and positioning of natural light is essential. You'll find the golden hour, occurring one hour after sunrise or before sunset, provides the softest and warmest light for your shots. This gentle illumination creates flattering highlights and balanced shadows on your winter dishes.
When you're dealing with harsh midday light, move your setup into shaded areas to achieve even lighting. If you can't avoid direct sunlight, use reflectors to bounce light onto your subject and soften harsh shadows.
During winter months, when the sun sits lower, you'll need to work quickly during the shorter golden hours. Position your shooting area near windows or use natural filters like tree lines to enhance the soft, warm qualities of winter light.
Maximizing Winter Sun Angles
Since winter sunlight arrives at lower angles, proper reflector positioning becomes essential for capturing stunning food photographs. You'll want to keep your reflector tilt between 10-15 degrees to avoid blocking direct light while maximizing bounce. Adjust your reflectors monthly as the sun's position changes, especially during winter solstice when the sun sits lowest.
| Position | Advantage | Best For |
|---|---|---|
| Bottom | Captures ground light | Dark plates |
| Side | Even illumination | Tall dishes |
| Top | Controls shadows | Flat layouts |
| Rotating | Dynamic control | Action shots |
For ideal results, use curved reflectors to enhance light distribution without casting harsh shadows. You'll achieve 30-35% better light capture in winter by positioning your reflectors strategically. Remember that east/west reflector placement works particularly well during morning and afternoon shoots.
Position For Heat Retention
Beyond capturing the perfect shot, proper reflector positioning also maximizes heat retention during winter food photography sessions.
You'll want to angle your reflector down about 15 degrees from horizontal, with its south end tilted downward. This position guarantees ideal coverage of your subject at midday, delivering 1.8 times more light energy.
For best results, align your reflector to fully illuminate your food subject at noon.
You'll need to maintain roughly 45-degree incidence angles to minimize glazing losses while maximizing light absorption.
Keep your reflectors slightly wider than your shooting area to improve coverage, especially during early morning and late afternoon shots.
Don't forget to regularly clear any snow or ice from your reflector surfaces to maintain consistent light reflection and heat retention throughout your winter shoots.
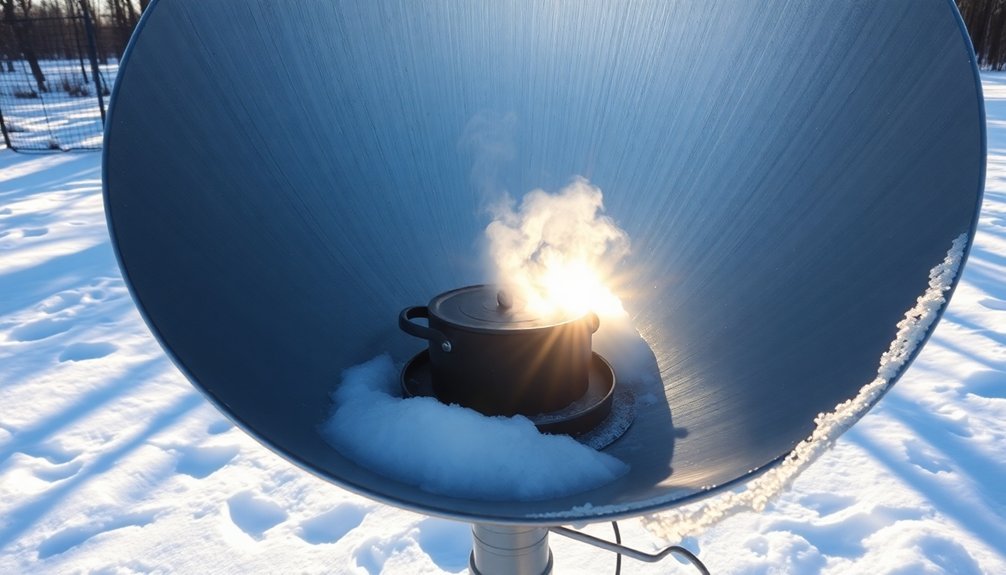
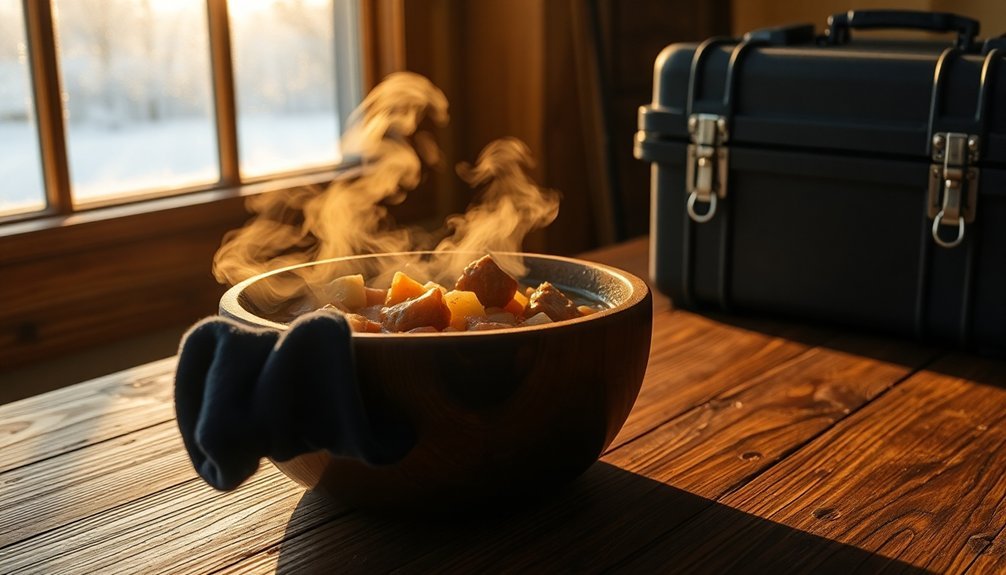
Winter Solar Oven Placement
Although winter sunlight may be less intense, proper solar oven placement can still yield excellent cooking results. You'll want to position your oven facing directly into the sun, setting the reflectors at a 90-degree angle to capture those low winter rays effectively.
Keep your oven in a wind-protected spot and secure it properly to prevent tipping. You'll need to create a tight seal using aluminum foil and plastic wrap to maintain heat, while dark-colored cookware and black paper will help absorb the available sunlight.
Don't forget to monitor the temperature with a thermometer to verify it stays between 150-225°F for safe cooking.
For best results, choose a sheltered location and adjust your reflector flaps throughout the day to maintain ideal sunlight capture, creating a parabolic effect that focuses heat onto your cooking area.
Maximizing Low Sunlight Exposure
When garden spaces receive limited winter sunlight, strategic planning becomes essential for maximizing exposure.
You'll want to position your garden on south-facing slopes whenever possible, as these areas capture the most precious winter rays. Remove any obstacles blocking southern exposure, like overgrown trees or structures.
You can amplify available light by incorporating reflective surfaces into your garden design.
Try placing mirrors, aluminum foil, or light-colored materials on walls and fences to bounce sunlight back onto your plants.
Don't forget to track the sun's movement using charts or online tools to identify your garden's brightest spots.
For areas that receive minimal light, opt for shade-tolerant varieties like leafy greens and root vegetables.
Remember to position taller plants on the northern side to prevent them from casting shadows on shorter ones.
Heat Retention Techniques
To keep your winter meals piping hot, you'll want to invest in proper insulated cooking equipment like vacuum-sealed containers or foam-based units that can maintain temperatures for 8-10 hours.
Using steam-lock lids on your cooking vessels creates an airtight seal that prevents heat from escaping while your food continues to cook.
You can enhance these methods by pre-warming your containers and filling them to maximum capacity, minimizing air space that could compromise heat retention.
Insulated Cooking Equipment Usage
Since proper insulation techniques can make or break your winter cooking success, understanding how to use insulated cooking equipment effectively is essential.
You'll get the best results from double-walled thermoses with vacuum insulation, especially those made of stainless steel with leak-resistant lids.
To maximize your insulated cooking equipment's performance:
- Preheat your container with hot water before adding food to maintain ideal temperature
- Fill containers to capacity, as air spaces reduce heat retention considerably
- Keep foods above 140°F or below 40°F to prevent bacterial growth
For extended outdoor cooking, consider integrating your insulated containers with solar cookers or using foam-based units like Wonder Ovens.
These methods can keep your food hot for 8-10 hours while reducing fuel consumption, making them perfect for winter meal preparation.
Steam-Lock Lid Methods
Building on proper insulation practices, mastering steam-lock lid methods can dramatically boost your winter cooking efficiency.
You'll want to keep lids tightly sealed during boiling, steaming, and braising to trap valuable heat and moisture. This simple technique accelerates cooking times while reducing energy consumption.
When you're steaming vegetables or braising tough cuts of meat, a well-fitted lid creates the perfect environment for even heat distribution.
You'll notice your food cooks more uniformly as the trapped steam circulates throughout the pot.
For solar cooking applications, which are challenging during winter months, proper lid usage becomes even more essential.
You'll maximize every bit of available heat by maintaining a tight seal, allowing your food to continue cooking even when sunlight diminishes.
Solar Cooking Time Adjustments
While winter's low sun angles present unique challenges for solar cooking, making proper timing adjustments can help you maintain efficient meal preparation. You'll need to compensate for shorter daylight hours by starting your cooking earlier and planning for extended cooking times.
- Position your cooker between 11:00 am and 3:00 pm when UV rays are strongest, but remember to preheat for 30 minutes before adding food.
- Rotate your solar oven every half hour to track the sun's movement, ensuring maximum exposure and reducing overall cooking time.
- Tilt your cooker at steeper angles during winter months to capture more direct sunlight, especially with box-style cookers.
For best results, you'll find that frequent monitoring and adjustments throughout the cooking process are essential to maintain consistent temperatures.
Snow and Reflection Benefits
You'll find that cooking outdoors in winter offers unique advantages due to snow's remarkable ability to reflect 80-90% of sunlight back into your cooking space.
This natural light enhancement can work to your benefit when positioning your outdoor cooking setup, as the snow's reflective properties act like a secondary light source.
When you're cooking with natural light, you can maximize these reflective benefits by strategically placing your food preparation area where it catches both direct sunlight and the snow's reflected light.
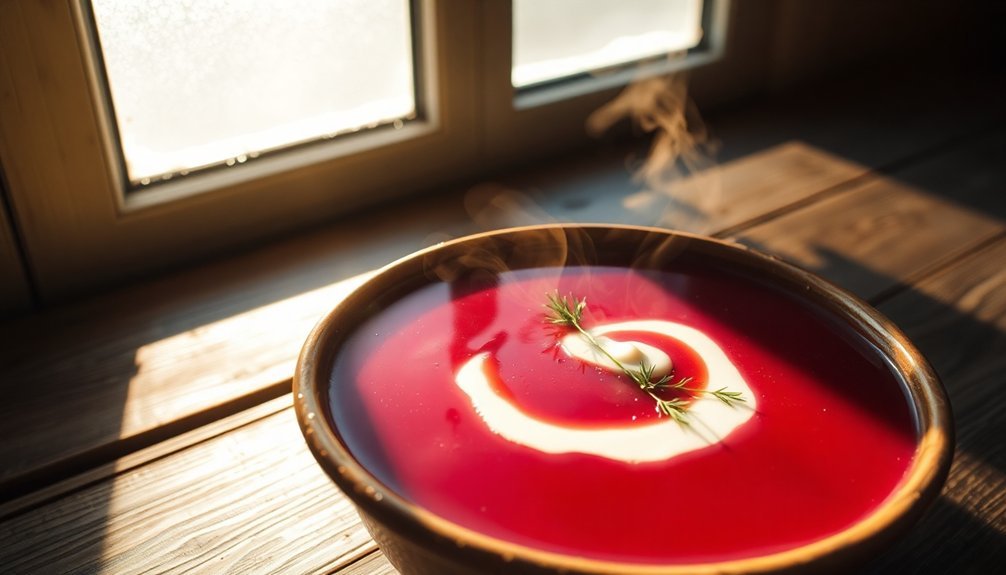
Natural Light Enhancement
Winter's pristine snowfall creates a natural light reflector that food photographers can leverage for stunning winter dish photography.
You'll find that snow's reflective properties can greatly enhance your winter food shots when you position your setup strategically near windows.
- Set up your shooting area near a north-facing window to capture consistent, diffused light bouncing off the snow, and use white foam core to further amplify this natural reflector.
- Place sheer curtains or muslin cloth between your subject and window to soften any harsh midday glare while maintaining the snow's reflective benefits.
- Position your food to catch the enhanced side lighting that occurs when sunlight bounces off snow banks, creating a natural fill light that reduces harsh shadows.
Complement these techniques with reflective surfaces like mirrors or glass tiles to maximize winter's unique lighting conditions.
Snow Reflections While Cooking
Leveraging snow's natural reflective properties can dramatically enhance your food photography setup during the cooking process itself. You'll find that snow acts as a natural reflector, bouncing soft, diffused light through your kitchen windows and onto your culinary subjects.
Position your cooking station near a window where snow reflects natural light inside. You can enhance this effect by slightly overexposing your shots to maintain the bright, clean aesthetic that snow reflection provides.
If you're shooting steaming dishes against snowy backgrounds, use a faster shutter speed to capture both the steam and the snow's reflective qualities clearly. Don't forget to adjust your white balance to prevent the blue tint that snow reflection often creates.
For best results, use a polarizing filter to control unwanted glare while maintaining the snow's natural illuminating properties.
Cold Weather Equipment Protection
When temperatures plummet, protecting your food service equipment becomes critical for maintaining operations and preventing costly damage.
You'll need to review manufacturer specifications carefully and verify all components are rated for cold weather operation.
- Shield your electrical components by using insulated enclosures with heating options for sensitive equipment, and don't power cycle units in extreme cold to avoid startup issues.
- Guard against moisture damage by applying weatherproofing solutions like cold shrink tubing and dielectric spray on exposed connections.
- Keep your power supplies warm and consider reducing power on certain units to enhance their longevity in harsh conditions.
Remember to check local temperature forecasts and wind chill factors when planning your equipment protection strategy.
Use protective covers and verify all cables are properly sealed against winter elements.
Essential Winter Solar Tools
Maintaining solar panels during snowy months requires specialized tools to guarantee peak performance and prevent damage.
You'll need soft brushes and brooms to gently clear snow without scratching your panels' surfaces. For those hard-to-reach rooftop installations, telescoping snow removal tools let you safely extend your reach while protecting your investment.
Before winter hits, consider applying anti-snow sprays or protective coatings to your panels. These create a slick surface that prevents snow from sticking and enhances natural snow shedding.
In areas with heavy snowfall, heating cables or roof heating systems can be your best defense. While they'll add to your energy consumption, these automated systems activate at preset temperatures to melt snow and ice, ensuring your panels continue producing power throughout the cold season.
Solar Energy Collection Methods

While solar energy collection has evolved considerably over the years, today's systems fall into four main categories: flat plate collectors, evacuated tubes, line focus collectors, and point focus collectors.
You'll find flat plate collectors most common in home applications, using metal absorber plates with special coatings to heat water efficiently.
For superior performance in cold conditions, you'll want to take into account evacuated tube collectors, which use vacuum-insulated glass tubes to minimize heat loss.
Meanwhile, industrial applications rely on concentrated solar power through:
- Parabolic troughs that focus sunlight onto receiver pipes
- Solar dishes that concentrate energy to a single point
- Large arrays of collectors that track the sun's movement
These concentration methods can achieve temperatures above 750°F, making them ideal for power generation and industrial processes.
Temperature Control Strategies
To maximize comfort and energy efficiency during winter, you'll need a thorough approach to temperature control.
Start by programming your thermostat to maintain 67-70°F when you're home and 60-65°F during sleep or away hours. This simple adjustment can cut your heating costs by 10%.
Make your home more heat-efficient by sealing gaps around windows and doors with weather stripping.
Hang heavy curtains and place rugs on hard floors for extra insulation. Set your ceiling fans to rotate clockwise at low speed, pushing warm air down.
You'll want to close vents in unused rooms and keep furniture away from registers for ideal airflow.
Don't forget to dress in layers and invest in warm bedding instead of cranking up the heat.
Small changes in your habits can lead to significant energy savings.
Frequently Asked Questions
Can Solar Cooking Be Combined With Traditional Winter Camping Cooking Methods?
Yes, you can combine solar cooking with traditional winter camping methods. You'll need to start solar cooking during peak sun hours, then shift to campfires or stoves to complete meals when sunlight diminishes.
How Do Different Cloud Patterns Affect Solar Cooking in Winter?
You'll find thick winter clouds completely block solar cooking, while thin clouds still let you cook but less efficiently. Near the equator, you'll face more cloud challenges during winter months than in higher latitudes.
What Backup Power Sources Work Best With Solar Cooking Equipment?
You'll get the best backup for solar cooking with lithium-based solar generators, as they're efficient and portable. They'll power your electric cookers during cloudy periods, while direct PV-to-load systems offer simple alternative solutions.
Are There Specific Foods That Should Never Be Solar-Cooked in Winter?
You shouldn't solar-cook raw seafood, dairy products, or foods requiring precise temperature control in winter. It's also best to avoid dishes that need quick searing or crispy textures due to limited heat consistency.
How Does Altitude Affect Solar Cooking Efficiency During Winter Months?
You'll get better solar cooking efficiency at higher altitudes during winter because there's less atmospheric interference. The clearer mountain air allows more direct sunlight to reach your cooker, improving its performance greatly.
In Summary
You'll find that successful winter solar cooking requires adapting to the sun's lower position and shorter days. Remember to angle your reflectors higher, position your oven for maximum exposure, and protect your equipment from harsh conditions. Don't let cold weather discourage you – with proper adjustments and tools, you can still harness solar energy effectively, even during the winter months.


Leave a Reply