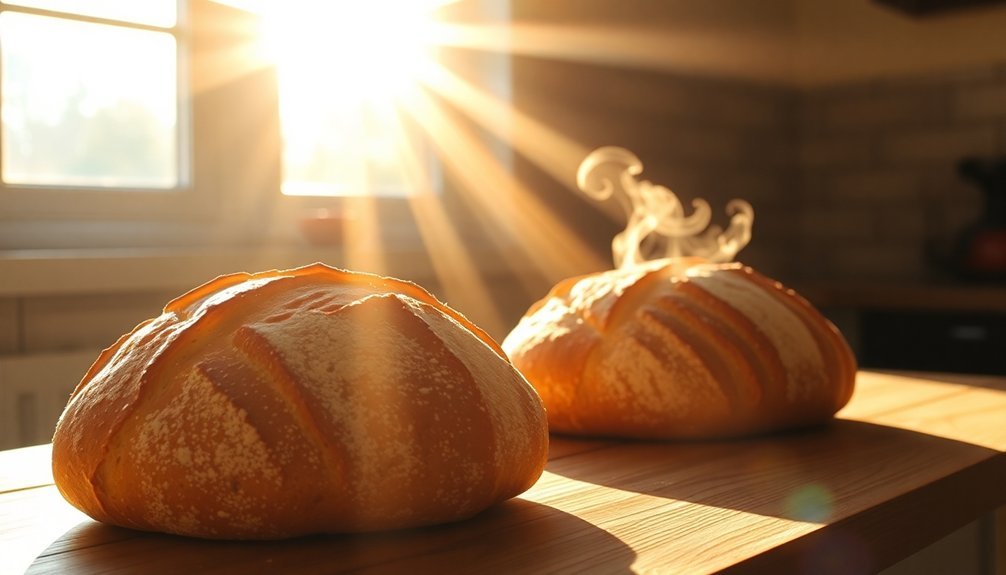
For perfect solar-baked bread, you'll want to position your solar oven at a 30-45 degree angle during peak sunlight hours between 11 AM and 3 PM. Place your oven on a flat, stable surface facing the sun's path, and adjust it every 30 minutes to maintain ideal exposure. You'll get the best results by using dark bakeware and keeping your reflector surfaces clean to maximize heat absorption. In summer, use colder water and shorter fermentation times; in winter, opt for warmer water and longer proofing. Understanding a few more key positioning techniques can transform your solar bread from good to exceptional.
Understanding Solar Angles for Baking
How can you harness the sun's power to bake the perfect loaf of bread?
It's vital to understand that the sun's position directly impacts your baking success. You'll get ideal results when the sun is at its peak intensity, typically around noon, with clear skies overhead.
You'll want to position your solar oven to capture maximum sunlight, and you'll need to adjust it throughout the day as the sun moves. A thermometer monitor will help you ensure the internal temperature reaches 190°F for properly baked bread.
Remember, cloud cover can greatly reduce your oven's temperature, so choose clear days for your baking projects.
For consistent results, you'll need to rotate your oven's turntable every 15 minutes to track the sun's movement.
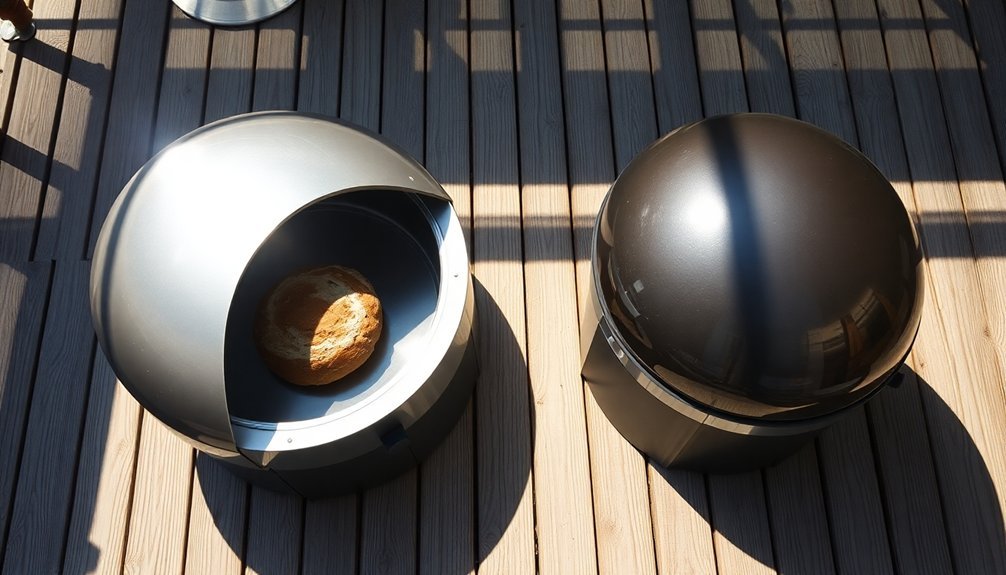
Positioning Your Solar Oven
When positioning your solar oven, location and timing are essential for successful bread baking.
You'll want to set up between 11:00 AM and 3:00 PM when the sun's intensity peaks, though you can start earlier during winter months. Place your oven on a dry, level surface and face it directly into the sun so there's minimal shadow. Your oven should be positioned at an angle equal to your latitude for optimal efficiency.
To maintain ideal baking temperatures, adjust your oven's position every 20-30 minutes to track the sun. Orient the shorter front panel eastward for noon baking or westward for evening baking.
Don't forget to stabilize the sides with bricks on windy days and create an air gap under your bread pan using a wire rack. Keep your reflector surfaces clean and use dark-colored bakeware to maximize heat absorption.
Tracking the Sun's Path
Understanding the sun's path is essential for maximizing your solar oven's efficiency.
You'll need to track the sun's movement throughout the day to maintain ideal baking temperatures. While professional solar systems use complex tracking mechanisms, you can manually adjust your solar oven every 30 minutes to follow the sun's path from east to west. Active tracking systems typically use light sensors and motors to automatically adjust their position.
For the best results, position your oven to capture both vertical and horizontal sun movements, similar to how dual-axis trackers work.
Even when the sun is at lower angles (around 10° above the horizon), you can still achieve half the baking power of noon-time levels.
Remember that you don't need perfect alignment – positioning your oven within ± 5° of the sun's direct beam will capture over 99.6% of available solar energy.
Seasonal Adjustments for Perfect Bread
You'll need to adjust your baking methods dramatically as the seasons change, with summer requiring cold water and reduced fermentation times to combat higher temperatures.
During spring's moderate weather, you can rely on room temperature ingredients and standard rising times for consistently good results.
In winter, you'll want to compensate for the lower temperatures by using warmer water and allowing for longer proofing periods as the sun sits lower in the sky.
Summer Baking Temperature Control
Mastering bread baking during summer months requires careful attention to temperature control and moisture levels.
You'll need to adjust your liquid content and be mindful of kitchen conditions to achieve ideal dough temperature between 75°F and 78°F.
Start by reducing your water content by about 10% to account for increased humidity, as flour naturally absorbs moisture from the air.
Use cooler liquid temperatures in your hot summer kitchen to offset the ambient warmth.
Remember that kneading adds heat to your dough – about 1°C per minute – so factor this into your calculations.
Monitor your kitchen's exposure to sunlight, as window placement can greatly affect room temperature.
Consider your work surface too – marble stays cooler than wood, making it ideal for summer bread making.
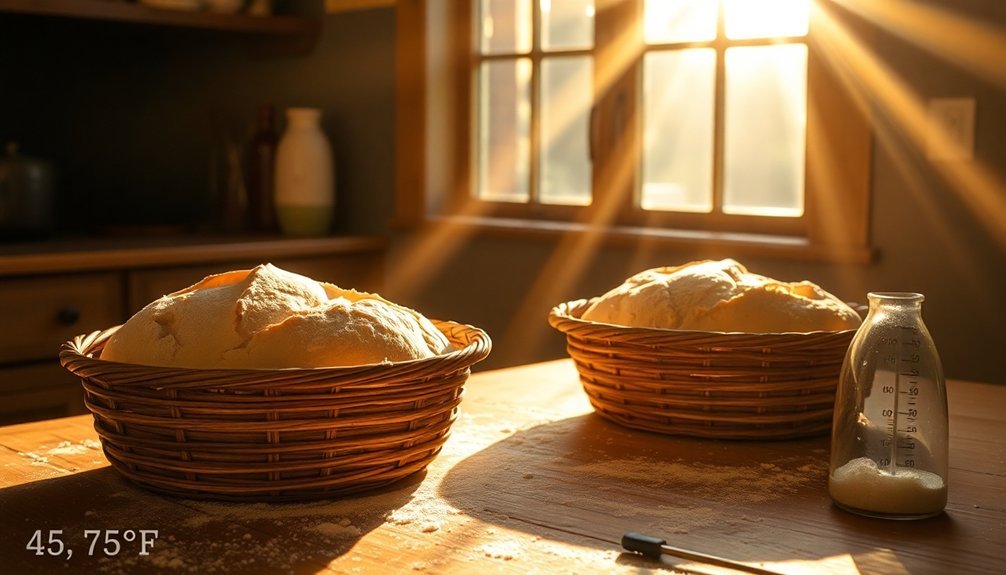
Spring Weather Rising Times
During spring's variable weather patterns, bread dough rising times require careful monitoring and adjustment. You'll need to adapt your fermentation schedule based on daily temperature fluctuations. When temperatures rise, reduce hydration by 10% and use cold water to maintain dough integrity.
| Temperature Range | Rising Time | Hydration Adjustment |
|---|---|---|
| Below 65°F | 4-5 hours | Standard recipe |
| 65-70°F | 3-4 hours | Reduce by 5% |
| 70-75°F | 2-3 hours | Reduce by 7% |
| 75-80°F | 1.5-2 hours | Reduce by 10% |
| Above 80°F | 1-1.5 hours | Reduce by 12% |
Watch for the dough to increase 1.5-2x in size during bulk fermentation. Test gluten development using the window-pane method before shaping. If your kitchen's warm, consider using ice-cold water and reducing pre-fermented flour percentages to slow fermentation.
Winter Sun Position Adaptations
While winter's shorter daylight hours pose challenges for bread baking, adapting your methods to the sun's lower position can help maintain consistent results.
You'll need to focus on maintaining proper dough temperature and fermentation despite the colder conditions. Start by warming your water to 75-80°F before mixing to achieve ideal dough temperature.
You can create a warm proofing environment by using your oven with just the light on, or by placing your dough near a heat source like a water heater. Don't forget to use containers with tight-fitting lids to prevent your dough from drying out in winter's dry air.
If you're noticing slower fermentation, increase your pre-fermented flour percentage and allow extra time for bulk fermentation.
Monitor your dough's progress using the poke test, though it may be less reliable in cooler conditions.
Weather Impact on Angle Choice
Because weather conditions greatly affect bread fermentation, the ideal sun angle for baking must adapt to these environmental factors.
You'll need to take into account humidity levels, temperature, and atmospheric pressure when positioning your bread for sun exposure. On humid days, choose a steeper angle to minimize moisture absorption, while in dry conditions, a gentler angle helps retain essential hydration.
- High humidity requires 45-60 degree angles to prevent excessive moisture absorption and maintain proper fermentation rates
- During cold weather, position bread at 30-40 degrees to maximize sun exposure and maintain peak yeast activity
- For high-altitude baking, use shallow 20-30 degree angles to control rapid rising and prevent collapse
Monitor fermentation closely as sun intensity varies with weather patterns, and don't hesitate to adjust angles throughout the baking process for best results.
Temperature Control Through Positioning
Since temperature control is essential for successful sun-baked bread, proper positioning of your sun oven can make or break the final result.
You'll want to aim for a preheating temperature of 300-350°F by facing your oven south and adjusting its angle to capture direct sunlight.
Keep in mind that you'll need to reposition your oven throughout the day to maintain ideal temperatures. Even on partly cloudy days, you can achieve good results by being strategic with positioning – just expect longer baking times.
When you're working with lower temperatures (225-250°F), spraying a light mist of water on the bread will help achieve that golden-brown crust.
Remember to preheat your oven higher than your target temperature, as opening the door will cause some heat loss.
Common Solar Oven Placement Mistakes
Despite proper positioning being essential for solar baking, many beginners make preventable mistakes that compromise their results.
You'll need to regularly adjust your oven's angle to match the sun's position and check alignment hourly for ideal heating. When you don't account for the sun's movement, you'll miss peak cooking temperatures and waste valuable daylight.
Common placement errors to avoid:
- Setting up in areas with partial shade from trees or buildings
- Not using reflectors properly to direct sunlight into the cooking chamber
- Failing to orient the oven along the east-west axis to capture maximum sunlight
Remember to smooth out your reflective surfaces and position them to bounce light directly into the cooking area, not toward the ground.
Start cooking early to utilize the full day's solar potential.
Frequently Asked Questions
Can I Bake Bread in My Sun Oven During Winter Months?
Yes, you can bake bread in your sun oven during winter. You'll need to adjust the T-leg fully, track the sun every 30 minutes, and maintain temperatures between 225-375°F for successful baking.
How Does Altitude Affect the Ideal Sun Angle for Bread Baking?
At higher altitudes, you'll need to adjust your sun oven's angle more frequently, as thinner air affects heat retention. You should increase the angle by 5-10 degrees to compensate for reduced atmospheric density.
What Happens if Clouds Appear Halfway Through the Baking Process?
Don't worry about clouds appearing during baking. Your oven maintains consistent temperature regardless of external weather. Keep the door closed and continue baking according to your recipe's time and temperature guidelines.
Should I Adjust Proofing Time Based on Sun Intensity?
Yes, you'll need to adjust your proofing time based on sun intensity. When it's brighter, reduce proofing time as warmth speeds up yeast activity. In less intense light, allow more time for proper fermentation.
Can Reflective Surfaces Near the Sun Oven Affect Bread Quality?
Yes, reflective surfaces near your sun oven can improve your bread's quality by increasing temperature and heat flux. You'll get better crust color, more even baking, and improved texture when you use them properly.
In Summary
You'll get the best results from your solar bread baking when you maintain a 90-degree angle between your oven's reflective surface and the sun's rays. Keep tracking the sun's movement and adjust your oven every 30 minutes for ideal heat. If you've positioned everything correctly and considered seasonal angles, weather conditions, and proper temperature control, you'll enjoy perfectly baked solar bread every time.


Leave a Reply