You'll need a solar oven with adjustable mirrors and a thermometer to bake perfect whole wheat bread using the sun's energy. Position your oven to maintain 350-375°F, adjusting it every 15 minutes to track the sun's movement. Activate your yeast in 100-110°F water and let the dough rise at 86-95°F until doubled in size. Use dark, cast iron pots with tight lids for stable temperatures, then bake for about 50 minutes until golden brown. Check doneness by tapping the bottom for a hollow sound and confirming the internal temperature reaches 190-200°F. Our expert techniques will help you master the art of solar bread baking.
Why Solar Bread Baking

Many bakers are turning to solar bread baking for compelling economic and environmental reasons. You'll notice immediate savings on your fuel costs, as solar ovens can slash up to 80% of your bakery's fuel expenses.
If you're running a commercial operation, you can save approximately 10 tonnes of diesel monthly, markedly reducing your production costs.
You're not just saving money – you're also protecting the environment. By switching to solar ovens, you'll eliminate pollutants from diesel generators and reduce your carbon footprint. You'll achieve consistent 180°C baking temperature with proper monitoring and equipment.
You'll help conserve valuable resources and support your country's renewable energy goals for 2030.
You'll find solar bread baking particularly practical during summer, as it won't heat up your house like conventional ovens.
If you live in an area with frequent power outages, you'll appreciate the independence from electricity. The process is straightforward, and you can bake various types of bread, from whole wheat to sourdough.
Your community benefits too – lower production costs mean more affordable bread for everyone, ensuring stable food availability even during economic or energy crises.
Essential Tools and Equipment
You'll need a solar concentrator system with mirrors and a thermometer to harness the sun's energy for baking, along with a backup charcoal burner for cloudy days.
Your baking toolkit must include various bread pans, nonstick cooking spray, and a set of measuring cups and spoons for precise ingredient portions.
A bread mixer or hand kneading tools will help you achieve the right dough consistency, while a floured work surface provides space for final dough preparation.
Set up your Lytefire in a suitable space that provides 7 meters in diameter of flat ground to ensure optimal solar concentration.
Basic Solar Equipment Needs
In order to bake whole wheat bread using solar power, several vital pieces of equipment must be assembled first.
You'll need a reliable solar oven, such as a Lytefire PRO or Global Sun Oven, that can reach temperatures of at least 350°F. These ovens come with user manuals and safety notices that you'll want to review thoroughly before use. You can achieve bread baking success by choosing either box cookers, panel cookers, or parabolic cookers.
Your solar oven's concentration system should include adjustable mirrors or reflectors to maximize sunlight capture. You'll need to position these carefully for ideal sun alignment throughout the baking process.
Since direct sunshine is essential, you'll want to protect your equipment from harsh weather by having a storage plan ready.
For the actual baking process, you'll need specific accessories: oven trays for placing your dough, baking grids for even heat distribution, and loaf pans for shaping your bread.
Don't forget to include oiled plastic wrap for covering the dough during rising periods. A reliable thermometer is vital for monitoring your bread's internal temperature.
Remember that you'll need to preheat your solar oven before baking, and cooking times will vary based on weather conditions.
Measuring and Mixing Tools
The three most essential measuring tools for baking whole wheat bread start with a reliable digital kitchen scale.
You'll want one that's accurate to 1 gram and has a high weight capacity of at least 8 kilograms. Look for features like a tare button and baker's percentage capability to guarantee precise measurements every time.
Your second essential tool is an instant-read thermometer to monitor dough temperature, keeping it within the ideal range of 75-78 degrees. This precision helps you achieve consistent results batch after batch.
Third, you'll need proper mixing equipment – either a dough whisk, stand mixer with dough hook, or bread mixer for larger batches.
For the scale, choose one with a removable stainless steel tray for easy cleaning and a backlit LCD display for clear readings. Most models run on batteries or AC adapters, and some feature adjustable auto-off functions to conserve power.
While measuring cups and spoons can serve as backup tools, they're less precise than a scale. Remember, accuracy in measurements is essential for developing reliable techniques and perfecting your recipes.
You'll also want to keep nonstick cooking spray handy for your loaf pans.
Selecting Your Flour Mix
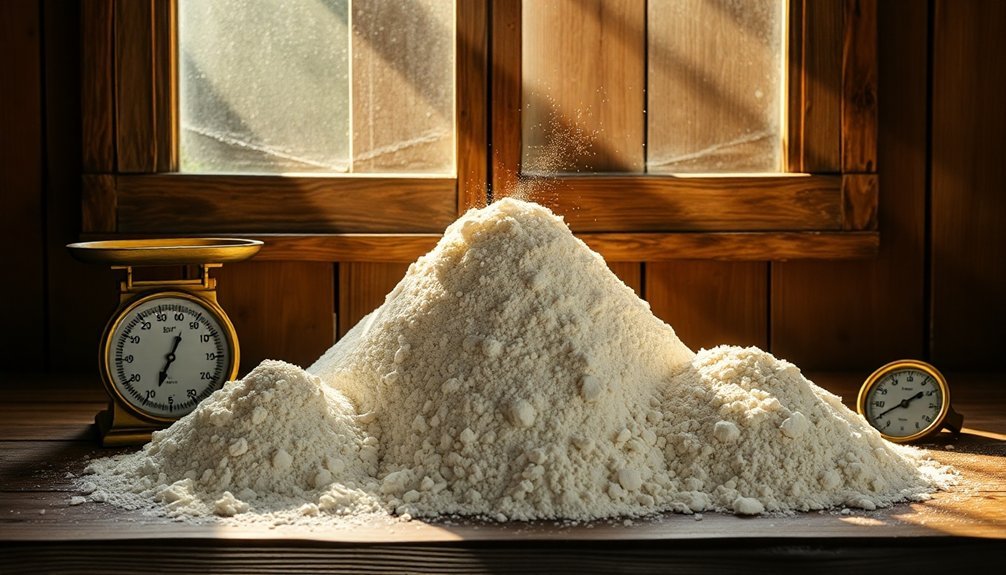
Selecting the right flour mix is essential for successful whole wheat bread baking. You'll need to understand that whole wheat flour behaves differently from white flour, absorbing more water and producing a denser texture.
When you're starting out, it's best to blend whole wheat flour with white flour to create a more manageable dough that still offers nutritional benefits.
For the best results in your bread baking, consider these key points:
- Choose hard wheat flour for its higher protein content, which helps develop better gluten structure and results in a superior rise.
- Start with a 50/50 mix of whole wheat and white flour, then gradually increase the whole wheat portion as you become more comfortable with the dough's behavior.
- Account for additional water needs – you'll typically need 2-3 tablespoons more water per cup of whole wheat flour compared to white flour.
- Allow your dough to rest for 20-30 minutes after initial mixing to let the bran fully hydrate.
If you're using freshly milled whole wheat flour, you'll need to adjust your kneading technique and be gentler with the dough to prevent tearing the developing gluten structure.
Proper Yeast Management
To get the most from your yeast in whole wheat bread, you'll need to activate it in water between 100-110°F and watch for bubbling to confirm its viability.
When proofing your dough, monitor it closely and consider using an aliquot jar, as whole wheat's higher nutrient content speeds up fermentation.
Keep your yeast fresh by storing it in an airtight container in the refrigerator, and always check the expiration date before use.
Yeast Activation Temperature Guide
Proper temperature control makes all the difference when activating yeast for whole wheat bread. You'll need to maintain temperatures between 100-110°F (38-43°C) to guarantee your yeast activates effectively without dying. This sweet spot creates the perfect environment for the yeast to dissolve and begin its essential work in your bread dough.
For whole wheat bread, you'll want to follow these critical temperature guidelines:
- Test your water temperature with a digital thermometer before adding yeast – it should feel pleasantly warm but not hot to your touch.
- Never use water above 130°F (55°C), as this will kill your yeast cells instantly.
- Don't use cold water below 100°F (38°C), as it won't properly activate the yeast and can make your dough sticky.
- Maintain a consistent temperature throughout the activation process for best results.
If you're using instant yeast in your whole wheat bread, you can mix it directly with dry ingredients at slightly higher temperatures (120-130°F).
Remember that during the fermentation phase, your dough will perform best at 80-90°F (27-32°C). Small temperature variations can appreciably impact your bread's final quality, so precision matters.
Proofing For Best Results
After mastering the right temperature for yeast activation, your next step focuses on proofing management. You'll need to maintain an ideal temperature of 30-35°C (86-95°F) during the proofing process to guarantee your yeast performs at its best.
Watch your whole wheat dough carefully, as it ferments faster than white flour due to its higher nutrient content. Plan for a 1.5-2 hour proofing period, but don't rely solely on time – look for visual cues of readiness. You'll want to avoid overproofing, which can weaken the gluten structure and reduce your bread's volume.
For cold fermentation, maintain your dough at 24°C (75°F) for 12-24 hours to improve quality and control fermentation pace. Remember to oil and cover your dough to maintain proper humidity during proofing.
Since whole wheat flour requires higher hydration due to its bran content, you'll need to handle the dough more gently to prevent tearing.
If you're using sourdough cultures alongside your yeast, you'll benefit from reduced acrylamide content, especially when using specific strains like L. rhamnosus. This combination creates an ideal microbial balance for successful fermentation.
Storing Yeast Properly
Maintaining the viability of your yeast through correct storage plays an essential role in successful bread baking.
You'll find several effective methods to preserve your yeast's liveliness, ensuring it's ready whenever you need to bake.
For home bakers, storing yeast with glycerin offers a reliable solution. Mix your yeast with 10% glycerin before freezing it, and you'll extend its shelf life considerably. If you're using mason jars, remember to leave enough headspace for off-gassing to prevent pressure buildup.
- Store yeast in distilled or sterile water at room temperature for up to three years by allowing it to settle and decanting the supernatant.
- Use silica gel desiccation by heating it to 177°C, cooling it, and mixing your yeast with a milk-water solution.
- Keep yeast in the refrigerator for months or freeze it with glycerin for years.
- Perform acid washing with tartaric acid every sixth to eighth use to maintain yeast health and eliminate bacteria.
When storing your yeast culture, always start with fresh, healthy cells to maximize storage success.
You'll find that proper storage techniques greatly impact your bread's quality and consistency.
Mastering Dough Hydration

Understanding dough hydration stands at the heart of successful whole wheat bread baking. When you're working with whole wheat flour, you'll need to increase your hydration levels by 5-15% compared to white flour recipes. This is because the bran and germ in whole wheat flour absorb more water than refined flour.
To calculate your hydration level, use Baker's Percentages – if you're using 1000g of whole wheat flour, you'll need about 780g of water for 78% hydration. You'll notice that higher hydration dough feels stickier and requires more careful handling, but it'll reward you with a softer texture and more open crumb structure.
To manage high-hydration whole wheat dough effectively, you'll want to incorporate techniques like coil folds to develop proper structure. You can also try the double hydration method or add ingredients like chia seeds to help your dough hold more water.
Don't rush the absorption process – let your flour fully hydrate before folding. If you're struggling with structure, consider adding essential wheat gluten or a tiny amount of vitamin C to strengthen the dough.
Kneading Techniques That Work
The art of kneading transforms properly hydrated whole wheat dough into a strong, well-structured foundation for your bread. You'll need to master both hand kneading and stand mixer techniques to achieve the perfect texture.
When kneading by hand, work on a well-floured surface, pushing the dough outward with your palm heels before folding it back toward you.
For stand mixer kneading, you'll want to run it for at least 8 minutes to develop proper gluten structure. Keep the dough slightly tacky but not overly sticky, and avoid adding too much flour, which can lead to crumbly bread.
- Push dough down and outward with palm heels, then fold toward you and rotate 45 degrees
- Monitor dough temperature and consistency throughout the process
- Perform the windowpane test to check if you've kneaded enough
- Let dough rest for 5 minutes if it becomes too sticky
You'll know you've achieved proper kneading when the dough feels smooth and supple. Keep a measuring cup of flour nearby for dusting, and remember that whole grain doughs typically require more extensive kneading than white flour varieties.
Perfect Rise and Proof

You'll want to keep your dough at an ideal temperature between 70-77°F (21-25°C) by using warm water, covering with a damp cloth, or placing it in a slightly warmed oven.
Watch your dough carefully during proofing, looking for visual cues like doubling in size and responding to a gentle finger poke test, which typically takes 1.5-2 hours for whole wheat.
Create an optimal rising environment by protecting your dough from drafts, maintaining consistent warmth, and using a clear container to monitor the dough's progress from all angles.
Dough Temperature Control Methods
Mastering dough temperature control sets the foundation for perfectly risen whole wheat bread. You'll want to aim for a final dough temperature between 24C and 26C, adjusting based on your kitchen's ambient conditions.
While you can't control every factor, understanding how to manage liquid temperatures will give you the most control over your dough.
To calculate your ideal water temperature, use this formula: ((DDT-1) x 3) – Air – Flour = Water. For example, if you're targeting 25C in a kitchen that's 27C with flour at 25.5C, you'll need your water at 19.5C.
- Use water between 120°F to 130°F when activating yeast in your whole wheat dough, as it requires higher temperatures than white flour.
- Keep your mixing bowl covered during rest periods to maintain stable temperatures.
- Add ingredients like salt and oil after initial mixing to prevent temperature fluctuations.
- Consider using a stand mixer with a dough hook to maintain consistent temperature throughout kneading.
Remember that manual mixing will slightly warm your dough, so adjust your liquid temperature accordingly.
When working in extremely warm conditions, subtract 1-2 degrees from your calculations for ideal results.
Monitor Proof Time Carefully
Building on proper dough temperature control, successful whole wheat bread baking relies heavily on accurate proofing times. You'll need to monitor your dough carefully, as whole wheat can ferment faster than white flour dough. During warm proofing, expect 1-4 hours, while cold proofing in your refrigerator extends to 10-16 hours.
| Proofing Indicator | What to Look For | What to Avoid |
|---|---|---|
| Visual Cues | Large bubbles, airy texture | Dense, tight structure |
| Touch Test | Soft, extensible feel | Tough, resistant dough |
| Surface Response | Slow-filling indentation | Deep, permanent dents |
Watch for specific signs that your dough's ready: it should feel alive and show some volume increase, though less than white flour dough. While the finger poke test isn't as reliable with whole wheat, you're looking for a slight indentation that fills in slowly. If you're unsure, try using an aliquot jar for more precise monitoring.
Remember to adjust your approach – whole wheat needs gentler handling and often requires more water. You'll need to knead longer to develop proper elasticity, and cold proofing can enhance your bread's final flavor and texture.
Creating Perfect Rise Environment
The perfect rise environment plays a crucial role in developing whole wheat bread's flavor and structure. You'll want to maintain a consistent temperature around 70°F (21°C) in a draft-free spot to guarantee even fermentation.
Since whole wheat dough requires more hydration than white flour, you'll need to monitor the environment's humidity carefully to prevent the dough from drying out.
To create an ideal rising environment, follow these essential steps:
- Cover your dough with plastic wrap or a damp cloth to lock in moisture and prevent a dry crust from forming.
- Place the covered dough in a clean, clutter-free area away from direct sunlight and air currents.
- Apply a light coating of oil or nonstick spray to the dough's surface before covering.
- Use a lightly dusted surface with whole wheat flour for handling after the rise.
Remember that warmer temperatures will speed up the rising process, while cooler ones will slow it down.
If you're using active dry yeast, expect longer rise times than with instant yeast. You can use a food processor or stand mixer with a dough hook to develop gluten properly before the rise begins.
Positioning Your Solar Oven
For successful solar bread baking, proper positioning of your solar oven is crucial. You'll need to find a spot with unobstructed sunlight and minimal shadows throughout the day. Select a location away from trees and buildings that could cast shadows on your oven, and make sure you've got enough space to adjust the oven's position as the sun moves.
| Position Factor | What to Do | Why It Matters |
|---|---|---|
| Sun Angle | Set reflector at 60° | Maximizes sunlight capture |
| Wind Protection | Find sheltered spot | Prevents oven disruption |
| Base Stability | Secure mounting | Assures consistent baking |
Position your oven on a stable, level surface and adjust the reflector flaps using a ruler to achieve the ideal 60-degree angle. If you're using a tracking system, make sure it's properly calibrated to follow the sun's path. You'll want to check the positioning every 30 minutes, making adjustments as needed to maintain direct sunlight exposure. For additional efficiency, verify your reflective surfaces are clean and smooth, as this greatly impacts the amount of solar energy captured. If you're in a windy area, secure your oven to prevent movement that could affect baking performance.
Managing Temperature Fluctuations

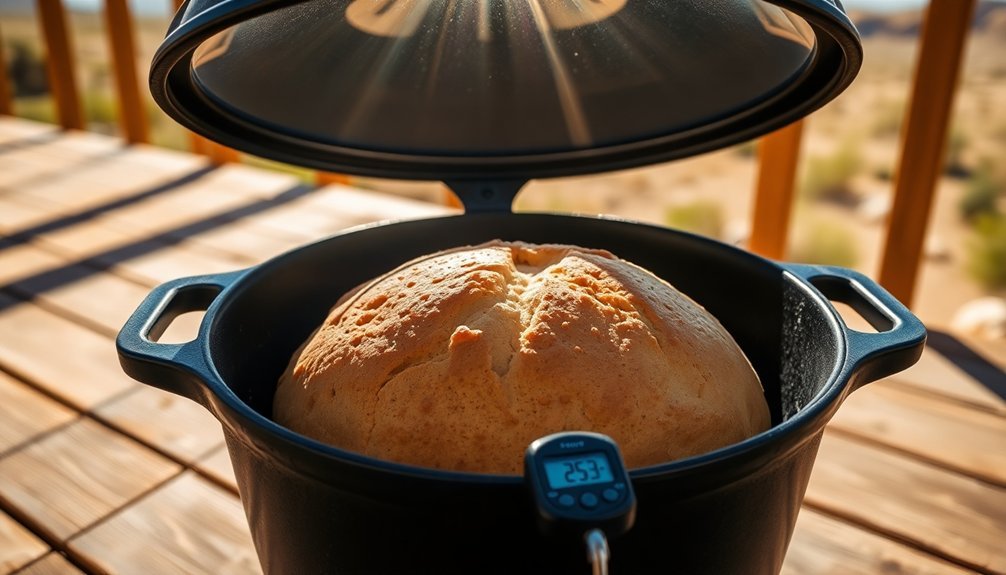
Successfully baking bread in a solar oven requires careful attention to temperature control. You'll need to maintain temperatures between 350-375°F for whole wheat bread, which demands consistent monitoring and adjustment.
Using a digital thermometer with a probe lets you track the internal temperature without opening the oven door, preventing unnecessary heat loss.
To effectively manage temperature fluctuations in your solar oven:
- Adjust the oven's position every 15 minutes to track the sun's movement, especially during early morning or late afternoon when the sun is lower.
- Use dark, cast iron pots with tight-fitting lids to maintain steady temperatures throughout the baking process.
- Monitor weather conditions closely – cold weather requires more frequent adjustments, while hot weather may need reduced sun exposure.
- Utilize the oven's design features, such as tilting the unit or partially covering the glass lid, to control temperature spikes.
If temperatures climb too high, you can reduce direct sunlight exposure by adjusting the oven's angle.
For advanced solar ovens, heat transfer fluids can help stabilize temperatures. Remember that ambient temperatures above 100°F won't prevent successful baking as long as you maintain proper monitoring and adjustment.
Checking Bread Doneness
Determining when your whole wheat bread is fully baked requires multiple testing methods for accuracy. When baking at 375 degrees, you'll want to check your bread after about 50 minutes. Look for a golden-brown color with slightly darker edges, and don't worry about a crack along the center as long as it's not wet inside.
You can test doneness by tapping the bottom of your loaf – it should sound hollow when fully baked. While this traditional method takes practice to master, it's especially useful for crusty breads. For more precision, use a thermometer to check the internal temperature. Your whole wheat bread should reach 190-200°F at its center.
Watch for the edges pulling away from the pan and guarantee the crust feels firm to the touch. The bread shouldn't appear doughy or wet in the middle.
Remember that your loaf will continue baking slightly after removal from the oven, so resist cutting into it too soon. For the most reliable results, combine visual cues with temperature testing – your bread should be evenly golden with a firm crust and proper internal temperature.
Troubleshooting Common Problems

Baking whole wheat bread can present several common challenges that are easy to address once you understand their causes.
When using a solar oven, you'll need to pay special attention to temperature consistency and rising times, as these factors greatly impact your bread's quality.
Common issues you might encounter include improper rising, shaping problems, crust formation, and texture inconsistencies.
To guarantee success with your whole wheat bread, watch for these specific problems and their solutions:
- If your bread's taking too long to rise, check that you're using enough active starter and maintain a temperature in the mid-70s to mid-80s Fahrenheit.
- When your loaf doesn't hold its shape, you're likely using too much flour during shaping or haven't kneaded the dough sufficiently after the final rise.
- For crust issues in your solar oven, maintain consistent high temperatures and adjust baking time as needed to achieve proper browning.
- To prevent a doughy or tough crumb, ensure thorough mixing of ingredients and proper kneading time, while using the correct ratio of whole wheat to white flour.
Monitor these aspects carefully, and you'll greatly improve your bread-making results.
Solar Bread Storage Tips
After mastering the art of baking your whole wheat bread, proper storage becomes your next key focus.
You'll want to keep your bread in a cool, dry place where it won't be exposed to excess heat, moisture, or air. If you're storing bread with added fat, use paper bags for better breathability, while sandwich bread can go in loosely twisted plastic bags.
A bread box is your best friend for solar-baked whole wheat bread, as it creates the perfect balance of moisture and air circulation. If you don't have one, you can use a Dutch oven or bread pan as an alternative.
When storing cut loaves, place them cut-side down to maintain freshness.
For longer storage, you've got two options. You can refrigerate your bread for 2-3 days by wrapping it in multiple layers of plastic wrap, but you'll need to reheat it at 300°F for 20-30 minutes to avoid a rubbery texture.
For extended storage up to 3 months, freeze your bread either whole or in slices. Wrap whole loaves in plastic wrap, place them in freezer bags, and remove as much air as possible.
When you're ready to use it, defrost overnight and reheat to restore freshness.
Frequently Asked Questions
Can I Bake Bread in a Solar Oven During Winter Months?
You can bake bread in a solar oven during winter, though it'll take longer due to reduced sunlight. Position your oven correctly, guarantee proper insulation, and be patient as baking times increase.
How Does Altitude Affect Solar Bread Baking Times and Temperatures?
At higher altitudes, you'll need longer baking times due to lower air pressure and boiling points. You should also expect faster fermentation, so reduce your yeast amounts and monitor your dough's temperature closely.
What's the Best Backup Plan if Clouds Suddenly Appear Mid-Bake?
You'll want to quickly transfer your partially baked item to a preheated conventional oven. Keep it ready at a similar temperature before clouds appear. Don't open the lid until you're ready to move it.
Does Solar-Baked Bread Have a Different Taste Than Conventionally Baked Bread?
Yes, you'll notice your solar-baked bread tastes different. It's typically moister inside with a softer crust. You won't get the same caramelized flavors since solar ovens don't reach the high temperatures of conventional ovens.
Can I Use Sourdough Starter in Solar Bread Baking?
Yes, you can definitely use sourdough starter in solar bread baking. You'll need to adjust baking times since solar ovens take longer, but your starter will work just like it does in conventional ovens.
In Summary
You'll find solar bread baking both rewarding and eco-friendly once you've mastered the basics. Remember to monitor your dough temperature, maintain proper hydration, and use quality whole wheat flour for the best results. Don't let cloudy days discourage you – with practice, you'll learn to work around weather variations. Keep experimenting with different flour combinations and timing, and you'll soon be baking perfect solar bread loaves.


Leave a Reply