Adapting traditional recipes for solar cooking requires doubling your usual cooking times and reducing liquid amounts by up to ½ cup due to better moisture retention. You'll need dark, non-reflective cookware with tight-fitting lids and should plan to cook during peak sunlight hours (11 AM to 3 PM) for ideal temperatures of 200-300°F. Pre-soaking beans, marinating meats, and layering seasonings strategically will enhance your results. Realign your solar oven every 30 minutes to maintain consistent heat, and use tied herbs for easy removal. With proper temperature monitoring and weather considerations, you'll reveal a world of sun-powered culinary possibilities.
Adjusting Cooking Times for Sunlight
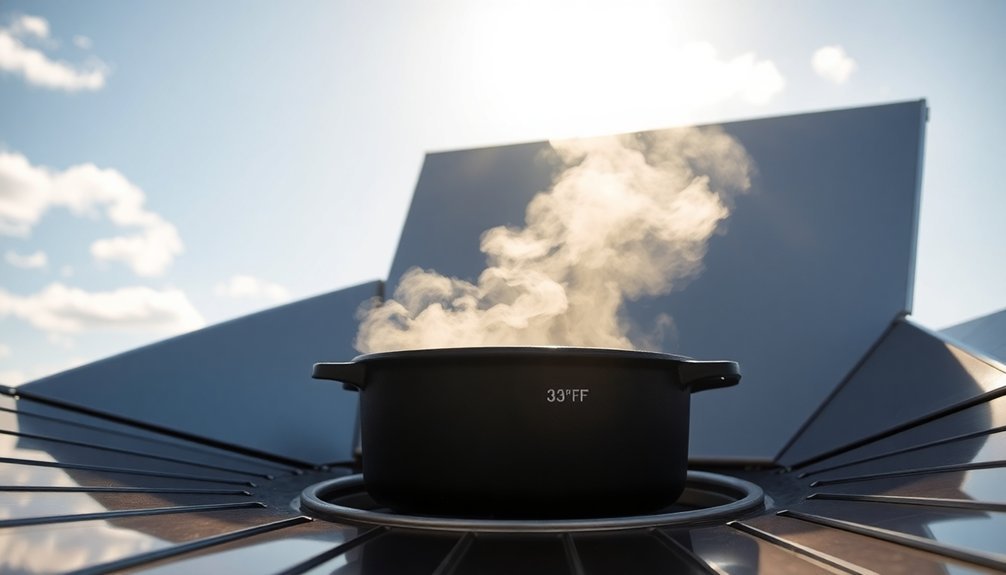
When cooking outdoors with a solar oven, you'll need to plan your meal preparation around peak sunlight hours between 11:00 AM and 3:00 PM to achieve perfect temperatures of 200-300°F.
You can expect cooking times to be roughly double what you'd experience with a conventional oven, so factor this into your schedule.
To maintain consistent temperatures, you'll need to realign your oven every 30 minutes to follow the sun's path. Since repeatedly opening doors impacts temperature, avoid checking food too frequently.
On a clear day, your solar oven will need about 20 minutes to preheat to 300°F.
If you're cooking unattended, position the oven where the sun will be strongest during peak hours.
Remember that weather conditions greatly impact cooking times – cloudy days will slow the process, while clear skies provide ideal results.
For lower temperature cooking, simply adjust the oven slightly away from direct sunlight.
Essential Solar Roasting Equipment
You'll need versatile cooking pots with dark, non-reflective surfaces to maximize heat absorption during solar roasting.
Just like leading automated roasting systems that operate with a maintenance-free design, your solar cooking equipment should be selected for durability and minimal upkeep requirements.
Your cooking surfaces should include heat-conducting materials like cast iron or black metal plates that can efficiently capture and distribute the sun's energy.
Temperature monitoring tools, including an infrared thermometer and adjustable reflectors, will help you maintain precise control over your solar cooking process.
Versatile Solar Cooking Pots
The cornerstone of successful solar cooking lies in choosing the right pot for your outdoor culinary adventures.
You'll find that dark-colored, enameled steel pots work exceptionally well, as they efficiently convert sunlight into heat for your meals.
Cast iron pots offer superior heat retention, though they're heavier and costlier.
If you're using aluminum cookware, simply spray-paint it black to boost heat absorption.
For maximum efficiency, pair your pot with a heat-resistant glass bowl or clear plastic bag to trap warmth and create a greenhouse effect.
You'll be amazed at how these pots can handle diverse cooking tasks – from boiling water in under an hour to slow-cooking a chicken for two hours.
With proper pot selection, you can cook everything from vegetables and grains to tender meats and legumes.
These versatile cooking vessels are perfect for preparing no-smoke meals, making them ideal for areas with fire restrictions.
Heat-Absorbing Cooking Surfaces
Building on proper pot selection, effective heat-absorbing surfaces form the foundation of solar roasting success.
Doubled layers of plastic create an improved insulating barrier. You'll want to focus on dark-colored materials that maximize heat retention. Dark glass dishes and cookie sheets work exceptionally well, as they efficiently convert sunlight into thermal energy.
Line your cooking box's interior with black construction paper or paint to enhance heat absorption.
For best results, pair these heat-absorbing surfaces with reflective elements like aluminum foil-lined flaps that direct additional sunlight onto your cooking area.
Don't forget to add a layer of clear plastic wrap or glass over your cooking surface to trap the accumulated heat.
This combination of dark surfaces and clear covers creates a greenhouse effect that maintains consistent cooking temperatures, essential for successful solar-powered meal preparation.
Essential Temperature Control Tools
Successful solar roasting depends heavily on having the right temperature control tools at your disposal.
You'll need precise monitoring equipment and adjustment mechanisms to maintain ideal cooking temperatures between 150-225°F throughout the cooking process.
To effectively control your solar oven's temperature:
- Install Type-K thermocouples for accurate temperature readings, paired with data visualization tools to track cooking patterns.
- Set up photoresistors and servo motors for real-time temperature monitoring and automated tracking adjustments.
- Position reflective panels strategically and adjust the oven's angle every 30-45 minutes to maintain consistent heat.
- Use dark, thin metal cookware with tight-fitting lids to maximize heat absorption and retention.
Remember to preheat your solar oven and modify your approach based on current weather conditions and thermal modeling data for best results.
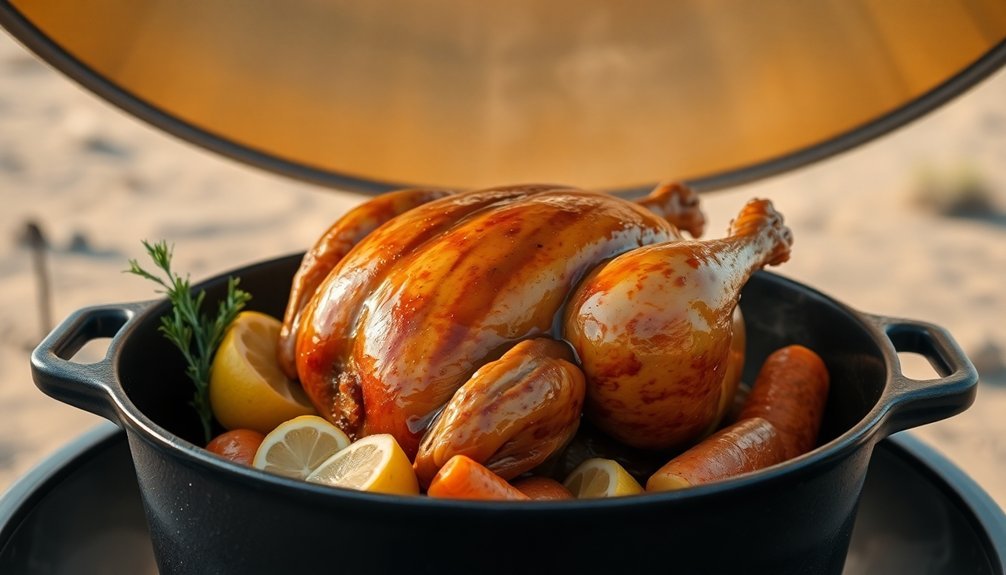
Marinades for Solar Success
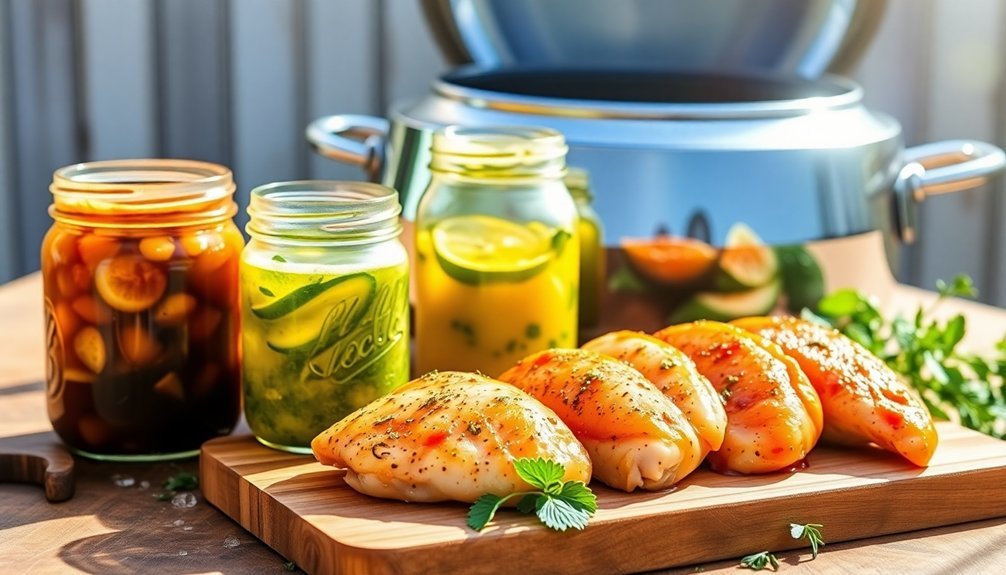
Creating flavorful marinades is essential for delicious solar-cooked chicken, as they infuse the meat with rich flavors while keeping it moist during the slower cooking process. You'll want to combine citrus juices, olive oil, and your choice of herbs and spices in a bowl before adding your chicken pieces.
| Ingredient Type | Recommended Options |
|---|---|
| Base Oils | Olive oil, vegetable oil |
| Citrus Elements | Lemon, lime, orange |
| Herbs | Herbes de Provence, thyme |
| Spices | Paprika, cumin, cayenne |
| Enhancers | Soy sauce, garlic powder |
Let your chicken marinate for at least 2 hours, though you can extend this up to 12 hours for deeper flavor. When you're ready to cook, place the marinated chicken in a black pot, cover it with a high-temperature baking bag, and position it in your preheated solar cooker.
Temperature Control Techniques
While solar cooking requires minimal energy input, mastering temperature control is essential for consistent results. You'll need to adjust your cooking surfaces and manage insulation to maintain steady temperatures throughout the cooking process.
- Position your reflectors to concentrate sunlight and modify heat levels – use a sun angle finder for ideal placement.
- Control heat retention by using insulated cooking cores and heavy-duty pots that maintain temperature when clouds appear.
- Regulate cooking temperature by adjusting lid tightness and heat seals – use a thermometer to monitor the heating area.
- Adapt to weather conditions by extending cooking times on overcast days or switching to more efficient tubular ovens.
Remember to place your solar cooker where it'll receive consistent sunlight, and use black paper as a heat sink to maximize absorption and maintain steady temperatures.
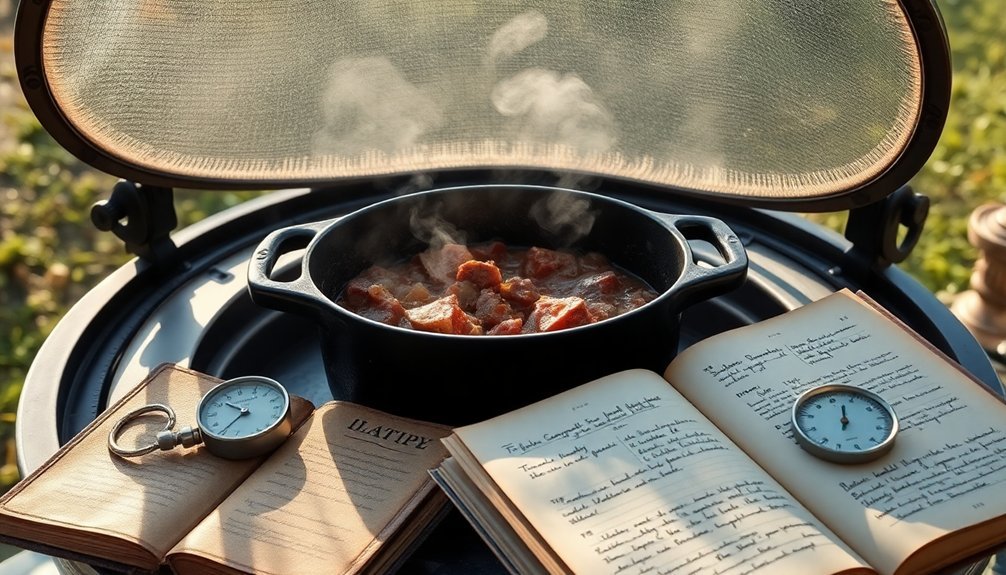
Monitoring Your Solar Roast
Proper monitoring serves as the cornerstone of solar roasting success. You'll need to track several key measurements to achieve consistent results with your solar roaster.
Keep a close eye on your focus point temperatures, which typically range from 456°C at peak to 173°C at minimum.
Watch your Direct Normal Irradiance (DNI) readings, which should fall between 835 and 455 W/m², to gauge available solar energy.
For light roasts, you're looking at approximately 20 minutes of roasting time. When conditions are ideal, you can expect to roast up to 36 kg daily for light roasts.
Use your solar position sensors to maintain precise focus, and don't forget to check your reflector alignment.
If you need to halt the process quickly, you can rotate your mirrors upward into the 'off' position.
Converting Traditional Recipes
To successfully adapt traditional recipes for solar cooking, you'll need to make several key adjustments to your ingredients and methods. Since solar ovens retain more moisture than conventional ovens, reduce liquids by 1/4 to 1/2 cup in your recipes. Always use dark-colored cookware to maximize heat absorption and guarantee efficient cooking.
- Choose recipes that work well with longer cooking times, such as stews, roasts, and rice dishes.
- Position your solar oven where it'll receive maximum sunlight, typically between 10 AM and 2 PM.
- Pre-soak beans and grains, and marinate meats in advance to reduce cooking time.
- Use clear plastic bags or parchment paper to trap heat effectively.
Remember to plan your cooking schedule around weather conditions and adjust cooking times based on your specific solar oven model.
Best Foods for Solar Roasting
Several foods excel in solar roasting due to their ability to absorb and retain heat effectively. You'll find that green chiles roast uniformly under concentrated sunlight, offering better results than traditional propane methods.
Coffee beans thrive at 240-250°C, preserving their distinct flavors and aromas when solar-roasted. You can also successfully roast soybeans at high temperatures for both human consumption and animal feed.
If you're into brewing, you'll appreciate how grains roast perfectly at 200-400°F for beer production. Nuts like almonds and cashews respond well to solar roasting at around 300°F.
When you're using a solar oven with proper reflectors and temperature monitoring, you'll achieve consistent results. The best part? You won't need to spend money on fuel, and you'll help the environment while preserving food flavors.
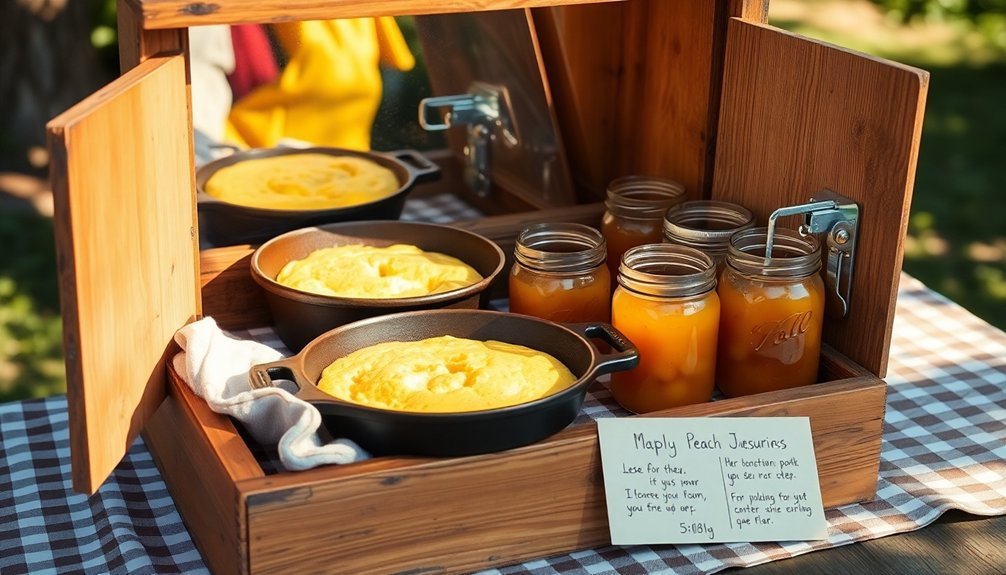
Seasoning and Spice Modifications
When preparing dishes for solar cooking, mastering the art of seasoning requires careful timing and precise measurements.
You'll need to layer your flavors strategically, adding aromatics after soaking and saving salt and pepper for the final cooking stage. Dark pots with lids will help maximize heat absorption while you follow the sun's path for consistent cooking.
For the best results, follow these essential spice modifications:
- Add herbs like thyme and rosemary tied together for easy removal
- Use mustard powder (½ teaspoon per cup of beans) for depth
- Incorporate tomato paste (1 tablespoon) after initial cooking
- Balance heat with cayenne or dried chiles according to taste
For unique flavors, try specialty ingredients like Spanish Pimenton de la Vera or experiment with traditional spice combinations in your solar-cooked dishes.
Weather Considerations While Cooking
Successful outdoor cooking relies heavily on your ability to adapt to and prepare for various weather conditions.
You'll need to monitor temperatures carefully, making certain they stay below 90°F for safe cooking while protecting yourself from heat stroke risks above 130°F. If you're using a solar cooker, pay special attention to wind patterns as they can greatly affect cooking temperatures and times.
Make certain you've got proper protection from the elements.
Install a sturdy roof or awning to shield your cooking area from rain, and create windbreaks to maintain consistent cooking temperatures. In humid climates, you'll want to make sure good ventilation to prevent moisture buildup.
Don't forget to secure your equipment and have weather-resistant covers ready. When storms threaten, have a plan to quickly move your cooking setup to safety.
Solar Roasting Safety Guidelines
You'll need to check food temperatures at regular intervals using a reliable cooking thermometer to guarantee internal temperatures reach 165°F (74°C) for safe consumption.
While maintaining food in hot zones above 140°F, keep the solar oven properly angled toward the sun and adjust its position every 30 minutes for consistent heating.
Remember to protect yourself from UV exposure during these temperature checks and adjustments by wearing appropriate sun protection, including sunglasses, sunscreen, and protective clothing.
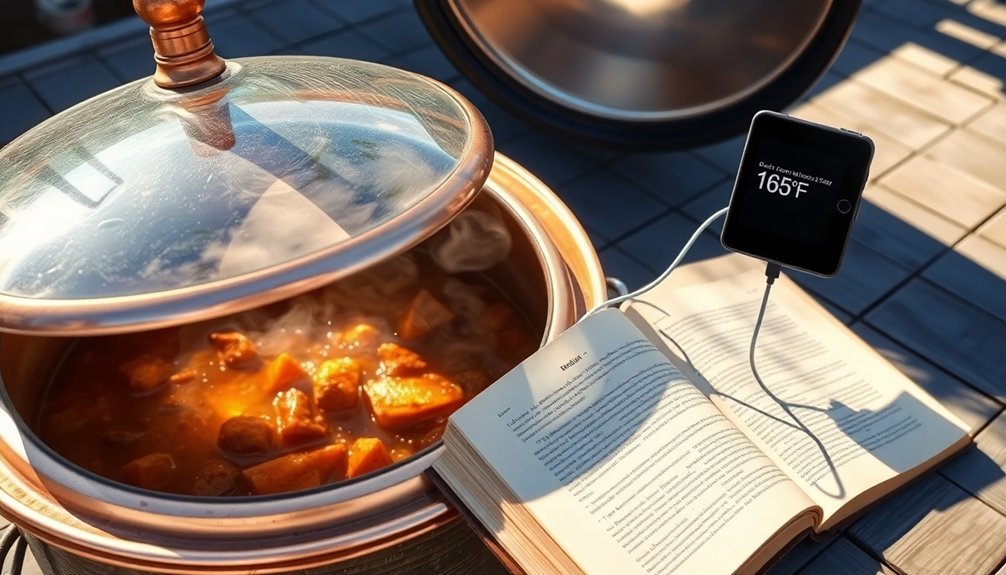
Temperature Testing Procedures
Safe solar roasting requires rigorous temperature testing to confirm both ideal cooking performance and food safety.
You'll need to conduct systematic tests using calibrated thermometers that can measure beyond 100°C to guarantee your solar cooker maintains proper heat levels.
When testing your solar cooker's performance, follow these essential procedures:
- Pre-heat your cooker and measure water temperature rise from 40°C to 80°C during peak sunlight hours.
- Monitor oil heating patterns between 11:00-13:00 to understand maximum temperature capabilities.
- Test stagnation temperatures on clear days to determine your cooker's heat retention efficiency.
- Track food temperatures regularly, confirming meats reach at least 75°C for safe consumption.
Keep detailed temperature logs for all tests, considering variables like wind speed and sunlight intensity to optimize your solar cooking results.
Maintain Food Hot Zones
Maintaining proper hot zones in solar roasting requires careful attention to temperature control and timing. You'll need to keep your food at safe temperatures between 200°F and 300°F while avoiding the dangerous 40°F-140°F zone where bacteria thrive. Position your solar oven to maximize sunlight exposure between 11:00 am and 3:00 pm, and use dark cookware for ideal heat absorption.
| Temperature Zone | Required Action |
|---|---|
| Above 300°F | Adjust reflector angle to reduce heat |
| 200°F – 300°F | Maintain position, monitor regularly |
| 140°F – 200°F | Reposition for more direct sunlight |
| Below 140°F | Move to alternative heat source |
Remember to rotate solid foods and stir liquids every 10-15 minutes for even cooking. Use a thermometer to verify internal temperatures and reposition your oven as the sun moves across the sky.
UV Protection While Cooking
While managing hot zones is important for effective solar cooking, protecting yourself from intense UV exposure is equally essential.
You'll need to monitor your solar oven frequently while following the sun's path, which means spending considerable time outdoors during peak sunlight hours.
To protect yourself while solar cooking, follow these key safety guidelines:
- Position yourself on the shadowed side of the oven when checking temperatures or adjusting the reflectors every 30 minutes.
- Use UV-protective eyewear when working with reflective surfaces that redirect sunlight to your oven.
- Wear broad-spectrum sunscreen and reapply every 2 hours while managing your solar cooking setup.
- Don SPF-rated protective clothing, including a wide-brimmed hat and long sleeves, even during brief oven adjustments.
Remember to maintain your positioning relative to the sun's movement to avoid direct exposure while checking your food.
Preparing Perfect Solar Side Dishes
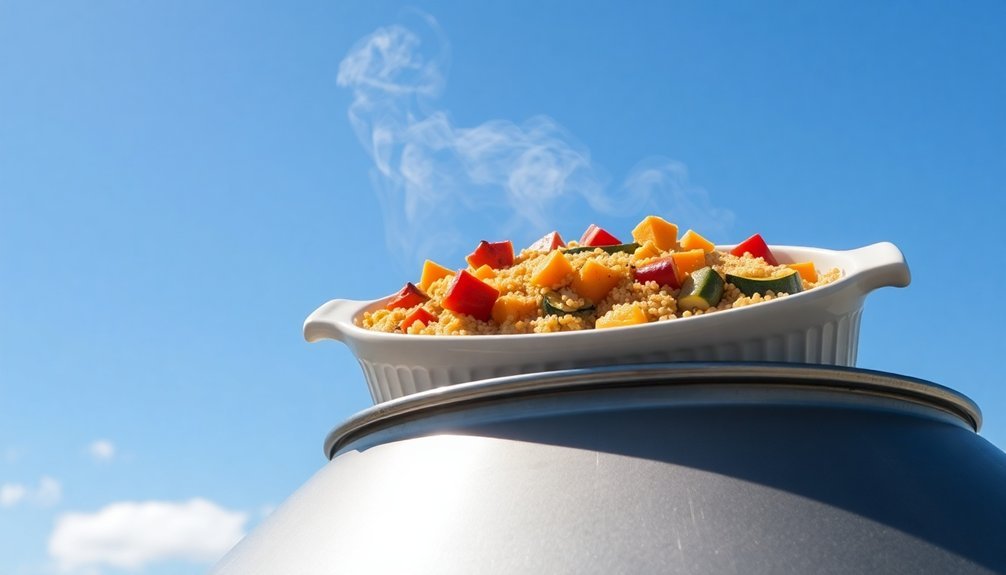
Preparing delicious side dishes in a solar oven requires careful attention to ingredient selection and timing. You'll want to choose vegetables that maintain their texture during slow cooking, like potatoes and bell peppers. Position your solar oven in peak sunlight between 11 AM and 3 PM for ideal results.
| Ingredient | Preparation Tips |
|---|---|
| Potatoes | Peel and dice into uniform sizes |
| Bell Peppers | Cut into 1-inch chunks |
| Onions | Slice thinly for even cooking |
| Root Vegetables | Pre-cut and season before cooking |
| Fresh Herbs | Add just before serving |
Maximize your success by using dark-colored cookware and covering dishes with lids to retain heat. Remember to double your usual cooking times and monitor internal temperatures with a thermometer. For best results, combine ingredients in a single pot and use parchment paper to prevent sticking.
Frequently Asked Questions
Can Solar Cooking Disinfect Contaminated Food Ingredients?
You can't rely on solar cooking to disinfect contaminated ingredients. While it kills bacteria at proper temperatures above 165°F, it won't eliminate toxins or chemicals already present in spoiled food. Always use fresh ingredients.
Do Solar Cookers Work Effectively in Snowy Conditions?
Yes, you'll find solar cookers work well in snowy conditions when there's bright sunshine. The outside temperature isn't critical – snow can actually help by reflecting more light, and you'll just need proper insulation and positioning.
What Happens if Animals Are Attracted to the Cooking Smells?
You'll need to be cautious as cooking smells can attract wildlife, especially bears. Keep your cooking area separate from your campsite, store food properly, and change out of food-scented clothes to stay safe.
How Long Can Solar-Cooked Food Safely Stay Warm After Cooking?
You'll need to remove your food within 2 hours to maintain food safety. If you're keeping it warm in a well-insulated solar oven, don't let it stay below 140°F or bacteria can grow.
Can Solar Cooking Affect the Color or Appearance of Food?
You'll notice minimal color changes with solar cooking since it uses gentle, low temperatures. Your food will maintain its natural appearance, though cooking times are longer than conventional methods, helping preserve nutrients and textures.
In Summary
You'll find that solar cooking brings a sustainable and rewarding twist to traditional recipes. With proper timing adjustments, temperature monitoring, and weather planning, you're able to create delicious meals using just the sun's power. Keep experimenting with different marinades and seasonings while following safety guidelines. Whether you're roasting a main dish or preparing sides, solar cooking offers an eco-friendly way to enjoy your favorite foods.


Leave a Reply