Start your herb drying journey by harvesting in early morning after the dew evaporates but before the day heats up. Create small bundles (1-2 inches thick) using organic cotton string, leaving space between bundles for air circulation. You'll want to dry herbs in a spot that's 60-70°F with 50-60% humidity, away from direct sunlight. Check for dryness by crushing leaves – they should crumble easily, and stems should snap cleanly. Store your dried herbs in airtight glass containers, clearly labeled with type and date. Monitor humidity levels during storage, and rotate your stock to maintain freshness. These foundational steps will open the door to mastering herb preservation.
Selecting Prime Herbs for Drying

Success in herb drying begins with selecting the right herbs and harvesting them at ideal times. You'll find that less tender herbs like rosemary, sage, and thyme are excellent choices for beginners, as they're naturally more forgiving during the drying process. After drying, strip the leaves from stems before storage.
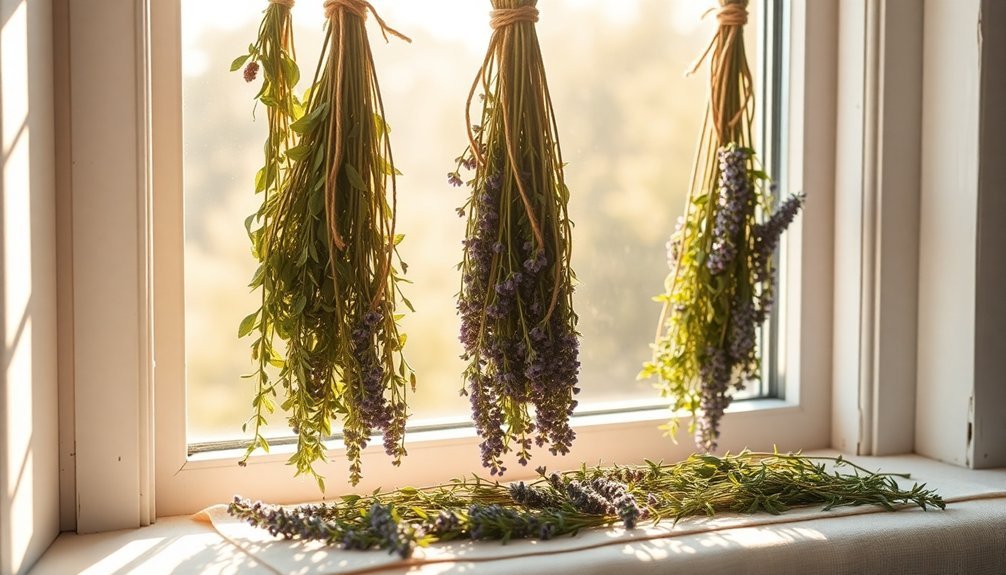
For more fragrant options, consider lavender, anise hyssop, or calendula, which retain their aroma exceptionally well.
Timing your harvest is vital for best results. You'll want to pick your herbs just before their flowers open, during the bursting bud stage, when their essential oils are most concentrated.
Plan to harvest in early morning after the dew has evaporated but before the day heats up. Don't wait to process your herbs – they should be prepared for drying within an hour of harvesting to preserve their potency.
Proper Herb Bundle Assembly
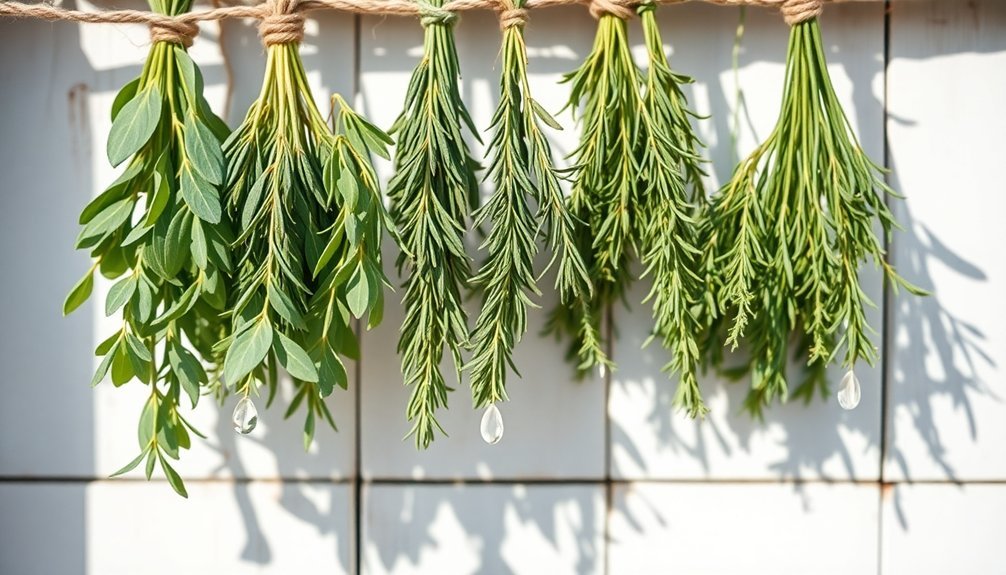
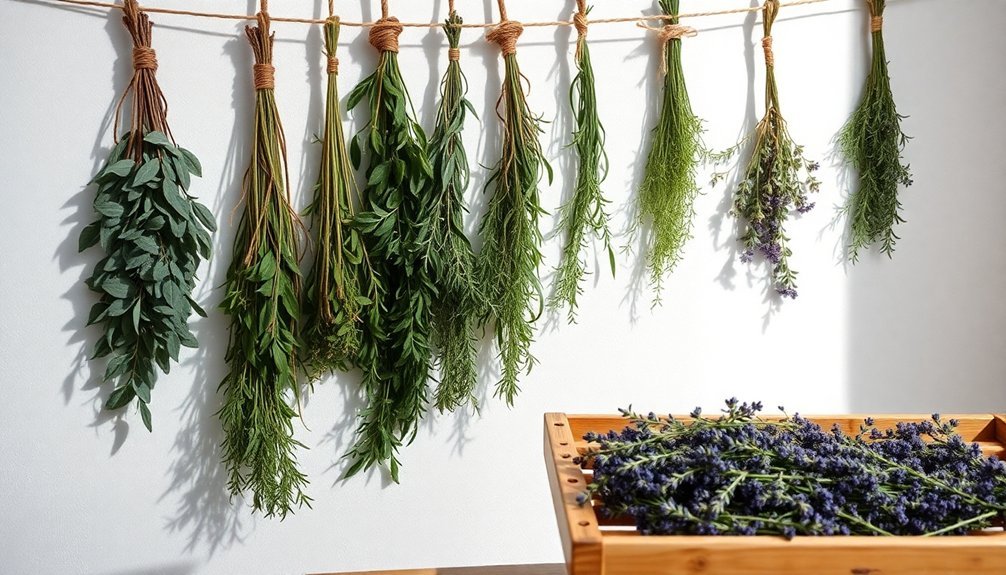
When you're assembling herb bundles, start by gathering stems into groups that are small enough to allow sufficient air circulation, typically about 1-2 inches in diameter at the base.
You'll want to bind your bundles securely with string, starting at the stem end and crisscrossing upward to catch all the leaves while maintaining a firm hold. Using organic cotton string will help prevent toxic fumes during burning.
Make sure to leave enough space between bundles when hanging them to dry, as proper air flow is essential for preventing mold and ensuring even drying throughout each bundle.
Bundle Size Matters Most
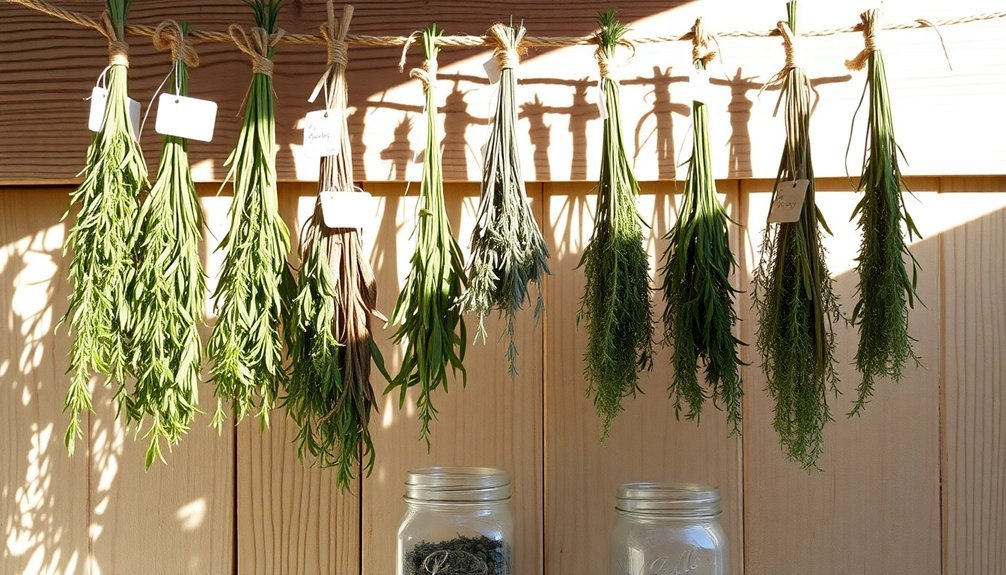
The size of your herb bundles plays an essential role in achieving properly dried herbs. You'll want to create bundles that comfortably fit in your hand, typically ranging from ½ to 1.5 inches in diameter. Smaller bundles promote better air circulation and faster drying times, which is vital for preventing mold.
Adjust your bundle size based on the herb type you're working with. For soft, moisture-rich herbs like mint, basil, and tarragon, keep bundles thinner to guarantee even drying. Warm summer weather is ideal for harvesting these herbs when they're at peak flavor.
Woodier herbs such as rosemary and thyme can handle slightly larger bundles. When you're binding the herbs, consider their leaf structure – herbs with large leaves need less binding, while those with thin leaves require more secure fastening.
Remember that proper bundle size directly affects drying time, which can range from one to four weeks.
Securing Herbs With Care
Proper assembly techniques transform loose herb stems into secure, well-organized bundles ready for drying.
You'll want to start by cutting a piece of string that's four times longer than your bundle. After gathering stems of equal length and removing any wilted leaves, tie a tight knot at the base.
Work your way up the bundle by wrapping the string at an angle, creating a crisscross pattern that captures the leaves. For thin-leaved herbs, you'll need more winding, while larger leaves require less.
Once you reach the top, loop back down at an opposite angle, folding under loose foliage as you go. Finish with a double or triple knot at the bottom.
Remember to label your bundles before hanging them in a warm, dry spot with good airflow. Traditional drying methods typically require one week drying time for herbs to fully dehydrate.
Air Flow Spacing Tips
Successfully drying herbs depends on maintaining adequate space between bundles during the assembly process. When you're arranging your herbs, make sure branches don't touch each other to prevent moisture buildup and mold growth. Use wire hangers, hooks, or mesh drying racks to keep your bundles properly separated.
| Space Requirements | Air Flow Needs | Setup Tips |
|---|---|---|
| 2-3" between bundles | Gentle circulation | Use mesh racks |
| No branch contact | 50-60% humidity | Install small fans |
| 8-12" stem lengths | 60-70°F temp | Add ventilation |
| Single layer spacing | Dark environment | Punch bag holes |
| Multiple rack levels | Away from moisture | Change wet towels |
For dense herbs, you'll want to create smaller bundles to guarantee proper drying. Cut stems into manageable lengths and arrange them in single layers on cooling racks or screens for best results.
Solar Positioning for Maximum Results
To achieve ideal herb drying, you'll want to position your setup where it receives morning sunlight while avoiding intense afternoon rays.
Your setup should track the sun's east-to-west path while maintaining indirect light exposure through shade cloth or proper positioning.
While direct sunlight can bleach and damage your herbs, strategic placement in bright, indirect light will guarantee even drying without compromising quality.
Optimal Sun Path Placement
Understanding the sun's daily path across your garden space plays a critical role in herb drying success.
You'll want to position your drying racks where they'll receive maximum sunlight during peak hours when temperatures reach around 100 degrees Fahrenheit.
Set up your drying station in a sheltered spot that gets 6-8 hours of direct sunlight, preferably on a patio or deck with protection from strong winds.
If you're using DIY solar dryers, angle them to follow the sun's path and maximize heat absorption through the glass top.
Don't forget to add 85% shade cloth to prevent UV damage to delicate herbs.
For best results, place your setup where you can easily monitor it throughout the day and quickly move herbs indoors when evening moisture threatens.
Direct vs. Indirect Light
When drying herbs in the sun, choosing between direct and indirect light exposure can make the difference between perfectly preserved herbs and damaged, discolored ones.
While direct sunlight offers rapid drying with its concentrated energy, it can bleach your herbs and diminish their quality. Indirect light, on the other hand, provides gentler, more balanced drying that preserves color and aromatic properties.
- Position your herbs in filtered sunlight using shade cloth or screens to protect them from harsh rays while maintaining ideal drying conditions.
- Keep temperatures around 100°F and humidity below 60% for best results.
- Set up your drying area with proper ventilation to help moisture escape.
- Remember to bring your herbs indoors at night to prevent moisture absorption and maintain consistent drying progress.
Temperature and Humidity Control
Maintaining precise temperature and humidity levels stands as the cornerstone of successful herb drying.
You'll want to keep your drying space between 60-70°F (15-21°C) to preserve your herbs' flavor and potency. If you're using a dehydrator, set it between 95-115°F (35-46°C), adjusting up to 125°F in humid conditions.
Monitor your environment's humidity closely, aiming for 50-60% relative humidity. You'll need a reliable hygrometer to track these levels.
For best results, guarantee proper air circulation throughout your drying space. Position fans strategically to maintain consistent airflow, which prevents mold growth and promotes even drying.
Check your herbs regularly for crispness and adjust conditions as needed. Remember, your goal is to reduce moisture content from 80% to roughly 10% while preserving essential oils.
Drying Duration and Storage
The drying process requires different timeframes depending on your chosen method.
You'll find that air drying takes the longest, typically a week or more, while microwave drying can be completed in just minutes. For consistent results, a dehydrator offers a happy medium at 1-4 hours.
- Your herbs are ready when they crumble easily between your fingers – this is true for all drying methods.
- Store your dried herbs in airtight glass containers, labeled with the type and date.
- Keep your containers in a cool, dark place away from heat sources and humidity.
- You'll get the best flavor from your dried herbs within one year, so implement a rotation system to use older batches first.
Remember to check stored herbs regularly for moisture or mold to maintain their quality.
Natural Oil Extraction Methods
Several natural methods exist for extracting essential oils from herbs, each offering unique benefits for different plant materials.
If you're working with aromatic plants or spices, steam distillation is your best choice, as it yields high-quality oils through a gentle steaming process.
For citrus peels, you'll want to use cold pressing, which involves quickly extracting oils through abrasion to prevent oxidation.
When dealing with delicate flowers like jasmine, consider solvent extraction or enfleurage methods to protect the natural compounds.
You can also try infusion techniques: either the slow cold method, where herbs soak in oil for weeks, or the quick heat method using a double boiler kept below 110°F.
For more efficient extraction, ultrasonic technology combines sound waves with liquid solvents to pull out essential compounds.
Testing Herb Dryness
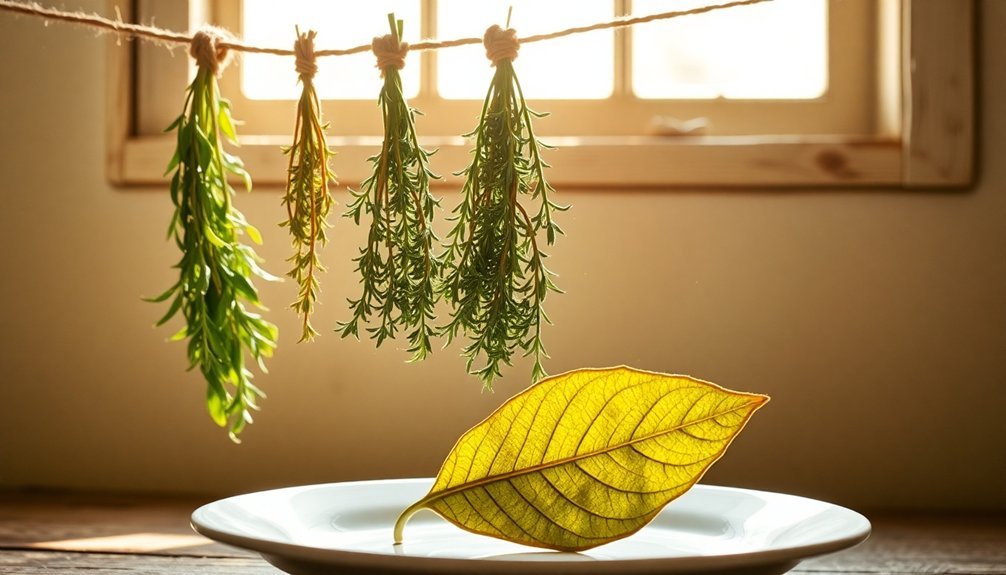
Properly testing herbs for dryness guarantees ideal preservation of their flavor and medicinal properties.
You'll know your herbs are ready for storage when they crumble easily between your fingers and their stems snap cleanly when bent.
For consistent results, you can test herb dryness using these reliable methods:
- Physical examination: Gently crush leaves between your fingers – they should crumble readily, and seeds should fall from stems.
- Dehydrator testing: Check herbs every hour at 90-100°F until they're brittle and break cleanly.
- Air-drying verification: After about two weeks in a well-ventilated space, herbs should be crisp and breakable.
- Color and aroma check: Properly dried herbs maintain their natural color and distinctive scent.
Avoiding Common Drying Mistakes
Your herbs' drying success depends heavily on proper moisture control and temperature stability to prevent harmful mold growth.
You'll want to maintain humidity levels between 50-60% while keeping temperatures steady at 60-70°F throughout the entire drying process.
Regular monitoring and adjustments of these conditions will guarantee your herbs dry evenly and retain their desired qualities.
Preventing Moisture and Mold
While drying herbs requires attention to detail, preventing moisture and mold stands as the most critical challenge you'll face during the process.
You'll need to maintain precise humidity levels between 45-55% using a hygrometer, while ensuring proper air circulation throughout your drying space.
- Keep your herbs well-spaced and hanging upside down to promote even airflow, using fans if needed to prevent stagnant air pockets.
- Remove all large fan leaves and sugar leaves before drying to reduce moisture retention points.
- Monitor your drying area daily for any signs of mold, including musty odors or discolored patches.
- Store your herbs in a dark, clean environment away from direct light, and maintain consistent temperature control throughout the process.
If you spot any signs of contamination, don't hesitate to remove affected portions immediately.
Temperature Control Essentials
Temperature control stands as one of three critical factors in successful herb drying, alongside proper airflow and humidity management.
You'll need to maintain temperatures between 95°F and 115°F when using a food dehydrator, though you might need to increase it to 125°F in high-humidity areas.
Don't fall into the trap of drying at lower temperatures, as this won't effectively remove moisture from your herbs.
If you're using a dehydrator, always preheat it to the recommended temperature before adding your herbs, and arrange them in a single layer on the trays.
You'll know your herbs are properly dried when they crumble easily and the stems snap when bent, typically within 1 to 4 hours.
Remember to check your herbs periodically to prevent over-drying and maintain consistent temperature throughout the process.
Seasonal Herb Preservation Techniques
As the seasons change, mastering herb preservation techniques guarantees you'll have flavorful ingredients throughout the year. The key to successful preservation lies in choosing the right drying method for your specific herbs and climate conditions.
- Start by gathering your herbs in the morning after the dew has evaporated – this assures maximum flavor retention and prevents wilting during the drying process.
- For tender-leaf herbs like basil and mint, you'll want to use quick-drying methods such as a food dehydrator set to 95°F to prevent mold formation.
- Create loose bundles for air-drying hardier herbs, hanging them upside down in a well-ventilated space away from direct sunlight.
- Store your dried herbs in airtight containers, making sure to label them clearly since many look similar once dried.
Infused Oil Preparation Steps
Creating infused oils begins with selecting the appropriate method based on your time constraints and available resources. You'll need to start with clean, sterilized jars and dried herbs for ideal results.
| Method | Duration | Key Steps |
|---|---|---|
| Cold | 6 weeks | Store in dark place, cover herbs completely |
| Sun | 6 weeks | Place in sunlight, use paper bag protection |
| Heat | 5-6 weeks | Use double boiler, shake daily |
For all methods, you'll want to make sure your herbs are fully submerged in your chosen carrier oil. Remove any air bubbles using a spoon handle or chopstick, and seal the jar tightly. Remember to label and date your creations. After the infusion period, strain the mixture through muslin cloth and store your finished oil in a cool, dark place.
Frequently Asked Questions
Can Dried Herbs Be Rehydrated for Cooking, and Will They Retain Flavor?
Yes, you can rehydrate dried herbs for cooking by soaking them in warm water or adding them directly to your dishes. They'll retain most flavors, though they're more concentrated than fresh herbs.
How Do You Prevent Insects From Infesting Herbs During the Drying Process?
You'll need to harvest herbs after dew evaporates, shake off insects, tie small bundles for airflow, and hang them in mesh bags. Consider freezing or heating dried herbs to eliminate any remaining pests.
Which Herbs Should Never Be Dried Together Due to Flavor Transfer?
You shouldn't dry sage with basil, mint with other herbs, or lavender with rosemary. Keep thyme and oregano separate, and never dry lemongrass near any other herbs to prevent unwanted flavor mixing.
Does Altitude Affect the Drying Time and Quality of Herbs?
Yes, altitude greatly affects your herbs' drying time and quality. You'll notice faster initial drying due to lower humidity, but you'll need longer overall drying periods to maintain proper quality and prevent flavor loss.
Can You Use LED Grow Lights Instead of Sunlight for Drying Herbs?
While you can use LED grow lights to dry herbs, they're not ideal since they produce minimal heat. You'll get better results using traditional drying methods like air drying, dehydrators, or natural sunlight.
In Summary
You'll find that mastering herb drying takes practice, but the rewards are worth it. Start with small batches until you've perfected your technique. Remember to store your dried herbs in airtight containers away from light and heat. Whether you're drying herbs for cooking, medicine, or crafts, these natural preservation methods will help you maintain their potency and flavor throughout the year.


Leave a Reply