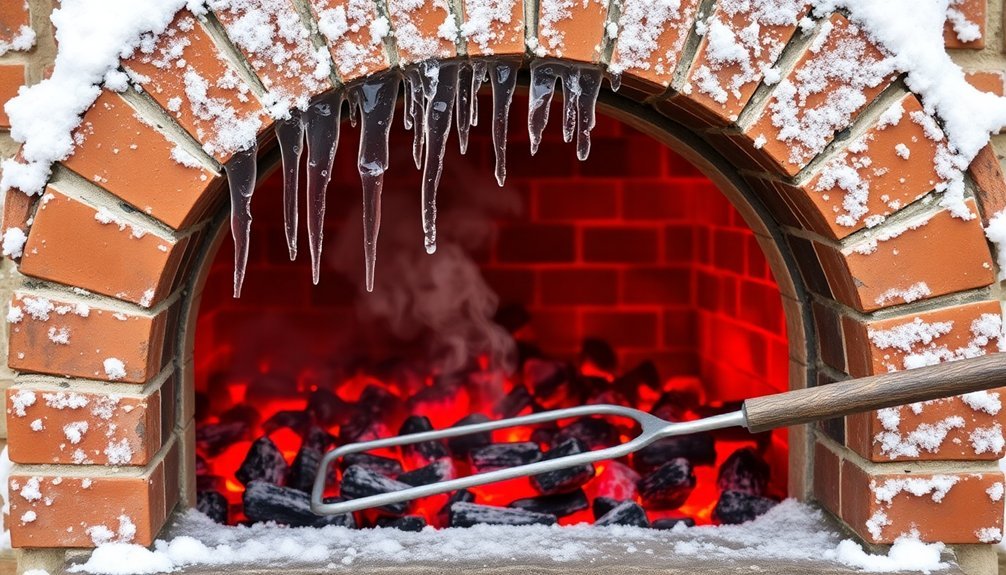
To preheat your outdoor oven effectively in winter, start early and allow up to 2.5 hours for proper temperature buildup. You'll want to use multiple insulation layers and create a double-layer wood stack with dry hardwoods that have 10% moisture content. Begin with a small fire near the oven's landing and gradually increase the heat while monitoring zones every 30 minutes. Keep your vent clear of snow and ice, and use the oven door as a damper to control airflow. Don't forget to protect against wind and maintain consistent temperature checks. These fundamental steps just scratch the surface of maximizing your winter baking success.
Start Early Morning Preheating

Because outdoor ovens take considerably longer to heat during winter months, starting your preheating process early in the morning is essential for successful cooking.
You'll need to monitor the oven's internal temperature closely with a thermometer while ensuring the thermal mass heats thoroughly for consistent cooking conditions.
Begin by accounting for any residual moisture in your oven, as this may require a slower heating approach during cold weather.
You'll want to allow ample time for the oven to reach your desired temperature – this process can take up to two and a half hours in frigid conditions.
Keep in mind that proper thermal mass heating is vital, so don't rush this step.
While waiting, you can prepare your ingredients and plan your cooking schedule around the extended preheating time.
Using seasoned hardwoods like oak will help maintain consistent high temperatures throughout your cooking session.
Insulate Your Oven Base
Your outdoor oven's base needs multiple insulation layers, starting with ceramic fibre blankets and topped with vermiculite-cement mixture, to combat winter heat loss.
For optimal heat retention, applying three to four layers of insulation is recommended for consistent baking performance throughout the winter season.
You'll want to secure these materials with wire mesh and create a dual slab system using silica sand between concrete layers for maximum thermal mass benefits.
Position your oven base strategically on a slight elevation to prevent ground moisture from seeping up and compromising your insulation's effectiveness.
Heat-Retaining Materials Matter
Proper insulation serves as the cornerstone of an efficient outdoor oven, especially during winter months.
You'll want to focus on materials that excel at heat retention while providing adequate protection for your oven's structure.
When selecting insulation materials, consider these proven options:
- Ceramic fiber blanket – Offers superior heat retention with just 1-2 inches of thickness, making it ideal for space-conscious installations.
- Vermiculite board – Naturally expands with heat and prevents cracking, requiring 4-6 inches around the dome.
- Insulating fire bricks – Perfect for floors and walls, maintaining consistent temperatures while supporting structural integrity.
Remember that proper thickness matters – you don't want to skimp on insulation during cold weather.
While ceramic fiber needs only 1-2 inches, vermiculite-based solutions require 2-3 times more thickness for peak performance.
This enhanced insulation capability allows you to achieve significant fuel savings while maintaining consistent cooking temperatures throughout your winter baking sessions.
Layer Protection Methods
Since winter temperatures can quickly sap heat from an outdoor oven's base, implementing strategic layer protection becomes essential for maintaining cooking temperatures. You'll want to build multiple insulation layers using proven materials and methods. Start with a calcium silicate board directly under your oven floor, then add vermiculite concrete in a 5:1:2 ratio for ideal thermal resistance.
| Layer Position | Recommended Material |
|---|---|
| Bottom Base | Perlite with bottles |
| Lower Middle | Calcium silicate board |
| Upper Middle | Vermiculite concrete |
| Dome Interior | Ceramic fiberboard |
| Exterior Shell | Clay-straw mixture |
Don't forget to use wire mesh between layers for structural support, and maintain proper clearance throughout. For added efficiency, create air pockets using empty bottles in your base layer – they'll serve as excellent insulators during those cold winter months.
Strategic Base Positioning
Establishing an insulated base for your outdoor oven requires careful consideration of both depth and material selection.
You'll want to dig down to your local frost line, typically 18-24 inches deep, to guarantee stability and temperature control. Choose durable materials like stone, brick, or urbanite for the base structure, then incorporate proper insulation layers of at least 4-6 inches thick.
- Position your base to allow natural airflow through strategically placed holes in brick walls, helping season wood and prevent moisture buildup.
- Create a ring of adobe to contain insulation materials like perlite or recycled beer bottles.
- Install a moisture barrier between the ground and base using breathable materials, such as straw insulation mixes, to maintain superior oven efficiency.
Double Layer Wood Stacking

Creating an effective double-layer wood stack in your outdoor oven requires careful attention to both structure and airflow.
Start by placing two dry, cured logs in opposite directions with kindling between them. You'll want to use quality woods like juniper or oak that have been properly stored under cover for at least a year.
Add two more pieces across the first layer, maintaining spaces for proper ventilation.
Continue building upward with three logs on the third level and three more on top, forming a log cabin structure.
Place your food-safe fire starter in the center.
Once lit, you'll need to monitor the temperature with a laser thermometer until it reaches 650+°F.
Remember to adjust the fire's position based on your cooking needs and close the smoke vents once you've reached ideal temperature.
Gradual Temperature Building Method
You'll want to start with a small, controlled fire near the oven's landing to establish a steady heat foundation before building it up incrementally.
Position your wood pieces strategically to maintain ideal airflow, letting hot air circulate throughout the dome while avoiding cold spots.
Keep a close eye on your heat zones using an infrared thermometer, and you'll see distinct temperature patterns emerge as the oven reaches its target range.
Start Small, Build Up
When preheating an outdoor oven during winter, proper temperature control begins with a measured approach to fire-building.
You'll want to start with small pieces of hardwood or kindling placed at the center of a clean oven floor. Using a propane torch, light the kindling and maintain a small, controlled fire to prevent thermal shock.
Follow these essential steps to build heat gradually:
- Begin at 140°F (60°C) and maintain this temperature for 4-5 hours
- Increase to 215°F (100°C) on day two, adding slightly larger wood pieces
- Progress to 300°F (150°C) by day three, using progressively larger logs
Remember to monitor your fire every 30 minutes, adjusting wood size and placement to maintain steady temperatures.
You'll need to keep the fire centered and well-ventilated, ensuring even heat distribution throughout your oven.
Position Wood For Airflow
Proper wood positioning serves as the cornerstone of gradual temperature building in winter outdoor ovens.
You'll want to arrange your wood in a pyramid shape, starting with small kindling at the center and gradually adding larger pieces. This creates ideal airflow pathways through your fire.
Choose seasoned hardwoods like oak or maple, and keep your pieces no larger than 3 inches in diameter for better heat control. Avoid softwoods that'll produce excess smoke.
As you build your fire, maintain space between wood pieces using a log cabin style arrangement with kindling between layers. Once lit, you can adjust the heat intensity using your oven's vents and dampers.
After about 20 minutes, move the fire to the back of the oven and add larger chunks while ensuring even burning throughout.
Monitor Heat Zone Patterns
Successful winter preheating starts with understanding your oven's heat zone patterns.
You'll need to track how heat builds and moves throughout your oven's dome by using an infrared thermometer to measure surface temperatures at regular intervals. Keep a small, centered fire using kindling and thin wood strips to establish a baseline temperature of around 300°F (149°C).
- Monitor different zones every 30 minutes using thermal couples placed at various depths.
- Record temperature readings from multiple points to understand heat distribution.
- Watch flame behavior – smaller flames indicate lower temperatures, while larger flames show higher heat levels.
As you maintain the fire, gradually add larger wood pieces while using the door and vents to control airflow.
This careful monitoring guarantees even heating and prevents thermal shock during winter preheating sessions.
Strategic Vent Control

Managing your outdoor oven's vents effectively can make the difference between a successful winter cooking session and a frustrating one. Start by ensuring your vent system follows the 3-2-10 rule with a double wall vent or spark resistant cover for safety.
You'll want to keep the vent area clear of snow and ice buildup.
When you're starting up, use your door as a damper to direct heat up the flue instead of letting it escape through the front. Begin with a small fire on the landing near the vent opening, then gradually push it back into the dome as it builds strength.
This pre-heating technique helps establish proper draw and reduces smoke spillage. Remember to inspect your venting system regularly and monitor internal temperatures to maintain peak performance.
Dry Heat Maintenance
Before starting your fire, you'll need to thoroughly check your oven's interior for any lingering moisture and wipe down all surfaces with a dry cloth.
To maintain ideal dry heat, keep the oven door closed between uses and regularly inspect your weatherproof cover for any tears that could allow moisture to seep in.
You can prevent heat loss by positioning your oven away from strong winter winds and using the minimum venting necessary to maintain your target temperature.
Residual Moisture Removal Tips
Proper moisture removal stands as the cornerstone of winter oven maintenance.
You'll need to carefully manage residual moisture to prevent cracks and maintain peak performance during cold weather. Before starting any fires, verify your oven has dried naturally for 3-5 days if it's been recently rendered.
Here's your essential moisture removal checklist:
- Start with low flames at 212°F (100°C) for 4-6 hours daily over 4-5 consecutive days.
- Monitor temperature gradually, beginning with 150-200°C for the first two days, then increasing to 300-350°C.
- Check for cracks and seal them with a 1:4 concrete-water mixture before they can trap moisture.
Keep your oven in regular use throughout winter – this helps maintain dryness and prevents moisture-related damage to the insulation blanket and dome structure.
Managing Heat Loss Prevention
Once you've addressed moisture concerns, effective heat retention becomes your next priority for winter oven operation.
Start by verifying your oven's ceramic fiber blanket is securely wrapped around the dome with wire mesh, providing an essential first layer of insulation. Add a vermiculite-cement mixture (5:1 ratio) over the blanket for enhanced protection.
Check that your insulating fire bricks are tightly fitted on the floor and walls, eliminating any gaps where heat could escape.
If you're using a dual slab system, confirm that your silica sand layer is maintaining its position between the concrete layers.
Don't forget to inspect your vent and chimney insulation, as these areas can be major sources of heat loss.
During winter, you'll need to extend your preheating time to guarantee the thermal mass reaches peak temperature.
Interior Dryness Safety Checks
Maintaining interior dryness stands as your first safety priority when preheating outdoor ovens in winter.
Before firing up your oven, you'll need to check for any moisture buildup that could compromise your cooking and safety. Start with a small fire to gradually warm up the oven over 4-7 hours, allowing trapped moisture to evaporate completely.
Follow these essential moisture checks before winter use:
- Look for visible dampness on interior surfaces and wipe down any wet spots.
- Light a test fire to observe if steam escapes, indicating residual moisture.
- Check that your chimney flue and vents are clear and functioning properly to allow moisture to escape.
Don't rush the drying process – proper moisture removal prevents cracking and guarantees your oven performs reliably throughout the winter season.
Optimal Wood Size Selection

Successful winter preheating of outdoor ovens starts with choosing the right wood size for your specific oven model.
For portable ovens like Ooni or Roccbox, you'll need 6-inch lengths with 1-2 inch diameters to create rolling flames. If you're using a full-sized dome oven, opt for 16-inch pieces instead.
Make sure your wood has about 10% moisture content after proper seasoning. You'll want to stick with hardwoods like oak, maple, or apple for the cleanest, hottest burns.
During winter preheating, place your next piece of wood on the far side of the oven to warm it up before adding it to the fire. Build your initial fire using the log cabin method with kindling in the center, ensuring there's enough space between the wood and your cooking area.
Heat Zone Distribution
Heat zone distribution builds on proper wood selection by leveraging your oven's design features.
Your dome-shaped oven naturally draws heat upward while the Full Effect Full Circulation Flue System® guarantees even distribution throughout the cooking chamber. You'll get the best results by working with your oven's OptiDome design to eliminate hot spots and maintain consistent temperatures.
- Move your fire strategically around the oven floor to heat all areas through conduction.
- Use your door as a damper to push heat up the flue rather than letting it escape through the front.
- Let the dome's semi-sphere shape do its work by allowing proper air movement and circulation.
Temperature Monitoring Techniques

When you're working with an outdoor oven in winter, accurate temperature monitoring becomes critical for consistent results.
You'll want to use an infrared thermometer to safely check surface temperatures from a distance – just aim it at the oven floor and add 100°F for air temperature readings.
For precise control, install a thermocouple in the oven's center and connect it to an automated temperature controller. This system will maintain your desired temperature through continuous feedback and power adjustments.
You can fine-tune the temperature by managing the damper – open it to increase airflow and heat, or close it to reduce temperature.
Remember to monitor your fire's intensity regularly, and don't let the chamber get overcrowded.
A small, well-managed fire will give you better temperature control than an overfilled one.
Wind Protection Strategies
Protecting your outdoor oven from winter winds requires strategic placement and thoughtful barriers. Position your oven so prevailing winds cross the front opening at an angle rather than hitting it straight on.
You'll want to take advantage of natural windbreaks like walls or buildings, and consider installing additional screens or barriers for enhanced protection.
- Install a premium outdoor cover that extends over your oven's edges to shield it from wind and moisture.
- Build a protective enclosure around your oven, ensuring proper sealing around the flue.
- Use the "top down" fire starting method to maintain better control in windy conditions.
Don't forget to keep your oven's path clear of snow and ice, and preheat the flue gradually to improve airflow.
When working in winter conditions, wear shoes with good grip to prevent slipping while tending to your oven.
Frequently Asked Questions
How Do Different Weather Conditions Affect the Type of Wood I Should Use?
You'll want hardwoods like oak in cold weather for longer burns, while avoiding moisture-laden wood during rain. In windy conditions, use denser woods and stack them tightly for better fire control.
Can I Use My Pizza Peel to Remove Snow From Inside the Oven?
Don't use your pizza peel to remove snow from your oven. You'll risk damaging the peel and contaminating it with moisture. Instead, use a brush or small shovel designed for snow removal to protect your equipment.
What's the Ideal Distance Between Multiple Pizza Ovens Operating in Winter?
You'll want to keep your pizza ovens at least 4-6 feet apart to guarantee proper ventilation, safe access, and prevent heat interference. This spacing also lets you work comfortably between them during operation.
Does Altitude Affect Winter Preheating Time for Outdoor Pizza Ovens?
Yes, altitude will affect your winter preheating time. You'll need to adjust temperatures down by 5-10°F per 1,000 feet elevation and may require longer preheating periods to compensate for thinner air and colder conditions.
Should I Adjust Cooking Times Differently for Frozen Versus Room-Temperature Ingredients?
Yes, you'll need to extend cooking times for frozen ingredients by 25-50% since they heat more slowly. When using room-temperature ingredients, you can stick to standard recipe times for best results.
In Summary
You'll find these winter preheating techniques make a significant difference in your outdoor oven's performance. By starting early, insulating properly, and managing your wood and airflow strategically, you're setting yourself up for successful cold-weather cooking. Don't let winter stop you from enjoying your outdoor oven – with these methods, you'll maintain consistent temperatures and create delicious meals year-round.

Leave a Reply