
Create a flavorful solar-powered veggie curry by following these essential tips: Start early (between 10 AM-2 PM) and position your solar oven in direct sunlight. Layer your ingredients strategically – begin with onions, garlic, and ginger, followed by harder vegetables like potatoes and carrots. Maintain ideal cooking temperature between 150-225°F by adjusting the oven's position every 1-2 hours. Keep the curry's consistency perfect by carefully managing liquid ratios with coconut milk and vegetable broth. Stir every 10-15 minutes for even cooking. Use dark cookware for better heat absorption. With these fundamentals, you'll discover how easy it is to harness the sun's power for sustainable, delicious cooking.
Essential Ingredients and Prep Work
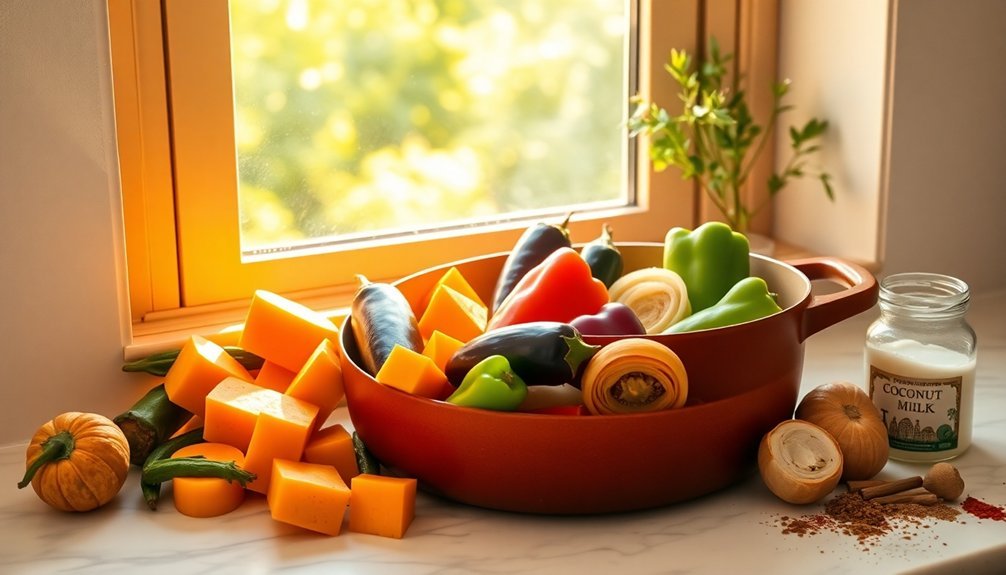
Gather your ingredients before diving into this flavorful slow-cooked veggie curry.
You'll need essential aromatics like diced onion, minced garlic, and grated ginger. For vegetables, prepare green beans trimmed into 2-inch pieces, sliced carrots, chopped potatoes, bite-sized cauliflower florets, and peeled sweet potatoes. Include protein sources like canned chickpeas and optional red lentils.
Your spice blend should contain garam masala, ground cumin, turmeric, and curry powder. For the base, you'll need coconut milk, diced tomatoes, vegetable broth, and either coconut or olive oil. Don't forget fresh cilantro and lime juice for finishing touches.
Start by chopping all vegetables into consistent, bite-sized pieces to guarantee even cooking. Trim your green beans, peel sweet potatoes, and cut cauliflower into manageable florets. Drain and rinse your chickpeas thoroughly.
If you're short on time, you can add aromatics directly to the slow cooker, but sautéing them first in oil will enhance their flavors. Combine all ingredients in your slow cooker, making certain to distribute the spices evenly throughout the mixture. Cook until potatoes are fork-tender, which takes 2-3 hours on high or 4-5 hours on low.
Setting Up Your Solar Kitchen
While traditional slow cookers rely on electricity, a solar kitchen offers an eco-friendly alternative for preparing your veggie curry. To get started, you'll need to construct a solar oven using a box with a lid, aluminum foil for the interior lining, and clear plastic wrap or glass for the top window.
Don't forget to add black paint inside to maximize heat absorption and insulate with newspaper or sawdust to retain heat. A properly insulated solar oven using heat-resistant materials can maintain cooking temperatures of up to 178°F during peak sunlight.
Position your solar oven in full sunlight between 11 am and 3 pm for ideal cooking. You'll want to place it on a dry, level surface and adjust its position throughout the day to maintain direct sunlight exposure.
Install a cooking rack made of aluminum or stainless steel, raising it about 6 centimeters to allow for even heat distribution.
To enhance your curry's cooking efficiency, attach a reflector to direct more sunlight into the oven. Adjust the reflector's angle based on the sun's position – higher when the sun is overhead, lower when it's near the horizon.
On windy days, stabilize your setup with stones or bricks to prevent disruption during cooking.
Temperature Control and Timing
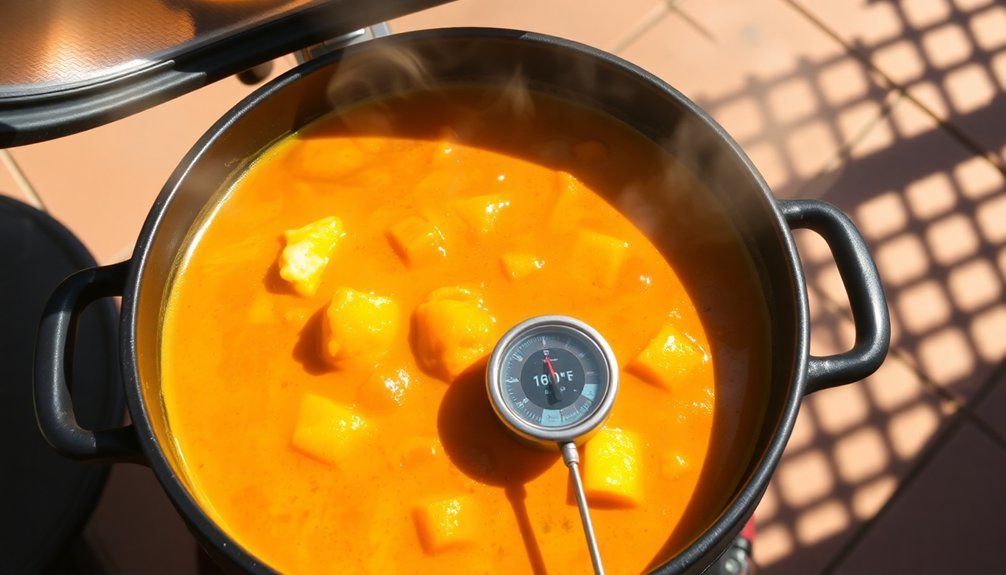
You'll need to keep a close eye on your solar cooker's temperature throughout the day using a reliable thermometer, aiming to maintain 150-225°F for your veggie curry.
To maximize your cooking success, plan to start your curry between 10 AM and 2 PM when the sun is strongest, adjusting the cooker's position every 30-45 minutes to maintain ideal exposure.
Check your curry's progress regularly with real-time temperature readings, making necessary adjustments to cooking times based on weather conditions and ensuring your vegetables cook evenly. Use dark metal cookware with tight-fitting lids to achieve the best heat absorption while cooking your curry.
Monitoring Heat Throughout Day
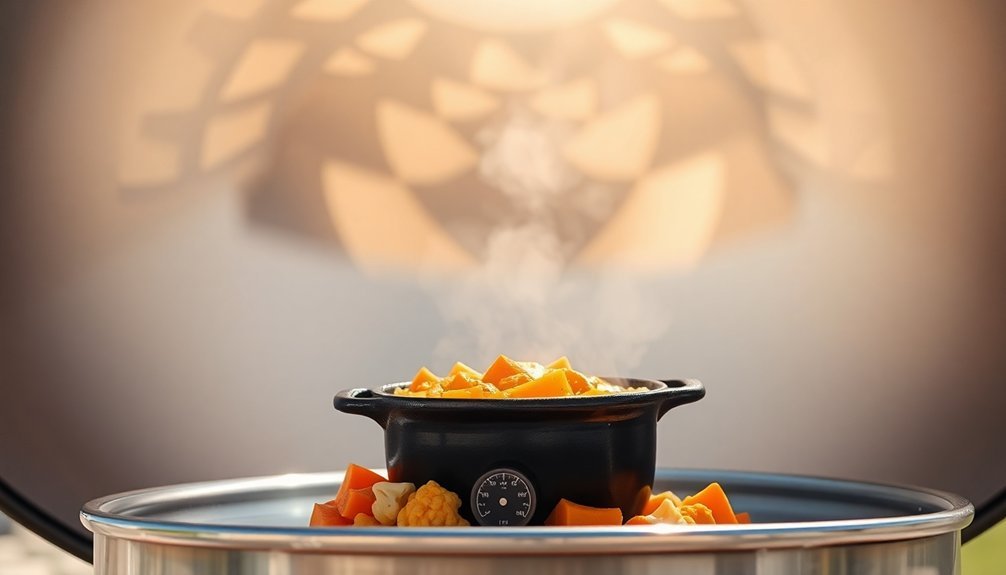
The art of slow cooking lies in maintaining proper temperature control throughout the day. You'll want to keep your slow cooker's temperature between 180°F and 300°F, with lower settings around 212°F being ideal for preserving nutrients and maintaining juicy textures in your veggie curry.
Monitor your curry's progress by checking it once or twice during the cooking process, which typically takes 3.5 to 6.5 hours depending on your heat setting.
You'll need to layer your ingredients strategically, placing items like potatoes, lentils, and tomatoes at the bottom of your 6-quart (or larger) cooker for even heat distribution.
Keep an eye on ingredient tenderness throughout the cooking time. You'll know your curry's done when the potatoes are tender and the lentils are soft.
If you're adding coconut milk, wait until the end of cooking to achieve the right consistency. For the final 30 minutes, remove the lid to let the curry thicken.
Before serving, taste and adjust your seasonings, and consider adding fresh herbs or a squeeze of lime to enhance the flavors.
Managing Optimal Cooking Windows
Mastery of cooking windows makes all the difference in creating the perfect veggie curry. You'll want to maintain temperatures between 80-100°C (176-212°F) to preserve nutrients and achieve that ideal texture in your vegetables. This temperature range guarantees your curry develops rich flavors while keeping the vegetables juicy and tender.
When planning your cooking schedule, you've got two main options: cook on low for 8 hours or high for 4 hours. If you're using a variety of vegetables, you'll need to time their addition strategically. Start with harder vegetables like potatoes and cauliflower, which need longer cooking times, and add softer vegetables later to maintain their texture.
You can save time by prepping your vegetables the night before. It's essential to monitor the temperature throughout the cooking process to prevent it from exceeding 100°C (212°F), as higher temperatures will destroy essential nutrients.
Remember that cooking times may need adjustment based on your vegetable quantity and types. For the best results, you'll want to guarantee uniform cooking by mixing ingredients thoroughly before starting the slow-cooking process.
Maximizing Solar Heat Efficiency
Successfully harnessing solar heat requires careful attention to design, positioning, and insulation techniques. To maximize your solar cooker's efficiency, start by lining the interior with reflective materials like aluminum foil or mirrors. Position these reflectors to direct sunlight toward your cooking pot, and remember to adjust them every 1-2 hours as the sun moves across the sky.
Insulation is essential for maintaining consistent cooking temperatures. Layer your solar oven with materials like newspapers, cotton balls, or packing peanuts to trap heat effectively. You'll want to create a well-sealed environment that can maintain temperatures up to 300°F in a box-style cooker. For higher temperatures reaching 400°F, consider using a parabolic design.
Place your cooker in direct sunlight and make sure the transparent window faces the sun. You'll get the best results on bright, cloudless days. If you're using a panel cooker, don't forget to enclose your pot in a heat-trapping plastic bag.
With proper insulation and positioning, you can even boil water within an hour using a low-power setup, making solar cooking a viable option for your daily meal preparation.
Safe Solar Cooking Practices
Practicing safe solar cooking techniques guarantees both delicious meals and food safety. When preparing your veggie curry, you'll need to monitor temperatures carefully using a digital probe thermometer. Keep your solar oven preheated to at least 200°F and don't let ingredients remain in the danger zone between 40°F and 140°F for more than 2 hours.
| Safety Aspect | What to Do | Why It Matters |
|---|---|---|
| Temperature | Monitor with probe thermometer | Prevents bacterial growth |
| Time Management | Cook between 11am-3pm | Maximizes sun exposure |
| Food Handling | Keep raw items separate | Prevents cross-contamination |
| Equipment | Use dark cookware with mitts | Guarantees efficient cooking |
| Positioning | Adjust every 1-2 hours | Maintains consistent heat |
You'll need to stir your curry every 10-15 minutes for even cooking and adjust the oven's position to follow the sun. Don't forget to protect your eyes with sunglasses when working with reflective surfaces. Place your solar oven in a stable location away from wind, and keep children and pets at a safe distance. Remember that solar cooking takes longer than conventional methods, so plan accordingly for your curry preparation.
Perfect Curry Consistency Tips
To achieve the ideal curry consistency, you'll need to carefully control liquid amounts while cooking, paying close attention to how much water or stock you add.
Watch the steam release during simmering and adjust your heat accordingly to prevent excessive moisture loss or accumulation.
Layer your ingredients strategically, starting with aromatics and ending with vegetables that release less water, to maintain the perfect balance between thick and runny textures.
Control Liquid During Cooking
Getting the perfect curry consistency requires careful control of liquid ingredients throughout the cooking process. When you're making a slow-cooked veggie curry, it's essential to manage your liquid additions wisely to achieve that ideal thickness.
You'll want to cook on low to medium heat, which helps preserve both flavors and nutrients while allowing better control over the curry's consistency.
Add your liquids gradually, whether you're using water, soy milk, or vegetable stock. Let each addition cook down before adding more, and always consider the moisture content of your vegetables when determining how much liquid to include.
If you notice your curry becoming too thin, you can simmer it uncovered to reduce excess moisture.
- Use measured amounts of liquid ingredients rather than eyeballing portions
- Allow each liquid addition to reduce before adding more
- Consider using vegetable stock instead of water for richer flavor
- Adjust liquid quantities based on your vegetables' natural moisture
- Keep heat at low to medium to prevent excessive evaporation
Remember to take into account that different vegetables release varying amounts of water during cooking, so you'll need to adjust your liquid additions accordingly.
Monitor Steam Release
Once you've mastered liquid control, proper steam management becomes your next essential key to achieving the perfect curry consistency. Keep your pot uncovered during cooking to allow steam to escape freely, which helps reduce the sauce and concentrate flavors more effectively. The larger surface area of an uncovered pot speeds up evaporation, preventing trapped steam from diluting your curry.
While simmering, maintain a lower temperature and stir regularly to prevent scorching. You'll know you're on the right track when you see the oil separating from the spices and aromatics. This separation is a vital indicator of doneness and proper consistency. Test the thickness by checking if the sauce coats the back of your spoon evenly.
Monitor the curry's consistency throughout cooking to achieve that ideal medium thickness – it shouldn't be too runny or too thick. The perfect consistency will allow your curry to coat bread nicely while maintaining enough liquid for rice or naan.
Remember that proper steam release enhances the overall flavor profile by allowing the full expression of your aromatics like ginger, garlic, onion, and tomatoes while preserving the intensity of your spices.
Proper Ingredient Layering
The art of layering ingredients stands as a fundamental principle for achieving the perfect curry consistency. When you're preparing your slow-cooked veggie curry, following the correct sequence guarantees each component develops its full flavor potential.
Start by sautéing your onions until translucent, then add tomatoes and let them cook until they break down completely. This creates a robust base that'll carry your curry's flavor throughout the cooking process.
In your slow cooker, layer your ingredients strategically and allow sufficient time for each addition to integrate fully with the others. Remember to add wet ingredients like chickpeas and vegetable stock alongside your curry paste to maintain ideal moisture levels throughout the extended cooking period.
- Begin with onions and cook until they're translucent before adding other ingredients
- Add tomatoes or tomato puree next, allowing them to break down completely
- Layer vegetables according to their cooking times – harder vegetables first
- Pour in wet ingredients (stock, soy milk, tinned tomatoes) evenly across the surface
- Finish with delicate ingredients that require minimal cooking time
This methodical approach guarantees even cooking and helps you achieve that perfect, harmonious blend of flavors and textures in your curry.
Serving Your Solar Masterpiece
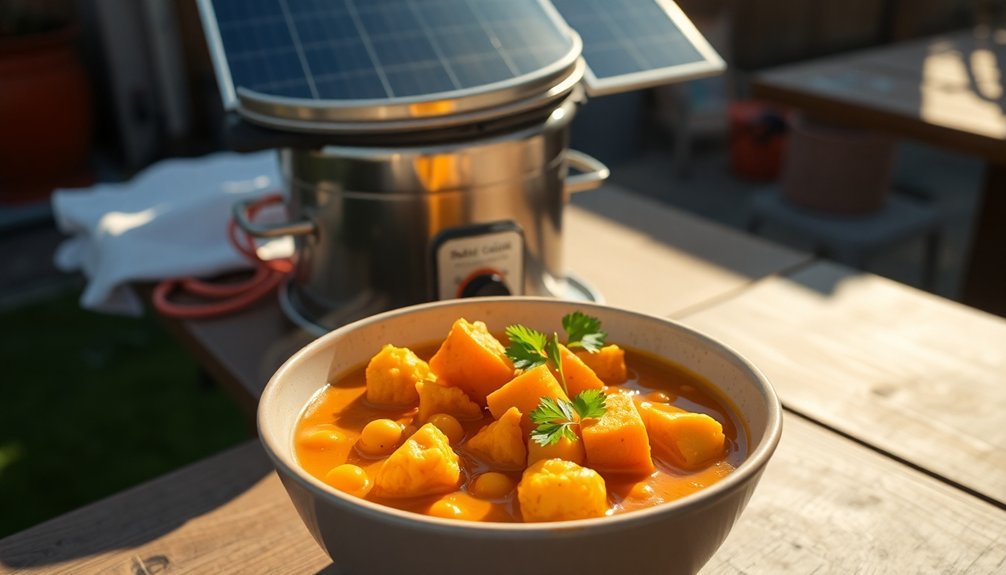
After hours of slow cooking, your aromatic veggie curry deserves a thoughtful presentation that enhances its flavors and textures.
Start by selecting your base – freshly cooked basmati rice offers a traditional foundation, while brown rice or quinoa provide healthier alternatives. Make sure your grain of choice is hot when serving to complement the curry's temperature.
You'll want to layer your toppings strategically. Sprinkle fresh cilantro and green onions over the curry for bright, herbaceous notes. Add a squeeze of lime juice to cut through the richness and wake up the flavors. For texture contrast, scatter toasted cashews or peanuts on top – they'll add a satisfying crunch to each bite. If you're looking for extra heat, incorporate dried chiles or red pepper flakes.
Don't forget about storing leftovers properly. Let your curry cool completely before transferring it to freezer-safe containers.
It'll keep well for up to three months. When you're ready to enjoy it again, reheat it thoroughly on the stovetop or in your slow cooker, adjusting the seasonings as needed. Serve with fresh rice and new toppings for the best experience.
Frequently Asked Questions
Can I Cook Curry in a Solar Oven During Winter?
Yes, you can cook curry in a solar oven during winter! You'll need an evacuated tube cooker for best results, and while it'll take longer, the clear winter air actually helps concentrate sunlight effectively.
What Happens if Clouds Appear During the Cooking Process?
If clouds appear during your solar cooking, you'll notice longer cooking times and reduced temperatures. Keep your food covered to retain heat, and you might need to extend cooking time or switch to backup methods.
Is Food Cooked in Solar Ovens as Nutritious as Conventionally Cooked Food?
You'll find solar-cooked food is actually more nutritious than conventionally cooked meals. It preserves vitamins better, enhances antioxidant content, and maintains higher levels of nutrients due to its gentle, low-temperature cooking process.
How Do You Prevent Vegetables From Becoming Too Mushy?
You'll prevent mushy vegetables by cutting them into larger, uniform pieces, reducing liquid content, and adding delicate veggies later in cooking. Layer denser vegetables at the bottom and maintain lower, consistent temperatures while cooking.
Can Solar Cooking Work at High Altitudes?
Yes, you'll find solar cooking works well at high altitudes. You'll actually benefit from stronger UV rays and less atmospheric filtering. Just guarantee you've got good insulation and adjust your cooker's angle to capture direct sunlight.
In Summary
You've mastered the art of solar curry cooking! By following these tips, you'll create an eco-friendly, flavorful meal that harnesses the sun's natural energy. Don't forget to store leftovers properly and clean your solar cooking equipment after use. Your successful solar curry proves that sustainable cooking doesn't sacrifice taste – it enhances it. Keep experimenting with different vegetables and spices in your solar kitchen!


Leave a Reply