
Your DIY oven won't hold steady heat due to several common issues you can fix. Poor insulation or gaps in sealing are often the main culprits, letting valuable heat escape through cracks and worn gaskets. Improper thermal mass balance could mean you're using too much or too little mass material, affecting temperature stability. Your ventilation system might be blocked or improperly sized, disrupting airflow and temperature control. Weather conditions and incorrect reflector positioning can also impact heat retention. Uneven heat distribution from poor construction materials or design flaws will compromise cooking performance. Let's explore how to stabilize your oven's temperature for better results.
Understanding Solar Heat Transfer Dynamics
When building a DIY solar oven, you'll need to understand the three main heat transfer mechanisms: conduction, convection, and radiation.
Your oven's absorber surface captures the sun's radiation and conducts heat to the air inside, while convection currents distribute warmth throughout the cooking chamber.
Your success depends on maximizing these heat transfer dynamics. You'll want to choose materials with high thermal conductivity for your absorber plate and guarantee proper insulation to prevent heat loss. Using materials with lower surface emissivity will help increase the overall efficiency of your solar oven.
The angle and orientation of your oven matter too – they'll affect how much solar radiation you can capture.
Remember that weather conditions will impact performance, so you'll get better results on sunny, hot days.
Understanding how mixed convection works in your oven's design can help you optimize airflow and prevent temperature fluctuations.
Proper Insulation Material Selection
Now that you grasp the heat transfer dynamics, selecting the right insulation materials will determine your DIY oven's success.
You'll need to take into account both the type and placement of insulation to maintain steady temperatures. Whether you choose reflective panels, thermal materials like fiberglass, or natural options like earth, proper installation is essential. Materials that have low thermal conductivity will provide the most effective insulation for your oven.
- Don't let your hard work go to waste with gaps that leak precious heat
- You'll kick yourself if you forget to insulate the base and door
- Your oven's efficiency depends on strategic placement of every layer
- Imagine the satisfaction of achieving perfect cooking temperatures
- Think of the energy you'll save with proper insulation
Remember to check your insulation regularly and keep it dry.
The right material should withstand high temperatures without degrading, ensuring your DIY oven performs reliably for years to come.
Reflector Positioning and Adjustment
Proper positioning of your reflector panels can make or break your DIY oven's performance. If you're struggling with uneven heating, start by checking your reflector's alignment with the fire source.
You'll want to face the oven's opening towards the side of the fire, not directly at the flames. A teepee-style fire works best for maintaining consistent heat output.
Keep your reflector oven level and stable using stones or built-in legs for support. You can fine-tune the temperature by moving the oven closer to or further from the fire – remember, if the top of your food browns faster, your fire's too large, and if the bottom browns faster, it's too small.
Don't forget to monitor the temperature by using an oven thermometer or the hand-test method: if you can hold your hand in front for 7-10 seconds, you're at about 200°F.
Weather Impact on Temperature
Your DIY oven's performance will fluctuate with the changing seasons, as cold air can greatly reduce heat generation and retention.
High humidity levels in your kitchen can extend baking times and alter how evenly your oven distributes heat.
If you've placed your oven near a window, drafts can disrupt temperature stability and blow away valuable heat, requiring additional energy to maintain consistent temperatures.
Seasonal Temperature Fluctuations
Weather patterns and outdoor temperatures can greatly impact your oven's performance throughout the year.
You'll notice your oven working harder to maintain heat during cold months, while warmer seasons might cause it to heat up too quickly. These fluctuations can affect your cooking results if you don't take proper precautions.
- Your perfectly timed recipes might fail due to unexpected temperature swings
- Your energy bills could spike from your oven's increased workload
- Your favorite baked goods mightn't turn out as expected
- Your oven's components could wear out faster from seasonal stress
- Your cooking schedule might need constant adjustments
To combat these issues, check your oven's door seal regularly, maintain proper calibration, and use an oven thermometer to monitor internal temperatures.
Remember that seasonal changes affect your oven's heating element efficiency and thermostat sensitivity, so staying proactive with maintenance is essential for consistent performance.
Humidity Effects Heat Retention
While the temperature outside fluctuates, humidity plays an essential role in how your oven retains and transfers heat.
If you're noticing inconsistent baking results, your kitchen's humidity levels might be affecting your oven's performance.
Your oven's atmosphere contains water vapor, which holds heat more efficiently than dry air due to its higher specific heat capacity.
When humidity is too low, you'll lose heat faster and may need longer cooking times.
Conversely, high humidity enhances heat transfer and can help maintain consistent temperatures, but it might also cause unwanted condensation if not properly managed.
You can optimize your oven's performance by using extraction fans and dampers to control humidity levels.
During baking, higher humidity early on helps keep dough surfaces elastic, while reduced humidity later guarantees proper crisping and browning.
Draft Impact Near Windows
Building on our understanding of humidity's effects, drafts from nearby windows can greatly impact your oven's temperature stability.
Cold air infiltration through window gaps can disrupt your oven's carefully calibrated heating system, especially if your oven door seal isn't functioning properly. To combat this, you'll need to ascertain proper ventilation while protecting against unwanted drafts.
- Feel the frustration of watching your carefully prepared dishes cook unevenly due to temperature fluctuations
- Experience the disappointment of longer cooking times when cold drafts steal your oven's heat
- Notice your energy bills climbing as your oven works harder to maintain temperature
- Sense the kitchen's temperature dropping when drafts interfere with your cooking
- Imagine the satisfaction of maintaining perfect heat after fixing draft issues
Check your oven door seal, maintain proper ventilation, and verify your thermostat's accuracy to minimize draft impact.
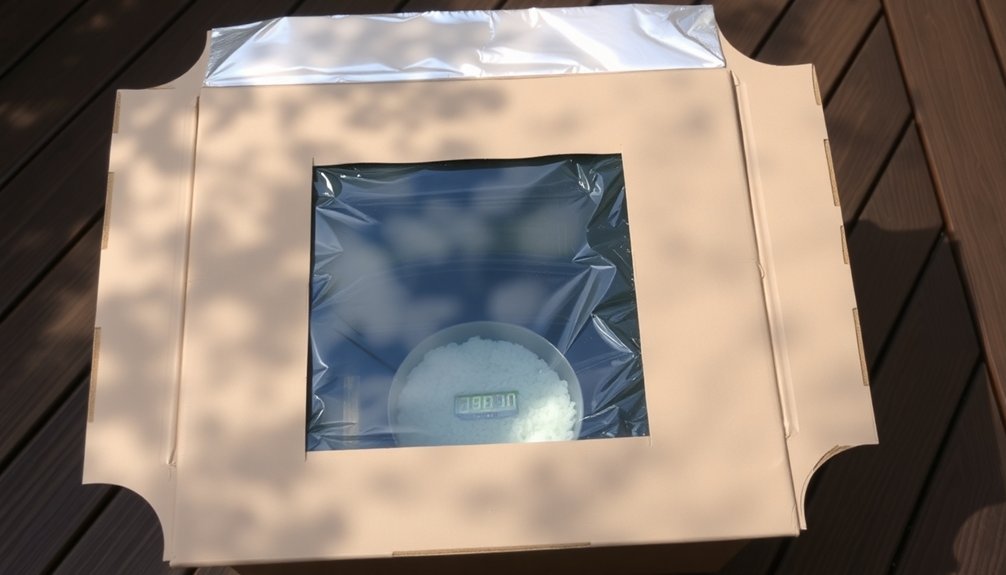
Double-Glazing Window Design
To effectively regulate your oven's temperature, understanding double-glazing window design is essential. This design uses two glass panes with a sealed gap between them, creating an insulation barrier that maintains stable temperatures.
You'll find that inert gases like argon or krypton in this gap can enhance the insulation effect.
The construction relies on a spacer, typically made of aluminum or fiberglass, to separate the panes while maintaining an airtight seal.
If you've noticed uneven cooking or temperature fluctuations, check your oven's double-glazed window. A broken seal or moisture between the panes signals it's time for replacement.
Regular maintenance, including cleaning and seal inspection, keeps your window functioning at its best.
With proper double-glazing, you'll achieve better heat distribution and more consistent cooking results.
Heat Storage Solutions
Effective heat storage begins with selecting materials that can absorb and retain thermal energy efficiently.
You'll want to implement a "sand battery" system, where sand acts as a thermal mass to store and release heat gradually.
By incorporating multiple layers of insulation and proper ventilation, you're creating an environment that maintains consistent temperatures.
- Your oven's heart beats strongest with high thermal mass materials
- You're building more than an oven – you're crafting a heat sanctuary
- Every layer of insulation is a shield protecting your culinary dreams
- Your carefully dried insulation layers are the guardians of heat
- You've created a thermal fortress with proper material selection
Ensure your wire frame supports vermiculite concrete effectively, and don't forget to overlap insulating blankets at the joints.
Managing Thermal Mass Effectively
When you're managing thermal mass in your DIY oven, striking the right balance becomes essential for peak performance. If you add too much mass, you'll struggle with long heating times and inefficient cooking. Too little, and you won't maintain stable temperatures for consistent results.
| Mass Level | Impact | Solution |
|---|---|---|
| Excessive | Slow heating, poor efficiency | Reduce thickness to 1.5-3" for home use |
| Insufficient | Rapid heat loss, unstable temps | Add proper refractory materials |
| Ideal | Even heat distribution | Use 5.0 kg mass with proper insulation |
| Perfect Balance | Stable cooking environment | Layer with rock wool, seal gaps |
You'll need to pair your thermal mass with proper insulation. Use rock wool insulation and reflective barriers to minimize heat loss, and make certain all joints are sealed to maintain temperature stability.
Sealing Against Heat Loss
You'll want to start by examining your oven's door gasket for signs of wear, cracks, or compression that could compromise its sealing ability.
To test the seal's performance, close the door on a dollar bill and pull it – if it slides out easily, your seal needs attention.
Common heat leakage points include worn hinges, warped door frames, and damaged gaskets, all of which you can address through proper maintenance or replacement parts from your local hardware store.
Check Door Gasket Quality
A properly functioning oven door gasket plays an essential role in maintaining consistent cooking temperatures and energy efficiency.
You'll want to check your gasket's condition regularly, as a damaged seal can lead to significant heat loss and uneven cooking.
If you notice these warning signs, it's time to replace your gasket:
- Your oven takes forever to preheat, wasting precious cooking time
- Your perfectly planned meals come out frustratingly undercooked
- Your kitchen feels like a sauna when baking
- Your energy bills keep climbing due to heat escape
- Your oven door's exterior is uncomfortably hot to touch
Replacing the gasket isn't complicated – just make certain you have the correct replacement part for your model.
With basic tools like a screwdriver and some cleaning supplies, you can restore your oven's best performance in about 30 minutes.
Test Seal Performance
Testing your oven's seal performance confirms you're not losing valuable heat during cooking operations. Since perfect insulation doesn't exist, you'll need to minimize heat loss through critical areas, especially around the door and ventilation points where hot air naturally escapes.
You can check seal efficiency by monitoring temperature stability during operation. If you're noticing significant temperature fluctuations, place an aluminum tray on the bottom rack to help regulate heat distribution and improve thermostat readings.
Remember that steam leakage through vents contributes to heat loss, so you'll want to verify your seals are functioning effectively. For the most accurate testing, preheat your oven for 45 minutes to achieve stable temperatures before checking seal performance. This allows the chamber walls to reach proper temperature and provides more reliable test results.
Fix Common Leakage Points
Once you've identified potential heat loss through seal testing, addressing common leakage points can dramatically improve your oven's efficiency.
Start by examining your oven's door gaskets for wear and tear, as damaged seals are often the primary culprit of heat escape. Don't overlook the importance of clearing debris that might prevent proper door closure.
For ideal heat retention, focus on these critical areas:
- Check entrance and exit points – they're silent heat thieves
- Install high-temperature curtains at openings where parts move through
- Implement powered air seals to maintain consistent temperature
- Add unheated vestibules for loading/unloading protection
- Pay special attention to corners and edges where seals meet
Remember to regularly inspect these areas, as even small gaps can lead to significant heat loss and increased energy consumption.
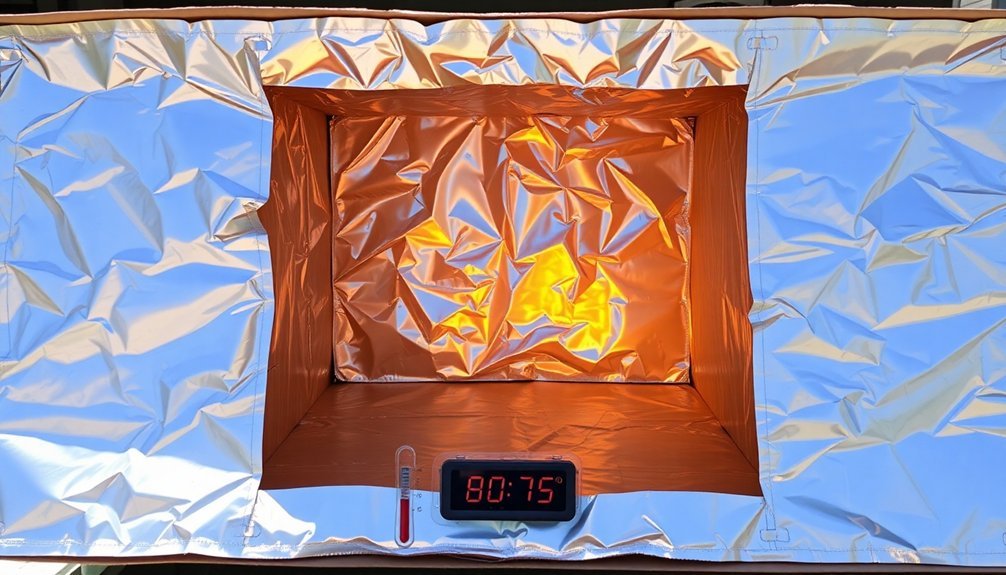
Maintaining Consistent Sun Exposure
Maintaining ideal heat levels in your DIY oven depends heavily on consistent sun exposure throughout the cooking process. You'll need to position your oven correctly and monitor the sun's movement to achieve best results.
| Time of Day | Sun Position | Required Action |
|---|---|---|
| Morning | East | Angle reflectors eastward |
| Mid-morning | Southeast | Adjust 45° southeast |
| Noon | Overhead | Flatten reflectors |
| Afternoon | Southwest | Adjust 45° southwest |
| Evening | West | Angle reflectors westward |
Your oven's efficiency relies on clear weather conditions and proper use of materials. Line the interior with black construction paper to absorb heat, and use aluminum foil on reflective surfaces to direct sunlight inward. During cloudy periods, you'll notice reduced performance, so plan your cooking around weather forecasts. Remember to protect your setup from wind, which can greatly impact heat retention.
Ventilation Control Mechanisms
Watch for warning signs of blocked vents in your oven, including uneven cooking and temperature fluctuations that won't stabilize.
You'll need to check the air flow paths around your oven regularly, ensuring both intake and exhaust vents remain unobstructed.
Keep your ventilation components clean by removing grease buildup, food particles, and dust that can restrict proper airflow and compromise your oven's performance.
Blocked Vent Warning Signs
Several key warning signs can alert you to blocked vents in your oven's ventilation control system. When vents become obstructed, you'll notice uneven cooking temperatures and longer cooking times. Your food may end up with hot and cold spots, making it difficult to achieve consistent results.
- Your smoke alarm keeps triggering during normal cooking
- You're seeing excess moisture collecting inside your oven
- Food isn't browning properly, especially on lower racks
- Your energy bills are climbing despite normal oven usage
- There's visible residue or blockage around vent openings
Don't ignore these warning signs, as they can lead to serious safety hazards and reduced oven performance.
Regular maintenance, including inspecting and cleaning vents with a vacuum and soft brush, will help prevent blockages.
Check your ventilation controls regularly to verify they're functioning properly and running long enough to clear any potential obstructions.
Air Flow Path Inspection
A thorough inspection of your oven's air flow path will help you identify potential ventilation issues before they become serious problems.
Start by examining your exhaust duct configuration, ensuring it's properly sized (typically 3/4" by 10") and sealed with HVAC-grade aluminum tape at all joints.
Check that your makeup air system, including the 8-inch round duct and motorized damper, is functioning correctly to maintain proper indoor air pressure.
You'll want to verify that all flues and fans are moving air in the intended direction.
Don't forget to inspect independent actuators controlling gas and air supplies, as they're vital for precise temperature control.
Look for signs of thermal bridging or uninsulated sections that could be causing heat loss.
If you notice temperature fluctuations, examine vent valves for potential leaks.
Cleaning Ventilation Components
Regular maintenance of your oven's ventilation control mechanisms guarantees excellent heat distribution and prevents common temperature issues.
You'll need to inspect and clean all ventilation components thoroughly, ensuring they're free from debris and damage. For peak performance, use a soft brush to clear vent openings and apply a gentle baking soda paste to clean heating elements.
- Don't let your family's safety be compromised by blocked vents
- Save money on repairs by catching ventilation issues early
- Protect your investment with proper maintenance
- Keep your cooking consistent and reliable
- Avoid the frustration of unevenly cooked meals
Seal any duct joints with aluminum tape and check that the ventilation system is correctly installed.
Remember to clean racks regularly and use a mixture of baking soda and water to prevent grease buildup that can affect your oven's performance.
Temperature Monitoring Methods
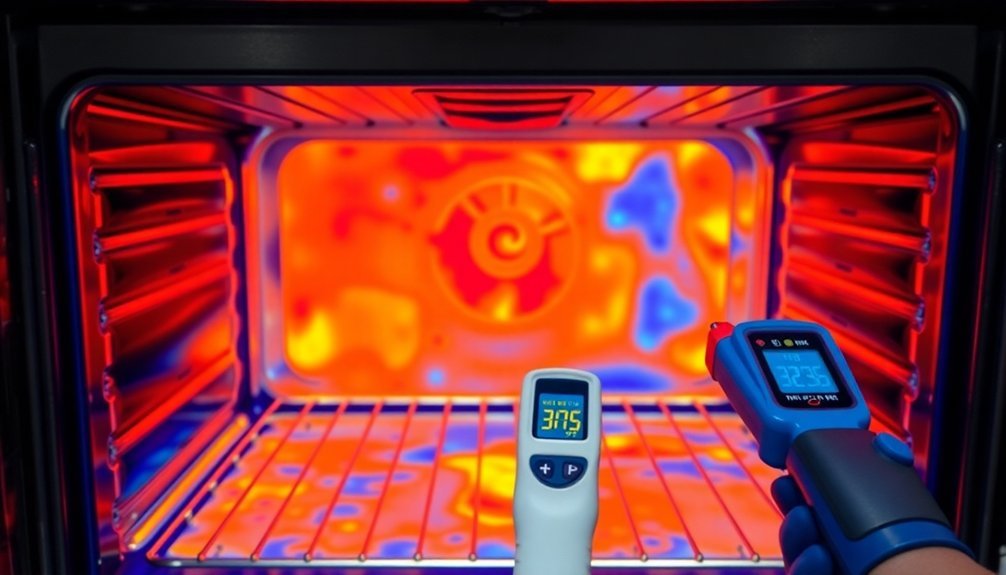
When monitoring your oven's temperature accurately, you'll need more than just the built-in thermostat. Place an oven-safe thermometer, like a Taylor Precision or ThermoPro, in the center of your oven rack for reliable readings.
Take measurements every 15 minutes over a two-hour period to calculate the average temperature and identify discrepancies.
You can improve temperature stability by installing a PID controller with a thermocouple, which predicts temperature trends and adjusts the heating element accordingly.
For a simpler solution, place an aluminum tray on the bottom rack to block excess radiation from the heating element.
If you find consistent temperature differences, adjust your oven's dial stem by removing the control knob or modify your cooking times to compensate for the variance.
Construction Material Considerations
Selecting appropriate materials for your DIY oven requires careful consideration of thermal properties and durability. Each layer serves an essential purpose, from the thermal core to the exterior finish.
You'll need a precise 1:3 clay-to-sand ratio for the thermal layer, while the insulation layer demands a careful mix of clay and straw.
- Your oven's heart lies in its fire brick foundation – don't skimp here, as it's vital for even heat distribution.
- That satisfying moment when your clay mixture passes the "golf ball drop test" means you're on track.
- Watch in amazement as proper insulation keeps your heat steady for hours.
- Feel the confidence of knowing your carefully layered materials will protect against heat loss.
- Experience the pride of building an oven that performs like a professional unit.
Solar Tracking Alignment

To maximize your DIY oven's solar efficiency, a precise tracking alignment system guarantees ideal sunlight exposure throughout the day.
Mount your oven on a slotted angle frame with bearings and a Lazy Susan base for smooth rotation. Install opposing solar panels that'll control a servo motor through a DPDT toggle switch, allowing automatic sun tracking.
You'll need to cross-wire the panels so they detect sunlight differences effectively. When both panels receive equal light, the servo centers and stops the motor.
The DPDT switch's three positions let you control rotation direction, while an on/off switch manages battery power. Fine-tune your oven's position using the triangular plywood base for side-to-side adjustments.
This setup ensures continuous sun tracking without needing manual resets, maintaining consistent cooking temperatures.
Frequently Asked Questions
Can a Faulty Thermostat Knob Affect Temperature Accuracy in My Oven?
Yes, your oven's faulty thermostat knob can cause temperature fluctuations, preventing accurate heat control. You'll notice uneven cooking results, and your set temperature won't match the actual oven temperature during operation.
How Do I Check if My Oven's Heating Elements Need Replacement?
You'll need to visually inspect your heating elements for damage, test continuity with a multimeter, and check if they glow red when operating. If elements fail these tests, they'll need replacement.
Why Does My Oven Take Longer Than Usual to Preheat?
Your oven's slow preheating could be due to faulty heating elements, a dirty interior, damaged door seals, or a malfunctioning temperature sensor. Check these components and verify you're not overloading the oven when preheating.
Should I Replace My Oven Door Seal if I Notice Heat Escaping?
Yes, you should replace your oven door seal if you notice heat escaping. It'll improve energy efficiency, guarantee even cooking temperatures, reduce preheating time, and prevent safety hazards. Don't delay this important maintenance task.
What Causes Temperature Fluctuations in My Electric Oven During Baking?
Your electric oven's temperature fluctuations can be caused by a faulty thermostat, damaged heating elements, worn door seals, or poor airflow. Opening the door frequently or having incorrect calibration settings will also affect temperature stability.
In Summary
Your DIY solar oven's temperature fluctuations aren't a lost cause. By upgrading your insulation materials, adjusting reflector angles, and implementing proper double-glazing, you'll see more consistent heat retention. Don't forget to monitor weather conditions and maintain precise solar tracking alignment. With these improvements and careful attention to ventilation control, you'll achieve the steady temperatures needed for reliable solar cooking performance.


Leave a Reply