Your DIY oven gauge should read between 150°F (66°C) to 400°F (204°C), with a minimum of 180°F (82°C) needed for safe cooking. Different oven types achieve varying ranges – box cookers can reach 200-400°F, panel cookers average 250°F, and parabolic designs can exceed 800°F. For reliable temperature monitoring, you'll want to place your gauge at the center rack level with your cooking area and check it every 15-20 minutes. Regular cleaning and proper calibration of your gauge will guarantee accurate readings. Understanding these temperature ranges and gauge practices will help you master your DIY oven's performance.
Understanding Solar Oven Temperature Ranges

Ever wondered what temperature your solar oven should reach to cook effectively? Most well-made solar cookers operate between 150°F (66°C) and 400°F (204°C), with 180°F (82°C) being the minimum temperature needed for cooking.
Your solar oven's temperature will depend on its design type. If you're using a box cooker, you can expect temperatures between 200°F and 400°F (93°C to 204°C). Using feathers or cotton for insulation can help maintain these temperatures effectively.
Panel cookers typically reach around 250°F (121°C), while parabolic designs can soar above 800°F (427°C). If you've built a simple pizza box oven, you'll likely achieve temperatures between 160°F and 200°F (71°C to 93°C).
To reach ideal temperatures, you'll need good insulation, proper sealing, reflector panels, and dark-colored cookware.
Remember that weather conditions and time of day greatly impact your oven's performance.
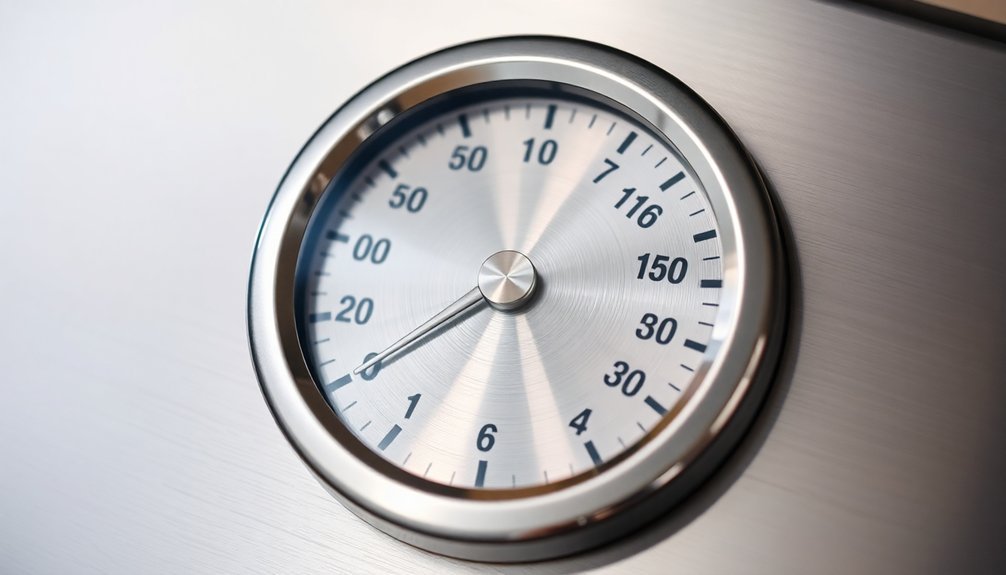
Choosing Your Temperature Gauge
Now that you understand solar oven temperature ranges, selecting the right temperature gauge will help you monitor your cooking progress effectively.
You'll find several reliable options, each with distinct advantages for DIY solar ovens.
When choosing your temperature gauge, consider these key factors:
- Dial thermometers offer durability with a 10-year service life and work well through oven windows, making them perfect for solar cooking.
- Probe thermometers give you instant readings and helpful alarm features when your food reaches target temperatures.
- Dial thermometers operate reliably in a +50°C to +300°C temperature range to handle all your solar cooking needs.
- Infrared thermometers provide quick measurements without opening your oven, helping maintain consistent heat.
- Digital displays on probe and infrared models make temperature reading crystal clear, even in bright sunlight.
Your choice should match your cooking style and the types of food you'll prepare in your solar oven.
Proper Gauge Placement Methods

You'll want to position your oven gauge in the center of the middle rack to get the most accurate temperature readings.
Keep the gauge away from the oven's walls and heating elements, as these areas can create misleading hot spots that skew your measurements.
For the best results, place your gauge at the same level as where you'll be cooking your food, ensuring it's visible enough to read without opening the oven door. Regular monitoring with a consistent temperature check is essential for achieving perfect doneness in your dishes.
Center Rack Positioning Tips
Proper gauge placement starts with understanding the importance of center rack positioning. Your oven's center rack provides the most consistent heat distribution, making it ideal for accurate temperature readings.
When installing your DIY gauge, you'll want to position it at this prime level for the most reliable measurements.
- Place your gauge in the middle third of the oven for the most accurate readings
- If your oven has an even number of slots, use the rack position just below center
- Keep the gauge away from oven walls to avoid heat reflection interference
- Verify the gauge isn't blocked by baking sheets or other cookware
For the best results, mount your gauge where you can easily view it through the oven window without opening the door, which helps maintain consistent temperature readings during monitoring.
Avoiding Heat Source Interference
Strategic placement of your DIY oven gauge requires careful consideration of heat sources that could skew temperature readings.
You'll need to position your gauge away from direct heating elements, flames, and known hot spots to guarantee accurate measurements.
To identify hot spots, conduct a simple bread test by placing bread slices throughout your oven and monitoring which areas brown faster.
Once you've mapped these areas, install your gauge where it can measure ambient temperature effectively, typically at the top interior of the cooking chamber or on the oven door.
Consider using a ceramic sleeve to protect the gauge from direct heat exposure.
For best results, you'll want to verify your gauge's accuracy by taking multiple readings at different temperature settings and comparing them with a reliable oven thermometer.
This helps establish consistent, trustworthy measurements for your baking needs.
Temperature Reading Best Practices
Accurate temperature readings in your DIY oven gauge rely heavily on consistent measurement practices and proper equipment positioning.
You'll want to position your thermometer or probe in the center of your oven, away from walls and heating elements, using a grate clip if needed. Once you've set your target temperature (typically 350°F), allow a full 30-minute stabilization period.
- Take readings every 15-20 minutes to track temperature fluctuations
- Record minimum and maximum temperatures throughout the testing period
- Calculate the average by adding all readings and dividing by the total count
- Make adjustments to your oven dial if readings consistently differ from the set temperature
Remember to conduct multiple testing cycles for the most accurate results, and always keep the oven door closed during measurements to maintain consistent temperature levels.
Common Calibration Problems

Diagnosing calibration problems in your DIY oven gauge requires understanding common issues that can affect temperature accuracy. Your thermometer's age and quality can greatly impact readings, so you'll want to invest in a reliable digital model placed centrally on the rack.
When adjusting your oven, follow your manual's specific guidelines. If you've got analog controls, make tiny 1/8th-inch turns to the temperature knob screws. For digital systems, use the keypad as directed. You'll need to test after each adjustment.
Watch out for hot and cold spots by placing multiple thermometers throughout your oven. If readings vary by more than 35 degrees or if you can't resolve issues through calibration, it's time to call a professional.
Gas ovens and complex calibration problems often need expert attention.
Adjusting For Weather Conditions
Weather conditions greatly impact your oven's temperature readings and performance.
You'll need to account for both ambient temperature and humidity levels to maintain accurate readings. On cold days, your oven may require longer preheating times, while high humidity can affect cooking times and temperature accuracy.
- Place your thermometer in the center of the oven for the most reliable readings, away from external temperature influences.
- Consider using a baking stone to stabilize temperatures, especially during extreme weather changes.
- Check your kitchen's ventilation to control humidity levels that might affect your gauge readings.
- Allow extra preheating time when your kitchen is particularly cold.
For best results, you'll want to monitor both temperature and humidity levels in your kitchen, adjusting cooking times and temperatures accordingly.
Remember that proper ventilation helps maintain consistent readings in any weather.
Gauge Maintenance Tips

You'll need to clean your oven gauge monthly to prevent buildup that could affect its accuracy.
Regular cleaning with a damp cloth helps maintain clear temperature readings and extends the life of your gauge's markings.
Check your gauge's accuracy against an oven thermometer every few weeks, especially if you notice inconsistent baking results.
Clean Gauge Monthly
Regular cleaning of your oven gauge guarantees accurate temperature readings and extends its lifespan.
You'll need to perform monthly maintenance to keep your gauge functioning properly and prevent any safety hazards.
- Unplug your oven and use a dry cloth to wipe down the gauge and surrounding knobs, avoiding liquid cleaners that could cause electrocution.
- Remove any food residue or debris that's accumulated around the gauge area.
- Check for signs of wear, damage, or loose connections while you're cleaning.
- Inspect the gauge's electrical components for any deformities or concerning issues.
During your monthly cleaning, you should also verify there aren't any cooking sheets or broiler pans stored in the oven that could affect airflow and temperature accuracy.
Remember to clean up spills immediately to prevent them from hardening and causing gauge-related problems.
Check Gauge Accuracy Often
Beyond monthly cleaning, maintaining accurate oven gauge readings demands frequent testing and verification. You'll need to test your oven thermometer by placing it in the center of the middle rack and preheating to 350°F. Take multiple readings over an hour to check stability and identify any discrepancies.
| Test Type | Action Required |
|---|---|
| Ice Bath | Check if thermometer reads 32°F ±1.8°F |
| Center Rack | Place thermometer in middle position |
| Preheat Time | Wait 20 minutes minimum |
| Temperature Range | Monitor for ±25°F variations |
| Adjustment | Calibrate if off by 15°F or more |
If you notice uneven browning or inconsistent cooking times, it's time to recalibrate. For ovens with built-in calibration features, follow your manufacturer's guidelines. Otherwise, you'll need to manually adjust the temperature settings to compensate for any variations.
Testing Temperature Accuracy
Accurately testing your oven's temperature requires careful placement and monitoring of a reliable thermometer. Position it in the center of the middle rack where you'll get the most accurate readings, and make sure you can see it through the window.
- Set your oven to 350°F and let it preheat for 20 minutes
- Take readings every 15-20 minutes over 1-2 hours
- Record each temperature to calculate the average
- Use a skillet for more stable measurements
Once you've collected your readings, add them up and divide by the total number of measurements to find your oven's actual average temperature.
If you notice a difference between this number and your set temperature, you'll need to adjust your oven's calibration. Many ovens let you do this through their settings menu by modifying the temperature offset.
Frequently Asked Questions
How Long Can My Temperature Gauge Safely Remain Inside a Hot Oven?
You can leave your temperature gauge in the oven indefinitely if it's properly designed with high-temp materials like stainless steel and ceramic insulation. Just guarantee the probe tip's exposed while keeping wires outside the oven.
Can I Use My Oven Gauge to Measure Temperatures in Outdoor Grills?
You can use your oven gauge in outdoor grills, but be cautious. Check its maximum temperature rating first, as grills often reach higher temps than ovens. For best results, consider getting a dedicated grill thermometer.
Why Does My Gauge Reading Fluctuate When Cooking Multiple Dishes Simultaneously?
Your gauge reading fluctuates because multiple dishes affect heat distribution in the oven. When you're cooking several items, they absorb heat differently and create temperature variations, especially if they require different cooking temperatures.
Should Temperature Readings Be Taken at Different Heights Within the Oven?
Yes, you'll want to take readings at different heights since temperatures vary throughout your oven. Check bottom, middle, and top racks to identify hot spots and guarantee even cooking for your dishes.
Does the Material of My Baking Sheet Affect Gauge Temperature Readings?
Yes, your baking sheet's material will affect gauge readings. Metal conducts heat faster than stoneware or silicone, so you'll need to adjust your readings accordingly. Consider using a metal skillet for the most accurate measurements.
In Summary
You'll want your DIY solar oven gauge to consistently read between 200°F to 350°F (93°C to 177°C) for ideal cooking performance. Check your gauge's accuracy regularly and recalibrate as needed. Remember to adjust your expectations based on weather conditions, as cloudy days will yield lower temperatures. Keep your gauge clean and properly positioned to guarantee you're getting reliable readings for safe and effective solar cooking.


Leave a Reply