You'll get the best results from your solar oven by cooking between 11:00 am and 3:00 pm when sunlight is strongest. Expect temperatures between 150°F and 400°F, depending on your oven type and weather conditions. Quick items like eggs take under an hour, while vegetables need 2-3 hours, and large meats require 4-7 hours. For peak performance, use dark-colored cookware, position your oven to face the sun directly, and adjust reflector panels hourly. Keep the transparent cover sealed tight to trap heat, and always use a probe thermometer to guarantee food safety. The right techniques will help you harness the sun's power like a pro.
Temperature Ranges and Cooking Times

While solar ovens operate across a broad temperature spectrum, you'll typically see readings between 150°F and 400°F for most cooking tasks.
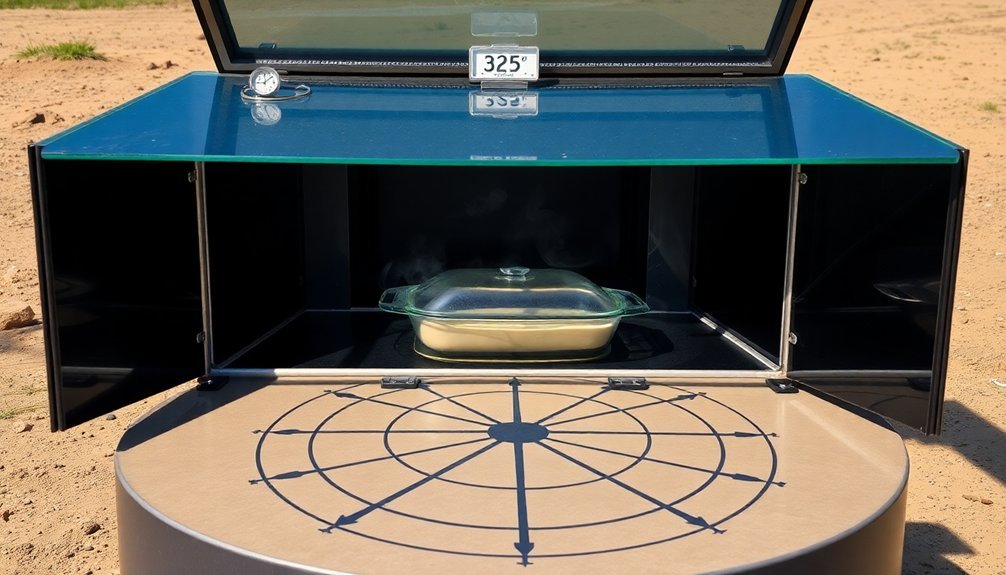
In summer months, you can expect temperatures to reach 325-350°F, while winter cooking generally maintains 250-300°F. If you're using a parabolic cooker, you'll achieve even higher temperatures, up to 800°F.
When planning your solar cooking schedule, factor in both temperature ranges and timing. You'll need roughly an hour extra compared to conventional cooking methods. Quick items like baked eggs and toasted coconut take less than an hour, while cookies and cut vegetables require 1 to 1.5 hours. For grains, fish, and cut meat, plan on 2 to 2.5 hours of cooking time.
Your cooking success depends heavily on proper insulation, reflector panel positioning, and the time of day you're cooking. Using dark-colored cookware will help absorb heat more effectively. Sealing all gaps in your solar oven helps maintain consistent temperatures.
For best results, schedule your cooking during midday hours when the sun is highest, especially if you're preparing larger items like whole vegetables or meat dishes that need 3 to 7 hours of cooking time.
Weather Impact on Solar Cooking
Your success with solar cooking depends largely on understanding how weather conditions affect your cooker's performance. While you might think external temperature is vital, it actually has minimal impact on well-insulated solar cookers. You'll find that even in freezing weather, your solar oven can reach temperatures above 350°F on sunny days.
What truly matters is direct sunlight and cloud cover. You'll find that even on days with frost-bite warnings you can successfully cook meals. You'll get the best results between 11:00 am and 3:00 pm when the sun's rays are most direct.
In winter months, you'll need to adjust your cooker more frequently and might want to preheat earlier in the day to compensate for shorter daylight hours.
Your location plays a significant role in solar cooking success. If you're in southern states like Arizona or Texas, you'll enjoy ideal conditions year-round. However, don't be discouraged if you live in cloudier regions like Oregon or Washington – you can still achieve excellent results on clear days.
When planning your solar cooking, you'll need to take into account your local weather patterns and adjust accordingly. If needed, you can split cooking over two days when sunlight is limited.
Best Materials for Heat Retention

To achieve the best heat retention in your solar oven, it is crucial to combine multiple material layers effectively.
For thermal mass, materials like bricks or ceramic tiles are highly effective. These materials have a high specific heat capacity, which allows them to store heat energy during the daytime and release it later. Bricks, in particular, are relatively inexpensive and widely available, and they should be used without mortar or cement to allow for air space between them for efficient heat transfer. Optimal performance requires R50 insulation values for maximum heat retention in standard conditions.
In addition to thermal mass materials, using insulating materials is essential. Rockwool, spun fiberglass, feathers (especially down feathers), and other similar materials help to trap thermal energy and prevent heat loss. These insulating materials should surround the interior cooking cavity of the solar oven on all sides except for the glazed side, usually the top.
Dark surfaces also play a vital role in maximizing solar absorption and converting sunlight into usable heat. A black ceramic or metal top can significantly enhance the solar oven's efficiency by absorbing sunlight and converting it into heat. The exterior and interior walls of the solar oven should also be black to raise the temperature and improve insulation.
While vacuum insulation provides superior thermal performance, excellent results can still be achieved by strategically layering common materials. Aluminum foil, down feathers, and even salt can be used to create effective heat barriers. Salt, for instance, has a fairly high specific heat capacity and handles high temperatures well, making it a viable option for heat retention.
Vacuum Insulation Benefits
Vacuum-sealed technology stands at the forefront of solar oven efficiency, delivering exceptional heat retention capabilities.
When you're using a vacuum-insulated solar oven, you'll benefit from up to 97% thermal energy retention, which means your food cooks faster and more efficiently. The vacuum between two layers of glass prevents heat loss through convection and radiation, allowing temperatures to reach up to 400°C. The selective coating process uses layers of copper, aluminum, and aluminum/nitrogen to maximize heat absorption.
You'll find that vacuum-insulated ovens typically use borosilicate glass for its superior thermal shock resistance. Many models incorporate stainless steel mesh to enhance stability and prevent thermal damage. If you're looking for a more affordable option, high-temperature plastic can serve as an effective alternative to glass while maintaining insulation properties.
The vacuum seal's effectiveness means you can cook meals in about 20 minutes, and your oven will maintain heat even during cloudy conditions. You'll appreciate the versatility, as these ovens support various cooking methods from roasting to steaming. Plus, you're making an eco-friendly choice by reducing fuel use and deforestation while gaining the ability to sterilize water and pasteurize food safely.
Layered Material Combinations
Several key material combinations work together to maximize heat retention in solar ovens. You'll want to start with a solid insulation layer using closed-cell foam or Reflectix around all walls and the bottom of your oven. This creates a thermal barrier that prevents heat from escaping through the structure.
For the interior, combine reflective materials like aluminum foil with a black bottom vessel to maximize heat absorption and distribution. Position reflective surfaces strategically to direct sunlight toward your cooking area, and consider using adjustable reflectors that you can reposition as the sun moves across the sky. The ideal oven can reach 200 degrees Fahrenheit on a sunny day with proper material layering.
Your transparent cover is essential for creating a greenhouse effect. You can use plastic wrap, large ziplock bags, or glass lids, but make sure they're sealed tightly to trap heat inside.
When selecting materials, consider using a double-layer design similar to the GoSun Stove, which provides additional thermal insulation.
The effectiveness of your layered combination depends on how well these materials work together. Your insulation thickness, reflector angles, and cover sealing all play important roles in maintaining consistent cooking temperatures throughout your solar cooking session.
Dark Surface Absorption
Building on the concept of layered materials, the strategic use of dark surfaces takes your solar oven's efficiency to the next level. You'll want to focus on incorporating black or dark-colored materials throughout your solar oven design, as they're substantially better at absorbing and retaining heat than lighter surfaces.
Line your oven's interior with black construction paper or use black duct tape to create a heat-absorbing surface. For cooking containers, opt for black cast iron pans or dark brown glass dishes – they'll convert radiant energy into thermal energy more effectively than their lighter counterparts.
If you're using metal pans, choose non-shiny black ones for maximum heat absorption.
When you're setting up your solar oven, place dark paper at the bottom and make certain all interior surfaces are covered with dark materials. You'll notice higher interior temperatures and better heat retention when you implement these dark surfaces correctly.
Keep an eye on your oven's temperature to confirm the effectiveness of your dark surface choices. Remember to seal any gaps with black duct tape to prevent heat loss and maintain consistent cooking temperatures.
Adjusting Your Solar Oven Angle
Successfully adjusting your solar oven angle plays a crucial role in maximizing its cooking efficiency. For most designs, you'll want to set your reflector panels at approximately 60 degrees, but you'll need to make regular adjustments throughout the day to track the sun's movement.
Since the sun moves 15 degrees per hour, you should rotate your reflectors about 10 degrees hourly to maintain peak performance. You can use a protractor to measure these angles precisely, or create a simple 30-degree angle guide by cutting an equilateral triangle in half.
For easier adjustments, consider installing a swivel base on your oven.
When positioning your reflectors, make certain they direct sunlight effectively onto your target cooking area. You can increase capture area by moving your cooking vessel slightly forward of the reflector panels.
If you're using multiple reflectors, you might want to set different angles for the top and bottom panels to maximize sunlight capture.
For stability, tilt your oven as much as needed without risking your cooking pot tipping over. If you prefer a more hands-off approach, some designs incorporate a pendulum mechanism for automatic angle adjustments throughout the day.
Testing Your Oven's Performance

To calculate your oven's performance, you'll measure cooking power through temperature changes over time.
You can standardize these results to 700 W/m² for consistent comparisons.
Record all measurements in recognized units, and use linear regression to analyze the relationship between cooking power and temperature difference.
Remember that both load and no-load tests provide essential data for a thorough evaluation of your solar oven's capabilities.
Seasonal Cooking Time Variations
Understanding seasonal variations is essential for effective solar cooking throughout the year. You'll need to adjust your cooking times and techniques based on the sun's intensity and position during different seasons.
During winter months, especially in northern latitudes, you'll want to double your usual cooking times due to less direct sunlight. Position your solar oven between 11:00 am and 3:00 pm for the best results, and tilt it to compensate for the lower sun angle.
Even in cold or snowy conditions, you can still achieve temperatures between 140°F and 266°F with proper insulation and positioning.
To maximize your solar cooker's efficiency year-round, you'll need to make several adjustments. Use a cooking thermometer to monitor food temperatures, and make certain your oven faces directly toward the sun.
If you're using a parabolic cooker, you'll need to adjust it more frequently to track the sun's movement. Consider using different types of solar cookers for various seasons – box cookers work well with compensated inclines during winter, while parabolic models excel in summer.
Remember that clear, sunny days provide the best cooking conditions regardless of season, and well-insulated ovens can overcome low ambient temperatures.
Food Safety Temperature Guidelines

You'll need to closely monitor your solar oven's temperature to maintain food safety, with meat requiring a minimum of 145°F for whole cuts and 165°F for poultry.
Keep in mind that the danger zone between 41°F and 135°F is where bacteria thrive, so your food shouldn't stay in this range for more than 4 hours total.
Your best tool for ensuring food safety is a quality probe thermometer, which you should use frequently to check internal food temperatures throughout the cooking process.
Minimum Safe Cooking Temps
Food safety begins with proper cooking temperatures. When using your solar oven, you'll need to monitor internal food temperatures carefully to guarantee safe consumption.
For poultry, stuffed dishes, and previously cooked ingredients, always reach 165°F (74°C) with less than a second of hold time.
Ground meats, including beef, pork, and seafood, require 155°F (68°C) for at least 17 seconds. This also applies to injected or mechanically tenderized meats and hot-held eggs.
For whole cuts like steaks and chops, you'll need to achieve 145°F (63°C) for 15 seconds, while roasts need the same temperature maintained for 4 minutes.
You'll want to use a properly calibrated thermometer, inserting it into the thickest part of your food. Remember to clean and sanitize it between uses.
If you're reheating previously cooked foods in your solar oven, bring them to 165°F before serving.
For vegetables and fruits, reach at least 135°F (57°C).
Always keep your cold ingredients between 33-41°F until cooking, and maintain proper hot-holding temperatures once your food is done to prevent bacterial growth.
Meat Temperature Danger Zone
The temperature danger zone represents a critical food safety concept every solar cook needs to understand. This range, between 41°F and 135°F (5°C and 57°C), is where bacteria multiply most rapidly in your food.
When using a solar oven, you'll need to be especially vigilant about keeping your meats out of this dangerous temperature zone.
To guarantee food safety, you must heat your meat quickly through this danger zone to reach the proper internal temperature. For ground meats, you'll want to achieve 160°F (71°C), while whole poultry requires 165°F (74°C). Fresh meat steaks and roasts need to reach 145°F (63°C).
Don't rely on guesswork – always use a food thermometer to verify these temperatures.
If you're cooling cooked meat, you'll need to move it through the danger zone quickly. Cool it from 135°F to 70°F (57°C to 21°C) within two hours, then get it down to 41°F (5°C) within four more hours.
When reheating leftovers in your solar oven, make sure they reach 165°F (74°C) to kill any bacteria that may have developed during storage.
Temperature Monitoring Essentials
Along with a reliable thermometer, proper temperature monitoring forms the backbone of food safety in solar cooking. You'll need to maintain hot foods at 135°F or above and cold foods at 41°F or below to prevent bacterial growth in the temperature danger zone (41°F-135°F).
When using your solar oven, you must achieve specific internal temperatures for different food types. Cook poultry to 165°F for 15 seconds, ground meat and eggs to 160°F, and seafood or whole muscle meats to 145°F. If you're reheating previously cooked food, bring it back to 165°F for 15 seconds to safeguard safety.
For ideal results, position your solar oven between 10:00 a.m. and 2:00 p.m. when the sun's intensity peaks.
You'll need to adjust the oven's orientation throughout cooking to maintain proper temperatures. Remember that solar cooking typically requires longer cooking times than conventional methods, so plan accordingly.
Store any leftovers within two hours of cooking and use sealed containers in your refrigerator.
Always check food temperatures frequently using a food thermometer, and prevent cross-contamination by keeping raw and cooked foods separate.
Frequently Asked Questions
Can You Use Aluminum Containers Instead of Dark-Colored Pots in Solar Ovens?
Yes, you can use aluminum containers in solar ovens, but they're less efficient than dark-colored pots. For better results, consider coating your aluminum container with dark, high-temperature paint or adding dark internal components.
How Do Different Altitudes Affect Solar Oven Cooking Temperatures and Times?
At higher altitudes, you'll experience hotter temperatures and faster cooking times due to increased solar radiation. Your solar oven can cook up to 20-30% quicker than at sea level, with less atmospheric interference.
What Happens if You Open the Oven Frequently While Cooking?
If you're opening your oven frequently, you'll lose significant heat, which causes longer cooking times and uneven results. You'll waste energy as the oven struggles to regain temperature after each lid opening.
Does Food Cooked in Solar Ovens Retain More Nutrients?
Yes, you'll get better nutrient retention with solar cooking! Your food will keep more protein, iron, calcium, and vitamins compared to conventional or microwave cooking, thanks to the gentle, low-heat cooking process.
Can Solar Ovens Be Used to Sterilize Water for Drinking?
Yes, you can sterilize drinking water using a solar oven. You'll need to heat the water to 165°F (74°C) or maintain it at 145°F (63°C) for 20 minutes to kill harmful bacteria and parasites.
In Summary
You'll find solar cooking success depends on properly timing your meals with temperature and weather conditions. By following proper food safety guidelines, adjusting your oven's angle throughout the day, and using heat-retaining materials, you're set for efficient solar cooking year-round. Remember to test your oven's performance regularly and account for seasonal variations to guarantee your food reaches safe cooking temperatures every time.


Leave a Reply