To align your solar oven for maximum sun exposure, position it in a spot that gets direct sunlight for 30-45 minutes every hour, ideally between 10 AM and 4 PM. You'll want to set up your oven 30-60 minutes before peak sun hours, aiming it directly at the sun. Check and realign the oven every 30 minutes, adjusting the angle based on the sun's movement – 45° east in the morning, horizontal at midday, and 45° west in the afternoon. Use a Sun-Track Indicator for precise positioning and confirm your oven is stable with rocks or bricks. Mastering these basic alignment techniques will release your solar oven's full potential.
Choosing the Perfect Sunny Spot

When it comes to successful solar cooking, finding the ideal sunny location is essential for best performance. You'll need a spot that receives direct sunlight for at least 30-45 minutes every hour, free from any shadows cast by trees, buildings, or other obstacles.
Make sure you've cleared the area of debris that could block sunlight. Look for a location that's protected from strong winds, as gusts can disturb your oven's reflectors or even tip it over. If you're cooking on a breezy day, secure your oven with wire stakes. The best cooking times are generally between 10 AM and 4 PM during summer months.
While ambient temperature has some effect, a well-insulated solar oven can perform well even in cold weather. Remember to position your oven where it'll catch the sun's strongest rays, typically between 1 PM and 2 PM, and adjust its position as needed throughout cooking time.
Understanding Sun Track Indicators
You'll find sun track indicators with two small holes at each bottom corner of your Sun Oven's glass door, helping you pinpoint the sun's direct position.
When sunlight passes through the top hole, it creates a bright dot that you'll need to center perfectly over the bottom hole for ideal alignment.
Measuring sunlight patterns on a clear day provides the most accurate readings for solar cooking. Checking and adjusting these indicators every 30 minutes guarantees your oven maintains maximum heat throughout the cooking process.
Track Direct Sunlight Position
Sun track indicators, located at the bottom corners of your solar oven's glass door, serve as essential alignment tools for perfect sun exposure. These indicators feature two small holes that work together to help you achieve ideal positioning. When sunlight passes through the top hole, it creates a bright dot that you'll need to center directly over the bottom hole.
To track the sun's position effectively, you'll want to adjust your oven every 30 minutes. Point the front of your oven directly at the sun and use the alignment leg to raise or lower it for peak exposure. The oven can reach 300°F in 20 minutes with proper alignment and strong sunlight.
Keep an eye on the shadows around your oven to guarantee even sun distribution. During winter months, you might need to lay the oven on its back, but continue using the track indicators to maintain proper alignment.
Indicator Arrow Adjustment Tips
Proper alignment of your solar oven's indicator arrows guarantees peak cooking performance throughout the day. Start by positioning the bracket on the back of your oven to achieve the correct elevation angle.
You'll need to line up the front hole so sunlight creates a focused circle of light that perfectly centers on the dark hole behind it.
Keep an eye on your alignment indicators throughout the cooking process. When you're properly aligned, you'll notice the sun's rays forming a precise circle through both holes.
If you spot any misalignment, quickly adjust your oven's position to maintain ideal sun exposure. For best results, use the bracket and elevation guides provided with your oven to make precise adjustments as the sun moves across the sky.
Essential Alignment Tools

E-Z Sun-Track Indicators help you quickly determine the ideal positioning of your solar oven by showing where the sun's rays should hit the cooking chamber.
Your oven's Rear Adjustment Leg System lets you fine-tune the angle to match these indicators, ensuring maximum sun exposure throughout the day.
Together, these tools make alignment straightforward and help maintain cooking efficiency as the sun moves across the sky.
E-Z Sun-Track Indicators
Located at the bottom corners of the glass door, your Sun Oven's E-Z Sun-Track Indicators serve as essential alignment tools for ideal cooking performance.
Each indicator features two small holes that help you achieve perfect positioning with the sun's rays.
To align your oven, stand behind or on its left side and watch as sunlight creates a small dot through the top hole. You'll need to adjust the oven horizontally until this dot centers directly over the bottom hole. If necessary, modify the rear alignment leg's height for best positioning.
Remember to check and realign your oven every 30 minutes as the sun moves across the sky. For unattended cooking, point your oven toward the sun's strongest position, typically between 1 PM and 2 PM.
Rear Adjustment Leg System
The adjustable rear leg system features three critical components to help you maintain ideal sun alignment. You'll need an adjustable wrench or locking pliers to access and manipulate the rear legs effectively. The legs rotate clockwise to raise your oven and counter-clockwise to lower it, allowing precise adjustments for optimal solar positioning.
To adjust the rear legs, you'll want to unplug your oven first and protect your flooring with appliance slides.
Use your level to check both diagonal measurements across the oven rack, ensuring perfect alignment with the sun's path. Make incremental adjustments until you achieve the desired height and angle.
Once you've positioned the rear legs correctly, verify that they're securely locked in place before moving on to the front leg adjustments.
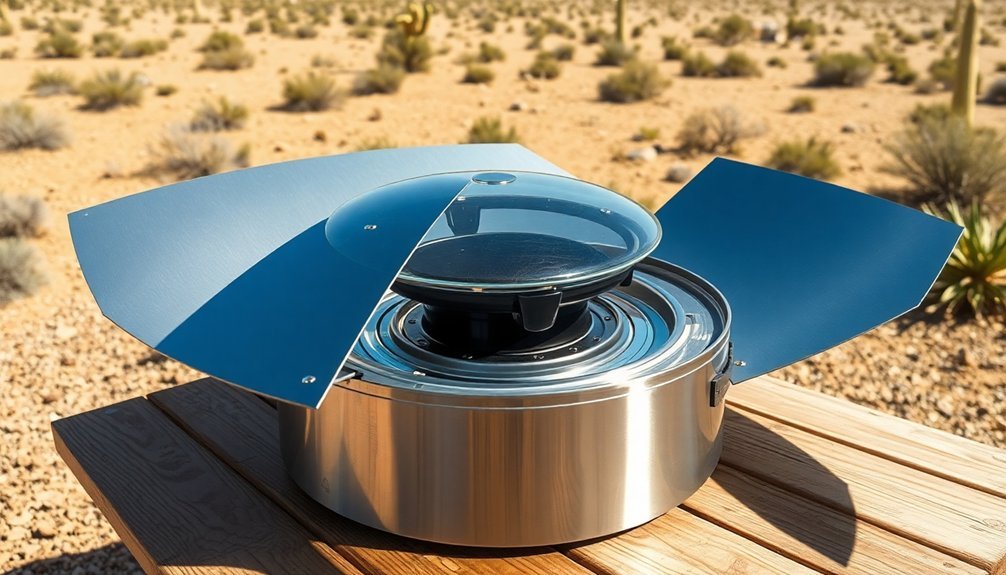
Setting Up Reflector Panels
Proper reflector panel setup can dramatically boost your solar oven's efficiency. Start by selecting highly reflective materials like aluminum foil tape or vinyl, and securely attach them to your panels.
Make sure your trapezoidal reflectors are 2.25 times wider and 1.25 times taller than your cook chamber width.
Position your reflectors so the sun's rays hit the opposite side of the cooking chamber. You'll need to adjust the angles throughout the day – use steeper angles for top reflectors and shallower angles for bottom ones when the sun's low.
Add small wooden supports to keep the panels stable. For maximum sunlight capture, consider using multiple reflectors at different angles.
Tracking Daily Sun Movement

Successfully tracking the sun's daily movement is essential for maximizing your solar oven's efficiency. You'll want to use AR visualization tools to project the sun's path for your specific location, helping you position your oven correctly throughout the day.
| Time of Day | Sun Position | Recommended Action |
|---|---|---|
| Morning | Eastern Sky | Angle oven 45° east |
| Midday | Overhead | Position horizontally |
| Afternoon | Western Sky | Adjust 45° west |
Monitor sunrise and sunset times to plan your cooking schedule, and don't forget to account for shadows from nearby objects that might block sunlight. You can use shadow simulation features to identify the best spots for your oven, ensuring unobstructed exposure. Set notifications for ideal cooking times, particularly during golden hours when sunlight is most intense.
Adjusting for Seasonal Changes
Beyond daily sun tracking, seasonal changes bring new challenges for solar oven users.
You'll need to make significant adjustments during winter months when the sun sits lower in the sky. Extend your Sun Oven's T-leg fully and adjust reflector panels to capture maximum sunlight.
For best winter performance, you might need to lay your oven on its back with reflectors open, especially at higher latitudes.
While winter cooking times are shorter, about 5 hours per day, you can still maintain temperatures between 300-350°F.
Use tools like the Sunsight device or shadow method to confirm proper alignment, and plan to adjust your cooker every 30 minutes.
Consider using oven roasting bags or booster panels to retain heat, and always secure your cooker against winter winds with stakes if necessary.
Managing Wind Conditions

While sunlight is essential for solar cooking, wind poses considerable challenges that can compromise your oven's performance. Strong winds can drastically reduce cooking temperatures and even tip your solar cooker over.
You'll need to secure your oven properly using bricks, cinder blocks, or logs to prevent accidents.
Create a stable cooking environment by positioning your oven in a sheltered spot, like behind your house or a natural barrier. For added protection, build a windbreak using transparent materials such as recycled glass panels.
Don't forget to secure reflectors and panels with weights, clips, or guy lines. If winds exceed 25mph, you'll notice considerably slower cooking times.
In extreme conditions above 30mph, it's best to postpone your solar cooking until calmer weather prevails.
Maximizing Cooking Temperature
The internal temperature of your solar oven determines its cooking effectiveness and food safety. To reach ideal cooking temperatures between 150°F and 400°F, you'll need to maximize heat retention and solar energy absorption.
Start by lining your oven's interior with black construction paper and using dark-colored cookware to absorb more solar energy. Seal the transparent lid tightly to prevent heat escape, and add proper insulation like crumpled newspapers or polystyrene between the inner and outer boxes.
You'll want to preheat your oven for an hour before cooking, and monitor the temperature with a thermometer to maintain at least 180°F for safe cooking. During operation, avoid opening the oven frequently, as this releases valuable heat.
Position your oven between 11:00 am and 3:00 pm for peak sunlight exposure.
Preventing Shadow Interference

Successful solar cooking depends heavily on preventing unwanted shadows from blocking precious sunlight.
To guarantee proper alignment, hold your finger vertically against the cooker's edge to create a perpendicular shadow, then adjust until both sides show even shadows.
You'll need to refocus your cooker every 30 minutes as the sun moves. Use your reflectors strategically by positioning them to avoid casting shadows on the cooking pot.
When aligning the cooker, tilt it until shadows disappear from the front, indicating direct sun exposure.
For precise alignment, you can use a hollow tube or a tool with a viewing hole.
Don't forget to check that your reflectors are angled correctly based on the time of day and season.
Keep the thermal trap and transparent insulation layer clean to maximize sunlight penetration while retaining heat.
Working With Cloud Coverage
Monitor cloud coverage during your solar cooking sessions, as even partial cloud cover can extend cooking times by up to 67% compared to clear skies.
You'll need to adjust your cooking schedule by starting earlier on partly cloudy days and being ready to add extra time when clouds roll in.
Make the most of clear sun periods by having your food and equipment ready to go, allowing you to take advantage of maximum solar intensity when clouds part.
Managing Intermittent Cloud Cover
While intermittent cloud cover presents challenges for solar cooking, you can maintain effective cooking temperatures by implementing key strategies. To optimize performance, verify your oven has a 5.0 kg thermal mass and maintain proper insulation with multi-layer configuration and air gaps.
| Component | Function | Impact |
|---|---|---|
| Thermal Mass | Heat Storage | 40% less fluctuation |
| Double Corners | Heat Retention | Minimizes loss |
| Matt Black Coating | Absorption | >0.95 efficiency |
| Air Gaps | Insulation | 30% less heat loss |
Keep your reflective panels clean and adjust your oven's position frequently during cloudy conditions. You'll need a 50mm edge clearance from walls to reduce thermal bridging. With these measures in place, you can maintain temperatures above 160°C for up to 30 minutes during cloud cover.
Adjusting Cooking Time Expectations
Adapting your cooking schedule becomes essential when clouds interfere with your solar oven's performance. You'll need to calculate new cooking times by using the actual temperature readings in your oven. If your temperature drops from 400°F to 350°F, multiply your original cooking time by 1.14 to determine the adjusted duration.
Position your food strategically to maximize heat absorption. Place delicate items on the lower shelf where temperatures are more stable, and don't open the oven door unnecessarily as this will further reduce the temperature.
When working with cloudy conditions, you'll find that some dishes, like braised meats, actually benefit from the slower cooking process. Remember to check your food earlier than the calculated time and reposition your oven as needed to capture available sunlight.
Maximizing Limited Sun Periods
Even when clouds roll in, you can still harness significant solar energy by understanding how different cloud formations affect your oven's performance.
Position your oven strategically to capture both direct and reflected sunlight from surrounding clouds, which can sometimes create a beneficial lensing effect.
You'll get about 50% solar output when clouds partially obscure the sun but its position remains visible.
During overcast conditions, expect 20-30% output if the sun's location is harder to spot.
Watch for thin, wispy clouds that only minimally impact performance, and take advantage of clouds that aren't directly blocking the sun – they can actually reflect scattered light back to your oven.
For ideal results, use weather forecasts and satellite data to plan your cooking schedule around predicted cloud movements.
Securing Your Solar Oven

Securing your solar oven against wind and instability is essential for successful outdoor cooking. Place your cooker on dry, level ground and brace it with bricks, cinder blocks, or logs on all sides, including the back leg.
For additional protection, secure the oven to a plywood base using anchor bolts and bungee cords.
When using lightweight panel cookers like the Cookit or Copenhagen Lite, you'll need extra stability measures:
- Position rocks along the edges and inside the windshield panels
- Use clothespins to clamp flaps and maintain structure
- Place the cooker inside a large bucket for added support
Create guy lines with rope or wire to anchor panels, and consider setting up in a sheltered location to minimize wind exposure.
Add insulation and weight as needed to prevent unwanted movement during cooking.
Maintaining Proper Angle Position
To maximize your solar oven's efficiency, proper angle positioning plays an essential role in capturing the sun's energy.
Position your oven to face the sun directly, using the E-Z Sun-track indicators on the glass door – the light dot should center over the bottom hole.
Adjust the alignment leg based on the time of day and season. You'll need more tilting during winter months or at higher latitudes, while summer requires less adjustment except during early morning or late afternoon.
For peak performance, check and realign your oven every 30 minutes as the sun moves across the sky.
If you're leaving the oven unattended, aim it toward where the sun will be strongest, typically between 1 PM and 2 PM.
Use wire stakes through the alignment leg base for added stability on windy days.
Optimizing Peak Sun Hours

Building on proper angle positioning, understanding peak sun hours will dramatically boost your solar oven's performance.
Peak sun hours represent the most intense solar energy periods, typically occurring during mid-day when sunlight is strongest. You'll want to plan your cooking around these ideal times to maximize efficiency.
To make the most of peak sun hours with your solar oven:
- Check local weather forecasts to identify clear-sky periods, avoiding cloudy or overcast conditions.
- Position your oven 30-60 minutes before peak hours to allow proper preheating.
- Schedule longer cooking tasks between 10 AM and 2 PM when solar intensity is highest.
Remember that seasonal changes affect peak hours, so you'll need to adjust your cooking schedule accordingly.
Consider using a solar calculator to determine the best times for your specific location and season.
Frequently Asked Questions
Can I Use the Sun Oven Indoors Near a Sunny Window?
You won't get effective results using a sun oven indoors. Modern windows block UV rays, greatly reducing cooking power. It's best to use your solar oven outdoors where it can receive direct, unobstructed sunlight.
How Do Extreme Temperatures Affect the Oven's Plastic and Aluminum Components?
Your oven's plastic components can melt, deform, or become brittle under extreme heat, while aluminum parts may warp and oxidize. Both materials can suffer structural damage and reduced performance from prolonged temperature exposure.
What Happens if the Alignment Leg Mechanism Gets Stuck?
If your oven's alignment leg gets stuck, you'll experience reduced cooking efficiency, longer cooking times, and potential safety risks. You'll need to carefully repair the mechanism to prevent overheating and guarantee proper performance.
Does High Altitude Affect the Sun Oven's Cooking Performance?
You'll find that high altitude actually helps your sun oven's performance. With clearer skies and stronger solar radiation, you'll get great results as long as your oven's well-insulated and protected from wind.
Can the Reflector Panels Be Replaced if Damaged or Worn?
Yes, you can easily replace damaged reflector panels. You'll need to select new materials like aluminum foil, reflective sheets, or mirrors, and install them using appropriate tools and fasteners for your oven's design.
In Summary
Getting your solar oven's alignment right is essential for efficient cooking. You'll find that regularly adjusting your oven's position throughout the day maximizes sun exposure and cooking effectiveness. Don't forget to keep tracking the sun's movement and check your reflector panels' angles. With proper alignment and consistent monitoring, you'll achieve ideal temperatures and better cooking results from your solar oven, even on partially cloudy days.


Leave a Reply