You'll save money and preserve food sustainably by using nature's free heat to dehydrate your harvest. Sun drying and solar dehydration eliminate electricity costs while concentrating nutrients and flavors in your foods. With basic items like wooden boxes, clear glazing, and metal shelves, you can create an effective drying station that harnesses temperatures above 85°F to remove moisture safely. This ancient preservation method not only reduces food waste but also helps you store seasonal produce year-round without chemical preservatives. Understanding a few key principles will transform how you approach food preservation and self-sufficiency.
Natural Heat Dehydration Basics
Nearly all natural heat dehydration methods trace back to ancient preservation techniques that still work effectively today.
You'll find three main approaches: sun drying, air drying, and solar drying, each offering unique benefits for different types of foods.
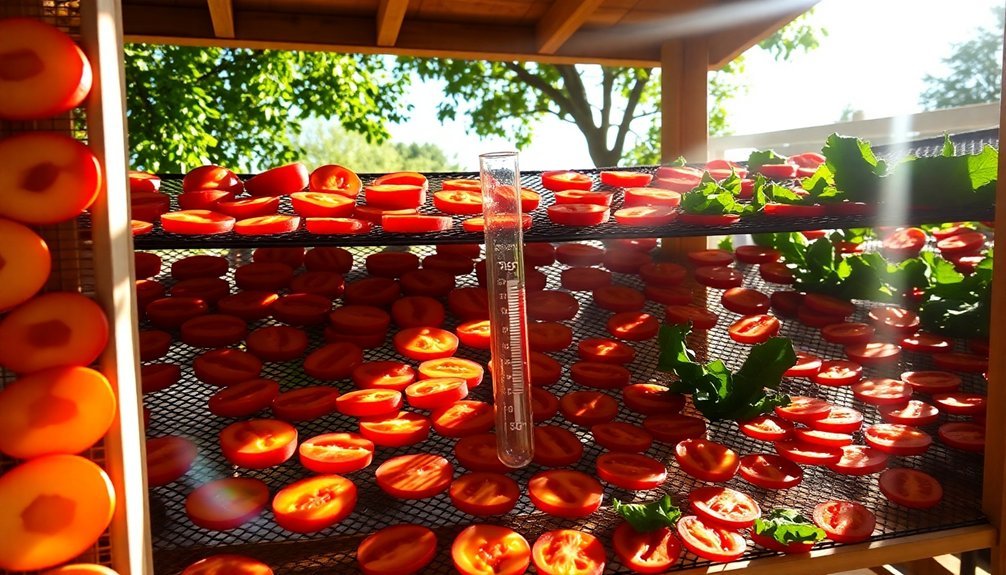
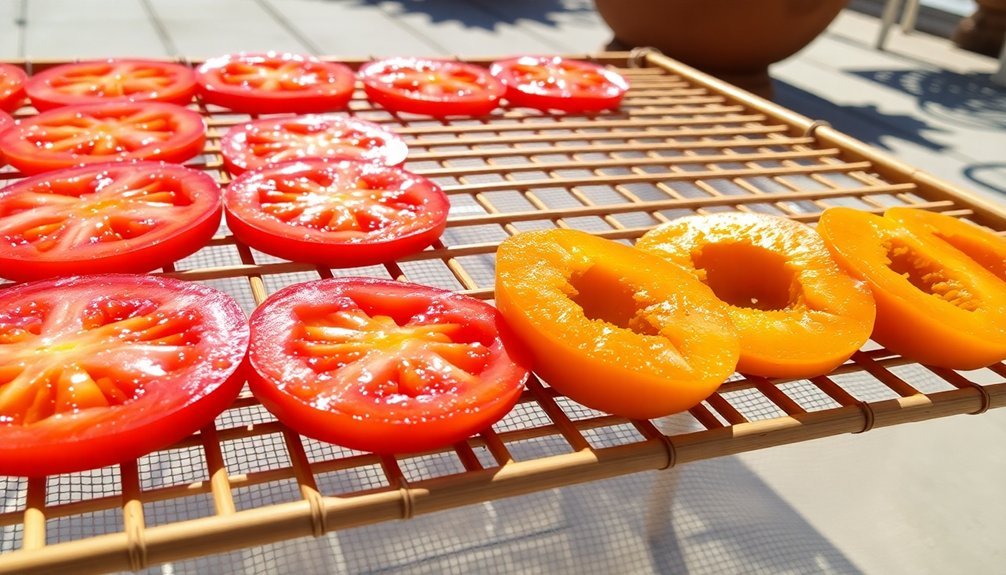
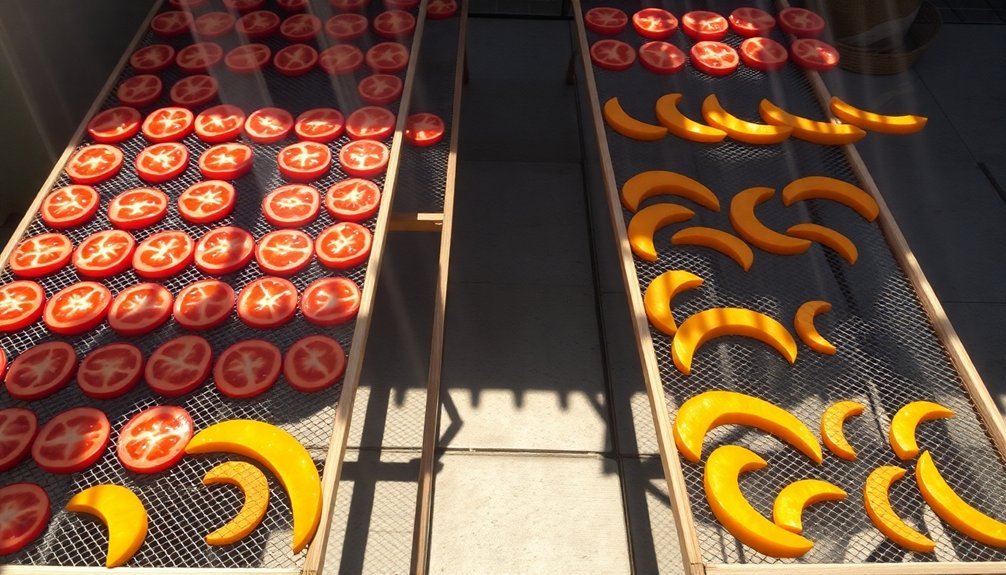
Sun drying works best when you've got a sunny spot with low humidity and temperatures above 86°F. You'll need to lay your foods on mesh screens, making certain to cover them with a second screen to keep pests away.
Don't use hardware cloth screens, as they can leave residue on your food. Proper dehydration will result in long-term storage without requiring refrigeration.
If you're working with delicate items like herbs or greens, you'll want to use air drying, which protects food from direct sunlight while still removing moisture effectively.
For a more controlled approach, you can opt for solar drying using a tabletop greenhouse-style dehydrator that harnesses the sun's energy without electricity.
You can also combine these methods for better results.
Try adding a fan to your sun-drying setup or mixing air and sun drying techniques.
Whatever method you choose, you'll need to monitor temperature and humidity levels to guarantee your food dries properly.
Cost Benefits of Sun Drying
Beyond the basics of natural dehydration methods, sun drying offers remarkable financial advantages that make it an attractive option for food preservation.
You'll eliminate electricity costs completely since you're harnessing the sun's free energy, making it particularly valuable if you live in areas with limited power access or high utility rates.
You won't need to invest heavily in equipment, as sun drying requires only basic items like drying racks or screens.
You can even create your own DIY setup using readily available materials, and these simple tools can be reused multiple times, maximizing your initial investment.
The long-term savings are significant.
You'll extend your food's shelf life, reducing the need for frequent purchases and minimizing waste from spoiled produce. With proper storage, dried fruits can last 5 years while providing excellent nutritional value.
By preserving seasonal fruits and vegetables, you'll decrease your dependence on expensive imported goods while maintaining nutritional value and flavor.
You're also making an environmentally conscious choice that supports sustainability.
Since sun drying doesn't consume fossil fuels or produce greenhouse gases, you're reducing your carbon footprint while preserving local produce, which contributes to regional food security and independence from commercial preservation methods.
Best Foods for Solar Dehydration
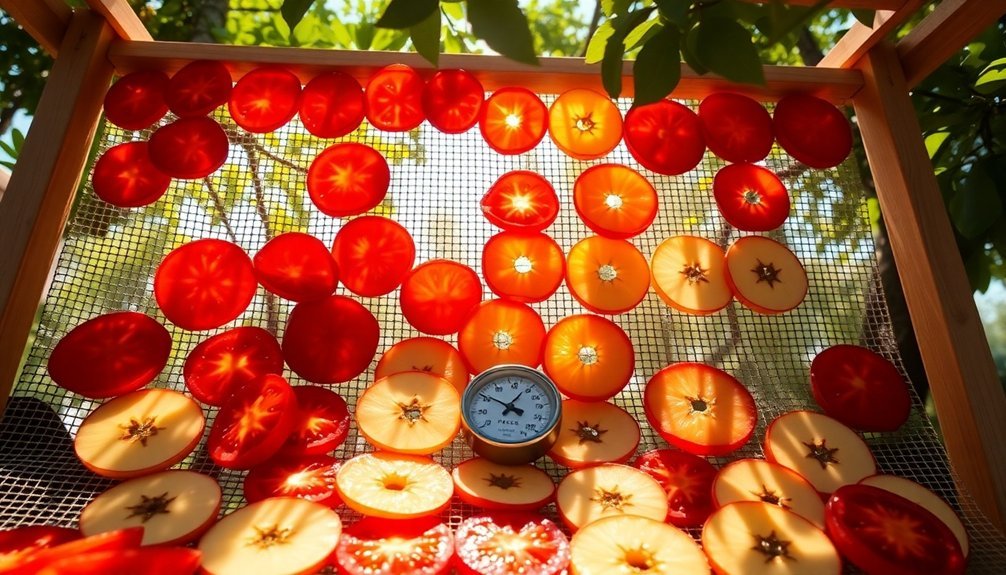
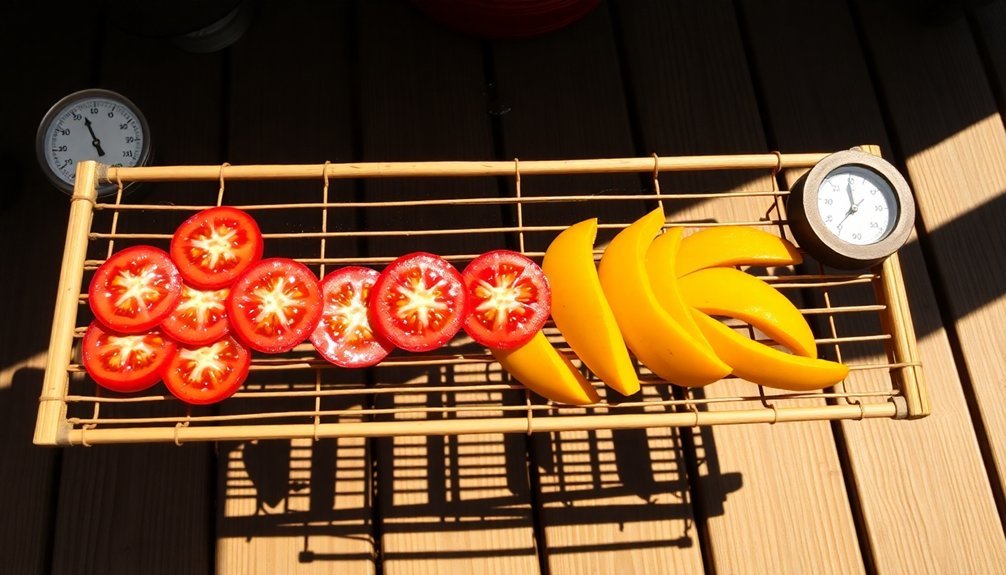
Sun-dried delicacies start with choosing the right ingredients for your dehydration project. You'll find that fruits like apples, bananas, and berries are excellent choices, as they retain both flavor and nutrients through the drying process. Using low-cost natural methods helps preserve seasonal foods while saving on energy costs.
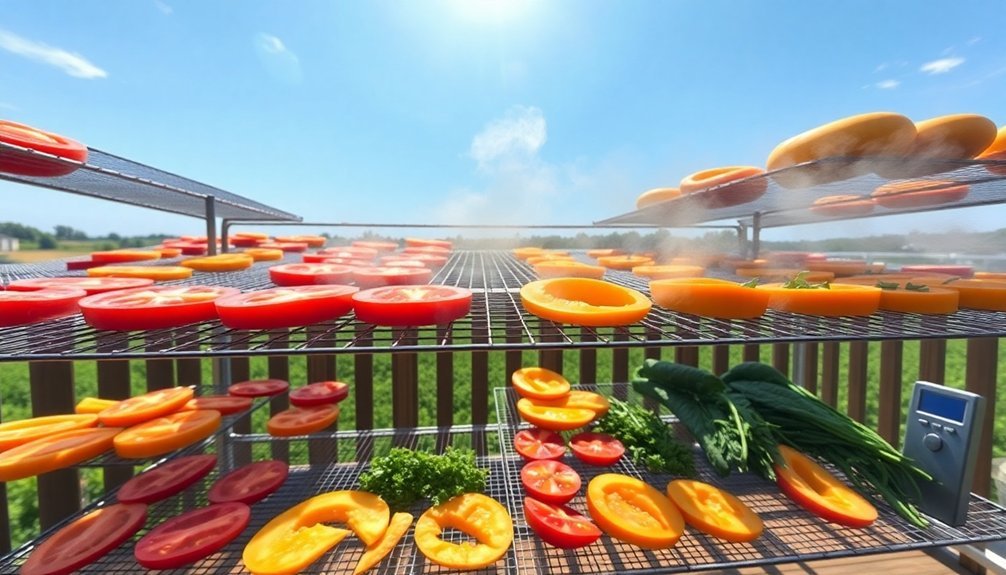
Vegetables such as tomatoes, carrots, and mushrooms also perform wonderfully, with mushrooms even gaining additional vitamin D during sun exposure.
- Transform your fresh herbs into long-lasting seasonings by drying basil, dill, rosemary, and oregano in the sun or shade.
- Create healthy snacks from dehydrated fruits like mangos, peaches, and grapes.
- Turn vegetables into crispy treats, including kale chips and dried tomatoes.
- Prepare protein-rich options by making your own solar-dried jerky from lean meats.
You can expand your dehydration projects beyond basic ingredients. Try making fruit leather from various fruits, drying sauces for long-term storage, or creating your own sun-dried granola.
Even dairy products can be dehydrated with proper preparation. Remember that leafy herbs and delicate items might benefit from indirect drying methods to preserve their qualities, while heartier foods can withstand direct sunlight exposure.
Setting Up Your Drying Station
You'll need to select a sunny, south-facing location for your drying station that's protected from dust, insects, and unexpected rain showers.
Start with the basic equipment: a wooden box or similar structure with clear glazing on top, vents for airflow, and a dark-colored metal shelf to absorb heat.
Make sure you've got oven thermometers to monitor temperature and airtight containers ready for storing your dehydrated foods.
Choose Your Spot Wisely
Setting up your drying station starts with choosing a spot that balances ideal sunlight, airflow, and protection from the elements. You'll want a location that receives direct sunlight throughout the day, especially if you're using sun drying or car dehydration methods. The spot should also have good air circulation to help move moisture away from your food and prevent any accumulation that could lead to spoilage.
When selecting your ideal drying location, consider these critical factors:
- Choose an area with consistently warm temperatures and low humidity, like a well-ventilated attic or screened-in porch.
- Make sure the space is easily accessible for regular monitoring of your food's drying progress.
- Set up protective screens or thin cloths to shield your food from insects and debris while maintaining airflow.
- Position your drying station away from high-moisture areas that could compromise the dehydration process.
If you're using natural heat sources like sun drying or car dehydration, you'll need to assess weather conditions regularly. For car dehydration, crack the windows slightly to maintain air circulation, and when using outdoor methods, keep a close eye on changing weather patterns.
Basic Equipment Needed
Successful food dehydration begins with having the right equipment at your fingertips. While you'll be using the sun's heat, you'll still need essential tools to guarantee proper food preservation. Start with basic kitchen items: a sharp knife, cutting board, measuring tools, and food-safe containers for storage. You'll also want wide-mouth Mason jars and vacuum-sealing equipment to maintain freshness.
| Essential Tools | Purpose | Tips |
|---|---|---|
| Tray Liners | Prevent sticking | Use ParaFlexx or parchment paper |
| Drying Racks | Air circulation | Choose mesh or wooden options |
| Storage Containers | Preserve dried foods | Select airtight containers |
For efficient preparation, you'll benefit from specialized equipment like a food processor or mandoline slicer to guarantee uniform cuts. Don't forget to include food-grade silicone mats or unbleached parchment paper as tray liners – they'll prevent sticking and make cleanup easier. A reliable thermometer helps monitor temperature, while fans can improve air circulation in your drying area. Consider investing in Mylar bags for long-term storage, especially if you're planning to preserve large quantities of food.
Protect From Elements
With your equipment ready, protecting your food from environmental elements becomes the next key focus.
You'll need to shield your dehydrating foods from dust, insects, and other contaminants while guaranteeing proper airflow. Paper bags work exceptionally well for protecting herbs and peppers during the air-drying process, while still allowing moisture to escape.
Here's what you'll need to focus on to protect your food:
- Keep your drying area pristinely clean and free from potential contaminants that could compromise food safety.
- Use protective coverings like paper bags or screens that allow air circulation while keeping out dust and insects.
- Blanch vegetables and pretreat fruits before drying to eliminate harmful bacteria and guarantee cleanliness.
- Store your finished products in sterilized, airtight containers to prevent moisture reabsorption.
Position your drying station in a well-ventilated area that's protected from environmental pollutants.
If you're using sun drying methods, guarantee the relative humidity stays below 20% and choose a screened-in location to keep insects away.
Remember to maintain consistent temperatures between 120°F to 160°F for ideal results, and always use clean, sterilized equipment throughout the process.
Effective Air Flow Methods
Maintaining proper air flow stands as the cornerstone of effective food dehydration. You'll want to focus on horizontal air movement, as it provides the most consistent drying by flowing across both the top and bottom of your food. This method greatly reduces the risk of uneven moisture distribution that's common with vertical systems.
Your dehydrator trays should have edges between a quarter- and half-inch high, made from sturdy, lightweight plastic with appropriate mesh sizing. This design prevents food spillage while ensuring ideal air circulation around your items.
You'll need to pay attention to proper tray spacing to avoid blocking air flow.
To maximize efficiency, you'll use two flow control valves to adjust air movement. Start with high speed to remove readily available moisture, then switch to low speed for removing the remaining moisture.
You can save considerable energy by recirculating exhaust air – mixing warm, moist exhaust with fresh air reduces heating costs by 30-60%. This technique also helps prevent case hardening, which can occur when food dries too quickly on the outside while remaining moist inside.
Climate and Weather Considerations
Due to its reliance on natural conditions, outdoor food dehydration requires specific weather parameters for ideal results. You'll need temperatures of at least 85°F (30°C) for effective drying, along with consistently low humidity levels to prevent bacterial growth and guarantee proper moisture reduction. When you're planning your dehydration projects, consider both daily and seasonal weather patterns in your area.
- You'll achieve the best results when temperatures stay above 86°F throughout the drying period, as temperature fluctuations can compromise the quality of your dried foods.
- If you live in a humid climate, you'll need to take extra precautions or consider indoor dehydration methods, as high humidity considerably slows the drying process.
- You must monitor weather forecasts carefully, as unexpected precipitation can ruin your drying foods and waste valuable resources.
- Consider climate change impacts when planning long-term food preservation strategies, as changing weather patterns may affect both the availability of foods for drying and the consistency of suitable drying conditions.
Understanding these weather requirements helps you maximize your success with outdoor food dehydration while guaranteeing the safety and quality of your preserved foods.
Food Safety During Drying
Safe food dehydration depends on three critical factors: proper temperature control, adequate moisture removal, and appropriate food selection.
You'll need to maintain temperatures between 120°F and 160°F for most foods, though herbs can dry at lower temperatures around 95-110°F. For meats and poultry, you must reach 165°F to guarantee safety.
Your goal is to remove 80-95% of the food's moisture content, achieving a water activity value of 0.85 or less to prevent bacterial growth.
You can test for proper drying by breaking or cutting pieces – there shouldn't be any moisture beads forming when you do this. Watch out for case hardening, where the outside dries too quickly and traps moisture inside.
Don't attempt to dehydrate high-moisture foods like melons or items high in fat such as avocados and nut butters. Dairy products and eggs are also off-limits due to food safety risks.
Instead, opt for commercially available alternatives like powdered versions of these products. To guarantee successful drying, cut your foods into uniform, thin pieces and maintain proper airflow throughout the process.
Long Term Storage Tips
You'll need to store your dehydrated foods in a consistently cool, dark, and dry location to maintain their quality over time.
The containers you choose must be airtight and food-grade, with Mylar bags and PETE bottles being excellent options when paired with oxygen absorbers.
Your storage containers should always be clean and free from any damage or defects to guarantee the maximum shelf life of your preserved foods.
Storage Location Basics
Proper storage location can make or break your food preservation efforts. When you're storing your dehydrated foods, you'll need a controlled environment that protects against the four main threats: temperature fluctuations, moisture, light exposure, and pests.
Key storage requirements you can't ignore:
- Keep temperatures between 40-70°F, with 50-70°F being preferred for long-term storage. Your basement's a great choice if it doesn't get too cold, but stay away from areas near heat sources like ovens.
- Control moisture by choosing dry, non-humid spaces. Don't store food under sinks or in damp areas. Use airtight containers to maintain ideal dryness and prevent mold growth.
- Block out light that can deteriorate both food quality and packaging. Dark pantries work well, and you'll want to use metal containers or other non-transparent storage options.
- Protect against pests by storing food off the floor in rodent-proof containers like plastic buckets or metal cans. Keep the area clean and check regularly for signs of unwanted visitors.
Make sure you're inspecting your storage area periodically for any signs of moisture, mold, or damaged containers to maintain food quality.
Container Quality Matters
Selecting high-quality storage containers directly impacts the longevity of your dehydrated foods. You'll want to choose containers that offer airtight seals and durable materials to protect your preserved goods from moisture and contaminants.
Glass containers are an excellent choice as they're chemical-free and won't retain odors or stains, though they're heavier and more breakable than plastic alternatives.
Look for containers with snap-on or clasp-style lids that create reliable seals. You can test their effectiveness by filling them with water and turning them upside down to check for leaks.
Wide-mouth containers make it easier to fill and retrieve your dehydrated foods, while straight-sided designs maximize storage space in your pantry. If you're storing bulk quantities, consider larger containers like Cambro or Tellfresh that stack efficiently.
When selecting containers, verify they're dishwasher-safe for easy cleaning and maintenance.
For versatility, choose containers that can shift between different storage environments. Glass containers offer the added benefit of allowing you to quickly identify contents without opening them, helping you maintain an organized storage system.
Sustainable Food Preservation Methods
The quest for sustainable food preservation has led to remarkable innovations that combine traditional wisdom with modern technology.
You'll find that today's methods focus on reducing energy consumption while maintaining food quality and safety. Solar-assisted dryers represent one of the most sustainable approaches, using nature's free energy to preserve food without relying on fossil fuels.
When you're looking to adopt sustainable preservation methods, consider these proven techniques:
- Lacto-fermentation: You're not just preserving food – you're boosting its nutritional value. Take sauerkraut, which contains 25% more vitamin C than raw cabbage.
- Solar Dehydration: You'll save considerably on energy costs since this method requires no electricity and can preserve food for years.
- Natural Salt Preservation: You're creating an inhospitable environment for harmful bacteria while using one of earth's most abundant minerals.
- Plant-Based Solutions: You can use natural plant extracts to inhibit microbial growth without artificial additives.
These methods aren't just environmentally friendly – they're also cost-effective.
Frequently Asked Questions
Can Dehydrated Foods Be Rehydrated for Cooking, and How Long Does It Take?
Yes, you can rehydrate dehydrated foods using boiling water, simmering, cold soaking, or pre-soaking methods. It'll take anywhere from 10-15 minutes with hot water to several hours with cold soaking, depending on the food.
What Natural Indicators Show That Food Is Completely Dehydrated?
You'll know your food's fully dehydrated when it's lightweight, brittle, and leathery. Check for no visible moisture, uniform dryness, and a snapping sound when bent. The texture should be consistently firm throughout.
Does Natural Dehydration Affect the Vitamin and Mineral Content of Foods?
You'll notice some vitamin loss, especially A and C, during natural dehydration due to sun exposure. However, minerals stay largely intact. The slower drying process can help preserve more nutrients than artificial methods.
Can Food Be Naturally Dehydrated During Rainy or Humid Seasons?
You can naturally dehydrate food during rainy seasons, but it's challenging. You'll need covered spaces, longer drying times, and careful monitoring to prevent spoilage. Indoor air drying works better in humid conditions.
How Do You Prevent Food From Becoming Too Brittle During Natural Dehydration?
You'll prevent brittleness by pre-soaking nuts, pureeing fruits into leathers, and monitoring drying time closely. Keep slices uniform, use proper pre-treatments like blanching, and store items with paper towels to maintain texture.
In Summary
You'll find that dehydrating food using natural sunlight isn't just cost-effective – it's also environmentally friendly and preserves nutrients effectively. With proper setup, airflow management, and food safety practices, you're creating sustainable, shelf-stable foods while reducing your energy consumption. Whether you're drying fruits, vegetables, or herbs, nature's free heat offers a time-tested method that connects you to traditional food preservation techniques your ancestors relied upon.


Leave a Reply