
Master outdoor cooking temperatures with these essential tips: Set up a two-zone fire by stacking charcoal on one side for both direct and indirect heat options. Control airflow by adjusting top and bottom vents – open them wider for higher heat, close them partially to cool down. Keep your lid closed for thick cuts and open for thin ones to manage heat effectively. Position your grill perpendicular to wind and use windbreaks when needed. Handle flare-ups by moving food to cooler zones. Monitor food safety temperatures with reliable thermometers, and maintain consistent cooking zones using water pans. These fundamentals will transform your grilling game into a precise culinary craft.
Master The Two-Zone Fire Setup

Nearly every successful outdoor cooking session starts with mastering the two-zone fire setup – a game-changing technique that gives you ultimate temperature control.
To create this setup, stack your charcoal on one side of your grill, leaving the other side empty. Use a chimney starter until the coals turn ashy grey before adding them to the grill.
This configuration creates two distinct cooking zones: direct heat over the coals for searing and quick-cooking items like steaks and burgers, and indirect heat on the empty side for slower-cooking larger cuts like roasts and whole chickens.
If you're using a gas grill, simply turn on one side of the burners while leaving the other side off. This versatile arrangement lets you manage flare-ups effectively and cook multiple items at different temperatures simultaneously.
Control Airflow Through Vent Management
While temperature control may seem intimidating at first, mastering your grill's vent system is the key to achieving perfect results every time.
Your grill's vents work together as a team – the bottom ones control oxygen intake while the top ones manage heat exhaust.
To raise the temperature, open both vents fully, allowing maximum airflow. When you need to cool things down, partially close them to restrict oxygen.
For low-and-slow cooking, keep the vents minimally open, and for medium heat, adjust to moderate positions. Remember to always set both top and bottom vents at matching levels for balanced airflow. Creating a two-zone fire provides an effective way to manage sudden temperature spikes and flare-ups.
Make small, patient adjustments as you monitor the temperature. You'll find that even minor vent changes can greatly impact your cooking environment.
Don't close the vents completely unless you're ready to extinguish the fire.
Strategic Lid Opening And Closing
Strategic lid management on your grill can make the difference between perfectly cooked food and disappointing results.
You'll want to keep the lid closed when cooking thicker cuts of meat, roasting whole birds, or using indirect cooking methods. This traps heat, distributes it evenly, and helps retain moisture, especially during cold weather.
For thin foods like burgers, steaks, or shrimp that are less than ¾" thick, keep the lid open. This gives you better control over direct heat and helps achieve that perfect sear without overcooking the center.
You'll also want the lid open when cooking delicate items that need quick cooking times and precise heat control.
For low-and-slow cooking or smoking, always keep the lid closed to maintain consistent temperature and proper humidity levels for ideal flavor development.
Weather-Smart Grill Positioning
Beyond mastering lid control, proper grill positioning can dramatically impact your outdoor cooking success, particularly in challenging weather conditions. You'll want to place your grill perpendicular to prevailing winds and guarantee it's on level ground, away from flammable materials. In extreme temperatures above 85°F, avoid direct sunlight to maintain consistent cooking temperatures.
| Position Type | Benefits | Key Actions |
|---|---|---|
| Near Structure | Natural windbreak, convenience | Keep 10ft from buildings |
| Protected Corner | Multi-directional wind blocking | Check exhaust clearance |
| Open Area | Better ventilation | Install windscreens |
| Anchored Setup | Maximum stability | Use ground anchors |
Consider installing a permanent windscreen or using landscaping features to create a wind barrier. You'll also want to secure your grill using appropriate anchors and guarantee all components are properly tightened. Remember to adjust your cooking techniques based on weather conditions, monitoring temperatures more closely when it's windy.
Handle Flare-Ups Like A Pro

When flare-ups occur, you'll need to act quickly by moving your food to a safe, indirect heat zone away from the flames.
It's crucial to maintain a designated flare-up management area on your grill where you can temporarily relocate items until the flames subside.
Keep your food mobile by avoiding an overcrowded cooking surface, and remember never to use water on grease fires, as this can cause dangerous explosions.
Keep Food Moving Fast
Mastering flare-up control requires quick thinking and confident movement of food across your grill's surface.
You'll need to establish a two-zone fire setup, with one hot zone for searing and a cooler zone for indirect cooking.
When you spot a flare-up, don't panic. Instead, quickly move your food to the cooler zone until the flames subside.
Keep watching through the air vents or by carefully lifting the lid. You can return the food to the hot zone once it's safe, but remember to adjust your cooking time accordingly.
To stay ahead of flare-ups, monitor your grill constantly and keep tools ready for quick food transfers.
You'll want to maintain clear paths between zones and be ready to use the cover-and-wait method if flames get too intense.
Safe Fire Management Zones
Professional grillers rely on three key fire management zones to handle flare-ups effectively.
You'll want to create a hot zone for searing, a medium zone for regular cooking, and a cool zone for safety. On your charcoal grill, stack coals on one side and leave the other side empty. For gas grills, simply adjust the burners to create these distinct zones.
When flare-ups occur, quickly move your food to the cool zone until flames subside.
Don't use water on charcoal flare-ups – it'll only scatter ash onto your food. Instead, keep your grill vents open and use long-handled tools to relocate items. For gas grills, turn down the burners and keep a spray bottle handy.
Remember to trim excess fat from meats and apply marinades sparingly to prevent flare-ups altogether.
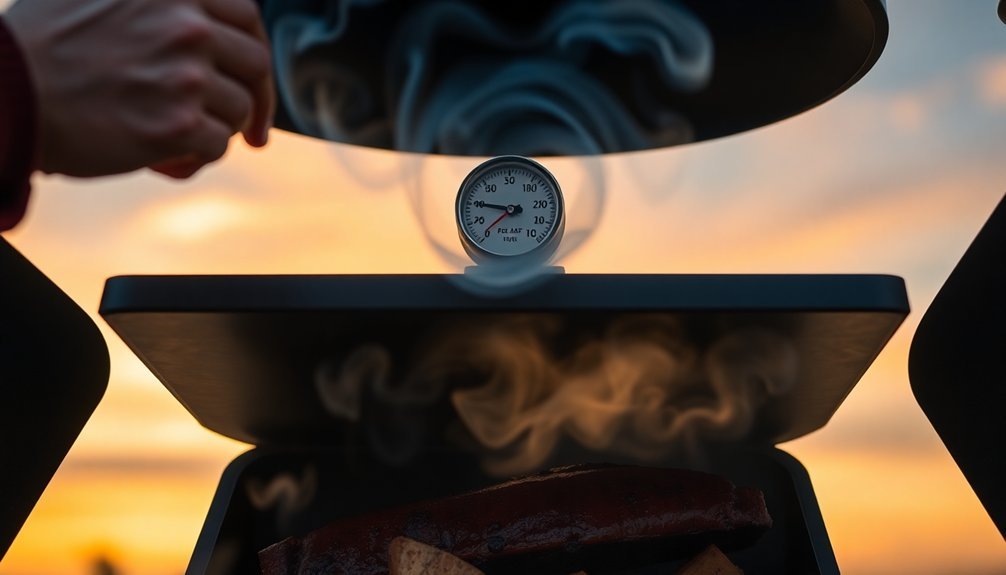
Monitor Food Safety Temperatures
Keeping tabs on food temperatures stands out as one of the most critical aspects of outdoor cooking safety.
You'll need to maintain cold foods at 41°F or below using coolers with ice packs, while hot foods must stay at or above 140°F in insulated containers.
Don't let food linger in the danger zone between 40°F and 140°F for more than 2 hours, or 1 hour if it's over 90°F outside.
You can protect your guests by using a food thermometer correctly – insert it into the thickest part of meats, avoiding bones, and guarantee poultry reaches 165°F and burgers hit 160°F.
Keep your coolers in shaded areas and covered with blankets, and divide large portions of food into smaller containers for faster cooling.
Check food temperatures every two hours and discard any items that've been in the danger zone too long. Always use clean plates and utensils when handling cooked meats to prevent cross-contamination.
Maintain Consistent Cooking Zones

Beyond monitoring food safety temperatures, successful outdoor cooking relies on establishing and maintaining distinct cooking zones.
You'll need to create both direct and indirect heat areas on your grill for ideal temperature control. Set up your direct heat zone for high-temperature searing and grill marks, while using the indirect zone for slower, more controlled cooking.
For charcoal grills, arrange your coals in a pyramid shape and adjust the air vents to regulate heat.
If you're using a gas grill, control different zones by adjusting individual burners.
When using devices like the Big Green Egg, install a plate setter to deflect heat and create stable indirect cooking zones.
Make small, gradual adjustments to maintain your target temperature, and use reliable digital thermometers to monitor each zone's heat levels.
Frequently Asked Questions
How Long Should I Let My Charcoal Grill Preheat Before Cooking?
You'll want to let your charcoal grill preheat for 20-30 minutes, or until the coals turn greyish-white. Using a chimney starter can speed this up to 10-15 minutes for faster cooking.
Can I Add Wood Chips Directly to Charcoal for Smoking?
Yes, you can add wood chips directly to charcoal while smoking. Spread them evenly to avoid flare-ups. For best results, place them on hot coals to start smoking immediately, keeping the lid closed.
What's the Best Way to Clean Grill Vents for Optimal Airflow?
Remove your grill's vent grates and clean them with warm soapy water. Scrub away debris and grease buildup with a non-abrasive sponge. Don't forget to clean the ventilation chamber for maximum airflow efficiency.
Should I Adjust Cooking Times When Grilling at High Altitude?
Yes, you'll need to increase cooking times by 25-50% at high altitude due to lower air pressure. Keep your temperature lower and use a meat thermometer to guarantee proper doneness during the extended cooking period.
How Do I Maintain Temperature When Adding New Charcoal Mid-Cook?
Add unlit coals on top of your hot coals, then open vents fully for more oxygen. You'll need about 15 minutes for new coals to heat up. Keep your lid closed during this process.
In Summary
Temperature mastery in outdoor cooking isn't rocket science – you've now got the tools to tackle it with confidence. By managing your two-zone setup, vents, lid, and grill position while keeping an eye on flare-ups and food safety temps, you'll maintain those perfect cooking zones. Put these seven techniques into practice, and you'll be grilling like a pro in no time.


Leave a Reply