
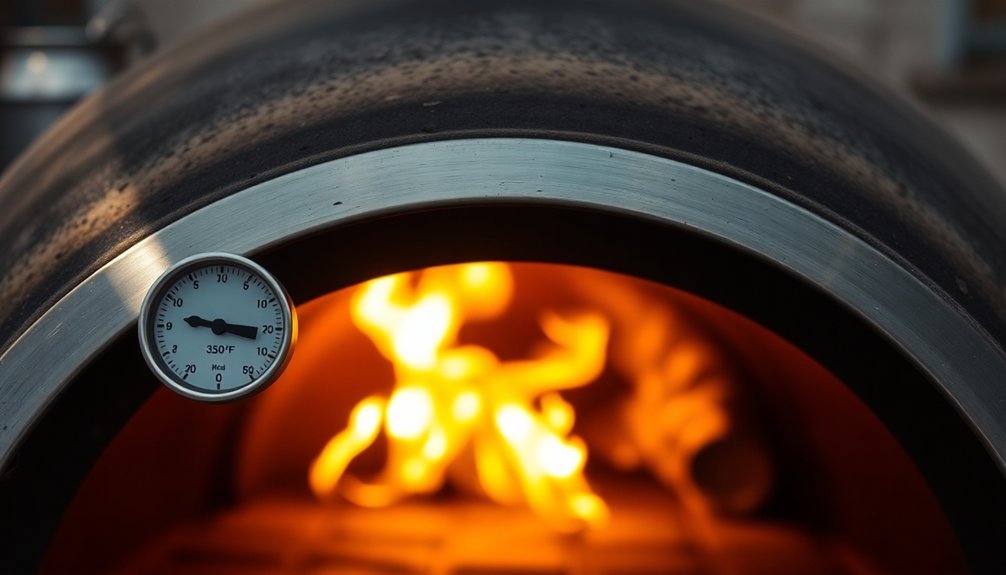
To properly preheat your outdoor oven, start with small, dry kindling and gradually add larger wood pieces while maintaining adequate airflow. You'll want to avoid overfilling the fire chamber, which can lead to overheating. Monitor the temperature using a laser-guided infrared gauge or flour test, aiming for 350-400°C for ideal pizza cooking. Control heat by adjusting the chimney damper and air intake – open to lower temperature, close to increase it. Allow at least 40 minutes for thorough preheating, and maintain heat with small wood additions. Understanding these fundamentals will help you master the more advanced techniques of outdoor oven management.
Temperature Control Basics
When mastering an outdoor oven, understanding temperature control is essential for successful cooking. You'll need to manage both the fire chamber and ventilation system properly to achieve ideal results.
Start by building your fire with small, dry wood pieces and kindling in the center of the oven floor. Once it's burning well, add larger pieces while ensuring proper oxygen flow. Don't overfill the chamber, as this can lead to overheating. Use heat-resistant gloves when adding or adjusting firewood for safety.
You can regulate temperature by adjusting the chimney damper and air intake controls – opening them lowers temperature, while closing them maintains or increases heat.
For accurate temperature readings, use a laser-guided infrared gauge or try the flour test. Remember to preheat your oven for at least 40 minutes before cooking, and maintain consistent heat by adding small wood pieces as needed.
Moisture Management Solutions
Proper moisture management in your outdoor oven is essential for both performance and longevity. You'll need to monitor humidity levels using high-resolution transmitters and verify moisture presence through mirror tests in the exhaust path. If you see fogging on the mirror, moisture is still present. Maintaining a consistent 300°F temperature level for thorough drying is crucial for optimal results.
Set up a systematic drying process by controlling your intake and exhaust valves. Start with air drying, then progress to small fires or candles to gradually remove moisture from the structure.
Don't skip protecting your oven from external elements – install a well-fitted weatherproof cover and chimney flue cap. Apply stainless steel protectant to prevent corrosion, and regularly inspect for water damage signs like cracking mortar or discoloration.
Keep the area around your oven free from standing water and maintain good drainage to prevent moisture-related issues.
Heating Element Maintenance
Testing your outdoor oven's heating element for proper resistance helps identify potential issues before they become major problems.
You'll want to use a multimeter to check for readings between 10-40 ohms, which indicates a properly functioning element.
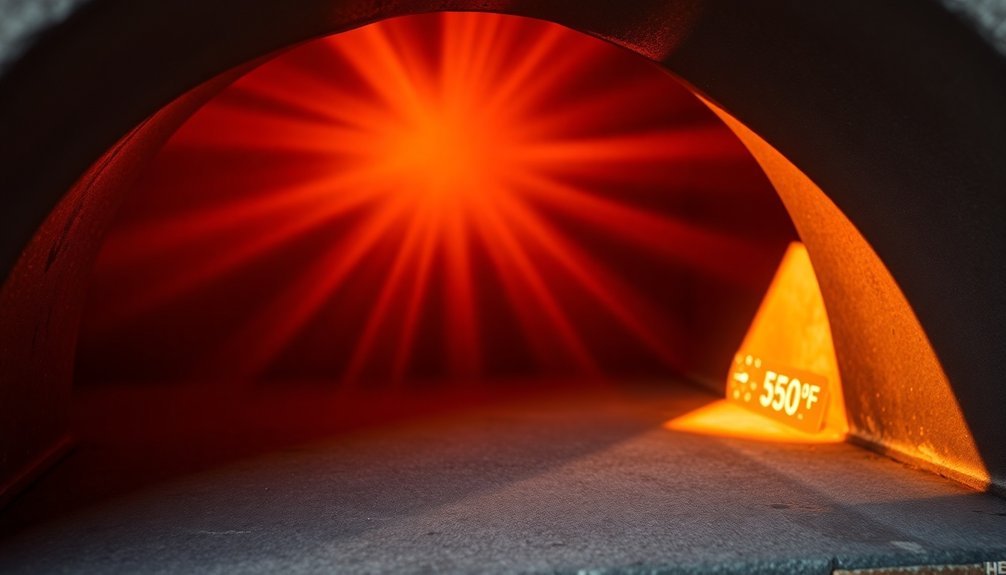
When replacement becomes necessary, carefully disconnect the power, remove the old element by unscrewing it from the back wall, and install the new one with matching specifications to guarantee peak performance. A properly heated oven should reach 350-400°C for optimal pizza cooking.
Resistance Testing Guidelines
Before attempting any resistance testing on your outdoor oven's heating elements, you'll need to follow specific safety protocols and preparation steps.
Unplug your oven or turn off the power at the breaker, and let it cool completely. Don protective gear, including cut-resistant gloves and safety goggles.
Access the heating elements by removing the back panels with your screwdriver and nut driver.
Set your multimeter to the ohms setting (around 2,000 ohms) and connect the probes to the element terminals.
You're looking for a resistance reading between 10 to 40 ohms, which indicates a properly functioning element. If you get no continuity or readings outside this range, you'll need to replace the element.
Also, check for short circuits by testing between the terminals and the oven's metal body.
Element Replacement Steps
Once you've determined that your heating element needs replacement through resistance testing, you'll want to approach the task methodically.
Start by confirming your outdoor oven is completely cool and gather all necessary tools, including protective gear and appropriate screwdrivers.
Begin the replacement process by locating the faulty element and carefully removing any mounting screws or brackets.
Take note of how the electrical wires are connected before disconnecting them. You'll need this information when installing the new element.
Gently remove the old element and position the new one in its place.
Reconnect the wires in their proper orientation and secure all mounting hardware.
Before finalizing reassembly, test the new element by running the oven briefly.
Watch for proper heating and confirm there's no unusual smoke or odors.
Structural Integrity Checks
You'll want to start your structural inspection by checking the oven's foundation for any shifting, instability, or erosion that could compromise its safety.
Look closely at both large and hairline cracks in the dome and walls, paying special attention to areas where water damage might occur.
Monitor any existing cracks regularly and repair them promptly to prevent further deterioration of your outdoor oven's structure.
Foundation and Support Issues
A solid foundation serves as the critical backbone for any outdoor oven, making structural integrity checks essential for long-term stability.
If you've noticed cracking or shifting, check your foundation's reinforcement and drainage system immediately. Don't rely on patio blocks, as they'll sink under your oven's weight.
You'll want to inspect your foundation for signs of frost heave, especially in cold climates.
If you've got a floating slab, ascertain it's properly reinforced and not tied to other structures. Watch for drainage issues that could compromise stability.
Check the concrete slab's thickness (it should be about 6 inches) and verify that the rebar extends into the first course of block.
Regular inspections of your foundation will help you spot problems before they become serious structural issues.
Crack Detection and Prevention
Three essential areas require regular inspection when checking your outdoor oven for cracks: the dome structure, mortar joints, and cooking surface.
Look for large fissures in the dome, loose bricks, and white powdery deposits (efflorescence) that signal moisture problems. Check if your cooking surface has shifted or deteriorated.
To prevent structural issues, you'll need to guarantee proper drainage and use refractory mortar between bricks.
Install a keystone brick at the dome's apex and maintain consistent brick overlap for peak strength.
Don't forget to insulate the dome with appropriate refractory materials to enhance heat retention.
Make it a habit to inspect your oven regularly, as catching small problems early prevents major repairs later.
Keep the chimney clear and verify it can support additional loads like snow.
Proper Insulation Methods
When building an outdoor oven, proper insulation serves as the cornerstone of heat retention and cooking efficiency. You'll need to carefully layer your materials, starting with a ceramic fiber blanket wrapped around the dome. Secure it with wire mesh before applying your vermiculite or perlite mixture.
| Material | Application |
|---|---|
| Ceramic Fiber | Wrap dome (1-2" thick) |
| Wire Mesh | Create supportive frame |
| Vermiculite/Perlite | Mix with cement (4-6" thick) |
| Insulating Fire Bricks | Floor installation |
| Rock Wool | Optional outer layer (10cm) |
Don't skimp on thickness – you'll want 3-4 inches around the dome and 1-2 inches near the vent and chimney. Remember, ceramic fiber insulation offers better efficiency than vermiculite mixes, though you might need to combine materials for best performance.
Chimney and Ventilation Care
Proper chimney and ventilation maintenance stands as the key to your outdoor oven's safety and performance.
You'll need to clean your chimney pipe at least once a year if it's under 12 feet, or every six months for longer pipes. When you notice soot buildup reaching 1/8 inch, it's time for a cleaning.
Always use well-seasoned firewood and avoid burning wet wood, which creates harmful creosote deposits.
For outdoor installations, you'll want a single wall stovepipe, but switch to double wall stainless steel if you're penetrating a roof. Remember to follow the "3-2-10 Rule" for proper chimney height.
Pre-warm your flue before lighting the fire, and keep it open during cooking.
If you're experiencing poor draw, consider using a cap fan or increasing your chimney height.
Electrical System Diagnostics
Beyond the chimney's mechanics, your outdoor oven's electrical system requires careful attention for safe operation.
Start by disconnecting power at the circuit breaker before accessing any wiring components. When testing the system, set your multimeter to AC voltage and check between hot wires for 240V, then measure from each hot wire to neutral for 120V readings.
Don't overlook safety precautions – wear fire-proof gloves and verify there's no live electricity before starting work.
Check for common issues like circuit overload if multiple appliances share the same circuit. Measure current flow when the oven's off; readings above 0.3A indicate wiring problems.
If you're unsure about any electrical work, it's best to contact a certified electrician. Regular voltage testing and connection inspections will help maintain your outdoor oven's electrical system.
Performance Testing Guidelines
Accurate performance testing of your outdoor oven begins with systematic temperature evaluation.
You'll want to measure different zones, as temperatures can vary considerably – from 750°F at the back to 700°F on the right side. Verify your thermostat is properly calibrated at specific settings for consistent results.
Test your oven's performance by cooking multiple pizzas back-to-back, checking for even cooking and consistency.
Don't forget to evaluate how it handles different pizza types, including whole wheat crusts and supreme toppings.
You should also monitor preheat times and energy consumption – a well-functioning oven should reach high temperatures quickly (around 950°F in 15 minutes) and maintain them efficiently.
Track the production rate and assess the oven's versatility with various foods beyond pizza.
Frequently Asked Questions
How Long Should I Let My Outdoor Oven Cool Before Cleaning?
You'll need to let your outdoor oven cool completely, which can take several hours. Don't rush the process – wait until no heat is emanating and you can safely touch the surfaces before starting any cleaning.
Can I Use Regular Household Cleaning Products on My Outdoor Oven?
Don't use regular household cleaners on your outdoor oven – they're too harsh and can damage the materials. Instead, stick to non-caustic options like baking soda and vinegar, or specialized oven-safe cleaning products.
What Type of Wood Gives the Best Heating Performance?
For the best heating performance, you'll want to use hardwoods like oak and beech. They'll provide high heat output, long burns, and consistent temperatures. Maple and ash are also excellent choices with minimal smoke.
Should I Cover My Outdoor Oven When Not in Use?
Yes, you should definitely cover your outdoor oven when it's not in use. It'll protect against weather damage, prevent moisture buildup, and extend your oven's lifespan. A quality cover helps shield from rain, UV rays, and debris.
How Often Should I Replace the Oven Door Gasket?
You'll need to replace your oven door gasket every 2-3 years or sooner if you notice signs of wear. Check regularly for air leaks, heat loss, or brown streaks that indicate it's time for replacement.
In Summary
You'll find maintaining your outdoor oven isn't complicated when you follow these key steps. Watch your temperature controls, manage moisture levels, and keep heating elements clean for peak performance. Don't forget regular checks of the structure, insulation, and ventilation system. By staying proactive with maintenance and testing, you'll guarantee your outdoor oven delivers perfect results every time you fire it up.


Leave a Reply