Start your sun-powered pot cleaning with basic safety precautions: let it cool down completely and use protective gear. You'll need gentle cleaning tools like a soft brush, microfiber cloth, and mild dish soap solution. Pre-inspect the pot for damage, then spray lukewarm water from top to bottom to loosen dirt. For stubborn residue, create a paste with baking soda or use a vinegar solution (1:4 ratio with water). After cleaning, dry thoroughly with a lint-free cloth and store in a well-ventilated area. Regular monthly maintenance keeps your pot performing at its best, and there's much more to discover about maximizing your solar cooker's efficiency.
Safety First Before Starting

Before cleaning your solar cooker, understanding proper safety measures is essential to prevent injuries.
You'll need to verify the cooker has completely cooled down and use protective gear like thick gloves when handling the equipment. Don't forget to wear sunglasses or sun goggles if you're working near reflective surfaces to protect your eyes from intense glare.
Place your cooker on level ground and turn the mirror face down when you're not using it. This prevents unwanted reflections that could harm your eyes or create fire hazards.
Keep children and pets away from the cleaning area, and remove any flammable materials nearby. Remember to check that the cooker is stable and won't tip over while you're cleaning it.
If you're working during morning or evening hours, be extra cautious of bright reflections. Since solar cookers can reach temperatures of up to 300°F, always allow sufficient cooling time before any maintenance.
Essential Cleaning Tools
While maintaining a solar cooker requires minimal equipment, having the right cleaning tools guarantees effective and safe maintenance.
You'll need a soft-bristled brush or microfiber cloth to gently clean the reflective surfaces without causing scratches. Keep a bucket of warm water mixed with mild dish soap handy, as it's perfect for removing stubborn grime.
A spray bottle filled with deionized water helps prevent mineral deposits from forming on your cooker's surface. Regular cleaning can boost your cooker's efficiency by preventing up to 25% loss in performance. For drying, use a lint-free cloth to avoid leaving behind any fibers that could affect the cooker's performance.
If you're cleaning elevated parts, a small step ladder will help you reach all areas safely. Remember to have a soft sponge available for tackling tough spots and a clean microfiber cloth for the final wipe-down.
Pre-Cleaning Solar Pot Inspection

Before you clean your sun-powered pot, check for any trip hazards in your work area and verify the unit is disconnected from its power source.
You'll want to inspect your cleaning tools and equipment to confirm they're in good working condition and appropriate for the task. Having mild dish soap and warm water as your primary cleaning solution will ensure safe and effective cleaning.
Look closely at your solar pot for signs of physical damage, including cracks, loose parts, or areas with stubborn residue that might need special attention.
Safety Check Before Starting
Safety must be your top priority when cleaning a solar-powered pot, starting with a thorough inspection of both electrical and structural components. Before you begin, check all electrical connections, verifying they're secure and protected from moisture. Confirm that the mounting structure is stable and there aren't any loose parts.
| Safety Check | What to Look For | Why It Matters |
|---|---|---|
| Electrical | Secure connections, no exposed wires | Prevents shock hazards |
| Structural | Tight mounts, no wobbling | Maintains stability during cleaning |
| Performance | No debris or obstructions | Maintains peak efficiency |
Don't proceed with cleaning if you notice any signs of corrosion, damaged wiring, or loose components. Also, confirm that all safety labels are intact and legible. If you spot any issues, contact a qualified technician before attempting to clean your solar pot.
Equipment Condition Assessment
Once you've completed the safety checks, conducting a thorough equipment condition assessment will protect your investment and guarantee ideal cleaning results.
Before cleaning your solar pot, you'll need to carefully inspect its components and performance to verify everything's in working order.
Check these critical areas with special attention:
- Examine the pot's surface for any cracks, chips, or structural damage that could worsen during cleaning.
- Test the solar cells' performance by checking voltage output under direct sunlight to confirm they're functioning properly.
- Inspect the electrical connections and wiring for signs of wear, corrosion, or loose components.
Don't proceed with cleaning if you notice any significant issues.
Instead, contact the manufacturer or a qualified repair service to address problems before they become more serious.
Visual Damage Inspection
A thorough visual inspection serves as your first line of defense in maintaining your solar pot's efficiency and longevity.
Before cleaning, you'll need to examine your pot for any obvious signs of damage or wear. Look closely at the surface for scratches, cracks, or stains that might affect performance.
Check if there's any separation of materials or structural issues around the edges. Don't forget to inspect the mounting components and connections – they should be tight and secure.
Pay special attention to any discoloration, which could indicate deeper problems.
You'll also want to check for moisture damage or water infiltration, as these can seriously impact your pot's functionality.
While visual inspection won't catch every issue, it's essential for identifying problems that need immediate attention before you begin the cleaning process.
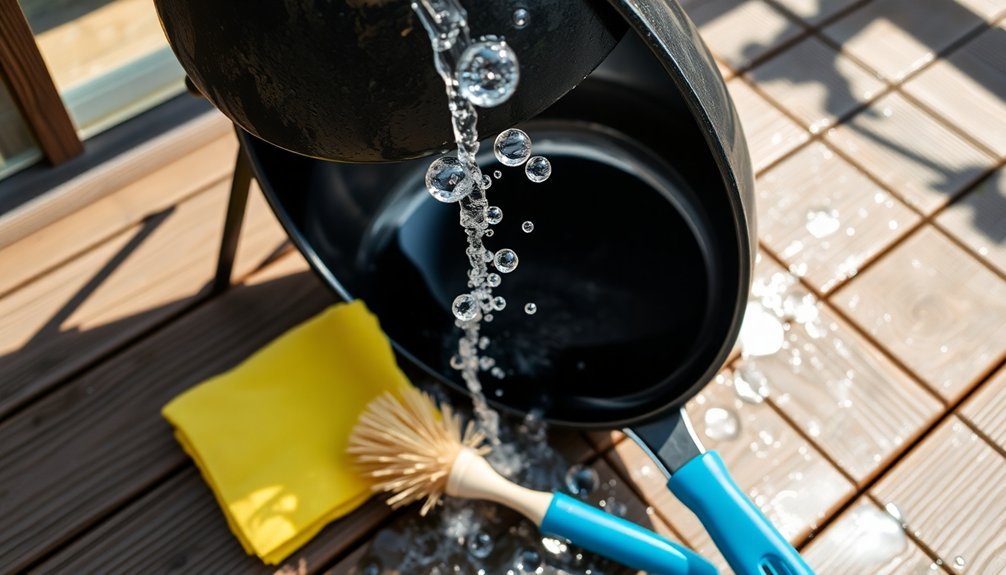
Basic Cleaning Steps
Keeping your solar panels clean starts with proper preparation and a systematic approach. Before you begin, turn off your system and gather all necessary cleaning materials. Check for obvious debris and verify you're wearing proper safety equipment if working on a roof.
Start by gently spraying lukewarm water from top to bottom to loosen dirt. Mix a mild soap solution and use a soft brush in circular motions to remove stubborn grime. Finish with a thorough rinse and squeegee dry.
For best results, follow these key steps:
- Always wet panels before scrubbing to prevent scratches
- Use light pressure with soft cleaning tools to protect the surface
- Work systematically from top to bottom for efficient cleaning
Don't forget to check your panels' energy output afterward to see the improvement in efficiency.
Removing Stubborn Food Residue

When dealing with stuck-on food in your sun-powered pot, you'll want to start by soaking it in warm water for 15-20 minutes before attempting any cleaning method.
Natural solutions like baking soda, vinegar, or lemon can effectively break down stubborn residue without damaging your pot's surfaces.
You'll get the best results by using gentle, circular motions with a soft sponge or nylon brush rather than harsh scrubbing that could scratch the cooking surface.
Pre-Soak For Best Results
Pre-soaking your sun-powered pot serves as the most effective first step in tackling stubborn food residue. Fill your sink with lukewarm water and add either a stain-specific solution or mix water with regular laundry detergent.
For natural cleaning power, you can create a DIY solution using baking soda and vinegar.
The success of your pre-soak depends on these key factors:
- Time – Allow 30 minutes for light residue or overnight for tough, baked-on food
- Agitation – Gently move the water around to help loosen particles while soaking
- Technique – Use circular motions with a soft cloth during and after the soak
Once you've completed the pre-soak, scrape off loosened residue before loading your pot in the dishwasher or washing by hand.
Remember to place it face down if using the dishwasher for maximum cleaning power.
Natural Cleaning Solutions Work
Natural cleaning solutions offer powerful yet gentle ways to remove stubborn food residue from your sun-powered pot.
You'll find that a simple vinegar solution, mixing one part white vinegar with four parts water, effectively breaks down stuck-on food particles. Just apply it liberally and wipe with a soft cloth.
For everyday cleaning, you can use mild soap mixed with water, applying it with a soft brush in gentle circular motions.
Don't use harsh chemicals that might damage the pot's surface. If you're dealing with oily smudges, reach for isopropyl alcohol instead of detergent. It's particularly effective on greasy stains without leaving marks.
Remember to always use soft brushes or cloths during cleaning to prevent scratches, and finish by rinsing thoroughly with clean water to maintain your pot's efficiency.
Gentle Scrubbing Techniques Matter
Since stubborn food residue can be challenging to remove, using proper scrubbing techniques will protect your sun-powered pot's surface while ensuring thorough cleaning.
Start by soaking your pot in warm, soapy water for 20-30 minutes to loosen stuck-on food particles.
When you're ready to scrub, follow these proven techniques:
- Use a soft sponge or silicone scraper in circular motions to gently lift away loosened food debris.
- For tougher spots, apply a paste made from baking soda and warm water, letting it sit briefly before scrubbing.
- Switch to a non-scratch scouring pad only when necessary, and always maintain gentle pressure.
Avoid abrasive tools or harsh chemicals that could damage your pot's surface.
If food remains stubborn, try boiling water in the pot to help release it.
Proper Drying and Storage
After you've thoroughly cleaned your sun-powered pot, proper drying and storage become essential for maintaining its longevity.
You'll want to use controlled environment drying methods to guarantee your pot doesn't retain any moisture that could lead to damage. Place it in a well-ventilated area and make sure air can circulate around all sides.
For storage, keep your sun-powered pot in a dry, organized space away from direct sunlight and extreme humidity.
You'll need to protect it from the elements while guaranteeing it's easily accessible for regular use. Consider using protective covers when it's not in use, and always check that it's completely dry before storing.
Store it in a clean area where you can easily inspect it periodically for any signs of moisture damage or other issues.
Monthly Maintenance Schedule

Maintaining your sun-powered pot requires a systematic approach beyond regular cleaning and storage.
You'll need to perform monthly visual inspections using binoculars to spot any potential issues without risking unsafe climbing. Keep an eye out for debris, loose mounting hardware, and unwanted pest activity.
Track your pot's performance by following these essential steps:
- Monitor energy output consistently during peak sunlight hours, ideally around noon.
- Record monthly production data and compare it to identify any concerning trends.
- Use a monitoring app to detect sudden drops in efficiency.
Don't forget to check for environmental factors that might affect performance, such as overhanging branches or accumulated leaves.
If you notice persistent shading or debris issues, install protective mesh netting and maintain proper clearance from nearby vegetation.
Frequently Asked Questions
Can I Use My Sun-Powered Pot Indoors Near Windows?
Yes, you can use your sun-powered pot indoors near windows. You'll need large, south-facing windows with clear sunshine and a well-insulated cooker. Remember that cooking times might be longer than outdoor use.
Will Extreme Temperatures Damage the Solar Heating Element?
Your solar heating element is built to handle extreme temperatures. While efficiency might drop in very hot conditions, you won't experience permanent damage. The element's designed to withstand temperatures ranging from freezing to 150°C.
How Long Does the Solar Battery Typically Last?
You'll typically get 5-15 years from your solar battery, depending on how you use it and maintain it. With proper care and ideal temperature conditions, you can maximize its lifespan toward the upper range.
Can I Cook Frozen Food Directly in the Solar Pot?
Yes, you can cook frozen food directly in your solar pot. Just remove all packaging, place it in a dark, oven-safe container, and guarantee your solar oven reaches sufficient temperatures for safe, thorough cooking.
What Happens if the Pot Gets Accidentally Submerged in Water?
If your solar pot gets submerged, don't use it immediately. Water can damage the electrical components and create short circuits. You'll need to dry it thoroughly and have it inspected before using it again.
In Summary
Your solar pot will stay efficient and last longer when you follow these cleaning methods regularly. Remember to inspect for damage before each cleaning, use gentle cleaning tools, and store your pot properly after it's completely dry. You'll get the most out of your eco-friendly cooking investment by sticking to the monthly maintenance schedule. Don't forget to prioritize safety throughout the cleaning process.


Leave a Reply