Master even outdoor cooking with these seven essential heat rack tricks. Start by positioning reflective materials like aluminum to maximize heat direction. Create distinct temperature zones by stacking your racks at different heights, with hotter zones at the bottom. Adjust mirror angles between 0-45 degrees for ideal heat reflection and control. Maintain proper airflow by spacing racks 36 inches apart and managing your vents effectively. Use water pans as thermal stores to stabilize temperatures. Position equipment strategically along the sides for clear heat circulation. Monitor each zone with reliable thermometers. These fundamental techniques are just the beginning of your journey to perfectly cooked outdoor meals.
Maximize Internal Heat Reflection
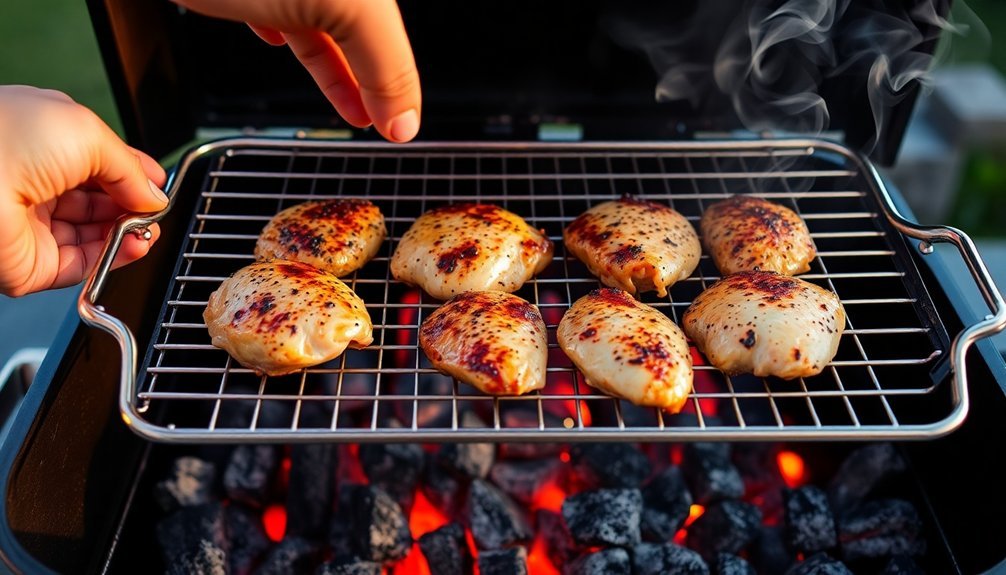
When setting up an outdoor heat rack, maximizing internal heat reflection is essential for achieving efficient cooking temperatures.
You'll want to select highly reflective materials like aluminum and position them at ideal angles to direct heat evenly onto your cooking surface. Keep these surfaces spotless, as dirt and grime can reduce their reflectivity.
Install both upper and lower reflective panels to guarantee heat bounces onto all sides of your cookware. Position your rack 5-6 inches from the heat source, and maintain vertical sides for consistent heat distribution. Using the ouch test method, carefully gauge temperature levels by feeling the heat from different distances.
Consider applying hot mirror coatings to your reflective surfaces – they'll allow visible light through while reflecting infrared radiation back into the cooking area.
For maximum efficiency, utilize a cavity design that creates multiple reflections, trapping and directing heat exactly where you need it.
Stack Racks For Temperature Zones
Stack racks transform your grill into a multi-zone cooking powerhouse by letting you control different temperature levels vertically.
You'll gain precise command over heat intensity as you move from the hottest zone at the bottom to cooler zones up top, perfect for cooking various foods simultaneously.
The adjustable rack heights give you the flexibility to create distinct temperature layers, making it easy to sear, roast, and keep foods warm all at once. The stainless steel construction ensures your rack will maintain its performance through countless grilling sessions.
Multi-Level Heat Control
Whether you're grilling multiple dishes or aiming for perfect temperature control, a multi-level heat system transforms your outdoor cooking game.
You'll have the flexibility to cook different foods simultaneously using split grids that create distinct heat zones from top to bottom.
Position your food strategically by using up to three cooking levels. Place items requiring intense heat on the lower grid near the charcoal, while foods needing gentler temperatures go up top near the rim. Saffire's patents ensure innovative features for optimal multi-level cooking performance.
You can arrange your grids left-to-right or front-to-back based on your preference. For precise temperature management, use ceramic deflectors to create indirect heating zones.
This setup lets you sear foods on one side while slow-cooking on another, making it easy to maintain ideal cooking temperatures for each dish you're preparing.
Vertical Temperature Management
Building on the multi-level approach, vertical temperature management lets you harness heat zones with precision through strategic rack positioning.
You'll want to arrange your racks to take advantage of natural heat flow, using water pans to stabilize temperatures between levels. Your water pans serve as thermal stores that help maintain consistent cooking temperatures throughout your smoking session.
Set up your bottom rack with a water pan to create a stable thermal base and deflect direct heat. Position your meats on higher racks where you can control temperatures through vent adjustments.
Keep the top vent partially open and adjust your bottom vent to fine-tune the heat flow. You'll know you've got it right when you see clean smoke flowing steadily from the exhaust.
Remember to monitor each zone separately, as heat naturally rises. If you're using a 2-zone setup, maintain about 225°F in your indirect cooking areas for best results.
Layered Cooking Heights
Mastering layered cooking heights transforms your outdoor cooking setup into a versatile temperature control system. You'll maximize your cooking space by using multiple levels, each with its distinct temperature zone. Whether you're using a Kamado Joe or multi-function oven, you can cook different foods simultaneously at varying temperatures.
| Height Level | Temperature | Best For |
|---|---|---|
| Top Rack | High Heat | Browning, Broiling |
| Middle Rack | Medium Heat | Proteins, Casseroles |
| Bottom Rack | Low Heat | Pizza, Bread |
Set up your cooking zones by adjusting the burners or vents to create targeted heat areas. For precise results, use the built-in thermometers to monitor each zone's temperature. Don't forget to rotate your dishes between levels during cooking to guarantee even heat distribution and ideal results.
Adjusting Mirror Angles
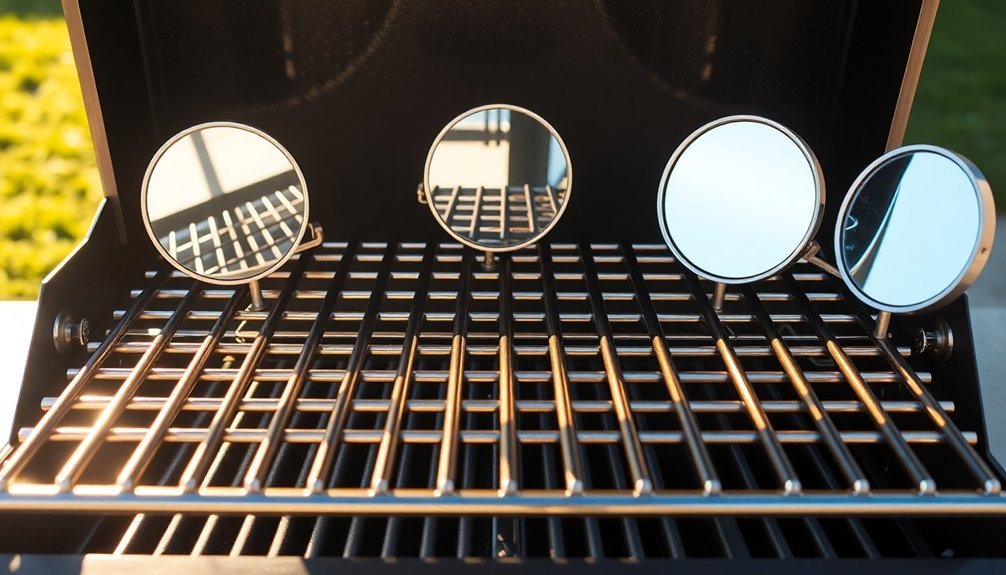
You'll need to position your mirror panels at precise angles to create distinct heating zones for different cooking temperatures.
The strategic placement of reflective surfaces lets you direct concentrated solar heat exactly where it's needed, from high-intensity searing areas to gentler warming spaces.
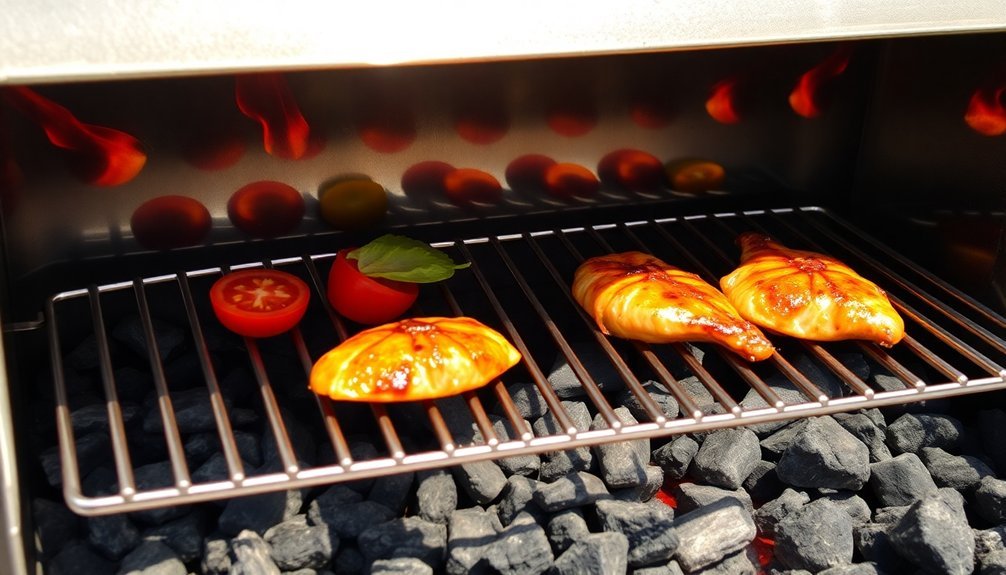
Angled Heat Distribution Zones
Creating distinct heat zones on your grill transforms an ordinary cooking surface into a precision instrument for outdoor cuisine. You'll get the best results by setting up dual zones: a hot zone (450-550°F) for searing and a cooler zone (225-275°F) for slower cooking. This setup lets you move foods between zones for perfect doneness while preventing burning.
| Zone Type | Temperature | Best For |
|---|---|---|
| Hot Zone | 450-550°F | Searing steaks |
| Medium Zone | 325-375°F | Chicken, fish |
| Cool Zone | 225-275°F | Slow barbecue |
For pellet grills, the FlameZone system's 88 conic vents direct heat upward while managing grease. You'll appreciate how the dual FlameZone covers let you switch between convection and direct heat cooking, preventing food from drying out while ensuring even heat distribution across your cooking surface.
Maximizing Solar Heat Reflection
Smart solar cooking starts with properly positioned mirrors that maximize heat reflection onto your cooking surface.
You'll get the best results by adjusting your mirrors to angles between 0° and 45°, ensuring ideal NIR and IR reflection.
For the most efficient heat concentration, use parabolic mirrors that focus sunlight onto a specific point, and remember to adjust them every 25-30 minutes as the sun moves.
- Watch in amazement as your custom-angled mirrors transform sunlight into powerful cooking energy
- Feel confident knowing you're harnessing nature's heat without wasting precious resources
- Experience the satisfaction of perfectly distributed heat across your entire cooking surface
- Enjoy the freedom of cooking anywhere the sun shines bright, whether you're camping or in your backyard
Strategic Mirror Panel Setup
When setting up your mirror panels for solar cooking, proper angle adjustments make all the difference in heat collection efficiency.
You'll want to position each mirror at a 10-degree downward tilt to guarantee proper water drainage and prevent damage to your window frames.
To achieve consistent angles across multiple panels, lay the mirrors face down on a soft, protective surface during installation.
Apply grip tape to your tension rod before mounting to maintain uniform spacing and angles.
Make sure you're directing the reflected sunlight toward the ceiling rather than eye level for safety and ideal heat distribution.
Before securing the panels, clean the backs thoroughly with rubbing alcohol and mark your attachment points for cable ties or demisters.
Double-check that all mounting hardware is firmly attached to the stationary part of your tension rod.
Heat Distribution Through Air Flow
Proper airflow management stands as the cornerstone of successful outdoor cooking, determining both your temperature control and heat distribution across the cooking surface.
You'll achieve better results by mastering your vent controls – opening bottom vents increases temperature while closing them reduces heat. The same principle applies to top vents, which regulate smoke and heat escape.
- Feel the satisfaction of perfectly balanced heat zones as you adjust your vents for that ideal temperature spread.
- Experience the joy of watching your meat develop that coveted bark as you fine-tune your airflow.
- Master the art of smoke control and watch your guests' eyes light up at the perfect flavor.
- Take pride in maintaining consistent temperatures throughout your cook without constant adjustments.
For best results, keep your firebox door slightly cracked and monitor temperatures with a reliable thermometer while experimenting with different charcoal configurations.
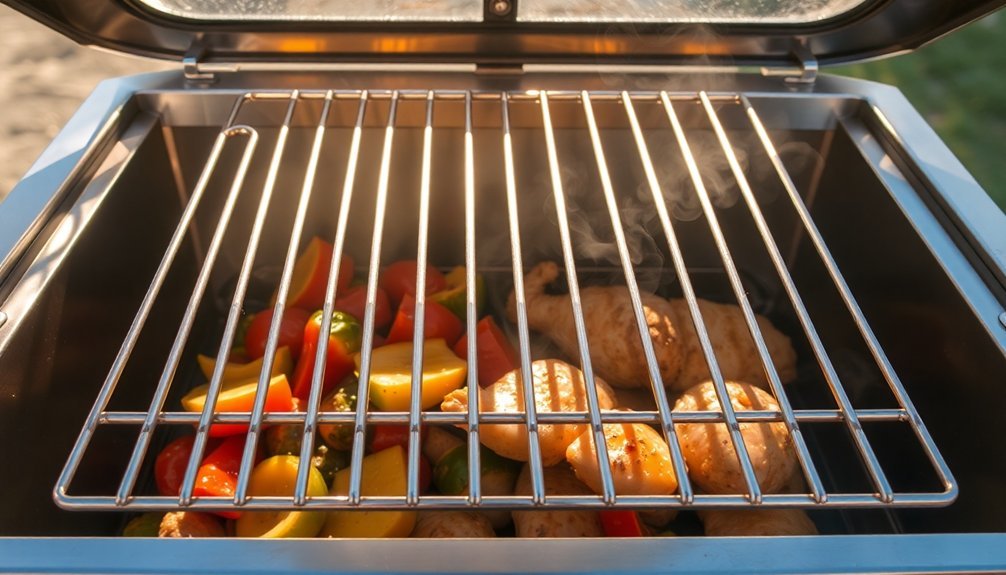
Optimal Rack Spacing Methods
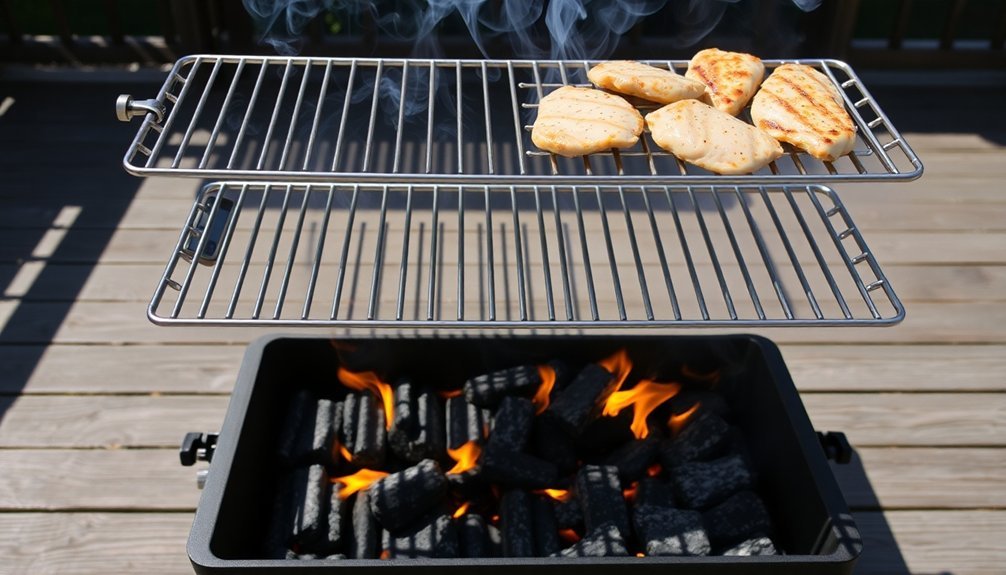
Successful outdoor cooking relies heavily on strategic rack spacing, which maximizes your heating efficiency and guarantees even cooking across all food items.
You'll want to maintain at least 36 inches between your cooking zones to facilitate proper air circulation and easy access to your food.
Position your racks vertically with enough space between levels to prevent heat from concentrating in one area.
If you're not using certain rack spaces, cover them with heat-resistant panels to control airflow and maintain consistent temperatures.
Don't forget to monitor the temperature distribution using thermometers at different rack levels.
Keep your equipment and tools organized along the sides, leaving clear paths for heat circulation.
You'll find it's easier to manage your cooking when you've got well-planned spaces between cooking stations and proper vertical separation between rack levels.
Multiple Rack Position Control
Building on effective rack spacing, precise temperature control adds another layer of sophistication to outdoor cooking setups. You'll want to master multiple rack positions to achieve professional-level results. By controlling different temperature zones, you can cook various dishes simultaneously while maintaining ideal heat distribution.
- You'll feel like a culinary maestro when you perfectly coordinate multiple dishes at different heights.
- You'll experience the thrill of achieving restaurant-quality results as you master temperature zones.
- You'll gain confidence knowing you can handle complex meals with precision timing.
- You'll enjoy the satisfaction of serving everything hot and perfectly cooked.
Position your racks strategically to take advantage of varying heat levels. The top rack typically runs hotter, while lower positions provide gentler heat.
This multi-level approach lets you control cooking speeds and achieve different levels of doneness simultaneously.
Solar Box Heat Management
When managing heat in a solar box setup, you'll need to master both temperature control and energy efficiency to achieve consistent cooking results. Start by positioning your box slightly east or west to avoid intense midday sun exposure, and guarantee proper ventilation by maintaining adequate space between components.
Install reflective materials and insulation to maximize heat retention while monitoring internal temperatures. You'll want to check regularly for hotspots and maintain clean surfaces for peak performance.
| Strategy | Purpose | Benefit |
|---|---|---|
| East/West Tilt | Avoid peak heat | Even cooking |
| Air Gap Spacing | Promote circulation | Prevents overheating |
| Reflective Lining | Enhance insulation | Better heat retention |
Don't forget to trim any overhanging vegetation that might cast shadows on your setup, and consider using foam trays or additional insulating materials to maintain consistent cooking temperatures.
Frequently Asked Questions
How Do I Prevent Rust on My Heat Rack During Rainy Outdoor Cooking?
After cooking, you'll want to dry your heat rack thoroughly, apply a thin coat of cooking oil, and store it in a covered area. When it's rainy, use a waterproof grill cover to protect it.
Can I Use Aluminum Foil to Create Temporary Heat Reflection Zones?
Yes, you can create temporary heat reflection zones with aluminum foil. Just shape it around your cooking area, secure it firmly, and angle it to redirect heat back to your food for more efficient cooking.
What's the Ideal Cleaning Method for Heat Racks Between Different Foods?
You'll get the best results by soaking your racks overnight in hot water with baking soda and dish soap. Remove debris first, then scrub with a stainless steel pad and rinse thoroughly between uses.
Should Heat Racks Be Seasoned Like Cast Iron Cookware?
Yes, you'll benefit from seasoning heat racks similar to cast iron. Apply a thin layer of high-heat oil and heat until it polymerizes. This creates a non-stick surface and helps prevent rust.
How Long Do Stainless Steel Heat Racks Typically Last With Regular Use?
With proper care, your stainless steel racks can last 5-10 years. You'll extend their lifespan by cleaning them properly, avoiding harsh abrasives, and storing them in dry conditions between uses.
In Summary
You'll find these seven rack techniques transform your outdoor cooking from inconsistent to reliable. Whether you're adjusting mirrors for heat reflection, managing airflow, or creating temperature zones, you've now got the tools for evenly cooked meals. By mastering rack spacing and position control, you're ready to harness solar energy effectively. Put these methods into practice, and you'll enjoy perfectly cooked outdoor dishes every time.


Leave a Reply