Store your sun-cooked food batches safely by maintaining proper temperature control. Keep hot foods above 125°F (53°C) or quickly cool them below 50°F (10°C) to avoid the danger zone. Use BPA-free containers with tight-fitting lids and vacuum seals to prevent air exposure and maintain freshness. Label each container with the dish name, date, and serving instructions before storing. Implement a FIFO (First In, First Out) rotation system and regularly check for quality. Control moisture levels using silica gel packets or uncooked rice for dry storage. These fundamental steps will help you master the art of preserving your sun-cooked meals.
Proper Temperature Control

When it comes to storing pre-made food batches safely, proper temperature control is your most critical defense against foodborne illness.
You'll need to keep your cooked food either above 125°F (53°C) or below 50°F (10°C) to stay out of the danger zone where bacteria thrive.
If you're planning to serve the food soon, maintain it above 125°F by bringing it to a boil and then simmering.
For storage, cool your food quickly by dividing it into smaller portions or using shallow containers. Store all food in sealed containers to prevent cross-contamination.
Don't leave food in the danger zone (50°F-125°F) for more than 3-4 hours.
Use a digital probe thermometer to monitor temperatures regularly and record your readings.
Check temperatures at every stage – from cooking to storage – and watch for any signs of spoilage.
Airtight Container Selection
When selecting airtight containers for your pre-made food batches, you'll want to choose between BPA-free plastic or glass options based on your specific storage needs and temperature requirements.
Look for containers with vacuum-seal mechanisms or lock-tight lids that prevent air from entering, and verify the seal quality by pressing gently on the lid to guarantee no air escapes. A high-impact resistant lid design ensures long-lasting durability and reliable food preservation.
Match your container sizes to your portion needs, opting for stackable designs that'll help maximize your storage space while keeping food fresh.
Material Types and Properties
The success of food batch storage heavily depends on choosing the right container material.
While glass containers like Pyrex offer versatility for oven, freezer, and microwave use, they'll need careful temperature management during reheating. Their see-through nature makes it easy to identify contents.
For liquids and dry goods, plastic containers provide airtight, leakproof solutions, though they aren't ideal for high-heat applications. Tightvac containers are especially effective since they stay fresh with contents even 10% full.
Stainless steel containers excel in durability and work well with both hot and cold foods, but avoid storing acidic items in them. They'll require proper plastic lids to maintain freshness.
Ceramic containers, while decorative, aren't your best choice for storing pre-made batches since their covers typically aren't airtight.
They're better suited for displaying dry goods like pasta or sugar on your counter.
Container Size Guidelines
Selecting the right container size proves essential for keeping your pre-made food batches fresh and organized.
You'll want to match container sizes to your food portions and usage frequency. For daily-access items, choose vacuum canisters like the Tightvac TV3 that remove oxygen and moisture while providing easy access.
Consider your storage location when selecting sizes. Refrigerator containers should leave headspace for expansion, while freezer containers need to be completely airtight.
For pantry storage, opt for larger containers like the LocknLock 5L for bulk items. Choose stackable containers to maximize space efficiency, and don't forget to factor in portion control – smaller containers can help you manage serving sizes better.
For irregular-shaped foods, rectangular or square containers work best, while powdered ingredients store well in airtight canisters.
Seal Quality Verification
Proper seal quality verification stands as your first line of defense against food spoilage in storage containers.
You'll need to inspect your containers for BPA-free plastic construction that's scratch and crack-resistant. Look for patented vacuum seal technology where you can push down the cap and press a button to remove air.
Check that your containers' seals work effectively in both humid and dry conditions, especially if you're storing food in RVs or during camping trips.
You can verify the seal quality by ensuring the lid clicks firmly into place and maintains its vacuum. Don't put your containers in the dishwasher or microwave, as this can compromise the seal's integrity. Instead, hand-wash and dry them thoroughly.
Replace any damaged caps immediately, and regularly examine the sealing mechanism for signs of wear.
Refrigeration and Freezing Methods

When storing pre-made food batches, mastering both refrigeration and freezing techniques will greatly extend their shelf life and maintain their quality.
Keep your refrigerated items below 4°C (39°F) and use them within three to five days. For longer storage, freeze portions at -18°C (0°F) or below within two hours of preparation.
You'll want to use airtight containers or freezer bags to prevent contamination and freezer burn. Label everything with dates and contents to track storage time.
When it's time to use your frozen batches, thaw them in the refrigerator rather than at room temperature to prevent bacterial growth. If you need to refreeze items, you can safely do so if they still contain ice crystals or haven't been in the fridge for more than a day.
Remember to blanch vegetables before freezing to maintain their quality.
Dry Storage Best Practices
Select airtight containers with secure, tight-fitting lids to protect your pre-made food batches from air and moisture exposure.
You'll need to store these containers in a temperature-controlled area between 50°F and 70°F, away from direct sunlight and heat sources.
Keep your storage space's humidity level below 60% by using moisture absorbers and ensuring proper ventilation around shelving units.
Airtight Container Selection Tips
The right airtight containers can make or break your food storage system. When selecting containers, prioritize BPA-free plastic options with secure snap-on or vacuum-seal lids that have passed leak tests.
You'll want containers that can withstand regular dishwasher cycles without warping. Choose a variety of sizes to accommodate different portions, and make sure they're stackable to maximize your storage space.
Clear containers help you quickly identify contents, while solid ones protect light-sensitive foods. Look for moisture-proof seals that keep out pests and prevent spoilage.
Don't forget to take into account portability – smaller containers work well for individual portions. Remember to regularly inspect your containers for wear and replace damaged parts promptly.
Skip microwaving plastic containers to extend their lifespan and maintain their airtight properties.
Temperature-Controlled Storage Areas
Having the right containers is just the start – proper storage conditions make all the difference in keeping your pre-made meals fresh.
You'll want to maintain a consistently cool temperature between 10°C and 21°C (50-70°F) in your storage area, away from direct sunlight.
Keep your storage space's humidity between 50-55% and monitor these levels regularly with thermometers.
You'll need to store different food categories separately, with prepared meals positioned above raw ingredients to prevent cross-contamination.
Guarantee all storage containers are at least 6 inches off the floor and away from walls to promote proper ventilation.
Don't forget to clearly label everything with descriptions, preparation dates, and expected shelf life.
Using clear containers will help you quickly identify contents and monitor freshness during your regular inventory checks.
Moisture Prevention Methods
Proper moisture control serves as your first line of defense against food spoilage in dry storage. Start by choosing airtight containers with secure seals, and maintain the original packaging when possible. Label everything clearly with contents and dates.
You'll need to manage humidity actively. Place silica gel packets or uncooked rice in cloth bags inside your containers to absorb excess moisture. Keep storage areas below 55% humidity and guarantee proper ventilation by maintaining space between containers.
Don't store items directly on the floor – keep them at least 6 inches elevated. Create a well-organized space with containers placed away from walls to promote airflow. Store different produce types separately to prevent ethylene gas interference.
Remember to check and replace moisture-absorbing agents regularly according to manufacturer guidelines, and keep your storage area clean and pest-free.
Preventing Moisture and Condensation

Since moisture and condensation can quickly compromise the quality of pre-made food batches, implementing effective prevention strategies is essential for long-term storage success. You'll need to employ airtight containers, moisture barriers, and proper storage conditions to protect your sun-cooked food.
| Prevention Method | How to Implement |
|---|---|
| Airtight Sealing | Use glass jars or vacuum-sealed bags |
| Moisture Barriers | Apply aluminum foil or flexible film |
| Desiccants | Add oxygen absorbers and moisture-absorbing pads |
| Temperature Control | Store at 50-60°F (10-15°C) |
| Humidity Management | Keep levels below 60% |
During temperature changes, you'll want to use temporary moisture barriers like shrink-wrap or prefabricated boxes. Store your containers in cool, dark areas away from direct sunlight, and rotate desiccants regularly to maintain a moisture-free environment. For extra protection, consider using Mylar bags with oxygen absorbers.
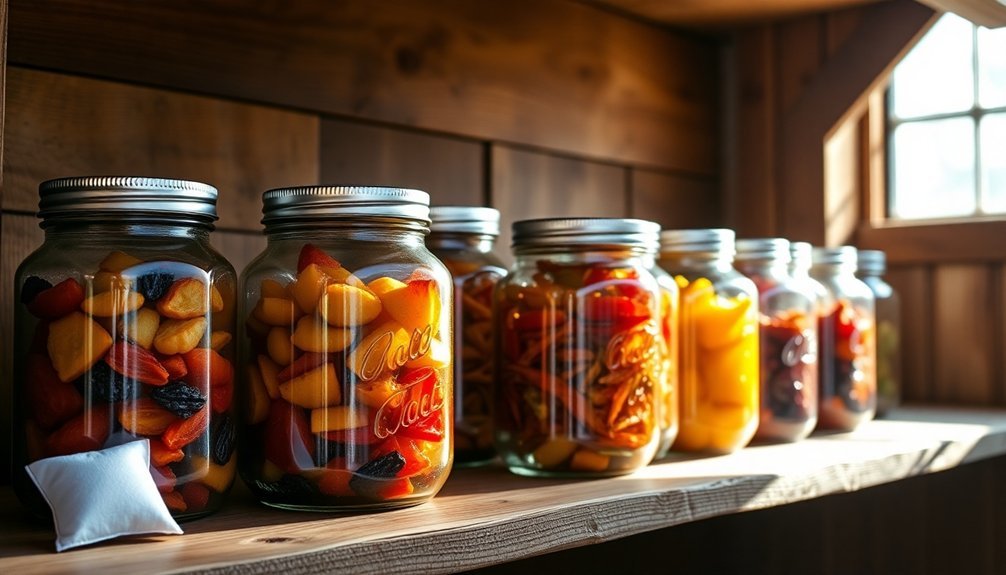
Long-Term Storage Solutions
To maximize your food's shelf life, you'll need airtight, food-grade containers like Mylar bags or vacuum-sealed packages with appropriate oxygen absorbers.
Your storage space should maintain consistent temperatures between 50°F and 60°F, with humidity levels below 60%.
Using the FIFO method, rotate your stored batches regularly while monitoring for any signs of spoilage through visual checks and smell tests.
Air-Tight Container Selection
Selecting the right airtight containers forms the foundation of successful long-term food storage.
You'll want to focus on containers that provide complete oxygen and moisture barriers while protecting your food from light exposure and pests. Choose from options like Mylar bags, #10 cans, PETE bottles, or Mason jars with proper sealing lids for smaller portions.
- Use dark-colored containers for light-sensitive items like oils, fats, and spices to maintain freshness and prevent degradation.
- Opt for crush-resistant materials with replaceable parts, ensuring your storage solution remains reliable over time.
- Consider vacuum-seal containers like Tightvac for items you'll access frequently, as they're easy to reseal while maintaining an airtight environment.
Remember to include oxygen absorbers in your containers to extend shelf life and prevent insect infestations.
Rotation and Temperature Control
Maintaining proper rotation and temperature control stands as the cornerstone of preserving your pre-made food batches. Always follow the First-In-First-Out system by placing new items at the back of your storage and using the oldest ones first.
Keep track of what you've used to maintain accurate stock levels. Store your food in a cool, dry place and avoid the temperature danger zone between 41°F and 135°F.
When cooling batches, you'll need to reduce temperatures from 135°F to 70°F within 2 hours, then from 70°F to 41°F within 4 hours. Use shallow pans or ice baths to speed up cooling.
When reheating, verify your food reaches 165°F within 2 hours, stirring regularly for even heat distribution. Don't forget to use calibrated thermometers to monitor temperatures throughout the process.
Avoiding Cross-Contamination During Storage

When storing pre-made food batches, cross-contamination poses a serious risk that can quickly spoil your entire meal prep. You'll need to keep raw and ready-to-eat foods completely separate, using proper storage containers and maintaining strict organization in your refrigerator.
- Store raw meats on the bottom shelf of your fridge, wrapped tightly in plastic or sealed containers, to prevent juices from dripping onto other foods.
- Keep unwashed produce away from your prepared meals and washed ingredients by using separate, labeled containers with tight-fitting lids.
- Clean and sanitize all storage containers before use, and don't forget to wipe down the exterior of containers before opening them.
Remember to label everything with names and dates, and never store your pre-made meals near cleaning supplies or chemicals, as cross-contamination can occur through these sources too.
Storage Container Labels
Clear and organized labeling stands as the foundation of successful food batch storage. You'll need to label your containers before filling them to prevent smudging and guarantee readability. Use freezer-specific labels or masking tape with permanent markers to write essential information.
Your labels should include the dish name, serving size, cooking instructions, and storage date. Don't forget to note recommended side dishes for easier meal planning.
For better visual organization, you can incorporate printed icons or use chalk markers that won't fade in freezer conditions.
Place your labeled containers strategically, keeping frequently used items easily accessible. Stack similar items together to maximize space and maintain order.
If you're using resealable bags, lay them flat and label the top portion to guarantee the text remains visible when stacked.
Food Safety Monitoring

Beyond proper labeling, safe food storage demands rigorous monitoring practices to protect your pre-made batches.
You'll need to consistently check temperatures, track pathogen presence, and document your monitoring activities to guarantee food safety compliance.
1. Monitor food temperatures at all stages – receiving, storing, cooking, cooling, and reheating.
Keep food out of the danger zone (5°C to 60°C) and use sanitized, calibrated thermometers for accuracy.
2. Test for harmful pathogens like Salmonella, Listeria, and E.coli through regular sampling.
Track indicator organisms and conduct ATP tests to verify your sanitation effectiveness.
3. Follow proper SOPs for each menu item and automate your monitoring systems when possible.
Use digital tools for real-time data collection and maintain detailed records of all safety checks and temperature readings.
Storage Room Temperature Guidelines
Proper storage room temperature management serves as your first line of defense against food spoilage and bacterial growth. Your storage area should stay well below the danger zone of 40°F to 140°F (5°C to 57°C) to prevent harmful bacteria from multiplying.
Choose a cool, dry basement or similar area away from direct sunlight for storing your pre-made food batches. You'll want to maintain temperatures at 41°F (5°C) or lower for perishable items.
If you can't achieve these ideal conditions, use a dehumidifier to keep humidity levels under 15% and implement alternative storage methods. You can also maintain food safety by heating items to boiling and simmering for a few minutes, keeping them above 125°F (53°C).
Batch Rotation System

Once you've established the right storage temperature, organizing your pre-made food batches becomes your next priority.
Implement a FIFO (First-In, First-Out) system to guarantee older batches are used before newer ones, preventing waste and maintaining food quality. Place newer items at the back of your storage area and older ones at the front for easy access.
For effective batch rotation, you'll need:
- Clear labeling system with batch numbers, preparation dates, and expiration dates
- Regular inventory checks to track stock levels and monitor expiration dates
- Specialized rotation systems with angled shelving for automatic front-to-back movement
Keep detailed records of your inventory using spreadsheets or management software.
This helps you track batch numbers for food safety and traceability while making it easier to maintain proper rotation schedules.
Frequently Asked Questions
Can Solar-Cooked Food Be Reheated in a Microwave Without Losing Nutritional Value?
Yes, you can safely reheat solar-cooked food in your microwave while preserving nutrients. Just cover the food, stir occasionally, and heat until steaming. It's actually one of the best methods for maintaining nutritional value.
How Do Different Colored Storage Containers Affect Sun-Cooked Food Shelf Life?
The color of your storage containers doesn't greatly affect sun-cooked food's shelf life. What's important is using properly sealed, insulated containers and maintaining safe temperatures to prevent bacterial growth during storage.
What Materials Should Storage Shelves Be Made of for Sun-Cooked Foods?
You'll want stainless steel shelving for storing sun-cooked foods since it's non-porous, resists bacteria, and handles humidity well. It's easy to clean and won't degrade in warm storage conditions.
Does Altitude Affect the Storage Duration of Solar-Cooked Meals?
While altitude doesn't directly affect storage duration, you'll need to monitor stored food more carefully at higher elevations due to lower air pressure and drier conditions. Follow standard storage guidelines regardless of your location's elevation.
Can Vacuum Sealing Replace Traditional Cooling Methods for Sun-Cooked Foods?
No, you can't skip cooling before vacuum sealing sun-cooked foods. You'll need to let your meals cool completely first to prevent dangerous bacterial growth and guarantee proper sealing without trapped steam pockets.
In Summary
Store your sun-cooked food batches correctly to maximize shelf life and maintain food safety. Keep dry goods in airtight containers away from light and moisture, refrigerate perishables at 40°F or below, and freeze items you won't use within a week. You'll need to label everything clearly with dates and rotate your batches regularly. Don't forget to check storage temperatures daily and watch for signs of spoilage.


Leave a Reply