You can restore worn-out reflector panels with seven simple DIY methods. Start by cleaning the surface with compressed air and a mild soap solution to remove debris. Try buffing minor scratches with whitening toothpaste using circular motions. Apply reflective tape for damaged sections, ensuring proper alignment and bubble-free application. Consider using chrome paint for larger areas, starting with a black base coat. Replace severely damaged sections with new Mylar sheets, or opt for professional rechroming services. For routine maintenance, regularly inspect and clean your panels with specialized solutions. These proven techniques will help you extend your reflectors' life and maintain peak performance, with each method offering unique advantages for different situations.
Basic Cleaning and Surface Preparation

When your reflector panels start showing signs of wear, proper cleaning is the critical first step in restoring their effectiveness.
Start by using compressed air to remove loose debris without touching the surface. If you're dealing with stubborn dirt, a camera sensor cleaning swab kit offers precise, gentle cleaning.
For a thorough clean, mix distilled water with mild soap, but never use tap water as it'll leave mineral deposits. You can use a wet q-tip with minimal pressure to dislodge stuck particles. Regular maintenance with gentle cleaning methods helps prevent the need for more aggressive treatments later.
If you need something stronger, 91% isopropyl alcohol works well, though be cautious as it can leave white lines on some surfaces. Always test your chosen cleaning method on a small area first, and use a soft, debris-free microfiber cloth for final wiping to avoid scratches.
Toothpaste Buffing Technique
Three simple steps make toothpaste buffing an effective solution for minor scratches on reflector panels.
First, apply whitening toothpaste (preferably with baking soda) directly to a clean microfiber cloth.
Next, spread the toothpaste evenly over the scratched area and let it sit for 5-10 minutes.
Finally, buff the surface using circular motions with light to moderate pressure for 10-20 minutes.
You'll need to be patient, as multiple applications may be necessary for ideal results.
Professional car dealers like Tony Aluneedtono have used this 130-year family secret successfully.
While buffing, avoid using excessive pressure that could damage the surface.
When you're finished, clean the area with glass cleaner or a vinegar-water solution.
Remember that this technique works best on superficial scratches and may not completely eliminate deeper damage.
Don't use abrasive sponges or rough materials during the process.
Applying Reflective Foil Tape

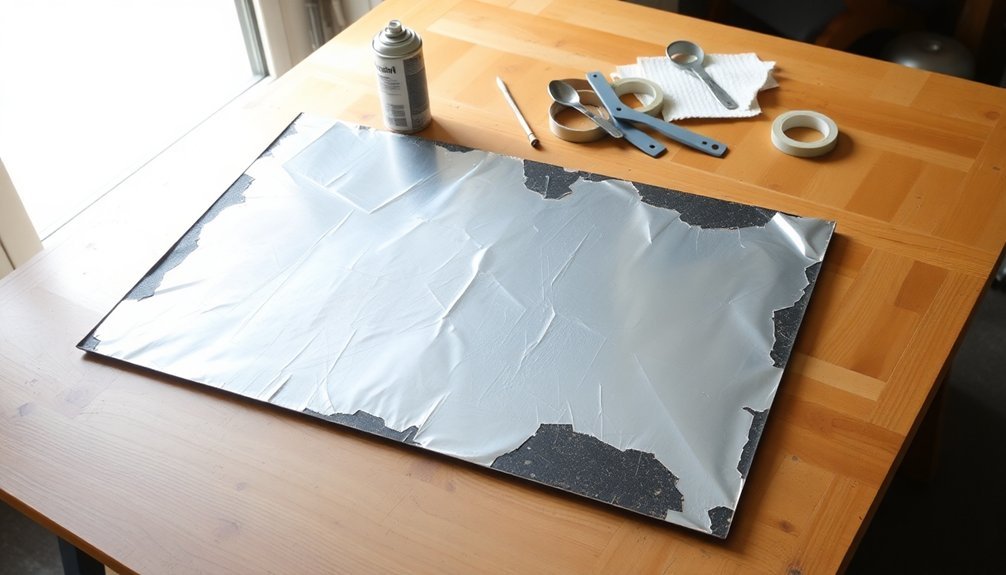
Before applying reflective foil tape to repair worn-out reflector panels, proper surface preparation is essential for a lasting bond. Clean the surface thoroughly with alcohol or soap solution, removing all dirt, dust, and old adhesive residue. Make sure it's completely dry before proceeding. The tape's heat-resistant properties make it ideal for reflector panels exposed to high temperatures.
Measure and cut the tape with sharp scissors, keeping the edges straight and clean. Don't touch the adhesive side to maintain its effectiveness.
When you're ready to apply, peel off the backing and start from one end, carefully aligning the tape over the damaged area. Press firmly as you go, using a credit card or squeegee to eliminate air bubbles.
For multiple strips, overlap the edges by at least 1/4 inch. Use a roller to apply extra pressure, ensuring maximum adhesion. Check for any gaps or bubbles and smooth them out immediately.
DIY Chrome Paint Method
You'll want to start with a glossy black 2-pack base coat mixed with hardener, allowing it to dry completely for 3-4 days before applying your chrome paint.
When selecting chrome paint, opt for a high-quality brand that's compatible with spray application methods for the most even coverage and reflective finish.
For the best results, apply multiple thin coats rather than one heavy layer, and use a rapid clear coat to enhance the final reflective properties.
Best Paint Selection Tips
Selecting the right chrome paint requires careful attention to both the base coat and top coat specifications.
You'll want to start with a black base coat, as it provides the most reflective finish. If you're working on larger panels, dark grey can be an effective alternative.
For the chrome layer, choose a paint that doesn't require mixing and applies easily in light, misty coats. Products like ALSA Easy Chrome and Multi-Mix Hyper Silver are reliable options.
Don't worry if the paint appears hazy initially – it should clear within 20 seconds. To protect your work, consider adding a water-based sealer or clear coat.
Remember to keep your base layer smooth and clean, avoiding wet applications that could dull the finish.
Using an epoxy primer can improve adhesion on challenging surfaces.
Surface Prep And Application
When tackling chrome paint restoration, proper surface preparation makes all the difference between success and failure.
Start by thoroughly cleaning the surface and applying a 2K etch primer. Once the primer dries after 24 hours, apply a jet-black base coat in two stages for ideal reflectivity.
After 24-72 hours of drying time, you're ready for the chrome paint application.
Keep your spray gun 10 inches away while applying an even coat of chrome paint. Once it clears up, seal your work with a protective 2K top coat using a two-stage application process.
- You'll feel proud seeing your reflection in the perfectly smooth surface
- You'll save hundreds of dollars compared to professional refinishing
- You'll enjoy showing off your restored panels to fellow enthusiasts
Mylar Sheet Replacement Process

Replacing worn Mylar sheets requires three key preparation steps before installation. Start by thoroughly cleaning the surface, removing all dust, oil, and debris. Next, select the right adhesive – contact cement spray works best for bonding sheets together. Finally, verify you're working in a well-ventilated area with protective gear.
| Step | Action | Time Required |
|---|---|---|
| Clean | Remove debris & old adhesive | 15-30 mins |
| Prep | Apply contact cement spray | 5-10 mins |
| Wait | Let adhesive become tacky | 1-2 mins |
| Align | Position sheets carefully | 5-10 mins |
| Bond | Press & allow to cure | 1-10 hours |
For damaged sheets, you can use 3M Super 77 glue with Mylar tape for repairs. Remember to relieve panel tension before applying adhesive and protect surrounding areas with paper towels during application.
Professional Rechroming Solutions
While Mylar replacement offers a quick fix, professional rechroming delivers superior, long-lasting results for worn reflector panels. The process involves stripping old layers, applying copper and nickel bases, and finishing with a thin chrome coating.
Professional services typically charge around $35 per unit and guarantee your reflectors meet safety regulations.
- You'll get peace of mind knowing experts use proper safety equipment and environmentally friendly solutions to protect both you and the environment.
- You'll save countless hours of frustration trying to DIY such a complex process that requires specialized tools and expertise.
- You'll experience the satisfaction of restored headlamps that look factory-new and provide peak lighting performance.
For best results, choose established services like Ashford Chroming that specialize in vintage and classic reflector restoration, particularly for hard-to-find models.
Testing and Final Assembly

Three essential tests will confirm your reflector panel's effectiveness before final assembly. First, use a flashlight in a dark room to check for strong, clear reflection – if it's dim or dull, you'll need additional repairs.
Next, take a flash photo in low light; your reflector should appear brilliantly illuminated in the image.
Finally, conduct an angle test by moving your light source to different positions, guaranteeing the panel reflects well from multiple viewpoints.
Once testing is complete, focus on proper installation. Mount the reflector according to manufacturer specifications, double-checking that all fasteners are secure.
Confirm perfect alignment of all components to maximize reflective efficiency. If you're working with multiple panels, verify they're configured correctly and positioned to provide ideal coverage for your specific application.
Frequently Asked Questions
Can LED Lights Work Effectively With Repaired Reflector Panels?
Yes, your LED lights can work effectively with repaired reflector panels if they're properly fixed using quality materials. You'll maintain ideal light distribution and efficiency when the repairs match original specifications and are professionally done.
How Long Do DIY Reflector Repairs Typically Last Before Needing Replacement?
You'll find DIY reflector repairs last 6 months to 2 years, depending on your method. Metal leaf needs more maintenance, while foil tape and polished surfaces can last longer with proper care.
Will Extreme Temperature Changes Affect the Adhesion of Reflective Materials?
Yes, your reflective materials' adhesion will be greatly affected by extreme temperatures. In cold, adhesives become brittle and lose grip, while high heat can melt them. You'll need temperature-specific adhesives for reliable bonding.
Does the Reflector Panel's Shape Affect Which Repair Method Works Best?
Yes, your reflector panel's shape directly determines which repair method you'll use. Complex prism cuts need gentler techniques, while flat surfaces can handle more aggressive cleaning and painting approaches for restoration.
Can Automotive Reflector Repair Methods Work on Solar Cooking Equipment?
You can adapt many automotive reflector repair methods for solar cookers, but you'll need to guarantee the materials can handle high temperatures. Heat-resistant foil tape and reflective Mylar work well, while chrome paint doesn't.
In Summary
You've now got several reliable options to restore those dulled reflector panels back to their original shine. Whether you've chosen the quick toothpaste buff, applied reflective tape, or opted for a complete rechroming job, remember to test the restored panels in low light conditions before final assembly. With proper maintenance and occasional touch-ups using these methods, your reflectors will keep bouncing light effectively for years to come.


Leave a Reply