To create better sun-baked dishes, start by selecting sharp, comfortable knives that match your cutting tasks. When preparing ingredients, slice meats between 1-2 inches thick and vegetables thinner for peak solar cooking results. Always let food cool on a wire rack before slicing to prevent crumbling and enhance flavor distribution. Make uniform cuts to guarantee even cooking throughout, and remember to slice meats against the grain for tenderness. Keep your blade clean and sanitized between uses, and practice safe handling by securing your cutting board and maintaining proper finger positions. These fundamental techniques will reveal the full potential of your solar cooking experience.
Select The Right Cutting Tools

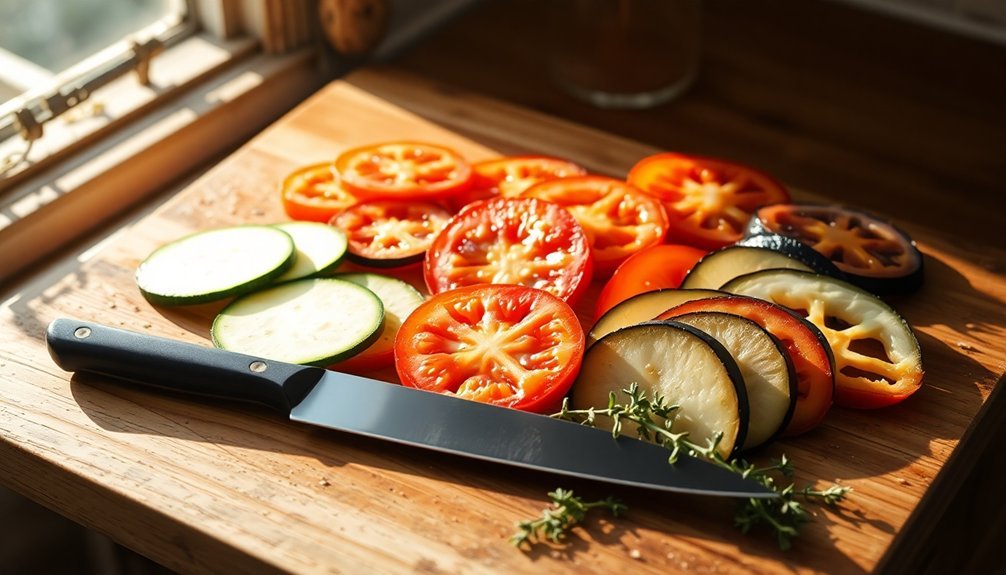
Every sun-baked dish requires precise cutting techniques that start with selecting the right tools for the job.
You'll need a sturdy cutting board made of wood or plastic that's large enough to handle your ingredients while protecting your knife's blade.
For your knife selection, start with a chef's knife as your go-to tool for general chopping and slicing. Add a serrated knife for soft ingredients like tomatoes and a paring knife for smaller items such as garlic cloves.
Make sure each knife has a comfortable grip and sharp blade for efficient cutting.
Choose a stable workspace and keep your cutting board clear of clutter. Since many sun-baked recipes use a box-type solar cooker, proper ingredient sizing ensures even cooking throughout.
When you're working with fresh ingredients for sun-baked dishes, having the right cutting tools will make your prep work safer and more efficient.
Proper Thickness For Solar Cooking
When preparing dishes for solar cooking, achieving the right thickness of your ingredients is essential for even heating and ideal results.
You'll want to slice most meats and fish between 1-2 inches thick to guarantee they cook thoroughly without drying out. For vegetables with high moisture content, cut them thinner to reduce cooking time and preserve nutrients.
Since solar ovens typically operate between 150°F to 300°F, uniform thickness helps manage cooking times more effectively. Using heavy materials inside like rocks or bricks can help maintain stable temperatures during longer cooking sessions.
You'll need to plan for 3-5 hours with thicker cuts and 1-2 hours for thinner items. Remember that the best cooking window is between 10:00 a.m. and 2:00 p.m. when sun intensity peaks.
If you're baking breads or pastries, adjust their thickness based on the day's conditions, as cloud cover can greatly impact cooking duration.
Cool Before Slicing

You'll get the best slicing results when your sun-baked dishes reach room temperature, as the cooling period allows ingredients to set properly and prevents unwanted crumbling.
For faster cooling, place your dish on an elevated wire rack to promote air circulation around all sides. The moisture redistribution process during this time helps develop better overall flavor.
While it's tempting to slice immediately, waiting just 1-2 hours will greatly improve your final presentation and texture.
Perfect Temperature Prevents Crumbling
To achieve perfect slices of sun-baked dishes, letting them cool to the right temperature is essential. You'll need to resist the temptation to cut into your dish immediately, as this can lead to a crumbly mess and compromise the final texture.
| Temperature Factor | Impact on Slicing |
|---|---|
| Room Temperature | Ideal for setting structure |
| Direct Sunlight | Causes sweating, leads to mold |
| Cool Environment | Maintains texture integrity |
| High Humidity | Creates soggy, crumbly results |
The cooling process allows gluten strands to set properly, which guarantees your slices will hold together. You'll find that waiting helps maintain moisture balance and improves the dish's shelf life. For best results, store your cooled dishes in airtight containers, and if your kitchen's particularly warm, you might want to take into account refrigeration to maintain the perfect slicing texture.
Quick Cooling Methods Work
A rapid cooling process is essential before slicing sun-baked dishes to maintain their structural integrity.
You'll need to cool your dish within two hours to prevent bacterial growth and guarantee food safety. Don't place hot dishes directly in the refrigerator, as this can lead to uneven cooling and compromise food quality.
Instead, use proven cooling methods that work efficiently. Transfer your dish to a stainless steel container, which conducts heat better than plastic, and place it in an ice water bath. Stir occasionally to speed up the cooling process.
You can also divide larger portions into smaller containers to increase cooling surface area. Once your dish reaches room temperature, loosely cover it and place it in the refrigerator until it reaches 41°F.
This careful cooling guarantees perfect slices and safe consumption.
Uniform Cuts For Even Cooking
Before you start cutting your sun-baked dishes, take time to measure and divide the portions into equal sections using a ruler or measuring tape.
You'll find it helpful to mark your cutting guidelines by gently wrapping cooking string around the dish at your measured intervals.
These markings will serve as your roadmap for achieving those vital uniform cuts, ensuring every slice cooks evenly and looks professional.
Measure Before Slicing
When preparing sun-baked dishes, precise measurements and uniform cuts play an essential role in achieving perfect results. Start by squaring off your ingredients to create a stable base before making any cuts.
You'll want to use your chef's knife for most tasks, switching to a paring knife for more delicate work.
Before you begin slicing, take time to measure your ingredients carefully. This step guarantees you'll achieve consistent sizes that cook evenly under the sun's heat.
Keep your fingers tucked under your knuckles as you practice the rock chop technique for controlled, precise cuts.
Remember that uniform pieces aren't just about appearance – they're imperative for even cooking times and consistent textures throughout your dish. When all pieces are the same size, you'll avoid the frustration of having some portions overcooked while others remain undercooked.
Mark Guidelines With String
String guidelines offer a simple yet effective method for achieving uniform cuts in sun-baked dishes. You'll want to lay a piece of cooking string across your ingredients to create visible markers for your knife to follow. This technique helps you maintain consistent spacing and precision while cutting.
To use this method effectively, position the string at regular intervals on your ingredient, securing it gently without pressing too hard.
When you're cutting, align your chef's knife with the string markers and use the forward and backward slice technique. Keep your fingers tucked under your knuckles for safety, and maintain steady pressure throughout each cut.
You'll find this approach particularly useful when preparing vegetables that need to cook evenly in sun-baked dishes, ensuring both ideal texture and visual appeal.
Slice Direction Matters

The proper direction of your slice can make or break a perfectly cooked brisket. Before you start cutting, you'll need to identify the meat's grain direction, as the flat and point sections run in opposite ways. Look for visible lines or fibers to guide your knife.
If you cut with the grain, you'll end up with stringy, tough meat that's hard to chew. Instead, slice against the grain using a long, serrated knife. Let the blade do the work by applying gentle pressure and cutting smoothly from tip to base.
You'll want to remove any burnt edges first, though don't toss them – they're great for baked beans.
When you slice correctly against the grain, you'll achieve tender, perfectly presentable portions that enhance both taste and texture.
Keep Your Blade Clean
A clean blade is essential for achieving perfect slices in sun-baked dishes. After each use, wash your knife with warm, soapy water and scrub both sides with a non-abrasive sponge. Avoid steel wool, which can scratch the surface. Rinse thoroughly under running water to remove all soap residue.
For stubborn food bits, don't let them stick around. You can briefly soak your knife in warm water or use a polishing compound to tackle resistant residue.
If you're working with raw meat, sanitize your blade using a diluted bleach solution, then rinse well.
Always dry your knife immediately with a clean towel or paper towel. This step is vital, especially for high-carbon blades that can rust if left damp. Proper drying prevents corrosion and extends your knife's lifespan.
Safe Handling While Cutting

Safe handling practices form the foundation of any successful cutting technique.
You'll want to maintain control of your knife by choosing one that fits comfortably in your hand and matches your cutting task. A paring knife works best for smaller items, while larger cuts of meat require a chef's knife.
Always secure your cutting board by placing a damp cloth underneath to prevent sliding.
When you're cutting, position yourself properly and slice away from your body using smooth, controlled motions. Keep your fingers curled inward while holding the food steady.
If you need to move around the kitchen with a knife, point it downward and alert others nearby.
Frequently Asked Questions
Can Sun-Baked Dishes Be Sliced While Still Hot From the Solar Oven?
You shouldn't slice sun-baked dishes while they're hot. Let them cool slightly to avoid burns and guarantee better control. You'll get cleaner cuts and prevent steam from making the food mushy.
How Do Weather Conditions Affect the Cooling Time Before Slicing?
You'll notice faster cooling times on cold or windy days. Hot, humid conditions will slow down cooling. If clouds block the sun, your dish will start cooling more quickly after you've removed it.
What's the Best Way to Store Partially Sliced Sun-Baked Dishes?
For partially sliced sun-baked dishes, you'll want to store them in an airtight container in the fridge, covered with olive oil. Don't keep them longer than 3-4 weeks, and always check for mold.
Should Different Sun-Baked Ingredients Be Sliced at Different Temperatures?
Yes, you'll want to adjust your slicing thickness based on cooking temperatures. When it's hotter (300-350°F), you can cut thicker slices, but you should slice ingredients thinner during cooler temperatures for even cooking.
How Long Can Sun-Baked Dishes Sit Out Before Becoming Too Firm to Slice?
You shouldn't let any prepared dishes sit out for more than 1-2 hours, regardless of texture. If they've been in the sun, they'll need refrigeration even sooner to prevent both food safety issues and hardening.
In Summary
Your sun-baked dishes deserve the best preparation, and proper slicing makes all the difference. You'll get better results when you follow these simple tips – from choosing the right knife to maintaining consistent thickness. Remember, it's not just about the cutting technique; it's about maximizing your solar cooking success. Keep these slicing fundamentals in mind, and you'll create perfectly cooked solar dishes every time.


Leave a Reply