Food thermometers are your vital tool for safe and delicious outdoor cooking. You can't rely on visual cues alone – proper internal temperatures guarantee your food is both safe to eat and perfectly done. When cooking outdoors, variables like weather and inconsistent heat sources make temperature monitoring even more essential. You'll need to maintain foods at 140°F or higher for safety, while specific meats require precise temperatures (like 145°F for beef) to achieve ideal doneness. A quality digital probe thermometer gives you instant, accurate readings and helps prevent foodborne illness. Master the basics of temperature control, and you'll reveal the secrets to outstanding outdoor cooking.
Safety Standards for Solar Cooking

When using a solar cooker, maintaining proper temperature control is essential for food safety. You'll need to preheat your solar oven to at least 140°F, though 200°F is ideal to compensate for heat loss when you add food. Always use a cooking thermometer to verify internal temperatures.
Position your solar cooker to maximize sunlight exposure between 11:00 am and 3:00 pm, when sun intensity is strongest. You'll need to monitor and adjust its position throughout cooking to maintain consistent heat.
Keep in mind that cooking times vary considerably – eggs and small desserts might take under an hour, while meat cuts and beans require 4-7 hours. Don't forget to stir liquids and rotate solid foods every 10-15 minutes for even cooking. Any food left in temperatures between 125°F and 50°F for over 3-4 hours must be thrown away.
If conditions aren't ideal, switch to an alternative heat source.
Temperature Zones in Solar Ovens
To get the most reliable temperature readings in your solar oven, you'll want to place your thermometer in the hot zone, which is typically centered between 4-6 inches below the reflective panels where temperatures can reach up to 400°F in box-type ovens.
You can manage temperature fluctuations by adjusting your reflectors every 30-45 minutes and using dark cookware to maximize heat absorption during peak hours between 11 AM and 3 PM.
For ideal heat distribution, verify your oven is properly insulated with materials like cotton or newspaper, and position it where it receives direct sunlight with minimal wind exposure. Proper insulation helps maintain cooking temperatures and allows food to stay warm for 2-3 hours after sunset.
Hot Zone Placement Guide
Three distinct temperature zones exist within a typical solar oven, each playing a crucial role in cooking effectiveness.
You'll find the hottest zone directly beneath your reflective panels, where temperatures can reach 300-400°F in box-type ovens and up to 800°F in parabolic models. This zone's perfect for quick-cooking items and browning.
The middle zone maintains steady temperatures between 200-300°F, ideal for most baking and slow-cooking needs. To maximize heat absorption, place dark-colored cookware in this area.
The outer edges form your cooler zone, which you'll want to avoid unless you're warming items gradually.
For best results, you'll need to reposition your oven every 20-30 minutes during peak hours (11 am-3 pm) to keep your food in the prime hot zone as the sun moves.
Managing Temperature Fluctuations
Since solar ovens rely entirely on sunlight, managing temperature fluctuations requires careful monitoring and regular adjustments throughout the day.
You'll need to reposition your oven every 30-45 minutes to maintain temperatures between 180°F and 250°F for safe cooking.
Use a digital probe thermometer to track internal food temperatures, and keep your oven facing perpendicular to the sun's rays.
You'll achieve peak temperatures between 11:00 AM and 3:00 PM, but weather conditions can impact performance. If you're cooking during winter months, expect to make more frequent adjustments and allow for longer cooking times.
To stabilize temperatures, guarantee proper insulation with materials like crumpled newspaper or spun fiberglass.
Dark-colored, lidded cookware will maximize heat retention, while thermal mass elements like bricks or water pans help maintain consistent cooking temperatures. Using Type-K thermocouples for temperature monitoring ensures the most precise measurements of your solar oven's performance.
Optimal Heat Distribution Tips
While different solar oven designs create distinct temperature zones, understanding their distribution helps you maximize cooking efficiency.
You'll find that box-type ovens maintain steady temperatures between 160°F and 400°F, while parabolic models can reach up to 800°F in their focal points. To guarantee ideal heat distribution, you'll need to position dark cookware where reflected sunlight concentrates most intensely.
For best results, place your thermometer in various spots to map out your oven's hot zones.
Remember to adjust your cooker every 30 minutes to track the sun, particularly during peak hours from 11 AM to 3 PM. If you're using a panel cooker, expect more moderate temperatures around 200°F to 300°F, and position food accordingly to achieve consistent cooking results.
Essential Solar Cooking Equipment

When you're cooking with a solar oven, you'll need a high-quality food thermometer with a temperature range of at least 500°F (260°C) to safely monitor your dishes.
Your thermometer should feature a long probe that can easily reach into deep cooking vessels while keeping your hands away from hot surfaces and concentrated sunlight.
Look for solar-safe designs with heat-resistant handles and digital displays that remain readable in bright sunlight.
Food-Grade Probe Selection
Selecting the right food-grade probe thermometer is essential for safe and effective solar cooking. You'll want to choose a probe that can handle temperatures from -50°C to 300°C and displays readings in both Celsius and Fahrenheit. Digital probe thermometers offer instant readings and work well for various foods, from meats to baked goods.
| Type | Reading Time | Best Use |
|---|---|---|
| Instant-Read | 10-20 seconds | End of cooking |
| Probe Digital | Immediate | Multiple foods |
| Thermometer-Fork | 2-10 seconds | Grilling |
| Pop-Up | Variable | One-time use |
Remember to maintain your thermometer properly. Clean it with soap and water after each use, store it safely to protect the probe cord, and calibrate it weekly if it's a bimetallic-coil model. You'll also want to take into account portability features like magnetic mounts or brackets for outdoor cooking convenience.
Temperature Monitoring Equipment
Three essential types of temperature monitoring equipment form the backbone of successful solar cooking: digital thermometers, Bluetooth-enabled probes, and integrated monitoring systems.
You'll find digital thermometers equipped with thermistors or thermocouples provide quick readings in 10-20 seconds, perfect for checking food temperatures near the end of cooking.
If you're looking for continuous monitoring, Bluetooth-enabled probes connect to your smartphone, allowing you to track temperatures remotely through dedicated apps while setting custom alerts.
For thorough control, integrated monitoring systems work seamlessly with your cooking equipment, featuring multiple probes to track both food and ambient temperatures.
These systems often include fan controls to regulate airflow and maintain consistent temperatures.
You'll also benefit from features like open lid detection and customizable data logging to guarantee food safety.
Solar-Safe Thermometer Designs
Since safety and reliability are paramount in solar cooking, modern thermometer designs incorporate robust features specifically engineered for outdoor use.
You'll find these thermometers built with high-impact stainless steel and ABS plastic, making them weather-resistant and durable for outdoor cooking.
The bi-directional solar panels power these devices efficiently, while backup batteries guarantee they'll work even in dim conditions.
You can count on accurate readings within ±1°C, and they're easily switchable between Fahrenheit and Celsius.
These thermometers work across a wide temperature range from -50°C to 300°C, perfect for monitoring your solar oven or barbecue.
With their glass passivated thermistor sensors and aluminum stems, you're getting precise measurements that are NIST traceable.
The external sensors and flexible cables let you position them exactly where you need them.
Proper Probe Placement
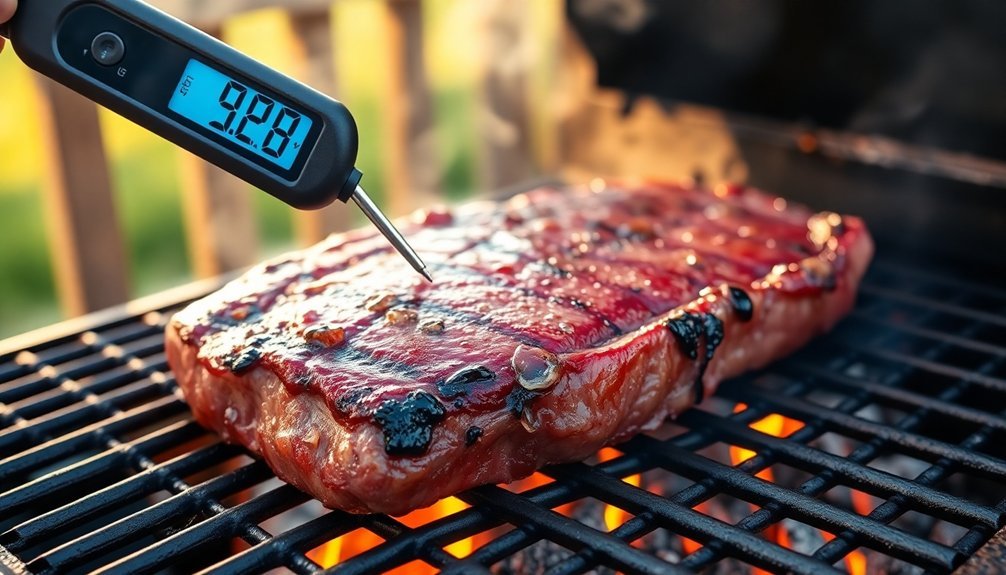
Proper placement of your food thermometer's probe is essential for accurate temperature readings when cooking outdoors. Insert the probe into the thickest part of your meat, about ½ inch deep for thin cuts and an inch deep for thicker pieces.
You'll want to avoid bones, fat, or gristle, as they can give you false readings. Don't let your probe touch cooking containers or metal grill parts, and keep it away from direct heat currents.
Wait at least ten seconds before checking the temperature, and take multiple readings if needed. For larger cuts like roasts or turkeys, check several locations to guarantee even cooking.
When measuring leg roasts, insert the probe through the center, steering clear of bones. For rolled or boneless cuts, aim for the thickest part.
Monitoring During Weather Changes

Weather changes can dramatically affect your outdoor cooking temperature readings and timing. You'll need to adjust your monitoring strategy based on both temperature fluctuations and humidity levels.
In cold weather, your thermometer's wire feed might give inaccurate readings if exposed, while hot conditions can speed up cooking times unexpectedly.
Pay attention to humidity's impact on your cooking process. High humidity slows down moisture evaporation, potentially leading to faster cooking times, while low humidity does the opposite.
If you're cooking at higher altitudes, you'll need to account for lower boiling points and adjust accordingly. Choose a weather-resistant thermometer like the ThermoWorks BlueDOT that can handle outdoor conditions reliably.
These environmental factors aren't just minor inconveniences – they're essential variables that directly affect your food's doneness.
Common Temperature Testing Mistakes
When testing food temperatures outdoors, even experienced cooks make critical mistakes that can compromise food safety and doneness.
You'll get inaccurate readings if you don't properly calibrate your thermometer using an ice bath and boiling water test, or if you rush the process without letting readings stabilize.
Don't place your thermometer near bones or fat, and always insert it into the thickest part of the meat. You'll need to wait at least 30 seconds for an accurate reading.
Be careful not to misuse different thermometer types – infrared models won't tell you internal temperatures, and pop-up indicators aren't always reliable.
Make sure you're using the right tool for the job and following the manufacturer's guidelines.
Remember that grill thermometers need proper positioning away from direct heat sources for accurate readings.
Achieving Perfect Doneness Outdoors

Beyond avoiding common temperature testing mistakes, mastering the art of perfect doneness outdoors requires precision and attention to detail.
You'll find that relying on visual cues alone won't guarantee safe or delicious results. Instead, your thermometer becomes your most trusted tool for achieving both food safety and ideal texture.
When you're cooking outdoors, your thermometer helps you maintain that perfect balance between safety and culinary excellence.
It's especially vital for different types of meat, which require specific internal temperatures to be both safe and delicious.
- Use your thermometer to hit 145°F for beef while keeping it juicy and flavorful
- Let meat rest after reaching temperature to redistribute juices and enhance taste
- Monitor both your grill's temperature zones and your food's internal temperature for consistent results
Thermometer Types for Solar Cooking
Since solar cooking requires precise temperature monitoring, choosing the right thermometer type becomes crucial for successful outdoor meal preparation.
You'll find solar-powered thermometers particularly suitable, as they operate without batteries using indirect light and offer precise measurements from -49 to 392°F.
For versatile use, consider pen-type thermometers with their 180° rotating heads and waterproof stainless steel probes.
They're ideal for checking various foods and liquids while providing the flexibility to switch between Celsius and Fahrenheit readings.
If you need guaranteed accuracy, opt for traceable thermometers with NIST certification.
These feature external sensors, large LCD displays, and magnetic backings for convenient placement.
Their 0.1°C resolution guarantees you'll get the exact temperature readings your solar cooking demands.
Food Safety Under Variable Conditions

Managing food safety outdoors adds new challenges to outdoor cooking, even with precise temperature monitoring.
You'll need to adapt your food safety practices to account for changing weather conditions, limited facilities, and potential cross-contamination risks. When cooking outdoors, it's essential to maintain proper hygiene and temperature control despite the lack of standard kitchen amenities.
- Keep raw meats securely wrapped and separated from other foods, using different plates for raw and cooked items to prevent cross-contamination.
- Wash your hands with warm, soapy water before handling food, or use moist towelettes if safe water isn't available.
- Store perishable foods in insulated coolers with ice packs, and remember that food left out for more than two hours (or one hour above 90°F) should be discarded.
Remember to sanitize all surfaces and utensils with a bleach solution, especially after handling raw meat.
Frequently Asked Questions
Can I Use the Same Thermometer for Both Hot Grilling and Cold Storage?
Yes, you can use the same thermometer for both hot grilling and cold storage. Modern food thermometers like the ThermoPro models offer wide temperature ranges (-58°F to 572°F) and accurate readings for both applications.
How Long Should I Wait Between Temperature Readings When Checking Multiple Items?
You'll need to wait 5 seconds for digital thermometers and 15-20 seconds for dial thermometers between readings. Don't forget to clean the probe with soapy water between checking different food items.
Should Thermometer Probes Be Cleaned Differently for Outdoor Versus Indoor Cooking?
You'll follow the same basic cleaning principles outdoors and indoors. However, you should be extra diligent outdoors, using alcohol wipes when water isn't readily available and cleaning immediately to prevent dried residue.
Do Wireless Thermometers Work Reliably Through Smoker or Grill Lids?
Yes, you'll find modern wireless thermometers work reliably through smoker and grill lids. They're designed with Bluetooth and RF technology that maintains strong signals, even with closed lids, typically reaching ranges of 300-2,500 feet.
Can Extreme Outdoor Temperatures Affect the Accuracy of Digital Food Thermometers?
Yes, extreme temperatures can affect your digital thermometer's accuracy. You'll notice slower response times and potential reading variations of 1-1.8°F in very cold or hot conditions. Regular calibration helps maintain reliable performance outdoors.
In Summary
You'll find that using a reliable food thermometer is your best defense against foodborne illness when cooking outdoors. Don't rely on guesswork – check those temps consistently, especially when solar cooking conditions change. By mastering proper probe placement and understanding your thermometer type, you're ensuring safe, perfectly cooked meals every time. Make it a habit to test temperatures, and you'll never serve undercooked food again.


Leave a Reply