You'll reduce your environmental impact and save money by building a travel-ready sun food dehydrator. This portable unit weighs only 2.27 kg, making it perfect for preserving fruits, vegetables, and meats wherever you go. Unlike electric models, it harnesses free solar power while eliminating plastic waste through reusable containers and sustainable materials. The compact design fits in tight spaces and features expandable drying capacity when needed. With basic tools and materials like hardwood timber and galvanized iron, you can construct a durable dehydrator that maintains ideal temperatures between 85-160°F. Discover how this eco-friendly solution transforms your approach to food preservation.
Eco-Friendly Food Storage
The growing emphasis on sustainable living has made eco-friendly food storage solutions more essential than ever. You'll find that investing in reusable containers not only reduces plastic waste but also saves you money in the long run, as 95% of plastic in the U.S. isn't recycled.
Glass jars, stainless steel containers, and silicone bags offer durable, dishwasher-safe options that keep your food fresh without chemical leaching. Each sustainable choice helps reduce the 67 pounds of waste that the average school-aged child generates yearly from lunch packaging alone.
You can enhance your eco-friendly storage system with innovative alternatives like beeswax wraps, which last up to a year and support sustainable beekeeping practices.
Soy wax paper provides another biodegradable option, while silicone bowl covers and food huggers create airtight seals without harmful chemicals. If you're looking for an elegant touch, try Furoshiki, the Japanese cloth wrapping technique that adds style to your food storage while reducing waste.
These sustainable storage solutions work perfectly with advanced preservation technologies like High-Pressure Processing and Modified Atmosphere Packaging.
When combined with your sun food dehydrator, you'll create an extensive system that maximizes food preservation while minimizing your environmental impact, ensuring your dried foods stay fresh and ready for travel.
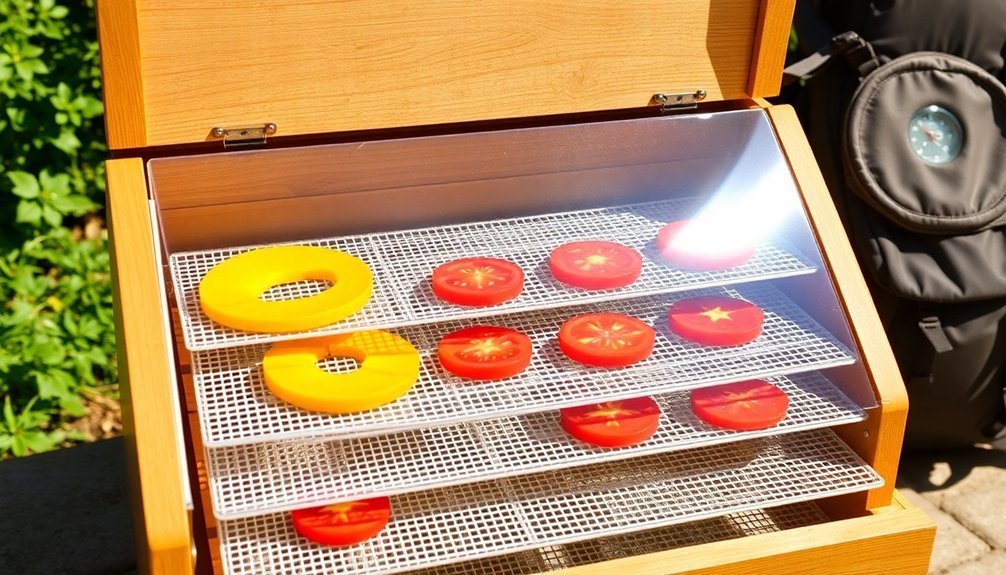
Compact Design Benefits
You'll appreciate how the sun food dehydrator's space-saving mobile construction lets you process multiple foods while taking up minimal counter space.
The compact design weighs just 2.27 kg, making it perfect for carrying to different locations and sharing among cooperative members.
Its efficient storage solutions mean you can expand drying capacity as needed while keeping the unit neatly tucked away when not in use. The lightweight system helps you maximize your grocery budget by allowing you to buy in bulk during peak harvest seasons.
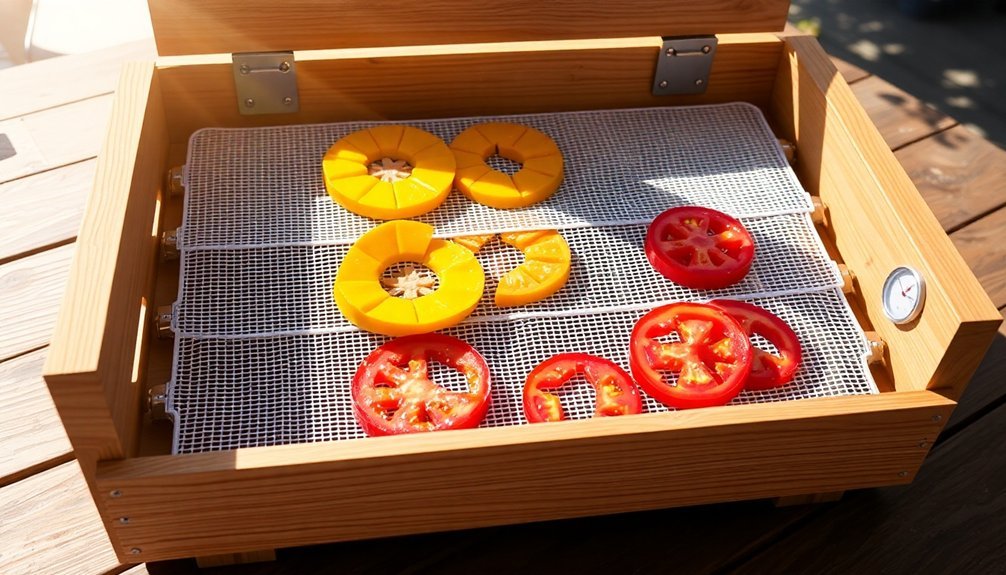
Space-Saving Mobile Construction
Modern travelers seeking portable food preservation solutions will appreciate the space-saving construction of travel-ready sun dehydrators. With options like the Dehytray weighing just 2.27 kg, you'll find these units incredibly easy to transport and set up wherever you go.
The innovative folding designs, demonstrated by the Sahara Folding Dehydrator's ability to compress to 1/3 of its size, make these units perfect for travelers with limited storage space. The unit's dual heaters and sensors ensure optimal drying performance even in compact form.
You'll discover several practical advantages when choosing a travel-ready dehydrator:
- You can fit these compact units in tight spaces, thanks to designs like the Sedona® Express's modest 12" width.
- You'll save valuable storage space with foldable models that collapse quickly for transport.
- You can easily clean and maintain the units, as they're built with FDA-approved polymers and durable materials.
- You'll have flexibility in placement, allowing you to position your dehydrator wherever sunlight is most effective.
The construction quality guarantees longevity, with features like stainless steel components and robust polymer materials that withstand frequent movement.
These travel-ready dehydrators combine durability with space-saving design, making them ideal for both short trips and extended travels.
Efficient Storage Solutions
Savvy travelers consistently maximize their storage capabilities with travel-ready sun dehydrators designed for efficiency. You'll find the Dehytray solar dryer particularly appealing with its lightweight 2.27 kg frame that's perfect for transport and storage. When you're done using it, you can stack multiple units together, saving valuable space in your travel gear.
| Feature | Benefit |
|---|---|
| Portable Design | Easy to carry and transport at 2.27 kg |
| Stackable Units | Maximize space while storing multiple dryers |
| Weather Protection | Quick indoor relocation during bad weather |
| Compact Footprint | Fits in small spaces and gardens |
The dryer's FDA-approved materials guarantee your food stays safe while maintaining durability throughout your travels. You'll appreciate how easily you can move the unit indoors when weather conditions change. For ideal results, store your dehydrated foods in airtight containers or vacuum-sealed pouches to maintain freshness. Consider using clear bins for easy identification and keep your dried goods protected from direct light. Whether you're a solo traveler or part of a cooperative, you'll find the dryer's compact nature perfect for shared use and efficient storage.
Building Materials and Tools

Getting your travel-ready sun food dehydrator built starts with gathering essential components like hardwood timber, galvanized iron, and flyscreen for the basic structure and drying racks.
You'll need basic construction tools including a saw, drill, and angle grinder to cut and assemble the materials efficiently.
For quick assembly on the go, consider using a pocket hole jig with screws to create strong joints, and include wheels or castors to make your dehydrator portable.
Essential Construction Components Needed
Building a sun food dehydrator requires careful selection of materials that guarantee both functionality and food safety.
You'll need durable materials that can withstand outdoor conditions while ensuring your food remains uncontaminated during the drying process. The frame and structure form the foundation of your dehydrator, typically constructed from wooden planks like 10mm ply or untreated pine, though metal or fiberglass offer excellent alternatives for longer-lasting results.
For effective heat retention and operation, you'll want to incorporate specific components that maximize solar energy collection and maintain consistent temperatures. These include sand for thermal mass, black-painted surfaces for heat absorption, and double-glazed windows to trap warmth efficiently.
- Frame materials: Choose between wooden planks (35 x 70mm untreated pine), pressure-treated 4×4 lumber, or metal/fiberglass alternatives
- Heat collection elements: Install corrugated metal sheets painted with low VOC black paint and plexiglass covers
- Food-safe screens: Select stainless steel, fiberglass, or polyester mesh for drying racks
- Mobility components: Add wheels, handles, and adjustable legs for easy transportation and positioning
Remember to seal all joints with food-safe silicone caulk and include proper weatherstripping for airtight operation.
Tools For Quick Assembly
Now that you've gathered your construction components, proper tools and building materials will streamline your dehydrator assembly process.
You'll need a drill equipped with large bits to create essential ventilation holes and a screwdriver for securing the frame components. A right-angle clamp proves invaluable for guaranteeing your frame maintains perfect 90-degree angles during assembly.
For the structural elements, you'll work with 2×6 boards or hardwood timber planks using an angle grinder to achieve precise cuts.
You'll need a stapler or strong adhesive to attach the wire mesh or flyscreen to your drying racks. When securing the plywood bottom and corrugated iron base, use galvanized screws to prevent rust and guarantee durability.
If you're including a fan system, you'll need tools to mount your Antec 3-speed fan or solar-powered alternative, along with the solar panel installation equipment.
Don't forget basic assembly tools like clamps to hold timber pieces while you work. For the final touches, you'll want painting supplies if you're enhancing heat absorption with dark paint, and fasteners to secure your glass cover over the top.
Step By Step Assembly
A well-organized workspace sets the foundation for assembling your sun food dehydrator. Start by marking and cutting components from a single 4-by-8-foot sheet of exterior-grade plywood, ensuring straight cuts for an airtight design.
You'll need to cut the sides in one piece to maintain continuity between the collector box and drying chamber. Proper brace installation is essential for structural integrity. Cut the required pine board braces using a rip guide, including six 3/4-inch squares, four 3/4-inch by 1-1/2 inches, and one 5-1/2-inch piece with a beveled edge.
You'll predrill holes and secure them with exterior-grade screws.
- Place the cut sides upside down on sawhorses and install the quarter-inch plywood bottom with waterproof wood glue and screws.
- Insert the heat-absorbent shelf above the legs.
- Build and install the drying screen using 2" x 2" pieces and screen material.
- Finish by attaching the window, covering vents with protective screening, and mounting the thermometer.
Remember to seal all edges thoroughly and check for air leaks as you progress through each step. The precision of your cuts and attention to sealing will directly impact your dehydrator's performance.
Temperature Control Techniques
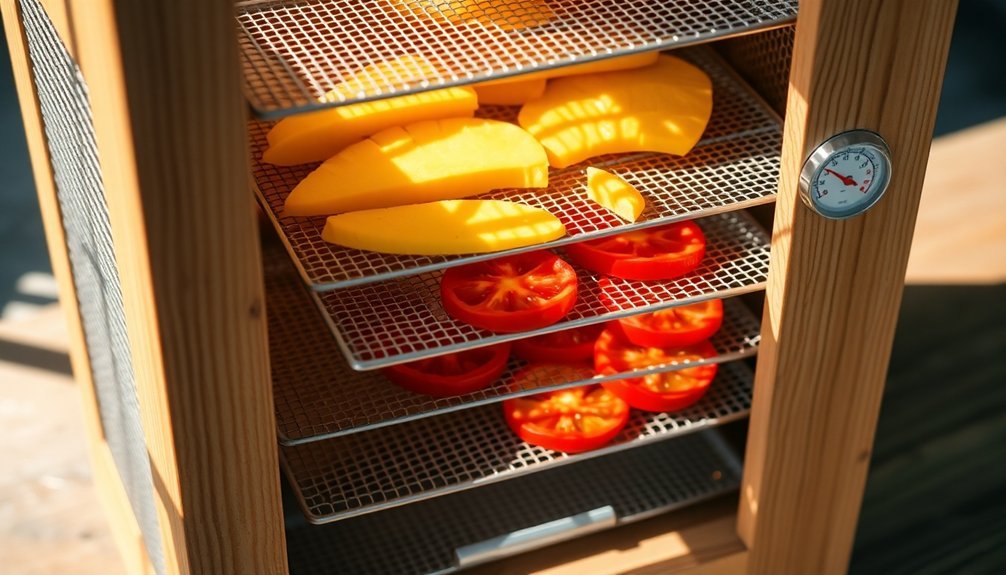
With your sun food dehydrator assembled, mastering temperature control will determine your success in preserving food. You'll need to maintain temperatures between 85-160°F, with 140°F being ideal for most foods. For meat jerky, you'll want to aim slightly higher at 150°F to eliminate potential pathogens.
You can enhance your dehydrator's temperature control by installing multiple sensors and an Arduino microcontroller system. This setup will help you monitor and adjust temperatures automatically across different areas of your dehydrator, ensuring even drying throughout.
You'll also benefit from an automatic shut-off feature that prevents scorching. Since you're using a solar-powered design, you'll need backup heating options for periods of low sunlight.
Consider installing auxiliary heaters like light bulbs to maintain stable temperatures. Adding desiccant beds will help absorb excess moisture and stabilize the drying environment. Your goal is to achieve consistent temperatures between 60-65°C (140-149°F) for peak results.
Maintenance For Extended Life
Regular maintenance of your sun food dehydrator involves three essential steps that guarantee its longevity and peak performance. You'll need to clean after each use, prevent bacteria growth, and make sure proper storage.
Start by soaking the trays in warm soapy water for 15-20 minutes, then scrub with a soft sponge to remove food residue. For extra disinfection, use a solution of equal parts water and white vinegar.
To maintain efficiency and extend your dehydrator's life, you'll want to:
- Wipe down the heating element and fan with a damp cloth, avoiding electrical components.
- Check regularly for wear and tear, identifying any parts that need repair.
- Store your dehydrator in a cool, dry place when not in use.
- Keep at least 10 cm clearance from other appliances during operation.
Remember to let all parts air dry completely before reassembly to prevent moisture buildup and mold growth.
When you're ready to use it again, make sure all components are securely in place before plugging it in.
Frequently Asked Questions
How Long Does It Take to Dehydrate Different Types of Foods?
You'll find dehydration times vary widely: fruits take 6-12 hours, vegetables 4-12+ hours, meats 6-12 hours at specific temperatures, and herbs dry quickly in 1-4 hours at lower temperatures.
Can Dehydrated Food Be Rehydrated Without Losing Its Original Taste?
You'll notice some taste changes when rehydrating food, but if you've dehydrated it properly at lower temperatures and use the right rehydration method, most foods can maintain much of their original flavor profile.
What Are the Best Weather Conditions for Using a Sun Dehydrator?
You'll get the best results in hot weather above 86°F with humidity below 60%. Look for sunny, breezy days with clear skies. You need consistent conditions and good air circulation for effective drying.
How Do You Prevent Insects From Contaminating Food During the Drying Process?
You'll need to use fine mesh screens to cover your food, keep the dehydrator elevated with tight seals, and place it in sunny spots. Don't forget to clean it regularly and check for damage.
Does Fruit Need Special Preparation Before Placing in a Sun Dehydrator?
Yes, you'll need to wash your fruit thoroughly, remove stems and seeds, and slice larger fruits evenly. Make sure they're ripe but firm, and consider adding sugar if they're not sweet enough.
In Summary
Building your own travel-ready sun food dehydrator lets you preserve food sustainably while on the go. You'll save money on store-bought dried foods and reduce your carbon footprint by using solar power. With proper maintenance and temperature control, your portable dehydrator will serve you for years. Don't wait – start constructing your eco-friendly food preservation system today and enjoy healthy, homemade dried snacks wherever you travel.


Leave a Reply