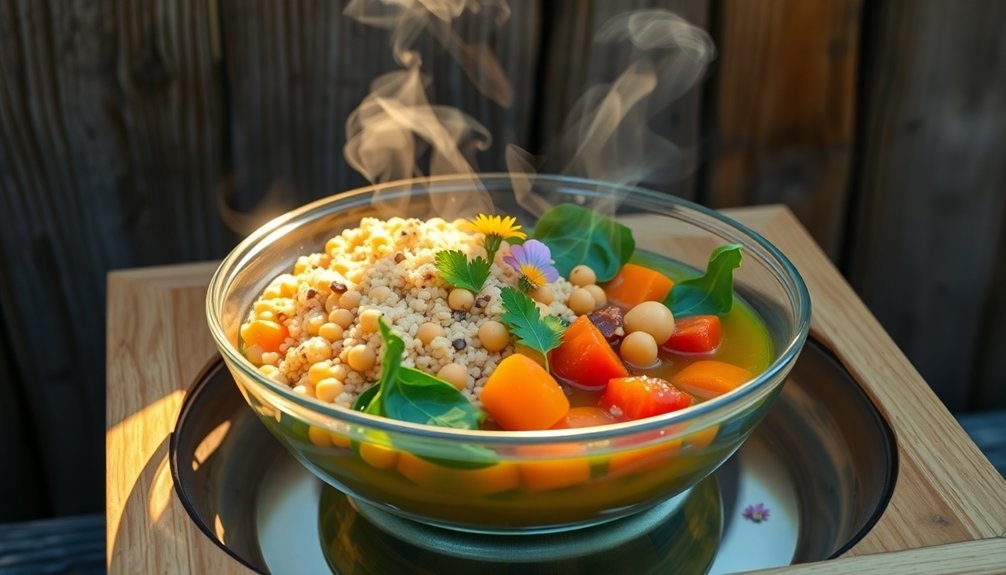
Transform your plant-based cooking with these sunlight-powered one-pot wonders. You'll find hearty options like Mediterranean Lentil Solar Stew packed with 47g of protein per cup, and creamy Coconut Chickpea Curry bursting with aromatics. Try the Southwest Bean Rice Bowl for a zesty kick, or whip up a Garden Vegetable Quinoa Medley for a nutrient-rich feast. The Creamy Solar Pasta Primavera and Three Bean Chili offer comfort food alternatives, while Thai Red Curry and Wild Mushroom Risotto bring global flavors to your table. These solar recipes don't just save energy – they'll revolutionize your approach to sustainable, wholesome cooking. Let's explore how these sun-powered dishes can enhance your plant-based journey.
Mediterranean Lentil Solar Stew

Every Mediterranean household treasures its own version of lentil stew, and this solar-powered variation brings together the robust flavors of legumes, aromatic vegetables, and warm spices.
You'll need red, green, or brown lentils as your base, along with a classic mix of onions, garlic, carrots, and celery for the aromatic foundation.
Begin by chopping your vegetables into bite-sized pieces. In your solar pot, sauté the aromatics until they're fragrant.
Add your choice of lentils, vegetable broth, and any additional vegetables like zucchini, tomatoes, or sweet potatoes. You'll want to bring the mixture to a simmer and let it cook for 20-40 minutes until everything's tender. For the best results, rinse lentils thoroughly before adding them to remove any impurities.
Don't add salt until the end – this helps keep your lentils from becoming tough.
Once they're cooked, season with Mediterranean spices like oregano, cumin, and smoked paprika. For extra depth, consider adding a splash of olive brine or tomato paste.
You can adjust the consistency by adding more liquid if needed. Before serving, finish with fresh herbs and a drizzle of olive oil.
This protein-rich, nutrient-dense meal provides about 47 grams of protein per cup of lentils used.
Coconut Chickpea Curry
When you're craving a creamy, aromatic curry that's both satisfying and simple, this solar-powered coconut chickpea version delivers.
Start by sautéing your diced onions, minced garlic, and freshly grated ginger in olive or coconut oil until they're soft and fragrant. Toast your choice of curry powder and cumin to release their full potential before adding chickpeas, tomato sauce, and creamy coconut milk to the mix. Fresh spices are essential since older ones can lose their potency and impact the overall flavor.
- Each serving packs 615 calories with a balanced profile of 73g carbs, 23g protein, and 29g fat
- You'll get an impressive 22g of fiber per serving, supporting digestive health and sustained energy
- The recipe's flexibility lets you customize heat levels and flavors using different curry powders or Thai red curry paste
- Add leafy greens like kale or spinach at the end for an extra nutrient boost
Let your curry simmer for 10-15 minutes in your solar cooker until it reaches your desired consistency.
You can serve it over rice, with bread, or prep it ahead for multiple meals. The dish naturally fits vegan and gluten-free diets while offering substantial plant-based protein and essential nutrients.
Southwest Bean Rice Bowl

Moving from the aromatic flavors of India to the vibrant Southwest, this solar-powered bean rice bowl brings bold Mexican-inspired flavors to your table.
You'll start by cooking your choice of rice in your solar cooker while sautéing a colorful medley of bell peppers, onions, and garlic. The combination of black beans, corn, and diced tomatoes creates a hearty, protein-rich base that's both nutritious and satisfying. This versatile dish can be stored in the refrigerator for up to three days as leftovers.
Season your bowl with a blend of taco seasoning or chili powder, ground cumin, coriander, and oregano. For extra heat, you can add green chilies or chipotle powder. A splash of lime juice brightens the entire dish, while fresh cilantro and avocado provide the perfect finishing touches.
You'll love how adaptable this recipe is – use pre-cooked rice and canned beans when you're short on time, or opt for freshly cooked ingredients when you have more time to spare.
The one-pot approach makes cleanup a breeze, and you can easily adjust the spice levels to suit your taste. Whether you're using brown rice or white, fresh corn or frozen, you'll create a satisfying meal that harnesses the power of the sun.
Garden Vegetable Quinoa Medley
You'll find this Garden Vegetable Quinoa Medley perfect for solar cooking, starting with a simple rinse of your quinoa before combining it with vegetable broth in your solar cooker.
Your vegetables, including corn, carrots, and bell peppers, can be added midway through the cooking process, letting the sun's energy slowly infuse the flavors together over 6-8 hours.
For maximum nutrition and taste, you'll want to finish the dish with fresh herbs, a tangy Dijon dressing, and protein-rich chickpeas, making this one-pot meal both satisfying and sustainable.
Easy Solar Cooking Steps
Creating a delicious Garden Vegetable Quinoa Medley in a solar oven starts with proper setup and preparation.
You'll need to line your pizza box solar oven with aluminum foil on the flap, seal it with plastic wrap, and place black paper at the bottom to absorb heat. Position your oven in direct sunlight and prop the lid open using a stick or wire hanger to maximize sun exposure.
- Pre-cook your quinoa until it's tender (about 12 minutes), or use pre-cooked quinoa to save time.
- Prepare your garden vegetables by sautéing them with bell peppers and onions until they're just right.
- Season your mixture with cumin, coriander, and lemon peel for enhanced flavor.
- Combine all ingredients in your solar oven, making sure they're spread evenly.
Your solar oven will reach temperatures between 160-200°F on a sunny day.
You'll want to stir the ingredients occasionally to guarantee even heating and proper flavor distribution. Keep monitoring until everything's heated through and well-combined.
You can serve your quinoa medley either warm straight from the solar oven or chilled – it's delicious both ways. Don't forget to taste and adjust the seasonings before serving.
Flavor and Nutrition Tips
Transforming your Garden Vegetable Quinoa Medley into a nutritional powerhouse requires attention to both flavor and health benefits. You'll get 8g of protein and fiber per serving, plus essential minerals like potassium (396mg) and iron (2mg), while keeping saturated fat and cholesterol low.
To maximize flavor, start by adding citrus notes with fresh lemon peel and juice. You'll enhance the dish's complexity by incorporating fresh herbs like basil and cilantro, while green onions add a pleasant crunch.
For a Mexican-inspired variation, blend in chili powder and smoked paprika, complemented by black beans and fresh salsa.
Create depth by stirring in Dijon mustard, organic tomato paste, and garlic powder to your dressing. You'll want to mix various vegetables for color and texture – try combining carrots, peas, corn, and broccoli with different colored bell peppers.
For convenience, you can use frozen vegetable medley as your base.
Remember to cook your quinoa with salt and lemon, then combine it with your perfectly cooked vegetables. Whether you're using a slow cooker or microwave for preparation, you'll achieve a satisfying, nutrient-rich meal.
Creamy Solar Pasta Primavera

When you're ready to make a plant-based Creamy Solar Pasta Primavera, you'll need to gather fresh spring vegetables, gluten-free pasta, and vegan alternatives like oat milk and nutritional yeast for the creamy sauce.
Your solar cooking time will vary based on sunlight intensity, but generally plan for 45-60 minutes to cook the pasta and vegetables together in one pot.
You can adjust the sauce's thickness by adding more liquid as needed during the solar cooking process, ensuring all vegetables are tender and the pasta reaches al dente perfection.
Recipe Tips and Ingredients
The Creamy Solar Pasta Primavera offers a versatile foundation for both traditional and plant-based cooking enthusiasts. You'll have flexibility in choosing your pasta type, whether it's orzo, penne, or fettuccine, allowing you to create your preferred texture and presentation.
The dish's success relies on proper vegetable preparation and creating a rich, creamy sauce that coats every ingredient perfectly.
- Save your pasta water – it's essential for achieving the ideal sauce consistency and helps bind the ingredients together.
- If you're going plant-based, substitute dairy with oat milk or vegan half-and-half, and use nutritional yeast for that cheesy flavor.
- Roast your vegetables ahead of time to develop deeper flavors and maintain better texture.
- Layer your seasonings throughout cooking, starting with sautéed garlic and ending with fresh herbs.
When preparing the sauce, you'll want to start with your chosen liquid base, whether it's vegetable broth or cream alternatives. Gradually incorporate your cheese option while stirring continuously.
The key to success is maintaining a smooth consistency while combining all ingredients. Remember to adjust seasoning with salt, Italian herbs, and a splash of lemon juice for brightness.
Solar Cooking Time Guide
Sunshine-powered cooking requires careful timing consideration for the perfect Creamy Solar Pasta Primavera. You'll want to start your cooking between 10:00 a.m. and 2:00 p.m. when the sun's intensity peaks. Since solar cooking typically takes 1½ to 3 times longer than conventional methods, plan for about 2-3 hours total cooking time for your pasta dish.
| Ingredient | Prep Time | Solar Cook Time |
|---|---|---|
| Pasta | 5 min | 45-60 min |
| Mixed Vegetables | 10 min | 60-90 min |
| Cream Sauce | 5 min | 30-45 min |
| Complete Dish | 20 min | 2-3 hours |
| Final Assembly | 5 min | N/A |
Remember to reduce your liquid ingredients by ¼ to ½ cup since there's minimal evaporation in solar cooking. Keep the pot covered throughout cooking to retain heat and speed up the process. You'll notice that vegetables might cook faster than in conventional methods, while pasta may take longer. Don't worry about overcooking – solar cooking naturally blends flavors while maintaining the integrity of your ingredients. On cloudy days, you'll need to add 30-60 minutes to your cooking time.
Spiced Solar Moroccan Couscous
Bringing Mediterranean flavors to your solar kitchen, Spiced Solar Moroccan Couscous delivers a perfect blend of aromatic spices and fluffy grains. You'll need couscous, vegetable broth, olive oil, and a mix of fragrant spices including cumin, coriander, and cinnamon.
Start by placing your solar-safe saucepan in your preheated solar oven, then sauté onions and garlic in olive oil until translucent.
To create a perfectly balanced dish, you'll want to:
- Monitor your broth temperature until it reaches a boil, which may take longer in a solar oven than on a conventional stovetop
- Let the couscous absorb all liquid while covered, using thermal mass to maintain temperature
- Fluff the grains with a fork once they're fully hydrated
- Add your choice of roasted vegetables, which you can prepare in advance using your solar oven
Transform this basic recipe into a complete meal by incorporating chickpeas for protein, sweet raisins or dates, and crunchy toasted almonds.
Fresh herbs like cilantro, parsley, or mint add brightness to the final dish, while also providing a beautiful garnish that makes your solar-cooked creation visually appealing.
Three Bean Solar Chili

You'll need basic pantry ingredients like olive oil, onions, peppers, garlic, and three types of beans to create this hearty solar chili.
The prep work is straightforward – just chop your vegetables, gather your spices, and layer everything in your solar cooking pot according to the recipe steps.
Once assembled, you'll let your solar cooker do the work for 30-60 minutes, monitoring occasionally to verify the beans and vegetables reach your desired tenderness.
Prep and Ingredient List
This flavorful three-bean chili packs a plant-based punch with its mix of fresh vegetables, aromatic spices, and protein-rich legumes. Before you start cooking, you'll want to gather your ingredients in four main categories to guarantee smooth preparation.
- Base ingredients include olive or vegetable oil, diced onions, bell peppers, minced jalapeños, and fresh garlic cloves – these form your aromatic foundation.
- Your bean trio consists of black, pinto, and red kidney beans – make sure they're drained and rinsed well to remove excess sodium.
- The liquid components combine vegetable broth with diced tomatoes and optional tomato paste to create your rich sauce base.
- Your spice blend features cumin, chili powder, oregano, and various paprikas, with optional additions like cocoa powder for depth.
Don't forget to prep your garnishes ahead of time – slice your scallions, chop the cilantro, and have lime wedges ready.
If you're using cheese or cashew sour cream, keep them handy. You can adjust the heat level by varying the amount of jalapeños and cayenne pepper to match your preference.
[DIRECTIONS]:
Cooking Time and Tips
Ready your solar cooker on a clear, sunny day to begin the three-bean chili adventure. Place your black speckleware pot with heated oil inside the solar box cooker or American Sun Oven, and verify it's properly oriented toward the sun throughout the cooking process.
You'll need 1/2 to 1 hour of cooking time, depending on sunlight intensity and your specific solar cooker. Keep the pot covered to maintain ideal heat, and remember to reposition the cooker as the sun moves. Stir occasionally to verify even cooking of your vegetables and beans.
To achieve the perfect consistency, you'll want to simmer the chili for 20-25 minutes. Add crushed tomatoes and vegetable broth to reach your desired thickness, and incorporate tomato paste if you need extra richness. Season with cumin, chili powder, and paprika during cooking, adjusting the flavors in the final stages.
Monitor the temperature carefully and maintain a gentle boil before reducing to a simmer. If you're using a slow cooker as an alternative, set it to low for 8 hours. Verify all ingredients are thoroughly cooked before serving your solar-powered creation.
Wild Mushroom Risotto
As the sun reaches its peak, a luxurious wild mushroom risotto beckons with its earthy aromas and creamy texture.
You'll start by heating your choice of oil in a large pot, where you'll brown 1-1.5 pounds of assorted mushrooms until they're deeply golden and fragrant. Once they're perfectly cooked and set aside, you'll begin the heart of your risotto.
The magic happens when you sauté aromatic shallots and garlic, then toast your arborio rice until it's lightly coated and translucent. The gradual addition of hot stock, combined with constant stirring, creates that signature creamy texture you're looking for.
- Add wine or sherry first, letting it fully absorb before starting with the stock
- Pour stock in ½ cup increments, stirring until each addition is absorbed
- Continue this process for about 20 minutes until rice reaches ideal tenderness
- Fold in your reserved mushrooms and enhance with mascarpone or miso
For the finishing touches, you'll season with salt, pepper, and fresh thyme.
Consider adding a drizzle of truffle oil or a sprinkle of vegan parmesan to elevate your solar-powered creation to restaurant-worthy status.
Thai Red Curry

Vibrant Thai red curry transforms your solar cooking into a fragrant Southeast Asian adventure. You'll need 2-4 tablespoons of red curry paste, a can of coconut milk, and your choice of fresh vegetables like broccoli, bell peppers, and carrots.
Start by heating coconut oil in your solar pot, then sauté your aromatics – onion, garlic, and ginger – until they release their fragrance. Add the red curry paste and cook until it becomes aromatic.
Next, stir in your chosen vegetables and pour in the coconut milk. Let everything simmer until your vegetables reach a tender-crisp consistency.
You can customize your curry by adjusting the spice level with sriracha or sambal oelek. For added protein and texture, consider including tofu, bamboo shoots, or leafy greens like kale. Season with salt, pepper, and a touch of coconut sugar for balance.
Finish with fresh Thai basil and cilantro. The entire dish comes together in about 30-35 minutes, making it perfect for busy weeknights.
Serve your curry over jasmine rice, and store any leftovers for tomorrow's lunch – the flavors will continue to develop overnight.
Sun-Powered Mexican Rice Casserole
Transform your solar cooking into a fiesta with this hearty Mexican Rice Casserole that blends wholesome ingredients into a satisfying one-pot meal.
You'll start by heating olive oil in your skillet, sautéing onions and bell peppers until they're perfectly tender. The magic happens when you add cumin, chili powder, and smoked paprika, creating layers of authentic Mexican flavors.
For a healthier twist, opt for brown rice as your base and enhance the protein content with black beans. You can make it completely plant-based by swapping traditional cheese with Nacho Cashew Cream.
The dish comes together in your solar oven, where it heats evenly and develops rich, complex flavors.
- Mix in corn and diced green chilies for bursts of sweetness and heat
- Layer the ingredients evenly in your skillet for consistent solar cooking
- Monitor the solar oven temperature to achieve the perfect consistency
- Top with fresh cilantro, green onions, or avocado before serving
You're not just creating a delicious meal; you're also getting essential nutrients like fiber, protein, and antioxidants.
The combination of ingredients helps manage blood sugar levels while providing sustained energy throughout your day.
Frequently Asked Questions
Can Solar Cooking Work in Winter or Cloudy Conditions?
You can solar cook in winter with bright sunlight, though you'll need proper equipment and longer cooking times. It's not effective on cloudy days since solar cooking requires direct sunlight for successful results.
How Do You Prevent Food From Drying Out in Solar Cookers?
You'll prevent food from drying out by using covered baking dishes, adding moisture-rich ingredients, reducing liquid amounts by half, and cooking foods in their natural state (like potatoes with skins on).
What Safety Precautions Should I Take When Handling Hot Solar Cookware?
Always use thick gloves or pot-holders when handling hot cookware. Don't touch metal parts directly, and keep your face away from the focal area. You'll need to place hot items carefully to avoid burns.
Are There Specific Cooking Containers That Work Better for Solar Cooking?
You'll get the best results using dark-colored, thin-walled containers with tight-fitting lids. Choose heat-resistant materials like stainless steel or black-coated metal pots that are small enough to fit your solar cooker.
How Do You Adjust Cooking Times for Different Altitudes Using Solar Cookers?
At higher altitudes, you'll need to monitor cooking closely since UV intensity increases. You can generally reduce cooking times by 10-15%, but always check your food's temperature and adjust based on local conditions.
In Summary
You'll love how these solar recipes simplify plant-based cooking while reducing your carbon footprint. Whether you're craving Mediterranean, Asian, or Mexican flavors, there's a one-pot dish that'll satisfy your taste buds. Start with the lentil stew or chickpea curry, then work your way through the collection. You'll soon discover that eco-friendly cooking doesn't mean sacrificing flavor or convenience.

Leave a Reply