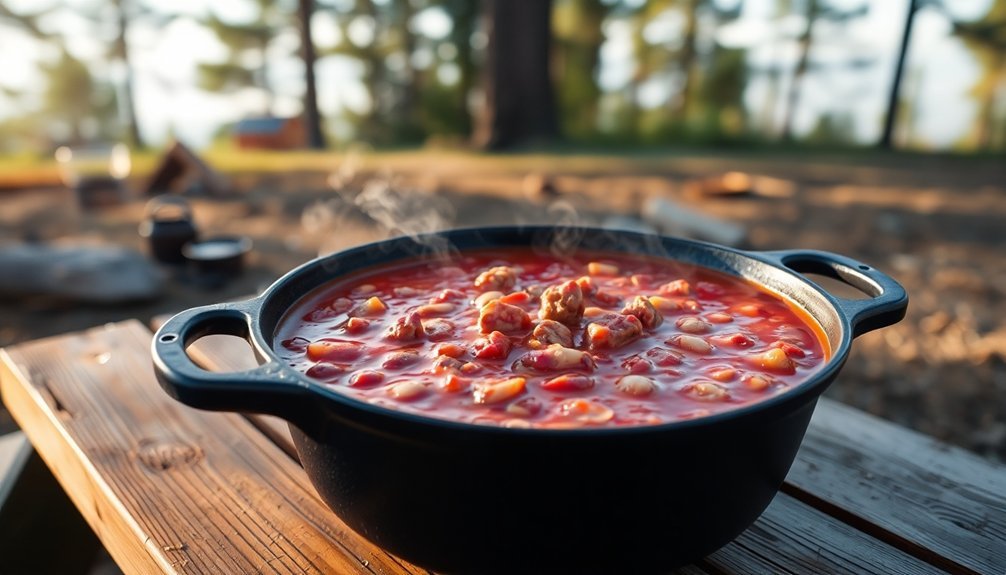
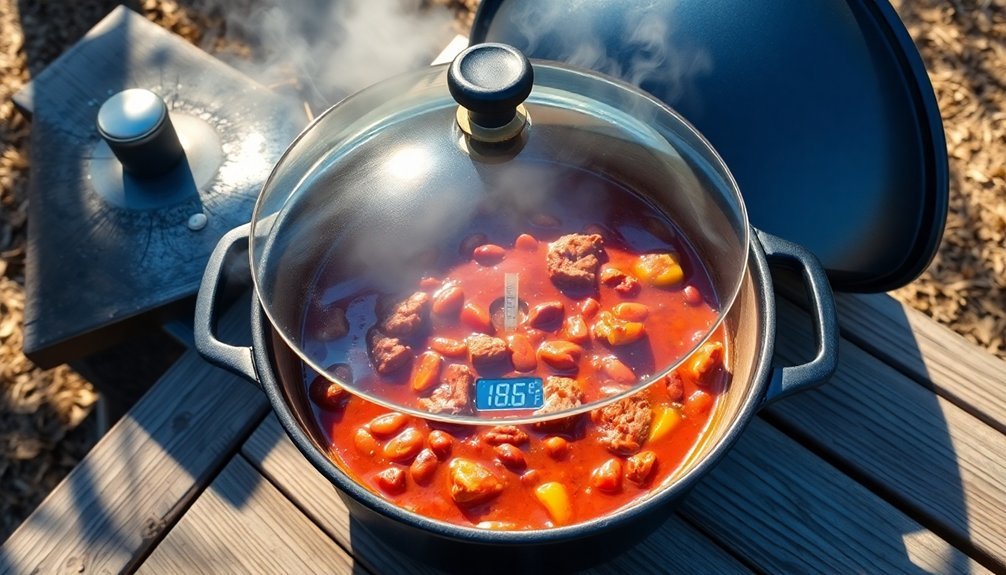
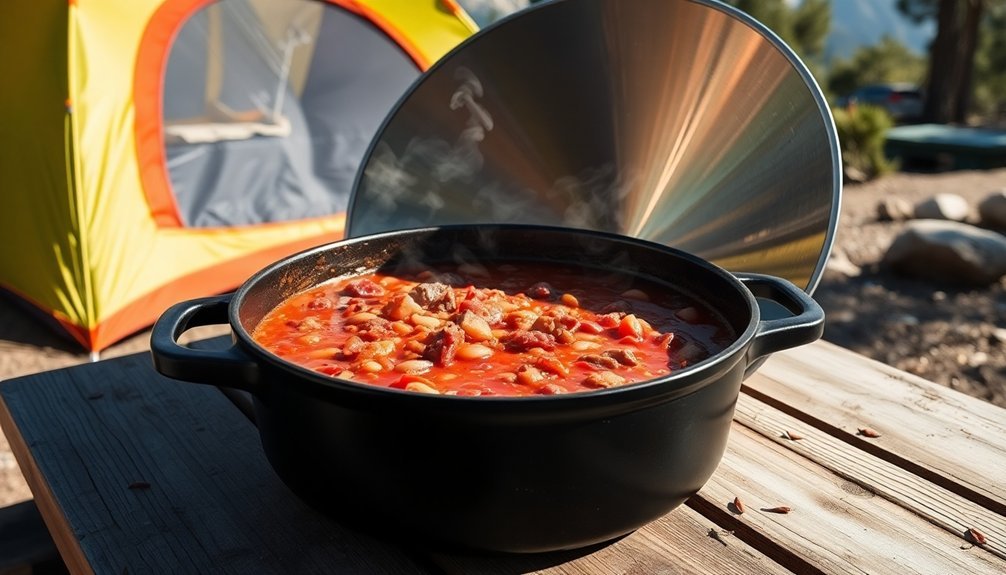
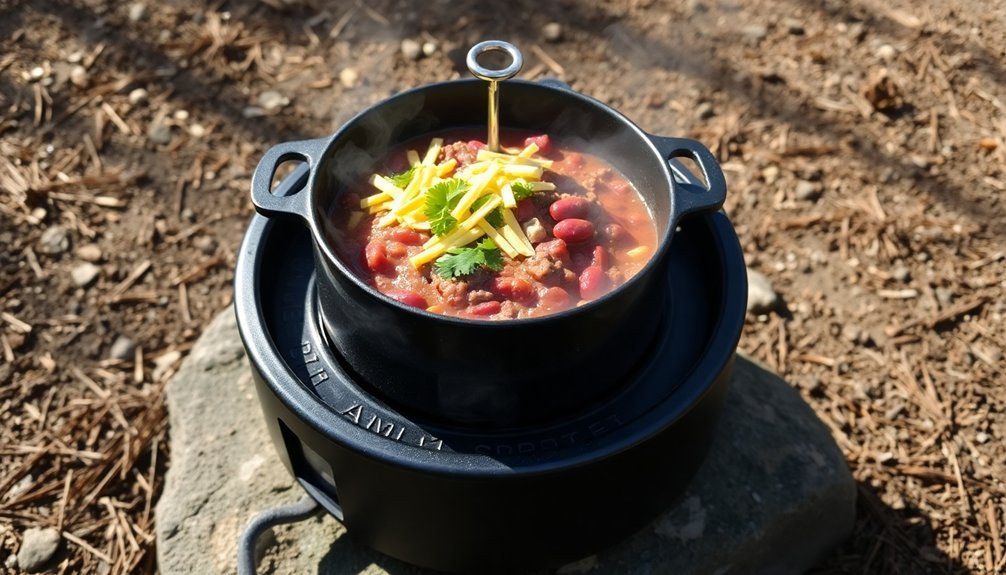
You'll love this simple solar-cooked campsite chili that lets nature do the work. Start by browning your meat and aromatics in a dark-colored pot, then add beans, tomatoes, and your favorite chili spices. Position your solar cooker facing east to west, adjusting throughout the day to maintain ideal sun exposure. Your chili will need 3-3.5 hours to cook thoroughly, reaching temperatures about 100°F above the air temperature. Top with cheese, sour cream, or fresh herbs for extra flavor. Whether you're using a parabolic dish or vacuum tube cooker, this hearty meal packs all the comforts of home cooking with sustainable outdoor practices.
Essential Solar Cooking Equipment
For faster cooking, you might opt for a dish solar cooker with its parabolic design, though you'll need to track the sun's movement.
The most advanced option is a vacuum tube cooker like the GoSun Sport, which reaches temperatures over 480°F but comes with a $599 price tag.
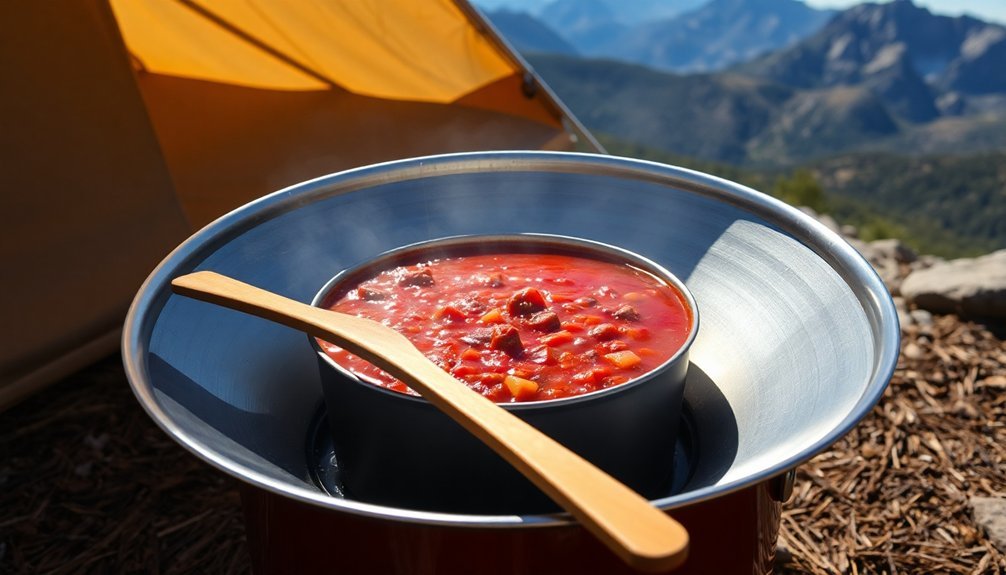
You'll also need essential accessories: a thermometer to monitor cooking temperatures, a dark-colored pot for heat absorption, and appropriate cookware that fits your chosen solar oven. A simple DIY option using clear plastic wrap provides an effective barrier to trap heat inside your solar cooker.
Don't forget to pack aluminum foil for emergency repairs or additional reflection, and bring a heavy-duty plastic bag or glass dish for food containment.
Preparing Your Base Ingredients
While camping adventures call for simplified cooking, preparing your base ingredients properly will make or break your campsite chili. Start by browning your meat choice – either lean ground beef or turkey – in your Dutch oven over medium heat. You'll want to chop and add onions during this stage to build a solid flavor foundation. Sautéing in oil helps develop richer flavors from your ingredients.
For your vegetable base, dice bell peppers into similar-sized pieces as your onions, and mince your garlic. If you're craving some heat, add finely chopped jalapeños.
Once your meat is browned, you'll need to decide whether to drain the fat based on your meat's content and personal preference.
Your canned goods form the essential liquid base. You'll need a 28-oz can of crushed tomatoes and a 15-oz can of diced tomatoes. Add your choice of pre-rinsed beans – black, kidney, or pinto work well. Pour in at least 24 ounces of broth to achieve the right consistency.
Finally, prepare your seasoning mix before heading out. Combine 2-6 tablespoons of chili powder, 1-3 tablespoons of cumin, and single tablespoons each of paprika and garlic powder. Add cayenne if you want extra kick.
Mastering Solar Temperature Control
Leveraging solar power for outdoor cooking requires strategic temperature control to maintain your chili's perfect simmer. By positioning your solar panels in an east-to-west orientation, you'll maximize sun exposure throughout the day. Adjust your panels to track the sun's movement: eastward in the morning, upward at midday, and westward in the evening.
To achieve consistent heating for your chili, you'll want to utilize a Sun Dome II solar water heater, which can reach temperatures up to 180°F on sunny days. You don't need to constantly align this heater, making it perfect for maintaining your chili's simmer while you handle other camp tasks. The semi-photovoltaic fabric technology ensures optimal energy absorption for consistent cooking temperatures.
The heater's ability to maintain temperatures 100°F above air temperature guarantees your chili cooks thoroughly.
Monitor your cooking temperature through a wireless control hub with a flexible touchscreen. You'll be able to track power generation and consumption while adjusting heat settings in real-time.
If you're using a tent with heated floors, like the Chill n' Charge Solar Tent, you can create a comfortable cooking environment even in chilly weather by activating the groundsheet's heating elements through the control system.
Choosing the Perfect Chili Ingredients
You'll need to balance fresh ingredients like onions and peppers with shelf-stable alternatives such as dried spices and canned goods when planning your campsite chili.
Your spice foundation should start with chili powder and cumin as the essential building blocks, with adjustable heat levels from cayenne pepper to suit your taste.
While fresh garlic adds vibrant flavor, having garlic powder on hand guarantees you've got backup seasoning options for when fresh ingredients aren't practical at your campsite.
Fresh Vs Shelf-Stable Options
Selecting the right chili ingredients can make or break your campsite recipe, especially when deciding between fresh and shelf-stable options. While fresh chilies offer vibrant colors and crunchy textures, they're highly perishable and might not be practical for extended camping trips. Dried chilies, on the other hand, can last several months and pack more concentrated heat and flavor.
| Feature | Fresh Chilies | Dried Chilies |
|---|---|---|
| Flavor | Fruity, floral | Rich, smoky |
| Storage | 2 weeks refrigerated | Up to 1 year |
| Versatility | Best raw or cooked | Great for spice blends |
For your campsite chili, you'll want to take into account your cooking duration and storage capabilities. If you're heading out for a weekend trip with proper cooling, fresh chilies can add wonderful texture and immediate heat to your dish. However, for longer expeditions, dried chilies are your best bet. They're lightweight, won't spoil, and can be easily rehydrated in hot water. Remember, dried chilies are more potent, so you'll need to adjust your quantities – start with about one-third of what you'd use fresh and adjust to taste.
Spice Blend Building Blocks
The foundation of a great campsite chili lies in its spice blend, where each component plays an essential role in building layers of flavor. Start with your core spices: chili powder provides the base, while ground cumin adds earthiness.
You'll want to include both garlic and onion powder for a robust savory foundation that won't spoil at your campsite like fresh ingredients might.
To control the heat level, you've got options. Cayenne powder and red pepper flakes let you adjust the spiciness to your preference.
Don't forget the basics – salt and black pepper are vital for balancing flavors. For extra depth, consider adding a tablespoon of cocoa powder or a pinch of cinnamon; these unexpected ingredients create complexity without overwhelming the dish.
If you're looking to add smokiness, smoked paprika is your best friend at the campsite, especially if you can't cook over an open fire. A sprinkle of dried oregano adds an herbal note that complements the other spices.
For the best results, mix your spice blend at home before heading out – it'll save space and make cooking at camp much simpler.
Building Layers of Flavor
Building rich, complex flavors in campsite chili starts with a strategic layering approach that transforms simple ingredients into a deeply satisfying meal.
Begin by heating oil in your Dutch oven, then add your aromatic vegetables – onions, garlic, and celery. You'll want to sauté them until they're soft and fragrant, seasoning with salt to enhance their natural flavors.
Once your aromatics have softened, it's time to add your protein of choice. Whether you're using ground beef, turkey, or plant-based alternatives, make sure to brown them thoroughly to lock in flavor.
After the meat is browned, pour in your liquids – broth, wine, or beer – to deglaze the pot and capture all the flavorful bits from the bottom.
Next, you'll layer in your main ingredients: beans, corn, and diced tomatoes or salsa. Let these simmer together, allowing the flavors to meld.
As the chili cooks, you can adjust the consistency by adding more liquid if needed. Finally, brighten the dish with fresh herbs, a splash of acidity, and adjust the seasoning to taste.
Don't forget to set out optional toppings like cheese, sour cream, or avocado for added dimension.
Efficient Solar Cooking Times
While mastering flavor layers sets the foundation for excellent campsite chili, timing your solar cooking correctly will guarantee perfect results. For your hearty chili, you'll want to plan for an extended cooking period of 3 to 3.5 hours, similar to other stew-like dishes in a solar cooker.
Start your chili preparation between 10:00 AM and 11:00 AM during summer months to take advantage of peak sunlight hours. If you're cooking in winter, begin no later than 11:30 AM, as you'll have a shorter window of ideal sunlight. You'll need to track the sun more frequently during winter months to maintain consistent cooking temperatures.
Since solar cooking typically takes 1.5 to 3 times longer than traditional methods, you'll want to account for this extended timeline. If you're using a solar parabolic cooker, you can expect faster cooking times than with a standard solar oven.
For the best results, consider using a slow cooker connected to your solar power system – set it on high for 2-2.5 hours or low for 8-9 hours, depending on your preferred cooking method and available sunlight.
Managing Weather and Sunlight
While cold temperatures won't severely impact your cooking, altitude can affect cooking times – higher elevations cook faster due to increased sunlight intensity.
Your chili can still cook effectively with occasional passing clouds, but consistent sunlight is essential to prevent food safety issues.
To maximize heat absorption, use dark-colored cookware regardless of weather conditions.
Adjusting Seasoning While Cooking
Proper seasoning throughout the cooking process can make or break your campsite chili. Since you're cooking over a longer period in the sun, you'll want to start with a foundation of salt and pepper early in the process, allowing these basic seasonings to penetrate your ingredients thoroughly.
As your chili simmers, taste it periodically to assess the flavor development. You'll need to reset your palate with water between tastings to maintain accuracy. Remember that dried herbs and whole spices should go in during the early stages, while fresh herbs are best added near the end of cooking.
If you find your chili needs adjustment, take out a small sample to test modifications before seasoning the entire pot. Too spicy? Add a bit of cream or sour cream to balance the heat. Too acidic from the tomatoes? A small amount of sugar or honey can help.
For enhanced flavor, consider toasting your whole spices before adding them to the pot.
Don't hesitate to ask fellow campers for their opinion on the seasoning – different palates can help you achieve a more universally appealing dish. Keep adjusting until you've reached the perfect balance of flavors.
Serving Your Campsite Masterpiece

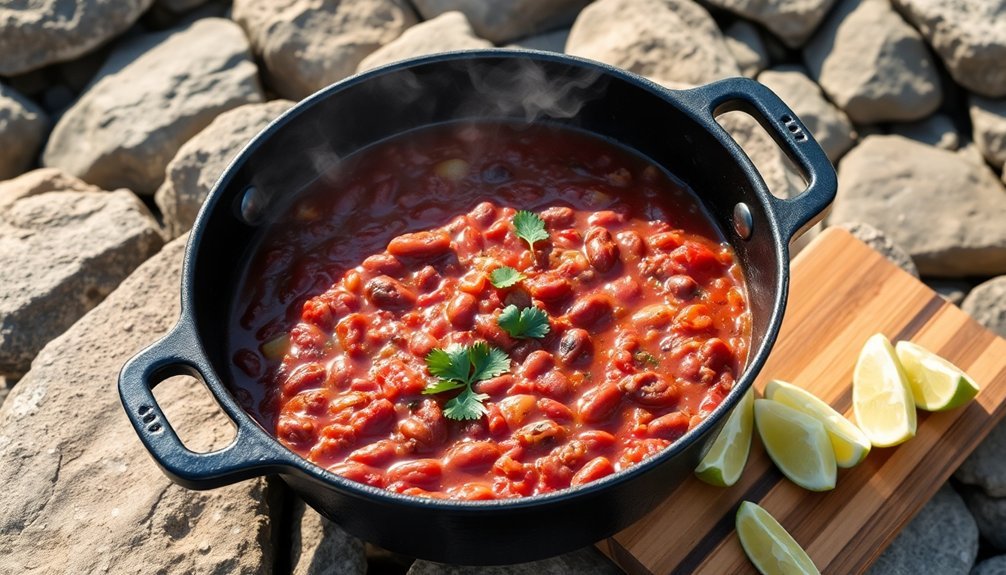
Your campsite chili becomes a personalized feast when you add classic toppings like shredded cheddar, cooling sour cream, and zesty jalapeños.
You'll find that creative serving options, such as sturdy mason jars or hollowed-out bread bowls, can transform your outdoor dining experience.
For easy cleanup and portability, consider using disposable bowls or letting tortilla chips serve double duty as both utensils and crunchy accompaniments.
Toppings Make It Special
A truly great campsite chili transforms into something extraordinary with the right combination of toppings.
You'll want to offer both vegan and non-vegan options to accommodate all your fellow campers. Start with classic dairy choices like sharp cheddar cheese and sour cream, or their vegan alternatives like plant-based shredded cheese and vegan sour cream.
Fresh ingredients add brightness and crunch to your chili. Sprinkle chopped cilantro, green onions, and diced onions for an herbal kick.
Add sliced jalapeños if you're craving extra heat, and don't forget a squeeze of lime juice to heighten all the flavors. Avocado slices provide a creamy contrast to the spicy chili.
For textural variety, you can't go wrong with crunchy toppings. Crumbled tortilla chips, Fritos, or crackers add satisfying crunch, while cornbread serves as a hearty side that's perfect for soaking up the rich sauce.
If you're feeling adventurous, try roasted nuts or seeds for unexpected crunch, or add diced bell peppers for fresh, crisp texture.
Let everyone customize their bowl for the ultimate campsite dining experience.
Creative Bowl Alternatives
Serving campsite chili doesn't require traditional ceramic bowls or heavy dishes. You'll find several lightweight, packable options that are perfect for your outdoor dining needs while minimizing your pack weight and environmental impact.
| Bowl Option | Key Benefits |
|---|---|
| Fozzils Snap and Fold | Doubles as cutting board; folds flat; non-stick surface |
| Guyot Squishy Bowl | Heat-resistant silicone; flexible; dishwasher safe |
| Sea to Summit X-Set | Nesting design; modular components; space-saving |
| UCO 6-Piece Kit | All-in-one solution; includes spork; fitted lid |
| Silipint Bowl Set | Non-slip surface; secure lids; multipurpose use |
You'll appreciate how these modern alternatives make cleanup a breeze at your campsite. The Fozzils system lets you quickly wipe down surfaces with a microfiber towel, while the Guyot's flexible design makes it easy to scrape clean. For group camping, consider the Sea to Summit X-Set's modular system, which allows you to pack multiple bowls without taking up extra space. These sustainable options not only reduce your environmental footprint but also provide durability that'll last through countless camping adventures.
Storage and Leftovers
Properly storing campsite chili starts with smart packing strategies to maximize space and maintain food safety. Transfer your ingredients to compact containers before heading out, and utilize mason jars for items you'll need to pour. Freeze portions of your chili in advance – they'll serve double duty as ice packs in your cooler while keeping other foods cold.
For the best storage during your camping trip, keep your cooler well-sealed and in a shaded spot. If you're using dry ice, pack it strategically to maintain ideal temperatures. When storing leftovers, let your chili cool completely before transferring it to airtight containers, where it'll stay fresh for up to 4-5 days when properly refrigerated.
- For extended storage, portion your chili into serving sizes and freeze for up to 3 months.
- If you've brought chile peppers, freeze them without pretreatment in plastic bags for up to a year.
- Consider drying your chile peppers for lightweight, space-saving storage that'll last through multiple camping trips.
When you're ready to enjoy your leftover chili, simply reheat it thoroughly on your camping stove or over the campfire until it's steaming hot.
Campsite Safety Tips
While storing your chili safely protects your meal, detailed campsite safety measures protect you and your fellow campers. Before you depart, verify your vehicle's ready for the terrain and inspect all camping equipment for damage.
Arrive early enough to survey your site for hazards like ant beds, poison oak, and steep drops.
When setting up camp, keep your tent at least five feet from your cooking area and mark stakes with bright fabric to prevent tripping. Don't use fuel-burning lanterns inside tents – stick to battery-operated lights to avoid carbon monoxide poisoning. Clear your tent area of flammable materials and secure it properly with shock-absorbing tie-downs.
Your campfire requires constant attention. Build it in a cleared space away from brush and falling leaves, and never leave it unattended. Keep water and a shovel nearby, and completely extinguish it before leaving.
For emergencies, pack a detailed first aid kit and maintain awareness of local wildlife, especially venomous snakes. Don't rely solely on your phone – carry a map, compass, and whistle. Always inform someone about your camping location and keep a weather radio handy for storm alerts.
Sustainable Outdoor Cooking Practices
When preparing your campsite chili, you'll want to keep your fire small and contained to minimize environmental impact while still achieving proper cooking temperatures.
You can conserve water by using a single pot for cooking and measuring ingredients precisely to avoid excess cleanup.
Minimize Campfire Impact
To minimize your environmental footprint while cooking this campsite chili, it's vital to follow sustainable outdoor practices.
When selecting your cooking location, use pre-existing fire pits and clear a 10-15 foot radius of flammable materials. Don't harvest wood from living trees; instead, collect naturally fallen deadwood from the ground and make certain it's dry and untreated.
Build your fire thoughtfully using proper tinder and kindling arranged in a teepee or log cabin structure. You'll need sustained heat for cooking chili, so maintain control of your fire size and keep water nearby for safety.
Remember that toxic materials have no place in your cooking fire – avoid burning anything with paint, ink, or synthetic materials.
- You're not just cooking a meal; you're preserving nature for future generations
- Every sustainable choice you make protects wildlife and their habitat
- Your responsible fire practices inspire others to follow suit
When you're done cooking, thoroughly extinguish all embers with water until they're cold to touch.
Scatter the ashes away from your campsite, pack out all waste, and leave the area looking untouched. Your commitment to minimal impact guarantees these natural spaces remain pristine for years to come.
Smart Water Usage
Smart water management lies at the heart of sustainable outdoor cooking. When preparing your campsite chili, you'll need to be mindful of how you use and conserve water throughout the cooking process. Collect rainwater in a clean container for washing vegetables and cleaning utensils, or use water from your campsite's low-flow fixtures to minimize environmental impact.
Set up a two-basin system for dish washing – one for washing with biodegradable soap and another for rinsing. You can reuse this grey water for putting out your campfire later. When cleaning your cooking equipment, don't let the water run continuously; instead, fill your basins with just enough water to get the job done.
If you're using a communal camping kitchen, take advantage of water-efficient fixtures and follow posted guidelines for water conservation. Keep a reusable water bottle handy for drinking while you cook, rather than using disposable bottles. If you need to rinse ingredients, collect the water in a basin below to reuse for other purposes.
Frequently Asked Questions
Can I Pre-Cook Ingredients at Home and Finish With Solar Cooking?
You can definitely pre-cook ingredients at home before solar cooking. It'll reduce your cooking time, enhance flavors, and make on-site preparation easier. Plus, you'll have peace of mind about food safety.
What Backup Cooking Methods Should I Have if Clouds Suddenly Appear?
You'll want to pack a camp stove or charcoal BBQ as your primary backup. Don't forget to bring a buddy burner for emergencies too. These options guarantee you're prepared when clouds roll in.
How Do Different Altitudes Affect Solar Cooking Temperatures and Times?
At higher altitudes, you'll experience faster cooking times and higher temperatures due to stronger solar radiation. You can expect up to 30% quicker cooking since there's less atmosphere to filter the sun's energy.
Will Strong Winds Affect the Efficiency of My Solar Cooker?
Yes, strong winds will considerably reduce your solar cooker's efficiency. You'll experience lower temperatures and longer cooking times. You can combat this by using windbreaks, sheltered locations, and properly anchoring your reflector.
Can I Use Frozen Ingredients in Solar Cooking for Chili?
Yes, you can use frozen ingredients in solar cooking, but they'll increase your cooking time. It's best to thaw meats first, while frozen vegetables and beans can go directly into your solar cooker.
In Summary
You've mastered the art of solar chili cooking – a sustainable, flavorful way to feed hungry campers. Remember to store your leftovers properly in airtight containers and keep them cool. Pack out what you pack in, and clean your solar cooking equipment thoroughly. With these skills, you'll make countless memorable meals while minimizing your environmental impact. Now get out there and let the sun fuel your next outdoor feast!


Leave a Reply