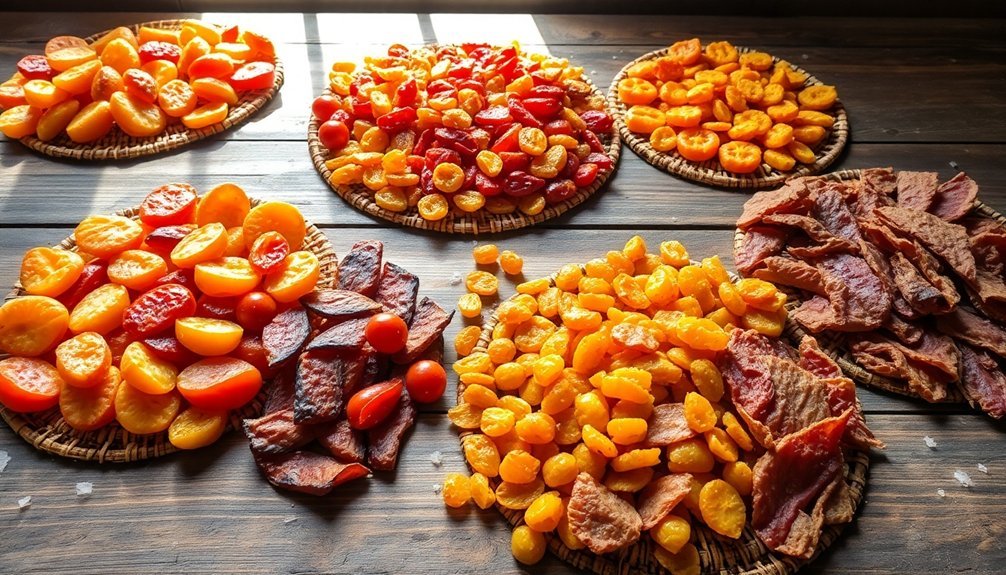
You can effectively preserve many foods using the sun's natural drying power. Fruits like apples, apricots, bananas, and cherries work exceptionally well, while vegetables such as tomatoes, hot peppers, and mushrooms also dry beautifully. Most herbs, from basil to rosemary, can be successfully sun-dried, and even some meats like beef, lamb, and venison can be preserved this way when properly prepared. The key is maintaining ideal conditions: temperatures around 140°F, low humidity, and good air circulation. While sun drying might seem straightforward, understanding the proper techniques and equipment will guarantee your preservation efforts succeed.
The Science Behind Sun Drying
The blazing sun holds remarkable food preservation power through a process called sun drying. When you expose food to sunlight, heat transfers through two main mechanisms: convection from the surrounding air and absorption of solar radiation on the food's surface. This heat then conducts to the food's interior, raising its temperature and triggering moisture evaporation.
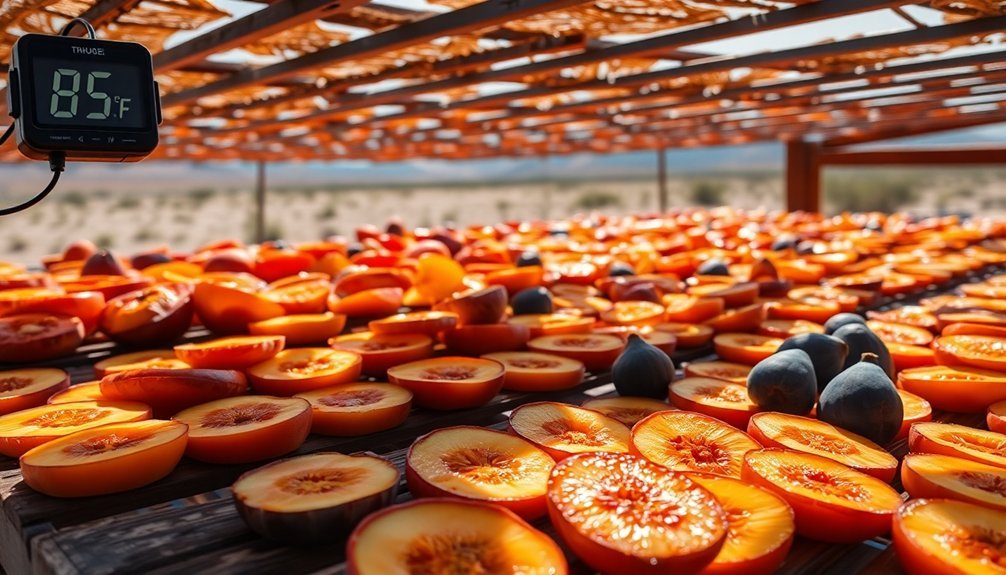
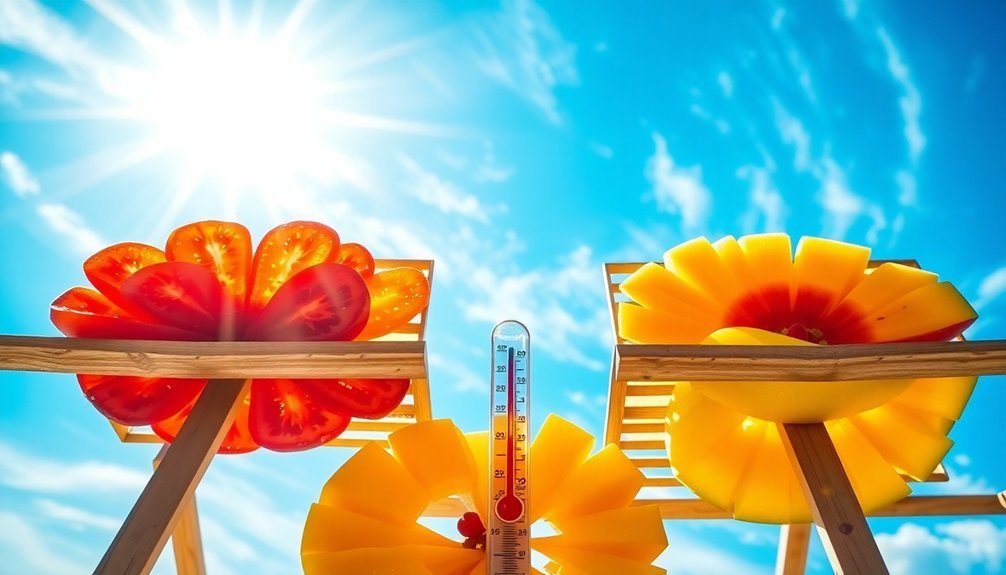
You'll get the best results when temperatures hover around 140°F – any higher, and you'll risk cooking your food instead of drying it. The process works most effectively during rainless seasons with bright sunshine and temperatures above 98°F. You'll also need low humidity and good air circulation to speed up the drying process.
As the sun works its magic, it's reducing the food's moisture content to levels that prevent bacteria, yeasts, and molds from thriving. This method is especially effective for mushrooms, which can develop over 46,000 IU of vitamin D per 100 grams when sun-dried.
What's particularly impressive is that sun-dried foods often retain more vitamins A and C compared to conventional drying methods, and they're packed with increased fiber content.
When done correctly, you can preserve dried fruits for up to five years and vegetables for an impressive decade or more.
Best Fruits for Solar Dehydration
Now that you understand how sun drying works, selecting the right fruits can make or break your solar dehydration success. Among the best candidates, you'll find apples, apricots, bananas, and stone fruits like cherries leading the pack. Each of these fruits offers unique characteristics that make them ideal for solar dehydration.
| Fruit Type | Drying Characteristics | Best Preparation Method |
|---|---|---|
| Apples | Excellent for drying and leather; needs anti-browning treatment | Slice thinly, soak in ascorbic acid |
| Apricots | High sugar content; resists spoilage; retains vitamins well | Halve or slice; no pre-treatment needed |
| Bananas | Concentrates natural sugars; longer drying time | Slice thinly; guarantee proper airflow |
To maximize your success, you'll need to properly prepare your fruits before drying. Start by cleaning and cutting them into uniform pieces. Most fruits benefit from pre-treatment with either sulfite or ascorbic acid solutions to prevent browning, though apricots and cherries can skip this step. When loading your solar dryer, slightly overlap the pieces to account for shrinkage, and remember to rotate the trays 2-3 times during the process for even drying. For optimal results, begin your drying process early in the day to take advantage of maximum sunlight exposure.
Vegetables That Thrive in Sunlight

Full-sun vegetables like tomatoes, beans, and eggplants are excellent candidates for solar drying because they naturally thrive in direct sunlight and contain ideal moisture levels for preservation.
These vegetables require 6 to 8 hours of direct sunlight daily for optimal growth and development.
You'll want to slice these vegetables thinly and uniformly, typically 1/4 inch or less, to guarantee even drying and prevent spoilage.
To test if they're properly dried, you can bend the pieces – they should be leathery and crack slightly but not break completely.
Best Vegetables For Drying
Selecting vegetables for sun drying requires careful consideration of their water content, sugar levels, and ability to retain nutrients.
Tomatoes are an excellent choice due to their high water content and impressive flavor retention. You'll want to cut them into smaller pieces for even drying, and you might need to move them to shade after initial sun exposure to prevent sunburn.
Hot peppers and chilies are particularly well-suited for sun drying thanks to their high sugar and acidic content, which naturally helps prevent spoilage. You can dry them whole or sliced, but you'll need to protect them from insects and provide shade during final drying stages.
Mushrooms make perfect candidates for sun drying, especially if you're planning to use them in winter soups and stews. You'll need to arrange them in a single layer and might want to treat them with red wine vinegar to prevent browning.
For beans and peas, you can dry them directly on the vine, but they'll require pasteurization afterward. Remember to maintain good air circulation and limit direct sun exposure for all vegetables to preserve their nutritional value, including vitamins, fiber, and minerals.
Preparation And Slicing Methods
Before exposing vegetables to sunlight, proper preparation plays an essential role in successful sun drying. You'll need to start by thoroughly washing your produce, removing any dirt, debris, or blemishes. Once cleaned, pat the vegetables dry with a clean cloth or paper towels to remove excess moisture.
To prevent browning, you'll want to pre-treat your vegetables. Use red wine vinegar or salt for tomatoes, and consider steam blanching other vegetables to stop enzyme activity. For mushrooms, a red wine vinegar treatment can enhance preservation.
When it comes to slicing, you'll achieve the best results by cutting your vegetables into uniform pieces less than half an inch thick. This consistency guarantees even drying throughout. Remember that smaller pieces will dry faster and more efficiently than larger ones.
Finally, you'll need to arrange your sliced vegetables properly. Place them in single layers on drying racks, keeping similar items together. Don't let pieces overlap, as this prevents proper air circulation.
Position your racks in areas with maximum sun exposure, and rotate the food regularly. If needed, use reflective surfaces to increase sun exposure and speed up the drying process.
Moisture Content Check Tips
A vegetable's moisture content serves as the key indicator of proper sun-drying completion. You'll need to master several testing methods to guarantee your vegetables reach the ideal dryness level.
The squeeze test offers a quick way to check – simply compress a piece of the vegetable. If it's properly dried, it shouldn't release any moisture or feel damp.
For precise measurements, you'll want to use a moisture meter specifically designed for dehydrated foods. Insert the probe into the thickest part of your vegetable pieces, aiming for a reading between 10-20% moisture content for best preservation.
If you don't have a meter, you can use the bend test: properly dried vegetables should be leathery and flexible but break cleanly when folded.
Check your vegetables' moisture levels throughout the drying process, focusing on the densest areas where moisture tends to linger.
You'll need to test multiple pieces, as drying rates can vary even within the same batch. If you're unsure, it's better to over-dry slightly than under-dry, as excess moisture can lead to spoilage and mold growth during storage.
Herbs and Spices Solar Guide
Your home-dried herbs and spices will take anywhere from 2-6 days to fully dry, with tender leaves like basil drying faster than woody stems like rosemary.
You'll know they're ready when the leaves crumble easily and stems snap cleanly rather than bend.
Store your dried herbs in airtight glass containers away from light and heat for up to a year, though you'll get the best flavor within the first six months.
Drying Times By Herb
Successful solar drying of herbs depends heavily on understanding the specific drying times each variety requires. While most herbs will take 3-4 days to completely dry in the sun, you'll need to account for your local humidity levels and daily temperatures to achieve ideal results.
When you're solar drying herbs, maintaining temperatures around 100 degrees with humidity at 60% or less will give you the best outcome.
- Tender herbs like basil, mint, and tarragon will dry faster than woody herbs, so you'll want to check them more frequently during the drying process.
- Woody herbs such as rosemary, thyme, and sage typically take the full 3-4 days to dry completely.
- Leafy herbs like parsley and cilantro need careful monitoring to prevent over-drying or sun bleaching.
You'll know your herbs are properly dried when they crumble easily and the stems snap when bent.
To preserve the best flavor and color, you shouldn't expose your herbs to direct sunlight – instead, use drying screens or a solar dehydrator with proper air circulation.
If you notice any herbs starting to brown or bleach, move them to a shadier spot immediately.
Best Storage For Longevity
Proper storage methods make the difference between dried herbs that stay fresh for months and those that quickly lose their potency. You'll want to store your sun-dried herbs in rigid, opaque containers with airtight seals, preferably using ceramic or darkened glass options that protect against light damage.
Before storage, verify your herbs are completely dry to prevent mold growth. You can use paper towels or clean cloth for thorough drying, and don't forget to remove any stems or debris. Label each container with the herb's name and date, as properly stored herbs can last up to a year.
Place your containers in a cool, dry area away from direct sunlight, heat sources, and humid environments. You'll also want to keep them separate from strong-smelling foods since herbs can absorb other odors.
For extra protection, consider using oxygen absorbers in your storage containers to maintain ideal dryness. Check your stored herbs periodically for any signs of spoilage or mold.
If you're looking for even longer preservation, consider freezer storage – some herbs actually retain their flavor better when frozen.
Meat Preservation Through Sunlight

Dating back thousands of years, sun drying stands as one of the oldest and most reliable methods for preserving meat. You'll find this technique particularly effective in areas with strong sunlight and low humidity, where it's still practiced as a cost-effective alternative to modern refrigeration.
While you can't use this method for all types of meat, it works exceptionally well with lean cuts of beef, lamb, and venison.
When you're preparing meat for sun drying, you'll need to:
- Slice the meat thinly to guarantee quick and even drying
- Place it on elevated racks or mats for proper air circulation
- Rotate the pieces periodically during the 4-6 hour initial drying period
You'll notice that not all meats are suitable for this preservation method. While beef and lamb are excellent candidates, you shouldn't attempt to sun-dry poultry due to food safety risks.
If you're working with fish, you'll need to heavily salt it first. Traditional practices often combine sun drying with other techniques like salting and pressing to enhance preservation.
For better results, you might want to take into account using a solar dryer to protect your meat from insects and dust while drying.
Essential Equipment for Sun Drying
Every effective sun-drying operation requires specific tools and equipment to achieve ideal results.
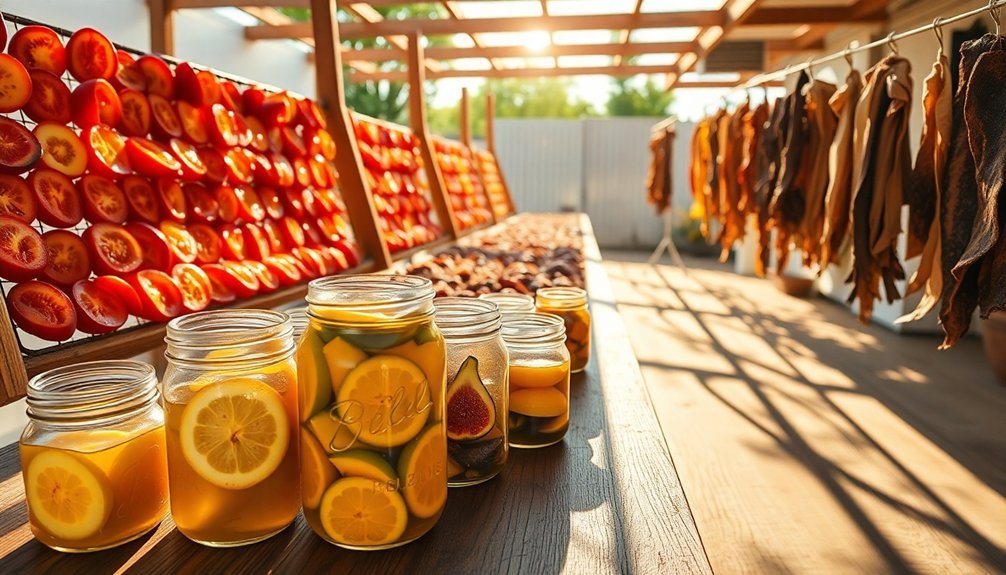
You'll need proper drying racks with slatted bottoms that allow air to circulate freely around your food items. These can range from simple cooling racks to specialized plastic trays from dehydrators or custom-made platforms that maximize airflow.
Protection is essential during the drying process. You'll want to cover your food with cheesecloth or protective screens to keep insects and debris away. For enhanced drying efficiency, you can use transparent covers like plexiglass to trap heat or reflective surfaces to increase sun exposure.
Before drying, you'll need to prepare a pretreatment solution – typically a mixture of lemon juice and water (1:4 ratio) or red wine vinegar to prevent browning.
Don't forget to have moisture-free containers ready for storing your dried foods.
To improve your sun-drying setup, consider adding components like solar collectors (black-painted surfaces), insulated drying chambers, and proper ventilation systems.
It's worth installing thermometers and hygrometers to monitor temperature and humidity levels, ensuring your food dries under ideal conditions. For larger operations, small fans can enhance air circulation considerably.
Weather and Climate Considerations
While having the right equipment sets the foundation for sun drying, understanding weather patterns and climate conditions determines your success.
You'll need consistently warm temperatures above 85°F (29°C), low to moderate humidity levels between 30-60%, and plenty of bright sunshine. If you're in regions like Texas, California, Spain, or Italy, you've got perfect conditions for sun drying due to their favorable climate patterns.
- Monitor your local temperature and humidity using thermometers and hygrometers to guarantee ideal drying conditions.
- Position your drying racks to catch prevailing winds while protecting food from excessive exposure.
- Plan for nighttime protection by covering food or bringing it indoors to prevent moisture reabsorption.
If you're in a humid climate like the Gulf states, you'll need to adapt your approach.
Consider using solar dehydrators with built-in fans to combat high humidity levels. You can also place intake vents low and exhaust vents high to create natural convection. Remember that south-facing slopes offer ideal sunlight exposure, and you can boost drying efficiency by using reflective surfaces like aluminum foil to increase sun exposure.
Common Sun Drying Mistakes
Sun drying food may seem straightforward, but even experienced food preservers make critical mistakes that can compromise their results. If you're not selecting produce carefully, you'll end up with poor results. Always choose fresh, unblemished fruits and vegetables of uniform size, and remove any pits, seeds, or high-fat components that could spoil quickly.
You're setting yourself up for failure if you don't optimize your drying environment. Without temperatures above 85°F and humidity below 60%, your food won't dry properly. If you're not using screens or netting to protect against insects and debris, or failing to position your racks to catch prevailing breezes, you'll face contamination and longer drying times.
Don't make the mistake of neglecting your drying items overnight. If you're not bringing food under shelter during evening hours, morning dew can reintroduce moisture and promote spoilage.
You'll also run into problems if you're not flipping items daily or monitoring UV levels. Remember, proper sun-dried foods should retain 15-20% moisture content. If you're in a humid area, you'll need a solar dehydrator with built-in fans to achieve consistent results.
Long Term Storage Solutions
Once you've mastered proper drying techniques, your next challenge is keeping those preserved foods fresh for months or even years.
You'll need to focus on creating ideal storage conditions and using the right containers to maximize shelf life.
For successful long-term storage, you'll want to:
- Keep temperatures between 40-70°F (4-21°C), with sun-dried foods specifically stored at 50-60°F (10-15°C)
- Maintain humidity levels below 60% to prevent mold growth
- Use moisture-proof containers with proper sealing methods, such as vacuum sealing or oxygen absorbers
Your storage containers make a significant difference in preservation quality.
Choose mylar bags, mason jars, or food-grade plastic containers, and always label them with contents and drying dates.
You can extend shelf life even further by freezing your dried foods, which can keep them fresh for up to two years.
Don't forget to check your stored items regularly for any signs of spoilage, such as mold or unusual odors.
With proper storage techniques, dried fruits can last 6-12 months, while vegetables typically maintain quality for 4-6 months.
Remember to rotate your stored foods, using older items first to maintain freshness throughout your supply.
Frequently Asked Questions
Can Sun-Dried Foods Be Rehydrated, and How Does It Affect Their Taste?
Yes, you can rehydrate sun-dried foods by soaking them in water or adding them to soups. You'll find they maintain their concentrated flavors while regaining most of their original texture and shape.
What Role Does Altitude Play in the Effectiveness of Sun Drying?
You'll find sun drying more effective at higher altitudes due to increased UV radiation and lower humidity. Your food will dry faster, but you'll need to protect yourself from stronger sun exposure while working.
Are Sun-Dried Foods Safe for People With Specific Dietary Restrictions?
You'll find most sun-dried foods safe for dietary restrictions, but watch carbs if you're on keto. Check vitamin D in sun-dried mushrooms and monitor portions of dried fruits if you're counting calories.
How Do Pesticides Affect the Sun-Drying Process of Fruits and Vegetables?
While you're sun-drying produce, pesticides gradually break down through photodegradation and heat exposure. You'll see significant reductions – up to 92% for some pesticides, though the process can concentrate remaining residues during water loss.
Can Sun-Dried Foods Be Used in Baby Food Preparation?
You shouldn't use sun-dried foods for baby food preparation. It's unsafe and doesn't meet food safety standards. Instead, choose proper preservation methods like freezing or commercial processing to protect your baby's health.
In Summary
You'll find that sun preservation works best with fruits like apricots, figs, and grapes, while tomatoes and peppers lead the vegetable category. Don't forget herbs – they're perfect candidates for solar drying. Though you can preserve certain meats in the sun, it's essential to follow strict safety guidelines. Remember to choose the right equipment, monitor weather conditions, and store your sun-dried foods properly to enjoy them year-round.


Leave a Reply