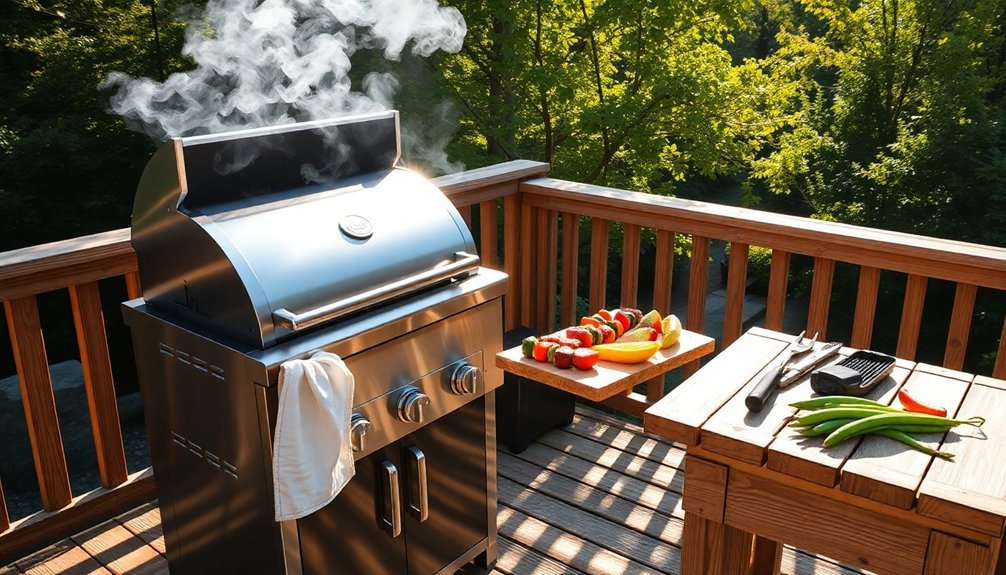
For ideal outdoor cooking, you'll want clear skies between 11:00 am and 3:00 pm when the sun is strongest. Aim for temperatures between 65-85°F with humidity levels of 35-50%. Position your cooking setup away from strong winds, using barriers if needed. Keep an eye on cloud coverage – scattered clouds (3/8 to 4/8) work best, but avoid cooking when coverage exceeds 70%. Use dark, non-shiny cookware and monitor temperatures with a reliable thermometer. Pre-heat your cooking area for 15-20 minutes and adjust positions every 1-2 hours as the sun moves. These basics will get you started, but there's much more to mastering the art of outdoor cooking.
Optimal Sun Position and Timing

When it comes to solar cooking success, understanding ideal sun positioning is essential. You'll want to position your cooker so the sun is directly in front of it halfway through your cooking time. To identify the best conditions, check your shadow – if it's shorter than your height, you've got prime cooking conditions. Solar cookers can reach up to 250°F on bright sunny days, making them highly effective for outdoor meal preparation.
For the best results, use NOAA's Solar Calculator to determine solar noon in your location. This will help you plan your cooking schedule around peak sunlight hours.
If you're cooking for more than three hours, you'll need to periodically refocus your cooker to maintain consistent temperatures as the sun moves across the sky.
Your geographical location plays a critical role in solar cooking effectiveness. If you're cooking at higher elevations, you'll benefit from stronger UV rays. However, if you're in northern latitudes, you'll need to compensate for less intense sunlight by adjusting your cooker's position more frequently.
Remember that most regions only offer the best solar cooking conditions for four to six months of the year. Monitor sky conditions carefully and keep an oven thermometer handy to track internal temperatures and make necessary adjustments.
Temperature Range for Solar Cooking
For successful solar cooking, you'll want to aim for temperatures between 180°F to 400°F, depending on your cooker's design and the food you're preparing.
Your solar cooker can reach these ideal temperatures when equipped with proper insulation and reflector panels that concentrate sunlight effectively.
During hot seasons, you can expect well-designed solar ovens to achieve temperatures comparable to conventional ovens, especially between 10 AM and 2 PM when the sun's rays are strongest. For maximum efficiency, using materials like aluminum foil and mirrors helps direct more solar energy to your cooking surface.
Optimal Solar Cooking Conditions
Understanding solar cooking temperatures is essential for successful outdoor meal preparation. You'll need to maintain a minimum temperature of 180°F (82°C) to safeguard food safety, while most solar cookers operate effectively between 200°F and 300°F (93°C to 149°C). For maximum nutrient retention and moisture preservation, aim to cook between 180°F and 250°F (82°C to 121°C).
Your choice of solar cooker design profoundly impacts the temperatures you can achieve. Panel cookers typically reach 250°F (121°C), while well-insulated box cookers can hit 400°F (204°C). If you're looking for higher temperatures, parabolic cookers can exceed 800°F (427°C), making them ideal for rapid cooking. Pre-heating the oven for 15-20 minutes helps achieve and maintain these optimal temperatures.
To maintain ideal cooking temperatures, you'll need to take into account several key factors.
Use dark, non-shiny cookware to maximize heat absorption, and make sure your cooker has proper insulation. Position your cooker in direct sunlight, avoiding shade and wind exposure.
Monitor weather conditions closely, as cloud cover can drastically affect cooking temperatures. Remember to adjust cooking times based on seasonal changes and sun intensity, and always verify that your food reaches safe internal temperatures.
Hot Season Temperature Targets
Building on these temperature fundamentals, hot season solar cooking offers ideal conditions for reaching and maintaining your target temperatures.
During peak sunlight hours, you'll find your solar cooker can achieve temperatures between 150°F and 750°F, depending on your equipment type and design. For most cooking tasks, you'll want to target temperatures between 150°F and 300°F, which is perfect for baking and slow-cooking meals.
To maximize your cooking efficiency, position your solar cooker facing south and plan your cooking sessions within two hours before or after solar noon. Prime cooking hours typically occur between 11:00 am and 3:00 pm when the sun is directly overhead. You'll need to use dark-colored cookware to absorb sunlight effectively, and don't forget to keep lids on your pots to retain heat and moisture.
When cooking meat, make certain your oven maintains at least 180°F for food safety.
If you're using a high-performance parabolic cooker, you can reach temperatures up to 550°F, making it possible to grill and stir-fry. For box-style cookers, expect temperatures around 300°F, which is ideal for most baking needs.
Remember to adjust your cooking times based on food quantity and size – larger portions will require more time to reach target temperatures.
Seasonal Weather Impact

Successfully managing outdoor cooking requires adapting to nature's ever-changing conditions throughout the year. You'll need to adjust your cooking approach as each season presents unique challenges and opportunities.
In spring, you'll face fluctuating temperatures and humidity levels that can affect cooking times. Keep an eye on sudden rain showers and be ready to adjust your cooking duration accordingly. High humidity means you should watch carefully as it can lead to surface heat retention and overcooked food.
Summer brings intense heat and direct sunlight, so you'll want to position your grill in a shaded area to maintain consistent temperatures and prevent overcooking.
As autumn arrives, you'll need to compensate for cooling temperatures by extending cooking times and protecting your grill from stronger winds. Consider using wind barriers and make sure you're using fresh, dry pellets for peak performance.
Winter demands the most attention, as extreme cold substantially impacts cooking duration and efficiency. You'll need more fuel to maintain temperatures, and it's vital to protect your grill from snow and ice damage.
Remember that altitude affects cooking times year-round, particularly in mountainous regions.
Regular maintenance becomes especially important during harsh weather conditions to guarantee your grill performs reliably regardless of the season.
Wind Protection Methods
Strong winds can quickly derail your outdoor cooking efforts, but effective wind protection methods will help you maintain consistent temperatures and prevent safety hazards. You'll need to focus on proper windscreen installation and strategic grill placement to create a favorable cooking environment.
Position your grill perpendicular to prevailing winds and guarantee it's anchored securely on a flat surface.
- Install a three-sided windscreen that's taller than your grill, using durable materials like wood or metal, but maintain proper clearance to prevent fire risks.
- Secure your grill with weighted anchors or heavy objects, and regularly check the anchoring system to guarantee stability.
- Use adjustable clamps to keep grill covers in place and add wind deflectors to disrupt airflow around your cooking area.
- Control ventilation by adjusting grill vents strategically and keep the lid closed as much as possible during cooking.
When selecting cooking methods, opt for thick cuts of meat that retain heat well and choose recipes that don't require frequent lid lifting.
You can also use portable barriers for temporary protection and consider commercial wind block options for a more permanent solution to your outdoor cooking setup.
Cloud Cover Assessment

When planning your outdoor cooking session, you'll need to distinguish between different cloud types, as low-hanging cumulus clouds can trap smoke and affect air quality more than high-altitude cirrus clouds.
You'll find that overcast conditions above 70% cloud cover can substantially impact your cooking experience by hindering smoke dispersal and potentially leading to temperature fluctuations.
Learning to read cloud patterns through weather apps or visual observation helps you anticipate changes in cooking conditions and adjust your schedule accordingly.
Cloud Types and Cooking
Understanding cloud cover can substantially impact your outdoor cooking experience. Different cloud types can affect temperature stability, cooking times, and overall grilling conditions. When you're planning an outdoor cooking session, it's essential to identify the cloud formations above and adjust your cooking strategy accordingly.
1. If you spot stratus clouds forming a gray blanket overhead, you'll need to extend your cooking times slightly and monitor your grill's temperature more carefully, as these clouds can affect heating consistency.
2. You won't need to make significant adjustments when cooking under scattered cumulus or stratocumulus clouds, as they typically don't interfere with cooking conditions unless they form dense lines.
3. Watch out for altostratus and nimbostratus clouds – they often bring challenging conditions for outdoor cooking, including increased humidity and possible precipitation.
You might want to reschedule or have a backup indoor plan.
4. Cirriform and stratiform clouds at high altitudes are your friends.
These ice crystal formations rarely impact cooking conditions and usually indicate stable weather, making them ideal for outdoor grilling sessions.
You can proceed with standard cooking times and temperatures when these clouds are present.
Overcast vs. Clear Skies
Evaluating cloud cover conditions is essential for successful outdoor cooking. When you're planning an outdoor meal, understanding the difference between overcast and clear skies can markedly impact your cooking experience.
Under overcast conditions (8/8 cloud coverage), you'll benefit from consistent temperatures and more comfortable cooking conditions, as you won't have to deal with direct sunlight's harsh glare.
You shouldn't start cooking when cloud cover exceeds 70% and the ceiling is below 2,000 feet, as smoke won't disperse properly, creating unsafe conditions. Instead, aim for scattered (3/8 to 4/8) or broken (5/8 to 7/8) cloud coverage, which provides ideal conditions for outdoor cooking.
These conditions offer a balance between comfort and proper smoke ventilation.
Clear skies (0/8 coverage) can make cooking challenging due to intense heat and glare, requiring additional shelter or timing adjustments. When you're evaluating conditions, remember that cloud cover influences both temperature and humidity.
In scattered or broken cloud conditions, you'll find it easier to maintain consistent cooking temperatures and won't need to constantly adjust your position to avoid direct sunlight, making your outdoor cooking experience more enjoyable and safer.
Reading Cloud Patterns
Learning to read cloud patterns can make or break your outdoor cooking plans. By understanding different cloud formations and their movements, you'll be able to predict weather changes and plan your outdoor cooking sessions accordingly.
Watch for shifts from harmless cirrus clouds to cirrostratus formations, as this often signals an approaching warm front within 24 hours.
1. Keep an eye on cumulus clouds
While these puffy white clouds usually mean fair weather, if they start growing taller and darker into cumulonimbus formations, pack up your cooking equipment as severe weather may be approaching.
2. Check high-altitude clouds first
Thin, wispy cirrus clouds typically indicate good weather, perfect for grilling, while a cirrostratus sheet with a halo around the sun suggests incoming weather changes.
3. Watch for altocumulus clouds
These rounded, soft clumps often appear after storms and could signal afternoon thunderstorms that'll disrupt your cookout.
4. Monitor cloud movement
Track the direction clouds are moving to determine where weather systems are coming from, giving you time to adjust your cooking schedule or location.
If you spot dark, towering clouds or anvil-shaped formations, it's best to postpone your outdoor cooking plans, as these indicate severe weather conditions.
Humidity Effects on Cooking
Most outdoor chefs overlook humidity's powerful influence on cooking results. Understanding how humidity affects your outdoor cooking can help you achieve better results and avoid common pitfalls.
When you're grilling or smoking on humid days, you'll need to make several adjustments. High humidity increases cooking rates, especially at lower temperatures, but it can also toughen your steaks.
You'll want to aim for mid-level humidity (35-50%) to maintain tenderness while enhancing juiciness. Be aware that high moisture levels in the air will restrict surface browning and limit the development of those desirable meat flavors you're after.
If you're baking outdoors, humidity requires even more attention. You'll need to reduce liquid ingredients by about 25% on humid days to offset the moisture your dry ingredients will absorb from the air.
Consider extending your baking time by 3-5 minutes to allow extra moisture to cook off. Running a fan near your cooking area can help control humidity levels.
Keep in mind that warm air holds more moisture than cold air, so early morning cooking sessions typically face higher relative humidity than afternoon sessions.
Heat Retention Strategies

A cook's success in outdoor cooking heavily depends on mastering heat retention techniques. You'll find that maintaining consistent temperatures becomes much easier when you implement proper insulation methods and use the right equipment.
By utilizing pot parkas and creating sheltered cooking areas, you can substantially reduce cooking times and protect your food from temperature fluctuations caused by wind and weather.
- Blacken your pot bottoms with barbecue paint or by charring them over a fire to improve heat absorption and retention
- Wrap your cooking setup with a windscreen, keeping it close but not restrictive to maximize heat transfer
- Place a layer of aluminum foil or a pie tin under your stove to insulate it from cold ground
- Use pot cozies to maintain food temperature longer and reduce fuel consumption
Cast iron cookware, particularly Dutch ovens and skillets, excels at maintaining steady temperatures once heated.
When using a Dutch oven, place coals on the lid to create even heat distribution from top and bottom.
Remember to create distinct heat zones in your cooking area and start with lower temperatures, adjusting gradually as needed. This approach guarantees better control over your cooking process and more consistent results.
Solar Reflector Positioning
Proper positioning of your solar reflector stands as the cornerstone of effective outdoor solar cooking. You'll need to take into account both the tilt angle and sun's position to maximize heat capture.
Set your reflector's angle lower than the meridian transit altitude, and remember that a 15.5° tilt often works well for lower angles.
Watch the sun's ray that reflects off the top of your reflector – it's your key reference point for proper alignment. You'll want this ray to hit the opposite side of your target area.
If you're using a parabolic reflector, make certain its focal point aligns with the bottom of your cooking pot for maximum heat concentration.
You'll need to adjust your reflector throughout the day to follow the sun's path. Think about installing an adjustable mechanism using twine and aluminum rods to make these modifications easier.
For precise measurements, use a protractor or downloadable template to set your angles correctly.
Don't forget to monitor your cooker's temperature with an oven thermometer, and face your entire setup directly toward the sun.
Using a black pan with a cover will help absorb heat more efficiently.
Weather Forecast Planning

While positioning your solar reflector helps maximize cooking efficiency, successful outdoor cooking starts with careful weather forecast planning.
You'll need to check both short-term and seasonal forecasts to make informed decisions about your outdoor cooking sessions. For locations away from weather stations, you'll need to adjust temperature and precipitation data based on your specific elevation and geography.
Here are four essential weather planning strategies for outdoor cooking:
- Check point forecasts for your exact location the night before or morning of your planned cooking session, paying attention to wind speeds and precipitation chances.
- Adjust temperature expectations based on elevation changes – remember that temperatures typically drop 3-5 degrees per 1,000 feet of elevation gain.
- Consider seasonal averages when planning longer-term outdoor cooking events, especially if you're organizing multiple sessions.
- Monitor local weather patterns through reliable sources like the National Weather Service, particularly for areas between weather stations or in remote locations.
Don't forget to have a backup plan for your outdoor cooking when weather conditions suddenly change, and always prioritize safety when making weather-based decisions.
Altitude Considerations
At higher altitudes, you'll notice significant changes in how your food cooks because water boils at lower temperatures – dropping from 212°F at sea level to just 194°F at 10,000 feet.
You'll need to adjust your cooking times by up to 25% longer and keep food covered to prevent moisture loss since the lower air pressure affects both boiling and evaporation rates.
Whether you're boiling pasta, grilling steaks, or using a pressure cooker, you'll want to modify your cooking temperatures and times to guarantee your outdoor meals turn out perfectly at elevation.
Boiling Point Changes
Understanding boiling point changes at different altitudes can dramatically impact your outdoor cooking success. As you climb higher, water boils at lower temperatures, which means your food will take longer to cook.
For every 500 feet of elevation gain, you'll notice the boiling point drops by about 0.5°C (0.9°F), considerably affecting your cooking times and food quality.
Here's what you need to know about boiling points at different elevations:
- At sea level, water boils at 100°C (212°F), giving you ideal cooking conditions.
- By 2,000 feet, the boiling point drops to 98°C (208.4°F), requiring slight cooking adjustments.
- At 5,000 feet, water boils at 95°C (203°F), meaning you'll need to add extra cooking time.
- When you reach 10,000 feet, water boils at just 90°C (193.6°F), dramatically affecting cooking times.
To compensate for these changes, you'll need to adjust your cooking times accordingly. Add one minute of cooking time for every 1,000 feet above 5,000 feet elevation.
Using a lid is essential to trap heat and prevent excessive evaporation, while a windscreen can help maintain consistent temperatures for your outdoor stove.
Air Pressure Effects
Successful outdoor cooking requires mastering the effects of air pressure at different altitudes. If you're cooking above 3,000 feet, you'll need to adjust your methods since atmospheric pressure drops by about 1/2 pound per 1,000 feet. This change affects everything from cooking times to food moisture.
| Altitude (ft) | Air Pressure (psi) | Cooking Adjustment |
|---|---|---|
| Sea Level | 14.7 | Standard recipes |
| 5,000 | 12.3 | +15% cooking time |
| 10,000 | 10.2 | +40% cooking time |
When using a pressure cooker at high altitudes, you'll need to increase cooking time by 5% for every 1,000 feet above 2,000 feet. For example, at 9,000 feet, add 35% more time to your recipes. You'll also notice that liquids evaporate faster at higher elevations due to lower air pressure and humidity. To combat this, keep food covered whenever possible and adjust cooking temperatures accordingly. For deep-frying, lower the temperature by 3°F for every 1,000 feet of elevation gain. Remember that your pressure cooker won't reach the same absolute pressure at high altitudes as it would at sea level, so you'll need to compensate with longer cooking times.
High-Altitude Cooking Techniques
High-altitude cooking techniques require specific adaptations to guarantee your outdoor meals turn out perfectly. When you're cooking at elevations above 3,000 feet, you'll need to adjust both your cooking times and temperatures to compensate for the lower air pressure and faster evaporation rates.
If you're grilling, reduce your cooking temperature by 25°F for every 1,000 feet of elevation, and expect to increase your cooking time by 25-50%.
Here's what you'll need to remember when cooking at high altitudes:
- Use tight-fitting lids and cover your food while cooking to trap essential moisture, as water evaporates more quickly at higher elevations.
- Adjust your grilling technique by creating two cooking zones – a hot zone for searing and a cooler zone for thorough cooking.
- Utilize marinades, basting sauces, and water pans to maintain moisture and prevent your food from drying out.
- Monitor internal temperatures regularly with a food thermometer to confirm proper doneness.
Remember to protect your cooking area from wind to maintain consistent heat, and consider using specialized high-altitude cooking equipment if you frequently cook at elevated locations. While moist-heat cooking methods will need longer times, dry-heat methods mainly require careful moisture monitoring.
Cooking Time Adjustments

Precision in cooking time adjustments can make or break your outdoor culinary experience. When you're adapting recipes for outdoor cooking, you'll need to take into account both temperature variations and equipment differences.
| Factor | Adjustment Needed |
|---|---|
| Multiple Items | Add 10-20% cooking time |
| Tight Packing | Increase time by 25-40% |
| High Humidity | Monitor and extend time |
| Poor Insulation | Add safety margin |
To calculate your adjusted cooking times, divide your starting temperature by the end temperature to find the percentage difference. Then multiply your initial cooking time by this percentage. You'll want to maintain at least 2 inches of space between meat pieces to facilitate proper airflow and consistent cooking.
When using a gas grill, utilize fewer burners and cook in the off-burner section to simulate oven heat. For charcoal grills, arrange your briquettes in a circle with an open middle for even heating. Don't forget to preheat your grill to about 25°F higher than your target temperature to account for heat loss when you open the lid. Using aluminum foil packets can help you maintain consistent moisture levels and prevent sticking, especially when cooking delicate items.
Temperature Monitoring Tools
Equipped with the right temperature monitoring tools, you'll transform your outdoor cooking from guesswork into a precise craft.
Digital thermometers with wireless connectivity let you monitor your food remotely through your smartphone, giving you the freedom to socialize while maintaining perfect control of your cooking temperatures.
Modern monitoring systems come with multiple probes, allowing you to track different meats and grill zones simultaneously while receiving real-time alerts through integrated apps.
Key Considerations
- Invest in a wireless grill thermometer with multiple probes to monitor both meat and ambient temperatures simultaneously.
- Choose devices with smartphone connectivity to receive instant alerts when your target temperatures are reached.
- Look for systems with data storage capabilities to analyze and improve your cooking techniques.
- Consider smart controllers that can automatically adjust cooking temperatures through integrated fans.
For ideal results, you'll want a thermometer with a backlit display for evening cooking sessions and high-temperature probes designed specifically for grilling. These advanced tools not only guarantee food safety but also help you achieve consistency in your outdoor cooking, making every session as successful as the last.
These advanced tools not only guarantee food safety but also help you achieve consistency in your outdoor cooking, making every session as successful as the last.
Sunlight Duration Requirements

Successful solar cooking hinges on three key sunlight duration factors: cooking time, geographic location, and seasonal timing.
For quick meals under three hours, you'll need direct sunlight during peak hours when shadows are shortest. Position your cooker so the sun aligns directly with it halfway through cooking. You won't need to refocus for these shorter cooking sessions, and you can reach temperatures up to 250°F in ideal conditions.
Medium-length cooking (3-4 hours) requires more attention. You'll need to refocus periodically, especially when preparing items like root vegetables or whole chickens. Watch for wind interference, as it can affect cooking efficiency.
For long cooking times (5-8 hours), such as dried beans or large roasts, you'll need frequent refocusing and consistent sunlight exposure. High altitudes demand more adjustments, though larger solar cookers can achieve higher temperatures.
Your geographic location plays a vital role. If you're between the 60th parallels of latitude, you'll have more solar cooking opportunities.
Desert regions offer ideal conditions, but elevation changes can affect temperature and precipitation. Check local weather data to plan your solar cooking sessions effectively.
Frequently Asked Questions
How Do Thunderstorms Affect the Safety of Outdoor Gas Grilling?
You shouldn't grill during thunderstorms as high winds can damage gas lines and propane tanks, while downed power lines create hazards. It's unsafe to move your grill indoors during storms.
Can Extreme Temperature Changes Damage Outdoor Kitchen Equipment and Surfaces?
Yes, you'll find that extreme temperature changes can severely damage your outdoor kitchen. They'll cause metal surfaces to rust, crack rubber hoses, strain refrigeration systems, and accelerate wear on equipment over time.
What's the Ideal Distance Between Multiple Grills for Proper Ventilation?
You'll need to keep at least 3 feet (36 inches) between multiple grills to guarantee proper airflow and prevent smoke cross-contamination. For larger grills, you should maintain even more space for ideal ventilation.
How Does Coastal Salt Air Impact Outdoor Cooking Equipment Longevity?
Salt air will substantially reduce your outdoor cooking equipment's lifespan by accelerating corrosion, damaging protective coatings, and compromising electrical components. You'll need frequent maintenance and cleaning to combat these damaging coastal effects.
Should Outdoor Cooking Equipment Settings Be Adjusted for Different Fuel Types?
Yes, you'll need to adjust your equipment settings for each fuel type. Wood pellets require lower temperatures, gas needs precise control, and charcoal demands frequent monitoring to maintain your desired cooking temperature.
In Summary
You'll get the best results from outdoor cooking when you pay attention to these environmental factors. Don't let weather conditions catch you off guard – monitor temperature, protect from wind, and plan around ideal sun exposure. Whether you're grilling, smoking, or solar cooking, these tips will help you adapt your cooking methods to nature's elements. Remember: timing and weather awareness are your keys to outdoor cooking success.


Leave a Reply