
You'll save up to 80% on cooking energy by properly insulating your slow-cooked meals. Start by bringing your food to a vigorous boil in a thin metal pot, then transfer it quickly to an insulated container or wrap it in heat-retaining materials. Keep the lid tight and fill your pot to ½-¾ capacity for ideal results. Your meals will stay hot for 3-12 hours, depending on your setup, while transforming tough cuts of meat into tender dishes. Soups, stews, legumes, and grains work especially well with this method. Discover how simple adjustments to your cooking routine can revolutionize your meal preparation.
Understanding Heat Retention Basics
Three fundamental principles drive heat-retention cooking: conservation, insulation, and time.
You'll save 20% to 80% of your normal cooking energy by using this method, which starts with bringing food to a boil before transferring it to an insulated container.
The insulation prevents heat from escaping into the environment, eliminating the need for additional energy input. Using thin metal pots enhances the effectiveness of heat transfer compared to thicker materials.
While your cooking time will extend to about double the normal stovetop duration, this slower process guarantees thorough cooking without constant monitoring.
Your food will stay hot for 3 to 5 hours in a heat-retention basket, cooking at just below boiling point for peak results.
The key is to minimize air space in your pot, as this helps maintain consistent temperatures throughout the cooking process.
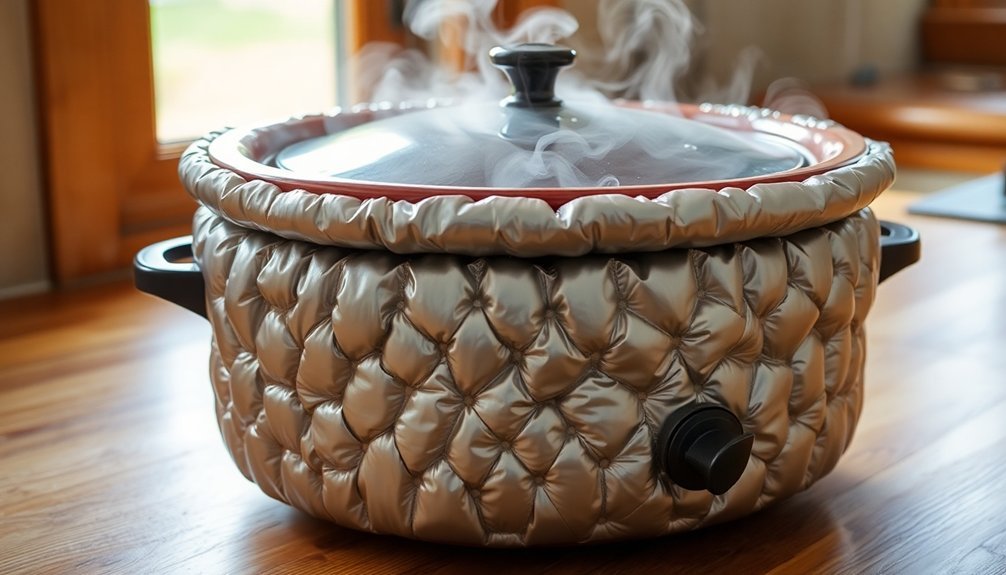
Essential Equipment and Materials
Now that you understand the basics of heat retention, let's focus on the tools and materials you'll need for successful slow-cooking.
You'll find several effective options, from traditional slow cookers to vacuum-insulated containers.
Slow cookers offer convenience with their built-in heating elements and tight-fitting lids, maintaining temperatures between 180°F and 210°F.
For a more portable solution, consider high-quality thermal cookers or vacuum bottles, which can keep food hot for up to 12 hours.
Many thermal cookers feature programmable settings and timers to make meal preparation even more convenient.
You can also create your own insulated container using an ice chest or military surplus bag.
For insulation, you've got multiple choices: fiberglass for consistent heat retention, reflective materials like aluminum foil to bounce back heat, or vacuum insulation for maximum efficiency.
Don't forget simple solutions like dry newspaper, cardboard, or blankets can work too.
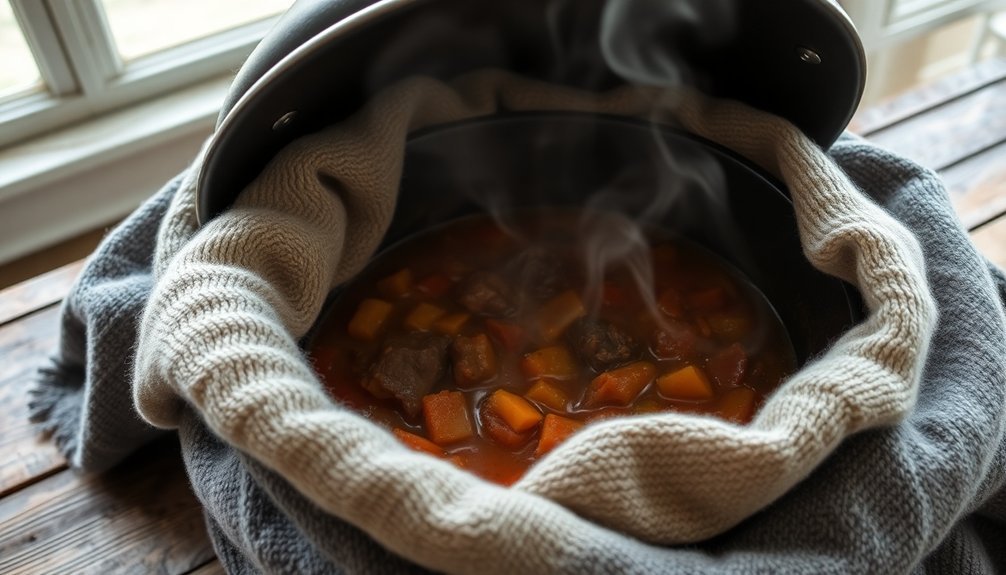
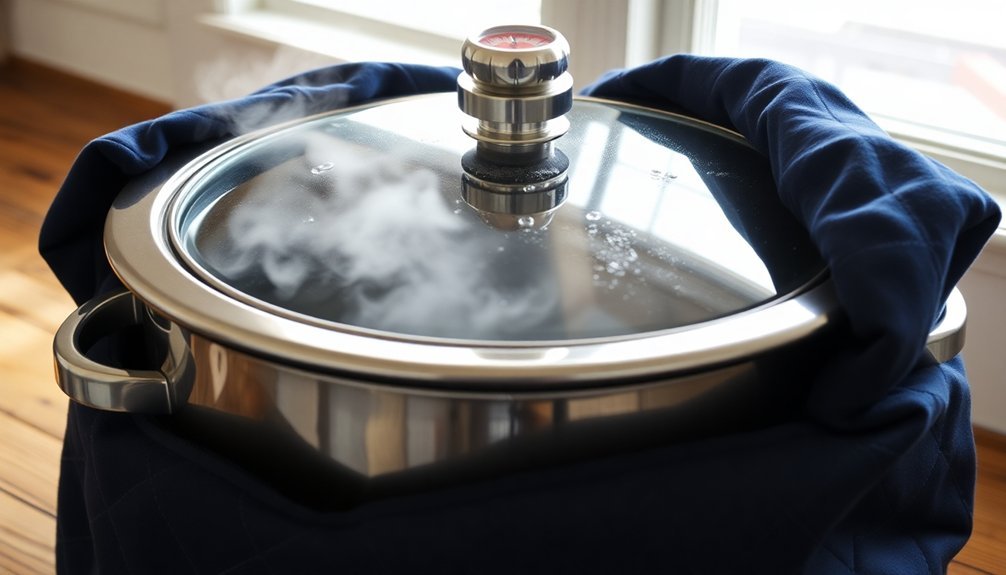
Preparing Your Thermal Cooker
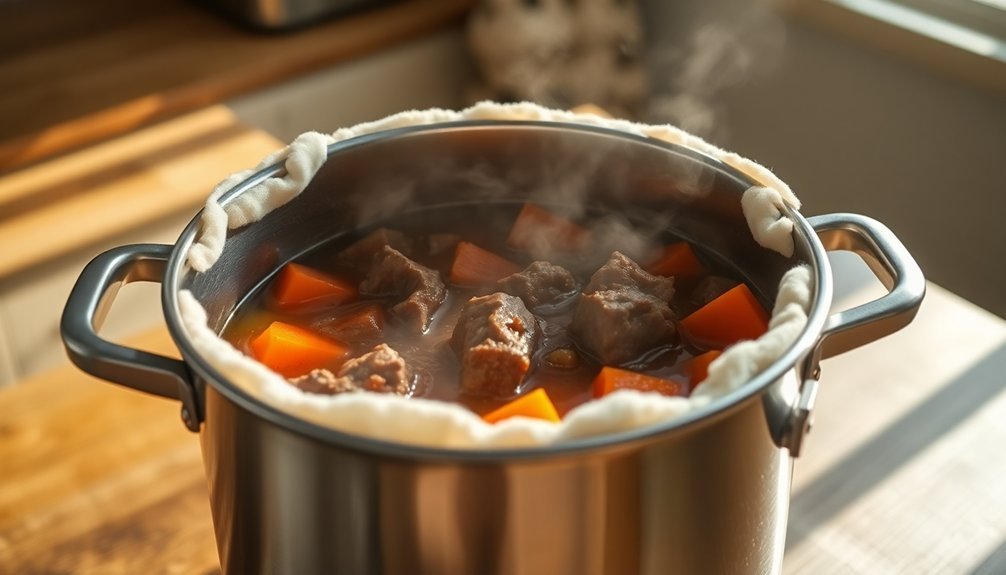
Proper preparation of your thermal cooker starts with a few essential steps to maximize heat retention and cooking efficiency. You'll need to bring your food to a vigorous boil and guarantee it's thoroughly heated before transferring it to the insulated container. Use enough liquid to maintain consistent heat, and don't forget to thaw frozen ingredients completely beforehand. Up to 8 hours of unattended cooking time can be achieved with proper preparation.
| Step | Action | Purpose |
|---|---|---|
| 1 | Full boil | Achieve maximum heat |
| 2 | Quick transfer | Minimize heat loss |
| 3 | Tight lid | Seal in heat |
| 4 | Pack insulation | Create thermal barrier |
Once your food is boiling, quickly transfer it to your thermal cooker while it's still hot. Pack the insulating materials tightly around the pot, using blankets, towels, or straw to fill any gaps. Remember, the fuller your cooker is, the better it'll maintain temperature throughout the cooking process.
Safe Food Temperature Guidelines
Understanding food temperature safety is essential for thermal cooking success. You'll need to monitor your food closely as it passes through the danger zone (41°F to 135°F), where bacteria multiply rapidly.
Using a clean kitchen area before preparing meals helps prevent foodborne contamination.
For your thermal cooking to be safe, make sure meats reach their proper minimum temperatures: 165°F for poultry and stuffing, 155°F for ground meats, and 145°F for whole muscle meats and seafood.
When you're using a thermal cooker, you'll want to maintain hot foods at 135°F or above during the cooking process. If your food temperature drops below this point, you'll need to reheat it to 165°F for 15 seconds.
Remember to cool any leftovers quickly – from 135°F to 70°F within two hours, then to 41°F within six hours total – and store them in shallow containers.
Best Foods for Thermal Cooking
Your thermal cooker will excel at creating rich soups and hearty stews that benefit from long, slow cooking times and gentle heat.
You'll get excellent results with legumes and grains, which need extended cooking periods to reach the perfect texture and tenderness.
For the most satisfying meals, try tough cuts of meat that transform into tender, flavorful dishes through the slow braising process.
Soups and Hearty Stews
When it comes to thermal cooking, soups and hearty stews stand out as ideal candidates due to their liquid-rich nature and slow-cooking requirements.
You'll find that these dishes benefit greatly from the thermal cooker's ability to retain heat and moisture while breaking down tough meat fibers into tender, flavorful bites.
To achieve the best results with your soups and stews, you'll need to:
- Bring all ingredients to a rapid boil before transferring them to the thermal cooker
- Fill the pot to maximum capacity to guarantee efficient heat retention
- Keep the lid closed throughout the cooking process to maintain consistent temperature
Your favorite recipes, from chicken and potato stew to hearty beef and pumpkin combinations, will turn out perfectly tender and nutrient-rich.
You won't need to worry about burning or overcooking, as the insulated design maintains ideal cooking conditions.
Legumes and Grains
Like soups and stews, legumes and grains excel in thermal cooking environments, making them perfect candidates for this heat-retention method. You'll need to multiply standard cooking times by three when using thermal cooking, while reducing water content by 25% to prevent sogginess. Pre-soak your legumes overnight to break down phytic acid and maximize nutrient absorption.
| Legume/Grain | Standard Time | Thermal Time | Water Ratio | Tips |
|---|---|---|---|---|
| Lentils | 25 min | 75 min | 1:2.25 | No pre-soak needed |
| Chickpeas | 75 min | 225 min | 1:3 | Soak overnight |
| Black Beans | 60 min | 180 min | 1:3 | Quick-soak option |
| Brown Rice | 45 min | 135 min | 1:1.5 | Rinse until clear |
| Quinoa | 20 min | 60 min | 1:1.5 | Rinse thoroughly |
For best results, bring your ingredients to a full boil before transferring to your insulated container. You'll get tender, perfectly cooked legumes and grains while preserving their nutritional benefits.
Tender Braised Meats
Braised meats stand out as prime candidates for thermal cooking, especially since the low-and-slow method naturally tenderizes tough cuts.
You'll find that cuts like brisket, chuck roast, and pork shoulder transform into succulent, fork-tender dishes when braised between 200°F and 300°F. Using a Dutch oven or slow cooker, you'll want to sear your meat first to develop a flavorful crust before adding your choice of liquid.
- Beef chuck roast becomes perfectly tender after 3-4 hours, making it ideal for heat retention cooking
- Short ribs need 2-3 hours at 300°F, developing rich flavors as they cook
- Pork shoulder shreds easily after 4-6 hours, absorbing all the aromatic flavors from your cooking liquid
Remember to keep your cooking vessel tightly covered to trap moisture and maintain consistent temperature throughout the braising process.
Energy Saving Kitchen Methods
You'll find significant energy savings in your kitchen by matching pot sizes to burners and keeping lids on during cooking to trap valuable heat.
Your smart heat storage approach should include turning off the heat a few minutes before food is done, letting the retained warmth complete the cooking process.
Make the most of thermal cooking techniques by wrapping pots in insulating materials to maintain cooking temperatures for hours while using minimal power.
Minimize Kitchen Power Usage
When it comes to minimizing power usage in your kitchen, smart appliance choices and cooking techniques can dramatically reduce your energy consumption.
Switch to induction cooking for its impressive 84% efficiency rate, and opt for convection ovens that use 20% less energy than conventional ones. You'll also save power by using microwaves and toaster ovens for smaller portions instead of heating up your main oven.
- Keep your refrigerator at ideal temperatures (37-40°F) and make sure it's full but not overcrowded to maintain efficiency.
- Match pot sizes to burner sizes and use lids to retain heat, turning off the heat 2-3 minutes early to use residual warmth.
- Install CFL bulbs for task lighting and turn off exhaust fans promptly after use to prevent unnecessary energy waste.
Smart Heat Storage Solutions
Smart heat storage solutions revolutionize kitchen efficiency by transforming traditional cooking methods into energy-saving powerhouses.
You'll need an outer container with proper insulation that can handle temperatures up to 100°C, paired with a thin metal cooking pot and tight-fitting lid.
To maximize heat retention, fill your pot to capacity and reduce water usage by 25%.
You can create DIY solutions using polystyrene boxes or invest in modern vacuum-insulated containers that lose only 8-10 degrees per hour.
These systems work like large-scale thermoses, keeping your food at cooking temperature for 8-10 hours with minimal energy input.
Whether you're making bread, slow-cooked meats, or overnight oatmeal, you'll achieve tender, moist results while cutting fuel costs.
Just remember to multiply standard cooking times by three.
Traditional Heat Retention Practices
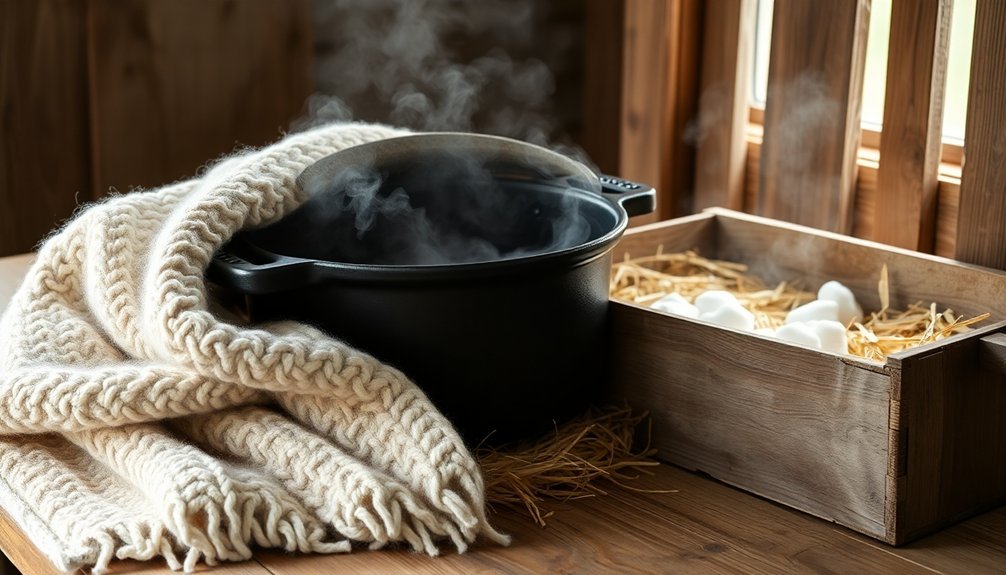
Long before modern cooking methods emerged, heat retention cooking served as a practical solution for preparing meals while conserving fuel and time.
Medieval farmers mastered this technique by nesting their hot cooking pots in hay bales while working in the fields, while households used special wooden boxes lined with insulating materials.
You'll find these traditional practices remarkably effective when you use:
- Heavy, squat-shaped pots made of cast iron or sturdy stainless steel
- Natural insulators like hay, straw, or wool blankets, packed 50-100mm thick
- Tight-fitting lids with sealed steam holes to lock in heat
The process requires bringing food to a full boil before transferring it to your insulated container.
You'll need to reduce water by 25% and expect cooking times to triple, but you'll be rewarded with tender, flavorful results.
Common Mistakes to Avoid
Despite the simplicity of heat retention cooking, several common mistakes can undermine your results. When you're using a slow cooker, proper filling and layering are essential. You'll want to fill your pot halfway to three-quarters full and layer root vegetables at the bottom for ideal heat distribution.
| Issue | Problem | Solution |
|---|---|---|
| Filling | Overfilling/underfilling | Fill 1/2 to 3/4 full |
| Moisture | Excess condensation | Line lid with paper towels |
| Liquid | Too much liquid | Cook on high, lid off |
| Layering | Uneven cooking | Put roots at bottom |
| Monitoring | Poor results | Follow recipe timing |
Don't let excess moisture ruin your dishes – line the lid with paper towels to absorb steam. If you've added too much liquid, reduce it by cooking on high with the lid off. Remember, ingredients release their own liquids during cooking, so you'll need less than you might think.
Recipes for Thermal Cooking
While thermal cooking may seem intimidating at first, you'll find it's perfect for a wide variety of delicious meals. From hearty chilis and pot roasts to flavorful curries and jambalaya, you can create satisfying dishes that retain their nutrients and moisture.
Start by thoroughly heating your ingredients on the stove for 10 minutes, then transfer them quickly to your thermal cooker to maintain the temperature.
- Try coconut curry chicken with vegetables, using a combination of coconut cream and chicken broth for rich flavor
- Make tender pulled meats for tacos by slow-cooking beef, pork, or chicken with Mexican seasonings
- Cook rice dishes in the top compartment while preparing beans, soups, or stews below
You'll discover that thermal cooking works especially well for one-pot meals like spaghetti sauce, corned beef, and unstuffed cabbage.
Emergency Cooking Without Power
When preparing for power outages, you'll want to create simple DIY heat storage solutions like hay box cookers and insulated thermal containers using common household materials such as blankets, newspaper, or straw.
For safety, always keep a thermometer handy to monitor food temperatures and guarantee proper ventilation when using alternative cooking methods indoors.
Planning ahead means stocking up on essential supplies like portable butane stoves, tea lights, and insulation materials while familiarizing yourself with multiple cooking techniques before an emergency strikes.
DIY Heat Storage Solutions
In times of emergency power outages, having reliable DIY heat storage solutions can mean the difference between a warm meal and going hungry.
You'll get ideal results by creating a thermal mass setup using bricks or stones around your alcohol stove. This combination allows heat to be stored and released gradually, extending your cooking capabilities well beyond the stove's burn time.
- Stack bricks horizontally around your stove setup for stability and maximum heat absorption
- Position your cooking vessel directly above the heat source, surrounded by the thermal mass
- Keep at least 10 feet of clearance from flammable materials while maintaining proper ventilation
When you're using 91% isopropyl alcohol, you'll get hotter temperatures, though 70% provides longer burn times.
The stored heat in your brick setup will continue warming your space even after the flame dies down.
Thermal Cooking Safety Tips
Safe thermal cooking practices go hand-in-hand with your DIY heat storage setup.
Always wear close-fitting sleeves when handling hot containers, and keep your cooking area clear of flammable materials. Don't leave your thermal cooking setup unattended, and use timers to track cooking progress.
If you're using alternative heat sources, only operate camp stoves, grills, or charcoal-based equipment outdoors.
For indoor cooking, stick to approved fuel sources in fondue pots or chafing dishes. Keep a fire extinguisher nearby, but not close to heat sources.
Ensure food safety by cooking ingredients to proper internal temperatures and preparing only what you'll eat in one sitting.
Clean all utensils and surfaces with hot, soapy water before and after use. If storing leftovers, use a cooler with ice and consume within 24 hours.
Plan Ahead Power Outages
Power outages need not disrupt your ability to prepare hot meals if you've planned ahead. You'll want to stock up on alternative cooking methods and essential supplies before an emergency strikes. Consider purchasing portable butane stoves, propane grills, or even exploring solar cooking options for outdoor meal preparation.
- Keep manual kitchen tools, extra fuel containers, and non-perishable foods readily accessible.
- Store pre-cooked and no-cook food options like peanut butter, crackers, and canned goods.
- Practice emergency cooking techniques during camping trips or backyard cookouts.
Remember to prioritize safety by never using outdoor cooking equipment indoors, as this can lead to carbon monoxide poisoning.
Store your fuel sources properly, keeping propane cylinders outside in an upright position. With proper planning, you'll maintain your ability to prepare hot meals during extended power outages.
Frequently Asked Questions
Can I Use Multiple Small Containers Instead of One Large Container?
Yes, you can use multiple small containers in your slow cooker. It's perfect for cooking smaller portions, and you'll get even results. Just make sure your containers are oven-safe and fit properly inside.
How Do I Clean and Sanitize Hay-Insulated Cooking Boxes?
Empty your haybox and remove insulation. Clean the interior with mild detergent, sanitize with warm water, and thoroughly dry all components. Don't forget to wash and completely dry the insulating material before reassembling.
Will Thermal Cooking Affect the Texture of Rice and Pasta?
Yes, thermal cooking will affect your rice and pasta textures. You'll get softer rice when properly insulated, but you'll need to watch pasta carefully since it's more prone to becoming mushy through thermal cooking.
Can Frozen Ingredients Be Used Directly in Thermal Cooking?
You shouldn't use frozen ingredients directly in thermal cooking. They'll lower the pot's temperature, affect cooking efficiency, and create food safety risks. Instead, thaw or pre-heat your ingredients before adding them to guarantee proper cooking.
Does Altitude Affect Cooking Times in Thermal Cookers?
Yes, altitude will affect your thermal cooking times. Since water boils at lower temperatures in high altitudes, you'll need to extend initial heating time and possibly insulation time to achieve proper cooking temperatures.
In Summary
Thermal cooking offers you an energy-efficient way to prepare delicious meals while maintaining food safety. You'll save time and money by mastering these heat retention techniques, whether you're using a modern thermal cooker or traditional methods. Keep experimenting with different recipes and insulation materials, and don't forget to monitor those critical food temperatures. With practice, you'll become an expert at this sustainable cooking approach.


Leave a Reply