Solar baking works exceptionally well for gluten-free bread because it creates the perfect environment for these sensitive loaves. You'll find that the slow, steady heat between 200-375°F provides gentle, even baking that helps develop proper structure without the harsh temperature fluctuations of conventional ovens. The solar oven's natural moisture retention prevents your gluten-free dough from drying out too quickly, while the consistent temperature allows proper binding of alternative flours and starches. This controlled environment lets you achieve the ideal texture and rise that gluten-free breads need. Understanding these unique conditions will open your path to successful gluten-free baking.
The Science Behind Solar Ovens

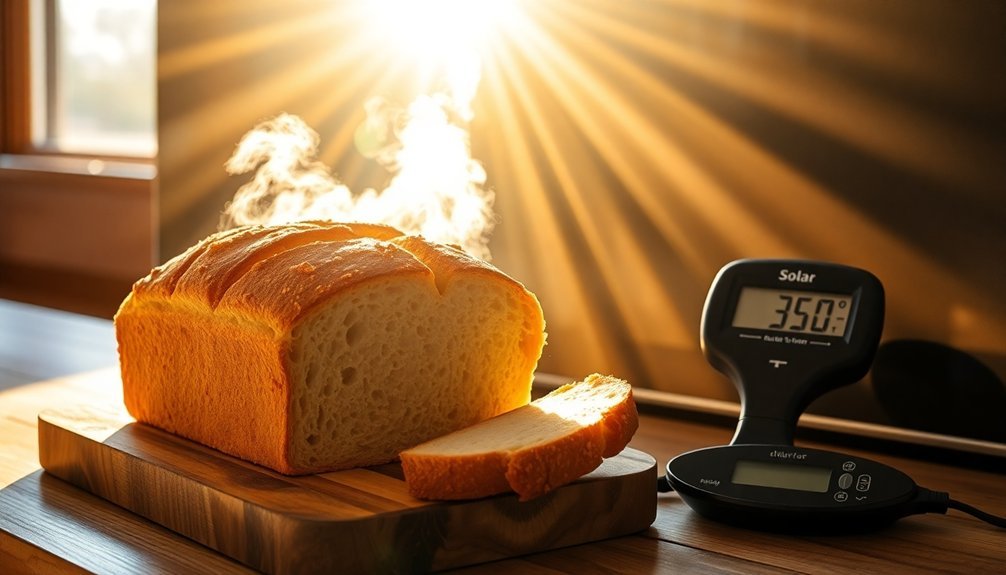
Your solar oven can reach temperatures up to 200°F (93°C) on sunny days, which is perfect for baking bread.
To maintain these temperatures, you'll need to adjust the reflector's position as the sun moves across the sky. The best time for baking is between 11 am and 3 pm.
Using a thermometer helps you monitor the internal temperature, ensuring you're maintaining the ideal heat needed for proper bread baking.
Understanding Gluten-Free Flour Properties
When working with gluten-free flours, understanding their unique properties is essential for successful solar baking. Each type of flour brings distinct characteristics that affect your bread's texture, structure, and nutritional content.
You'll need to blend different flours strategically to achieve the finest results in your solar oven, as no single gluten-free flour can perfectly replicate traditional wheat flour's properties.
For ideal solar baking, you'll want to focus on moisture retention and proper binding. Potato starch and tapioca flour act as excellent binders while improving your bread's texture. You can enhance elasticity by incorporating xanthan gum, which becomes particularly important when baking in solar ovens where temperature control may vary. Pseudocereal flours like amaranth and buckwheat can provide exceptional nutrient density to your solar-baked bread.
- Rice flour provides versatility and a mild flavor base, making it an excellent foundation for your gluten-free bread blends.
- Millet flour adds nutritional value with its high protein and fiber content, plus helps maintain structure.
- Legume flours boost protein content and can improve browning in solar-baked bread.
Remember that gluten-free doughs may require additional liquid and shorter proofing times compared to traditional bread recipes, especially when baking with solar energy.
Moisture Control Benefits

Controlling moisture effectively in solar-baked gluten-free bread offers three key advantages: improved texture, extended shelf life, and enhanced flavor development.
You'll find that solar baking's slow, even heating process helps you maintain ideal moisture levels throughout the baking cycle. When you combine this with moisture-retaining ingredients like honey, brown sugar, or liquid sweeteners, you're creating a perfect environment for your gluten-free loaf.
The lower temperatures in solar ovens prevent rapid moisture loss, which is essential since gluten-free flours typically require more liquid than traditional wheat flour. A tablespoon of honey helps create ideal moisture retention while adding subtle sweetness to your bread.
To maximize these benefits, you'll want to use a combination of binding agents. Xanthan gum or psyllium husk will form gel-like substances when mixed with water, while ground flaxseeds can help trap moisture within your bread.
The addition of tapioca or potato starch further aids in maintaining proper hydration levels.
Solar baking's controlled environment works particularly well with these moisture-retention strategies. You can enhance the process by using oiled plastic wrap or parchment paper during rising and baking, ensuring your bread maintains consistent moisture levels from crust to center.
Temperature and Heat Distribution
Beyond moisture management, successful solar-baked gluten-free bread depends heavily on proper temperature control and heat distribution. Your solar oven can achieve and maintain temperatures between 275-375°F (135-190°C), which is perfect for baking gluten-free bread.
You'll need to preheat the oven for 30 minutes and adjust its position every half hour to track the sun's movement, ensuring consistent heat throughout the baking process.
The unique heating mechanism in solar ovens relies on radiation and conduction, supported by insulation and reflective materials. While you won't get the same browning as conventional ovens, solar baking can still produce excellent gluten-free bread in 1-2 hours.
The even heat distribution is particularly beneficial for gluten-free recipes, which require uniform temperatures for proper structure.
- Track the sun's position every 30 minutes to maintain steady temperatures around 275°F (135°C)
- Check for doneness by measuring the bread's internal temperature of 190°F (88°C)
- Use the oven's reflective surfaces and insulation to maximize heat retention and distribution
Remember that warmer ambient temperatures will enhance your solar oven's efficiency, so plan your baking accordingly.
Perfect Rising Conditions

You'll find that maintaining steady heat in your solar oven creates the ideal environment for gluten-free bread to develop a strong internal structure.
Adding moisture through a water pan and covering your bread with a damp cloth prevents the dough from drying out and collapsing during the rise.
Taking advantage of longer rise times, especially overnight in cooler temperatures, helps your gluten-free bread develop better flavor and texture.
Steady Heat Supports Structure
The gentle embrace of a solar oven provides ideal rising conditions for gluten-free bread, maintaining steady temperatures that are fundamental for proper structure development.
You'll find that solar ovens preheat and maintain high temperatures through periodic refocusing, ensuring your bread reaches the best internal temperature of 200-205°F without developing hot spots or uneven baking areas.
When you're baking gluten-free bread, timing is essential. The solar oven's controlled environment prevents over-rising before baking, helping preserve the bread's structure and shape.
You'll achieve better oven spring, which is critical for the final volume and texture of your loaf, as the gentle heat distribution supports the starch matrix in your gluten-free creation.
- The fogged glass indicator tells you when your bread is approaching doneness, ensuring perfect timing
- Solar ovens use free, renewable energy while offering time-efficient baking
- You can use them as slow cookers by focusing where the sun will be later
This consistent heat approach gives you more control over the baking process, reducing the risk of undercooked or overcooked areas while supporting proper starch gelatinization throughout your loaf.
Moisture Prevents Collapse
Managing moisture levels precisely in your gluten-free solar bread prevents the dreaded post-bake collapse and creates ideal rising conditions. You'll need to maintain a 1:2 ratio of liquid to dry ingredients while accounting for environmental factors like humidity and altitude. Using hydrocolloids can help stabilize your dough and manage moisture distribution effectively.
| Factor | Challenge | Solution |
|---|---|---|
| Proofing | Risk of overrise | Monitor dough height closely |
| Temperature | Uneven baking | Use solar oven's steady heat |
| Moisture | Excess wetness | Follow precise liquid ratios |
Your choice of pan plays a vital role in moisture management. Glass pans retain heat differently than metal ones, affecting how your bread bakes. You'll want to guarantee your pan is tall enough to support the dough's rise without allowing overflow. When using your solar oven, you'll likely need to extend baking times slightly compared to conventional methods, but this slower baking actually helps prevent collapse by allowing moisture to distribute evenly. Use an instant-read thermometer to verify your bread is fully baked internally, as proper doneness is essential for structural integrity.
Longer Rise Time Benefits
Building on proper moisture management, successful gluten-free solar baking often benefits from extended rise times that create perfect conditions for dough development. You'll find that solar baking naturally provides a gentle, consistent warmth that's ideal for longer proofing periods, allowing your gluten-free dough to develop properly without overheating.
During extended rise times, you'll want to create an ideal environment that supports slow, steady fermentation. This means maintaining humidity with a shallow pan of water and covering your dough with a damp towel. Your solar setup can provide the perfect low-temperature environment, typically around 200°F, which prevents over-rising while maximizing flavor development.
- Overnight rises in cool conditions strengthen the dough's cell structure and enhance texture
- Slower fermentation develops more complex, sourdough-like flavors
- Extended proofing allows gluten-free flours to fully hydrate and stabilize
You can maximize these benefits by monitoring the dough's progress and adjusting its position in your solar oven to maintain consistent temperature.
Remember to let the dough rise until it reaches the pan's rim before proceeding with baking, ensuring ideal volume and structure.
Essential Equipment for Success
Successful solar baking requires a specific set of equipment to achieve ideal results when making gluten-free bread. You'll need a solar oven like SunOven® or GoSun Sport that can maintain consistent temperatures, along with appropriate non-reflective, lidded pans that fit your oven's dimensions.
Make sure to oil your baking pans and line them with parchment paper to prevent sticking. A reliable thermometer is essential for monitoring your bread's internal temperature, which should reach 200-205°F for gluten-free varieties.
You'll want to watch for fogged glass in your solar oven, as this indicates your bread is approaching completion. Keep black kitchen towels handy to cover any reflective surfaces and enhance heat absorption.
When using your solar oven, you'll need to preheat it and refocus periodically to maintain ideal temperatures. Don't worry if your bread doesn't brown as much as it would in a conventional oven – internal temperature is your key indicator of doneness.
Remember to adjust your baking times based on weather conditions, as passing clouds can affect your oven's performance.
Flour Blending Techniques

You'll need to start with the right ratios of primary and secondary flours, typically using a mix of whole grain flours like sorghum or brown rice flour combined with lighter starches such as tapioca or potato starch.
When blending your flours for solar baking, aim for a balanced mix of about 60% whole grain flours to 40% starches to achieve ideal texture and structure.
Your choice of complementary grains matters greatly, as each flour type brings unique properties to your gluten-free blend, with whole grains providing strength and nutrition while starches contribute lightness and moisture retention.
Creating Perfect Flour Ratios
Getting the right flour blend lies at the heart of successful gluten-free bread baking in a solar oven. You'll need to balance your grain-to-starch ratios carefully to achieve the perfect texture and structure that traditional gluten would normally provide.
Working with a combination of primary flours, secondary flours, and starches helps create a blend that'll perform well in the unique environment of a solar oven.
Start with your base ingredients, focusing on rice flours for structure and sorghum flour for strength and rising properties. You'll want to incorporate starches like tapioca and cornstarch to provide tenderness and binding. Don't forget to add xanthan gum as an essential binding agent that helps hold everything together.
- Mix equal portions of different starches (potato and tapioca) to optimize your blend's performance
- Use a stand mixer to thoroughly combine all ingredients, ensuring consistent distribution
- Store your custom blend in airtight containers, preferably in the refrigerator for extended shelf life
Remember to adjust your ratios based on specific recipe requirements and the desired outcome of your solar-baked bread. Different proportions will affect how your bread performs in the solar oven's distinctive heating environment.
Combining Complementary Grain Properties
Through careful selection and blending, complementary grain properties create the foundation for exceptional gluten-free bread in solar ovens.
You'll need to combine different flours like brown rice, white rice, and tapioca to achieve the ideal texture that solar baking demands. The consistent, gentle heat of solar ovens works particularly well with these balanced flour combinations.
When you're blending flours for solar baking, you'll want to focus on both structure and binding properties.
Add starches like potato or cornstarch to provide lightness, while incorporating binders such as xanthan gum to maintain dough integrity during the solar baking process. Ground flaxseeds or eggs can serve as additional binding agents, helping your bread hold together in the solar oven's unique heating environment.
You can maximize nutritional benefits by including whole grain gluten-free flours in your blend.
Each flour contributes its own distinct flavor profile – for instance, brown rice flour adds a nutty taste.
Store your custom blend properly to maintain its effectiveness, and remember that you can adjust the ratios based on specific recipe needs and solar baking conditions.
Time Management Strategies
Successful solar baking requires careful time management to guarantee your gluten-free bread turns out perfectly.
You'll need to plan your baking schedule around peak sunlight hours and implement time-blocking strategies to confirm you're maximizing solar energy efficiency. By conducting a time audit of your baking process, you can identify the best times for mixing, proofing, and baking your gluten-free bread.
To streamline your solar baking process, batch similar tasks together and break down the baking project into manageable steps.
You can use the Pomodoro technique to maintain focus during critical phases, such as dough preparation and monitoring the baking progress. Remember to schedule specific times for checking your bread's progress while minimizing distractions that could lead to timing errors.
- Set up a daily baking schedule that aligns with peak sunlight hours (typically 10 AM to 2 PM)
- Use time-blocking to coordinate mixing, proofing, and baking phases
- Create a checklist system to track each stage of the baking process
Achieving Ideal Texture

Solar baking's slow, consistent heat gives you a significant advantage in managing moisture retention for your gluten-free bread, as the extended cooking time allows binders and gums to fully activate.
You'll find the even heat distribution from a car shade solar cooker creates a more uniform structure throughout the loaf, eliminating common issues like dense spots or undercooked centers.
The gentle, 2-3 hour rise time lets your gluten-free flour combinations and binding agents work together more effectively, resulting in a better-textured final product.
Moisture Retention Benefits
Inside a solar baker, maintaining ideal moisture levels proves crucial for achieving the perfect gluten-free bread texture. With hydration requirements exceeding 100%, solar baking's gentle heat helps activate hydrocolloids like psyllium husks, flax seeds, and chia seeds, which absorb significant amounts of water to create a stable network.
You'll find that this controlled environment helps prevent moisture loss while allowing the bread to develop properly.
The solar baker's consistent temperature, typically lower than conventional ovens, works perfectly with gluten-free bread's need for longer baking times. You'll notice that this slower baking process allows moisture-retaining ingredients like eggs, butter, and olive oil to work effectively, preventing your bread from becoming dry or crumbly.
- Hydrocolloids can absorb up to ten times their weight in water, creating the gel-like structure you need for proper bread development.
- The solar baker's steady temperature prevents rapid moisture evaporation, crucial for the 120-130% hydration required in gluten-free bread.
- Your bread's interior stays moist while developing a proper crust, thanks to the solar baker's ability to maintain consistent humidity levels.
This moisture retention system guarantees your gluten-free bread maintains its structure and remains fresh longer.
Even Heat Distribution
The key to perfect gluten-free bread lies in achieving uniform heat distribution throughout the baking process. Solar ovens, with their large silver mirrors and reflective surfaces, capture and concentrate the sun's rays to maintain consistent temperatures between 275-375°F, ideal for gluten-free baking.
You'll need to track the sun's movement by adjusting your solar oven every 30 minutes, ensuring the shadow is evenly distributed on both sides. This tracking, combined with rotating the oven's turntable every 15-30 minutes, helps maintain steady temperatures and prevents hot spots that could affect your bread's texture.
Your choice of bakeware greatly impacts heat distribution. Use lidded, non-reflective pans to retain heat and steam effectively. Cover your casseroles with foil and a black kitchen towel to minimize reflection and promote even heating. Opt for deeper, shorter pans for best heat retention.
Monitor your bread's progress by checking for steam or fog on the oven's glass. For gluten-free bread specifically, you'll want to verify that the internal temperature reaches 200-205°F.
Remember to adjust baking times based on external temperatures and sun intensity for the best results.
Slow-Rise Structure Advantage
Baking gluten-free bread up into a proper structure requires mastering the slow-rise technique in your solar oven. You'll find that using pulverized flax seeds, rice flour, and quinoa flour creates a stable structure without relying on gluten for elasticity.
The steel-cut oat starter, when mixed with water and yeast, develops over 8 hours to provide the ideal fermentation base.
Your mixing sequence plays an essential role in achieving the best texture. By keeping dry and wet ingredients separate until the final mix, you'll prevent premature activation and maintain better control over the rise.
The solar oven's consistent heat application works perfectly with this method, allowing for thorough baking at 200-205°F.
Key elements for successful slow-rise structure:
- Create a frothy starter using steel-cut oats and maintain it through regular use and refrigeration
- Mix flax seed gelatin with rice and quinoa flours for optimal texture without gluten
- Use non-reflective pans with lids to trap steam and maintain steady heat distribution
This controlled approach prevents over-rising and collapse, common issues in gluten-free baking, while developing superior flavor through extended fermentation.
Testing For Doneness
When preparing gluten-free bread in a solar oven, testing for doneness requires a combination of precise temperature readings and careful observation.
You'll want to use an instant-read thermometer like a Thermapen, inserting it into the bottom of the loaf while avoiding contact with the pan. Your target internal temperature should be 200-205°F in a solar oven.
Since solar ovens typically require longer cooking times, you'll need to maintain temperature by refocusing the oven periodically. You can also rely on visual cues, such as checking if the glass steams up, which indicates your bread is approaching completion.
While traditional tests like the hollow thump aren't as reliable for gluten-free bread, you can still use the poke test to check if the dough springs back slowly.
To guarantee peak results, use non-reflective, lidded pans to trap heat and steam.
Don't let the bread rise before placing it in the solar oven, as this can cause it to fall.
While it's difficult to burn bread in a solar oven, you'll still want to avoid over-baking, which can result in a tough, dry texture.
Frequently Asked Questions
Can Solar-Baked Gluten-Free Bread Be Frozen and Reheated Successfully?
Yes, you can successfully freeze and reheat your solar-baked gluten-free bread. Just cool it completely, slice before freezing, wrap properly, and store for up to seven months. Reheat in your microwave or toaster.
Does Altitude Affect the Solar Baking Process for Gluten-Free Bread?
Yes, altitude markedly affects your gluten-free solar baking. You'll need to adjust leavening agents, monitor dough rise carefully, and expect longer baking times due to lower atmospheric pressure and variable sun exposure.
What Happens if Clouds Appear During the Solar Baking Process?
When clouds appear during your solar baking, you'll notice slower baking times and temperature drops. Your bread's rise may slow down, and you'll need to extend baking time or consider backup heating methods.
Are There Specific Seasons Best Suited for Solar Baking Gluten-Free Bread?
You'll find summer is your best season for solar baking gluten-free bread, with its long, sunny days. Spring and fall can also work well, but you'll need to plan around shorter daylight hours.
Can Solar-Baked Gluten-Free Bread Develop a Crispy Crust Like Conventional Bread?
Yes, you'll get a crispy crust on your solar-baked gluten-free bread. The solar oven's high temperatures trigger the Maillard reaction and caramelization, creating that desirable crunch you're looking for on your loaf.
In Summary
You'll find solar baking works exceptionally well for gluten-free bread because of its gentle, consistent heat distribution and superior moisture retention. The slower baking process allows your alternative flours to properly hydrate and gelatinize, creating better structure without gluten's support. When you're using a solar oven, you're taking advantage of the perfect balance between temperature control and gradual moisture release, resulting in a superior gluten-free loaf.


Leave a Reply