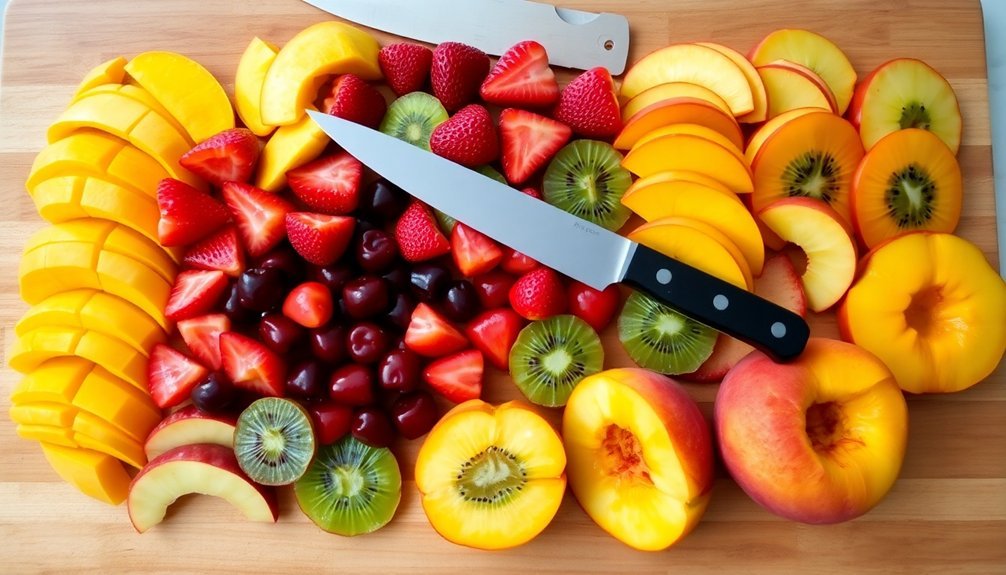
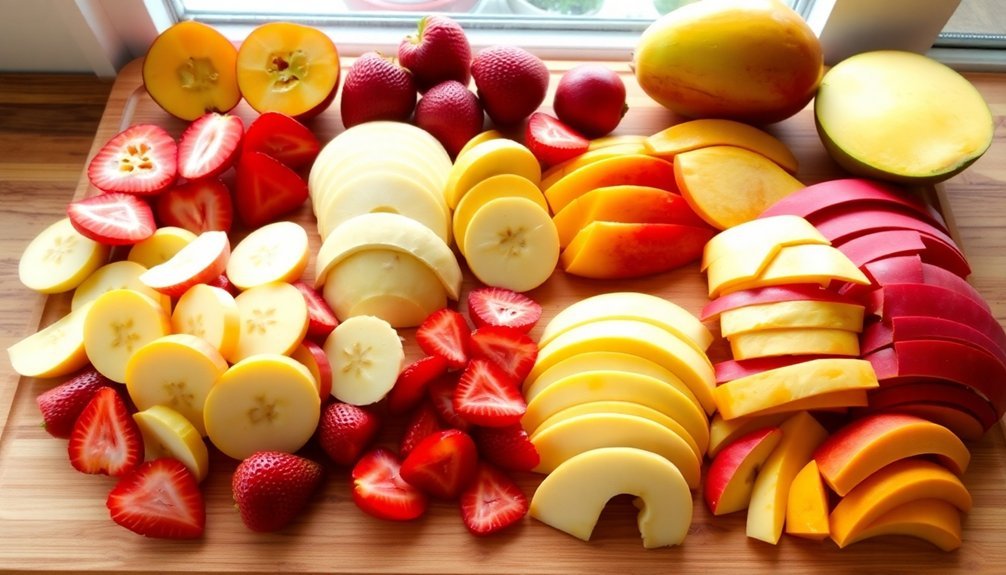
You'll need to prep all fruits before solar dehydration for the best results. Start by washing your hands and cleaning all fruits thoroughly under cool running water. Remove any damaged spots, stems, pits, or cores. Cut fruits into uniform slices around 1/8 inch thick for even drying. Most fruits like apples and pears need pretreatment with lemon juice or ascorbic acid to prevent browning, while berries and grapes benefit from fruit juice solutions. Don't skip peeling thicker-skinned fruits like apples and pears, but leave thinner skins on if desired. These essential prep steps create the foundation for successful fruit dehydration.
Essential Food Safety Guidelines
Following proper food safety guidelines is critical when dehydrating fruits using solar power. You'll need to start by thoroughly washing your hands and guaranteeing all your workspace, utensils, and cutting boards are clean before handling any produce.
Use stainless steel knives to prevent contamination, and keep separate utensils for different fruits to avoid cross-contamination.
When cleaning your fruits, wash them thoroughly but don't soak them in water, as this can promote bacterial growth. You'll want to inspect each piece carefully and discard any fruit showing signs of spoilage or mold. The solar dryer's ability to reach temperatures above 160°F ensures proper food safety during the dehydration process.
Remember that cleanliness extends to your drying equipment too – make sure your solar dehydrator and drying racks are sanitized before use.
As you prepare the fruits, maintain proper food handling practices throughout the process. Keep your work surface clean, and don't let prepared fruit sit at room temperature for extended periods.
When using pretreatment solutions like ascorbic acid or citric acid, follow recommended concentrations and soaking times precisely. Monitor drying temperatures carefully to guarantee they're high enough to destroy harmful bacteria while preserving the fruit's nutritional value.
Best Fruits for Solar Drying
When you're planning your solar drying projects, you'll want to start with fruits that have high water content like apples, grapes, and pears, as they'll dry consistently and produce excellent results.
Your easiest options include apricots and bananas, which require minimal preparation and maintain their flavors well during the drying process. For optimal results, ensure your drying environment maintains temperatures above 86°F for effective preservation.
These beginner-friendly choices will help you master solar drying techniques before moving on to fruits that need special preparation, such as cherries and plums.
High-Water Content Options
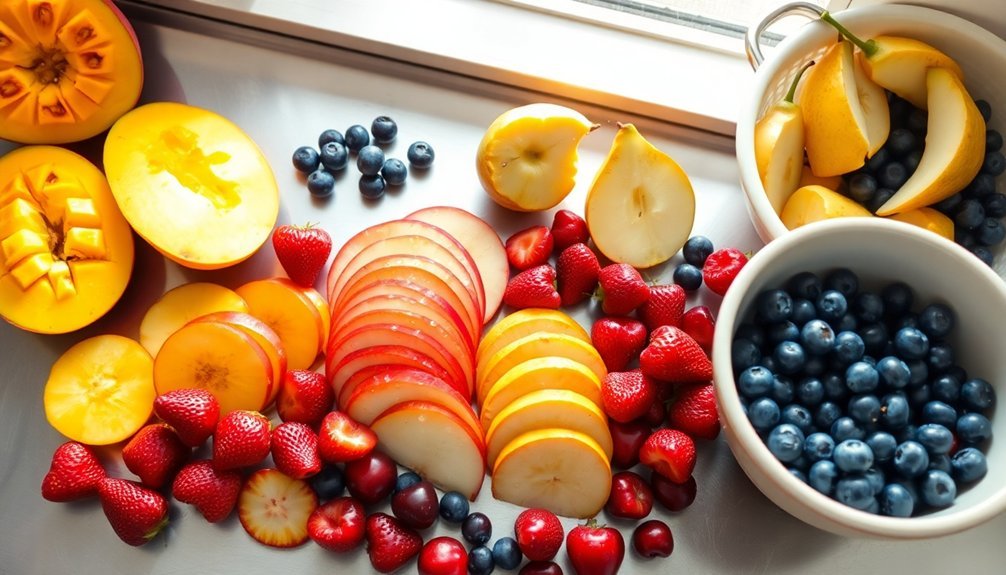
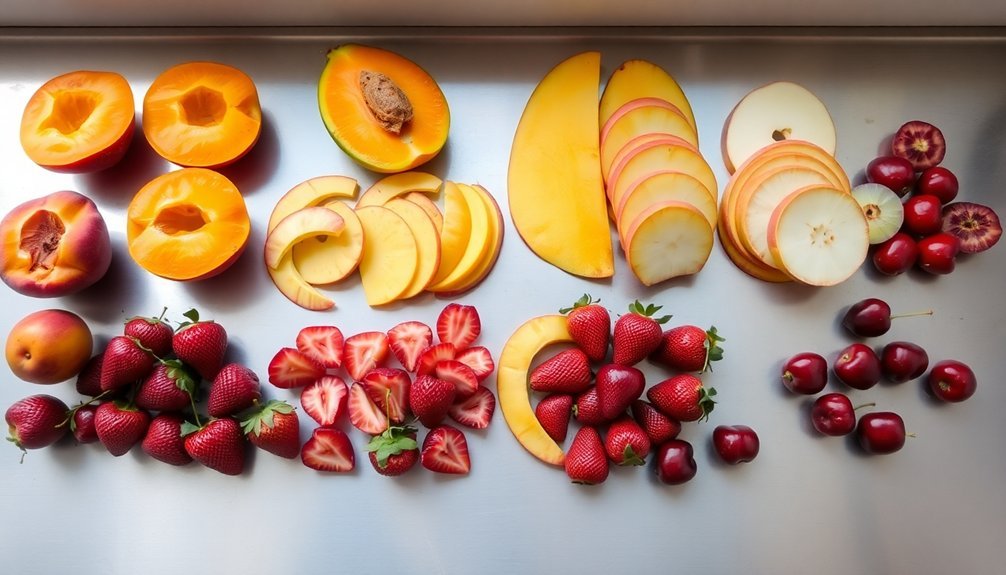
Selecting the right fruits for solar dehydration can make or break your drying success. You'll want to focus on fruits with high water content, such as apples, peaches, and berries, guaranteeing they're fresh and fully ripened. Don't use overripe or underripe fruits, as they won't dry properly and may affect the final quality.
Before you begin drying, you'll need to pretreat your fruits. Light-colored fruits require dipping in ascorbic acid, citric acid, or lemon juice to prevent darkening. For tough-skinned fruits like grapes and cherries, pretreatment is essential, while soft-skinned berries need antimicrobial solutions to guarantee safety. Properly dried and stored fruits can last up to 5 years when prepared correctly.
| Fruit Type | Water Content | Pretreatment Method |
|---|---|---|
| Apples | High | Ascorbic acid dip |
| Berries | Medium-High | Antimicrobial solution |
| Peaches | Very High | Citric acid dip |
For best results, maintain temperatures above 85°F with relative humidity below 60%. You'll need steady airflow to remove moisture effectively. Expect drying times of 2-4 days under ideal conditions. The process helps retain 15-20% moisture content while preserving most nutrients, though some vitamin C loss is normal.
Easy-to-Dry Fruit Choices
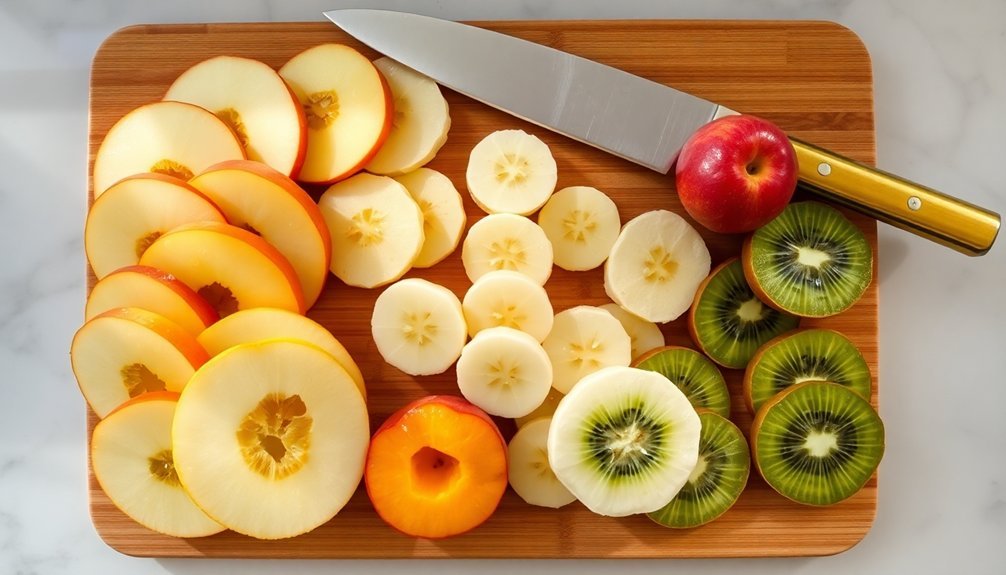
Now that you understand water content requirements, let's focus on fruits that excel in solar drying. You'll find that apples, bananas, and pears consistently rank among the easiest fruits to dry, requiring minimal preparation before the dehydration process. Simply core and slice apples and pears into rings or wedges, and cut bananas into uniform coins or chips.
While some fruits dry perfectly without pretreatment, others benefit from simple preparation steps. You'll want to treat apples and pears with lemon juice or ascorbic acid to prevent browning, while peaches and apricots might need a quick blanching to maintain their color and enhance texture.
For uniform drying, verify you're slicing all fruits consistently.
When you're looking for quick results, strawberries, blueberries, and grapes are excellent choices. Their natural size and structure allow for efficient drying. You can dry strawberries in halves, keep blueberries whole or halved, and transform grapes into raisins within 2-3 days.
These fruits also offer versatility in their dried form – you can incorporate them into trail mixes, baked goods, or enjoy them as standalone snacks.
Initial Fruit Cleaning Steps
Before you begin solar dehydrating fruits, you'll need to properly clean your produce and equipment using soap and warm water for your hands and tools.
Rinse all fruits thoroughly under cold running water while using a clean vegetable brush to gently remove dirt and debris.
Make certain your work surface and any cutting boards are sanitized, and remember to inspect your fruits for any signs of damage or decay before proceeding with the preparation process.
Basic Sanitization Practices
Proper sanitization stands as the cornerstone of safe fruit dehydration.
You'll need to wash your hands thoroughly with soap and warm water before handling any produce. Start by rinsing your fruits under cold running water, making sure to remove all dirt and contaminants. Don't soak the fruit, as this can lead to excess moisture that'll slow down the drying process.
Before you begin preparation, clean all your tools and work surfaces with soap and warm water. You'll want to inspect your dehydrating trays and storage containers, confirming they're clean and free from debris.
Keep your preparation area away from potential contamination sources.
Examine each fruit carefully for any blemishes or soft spots that need removal. You should cut away damaged areas and remove stems if necessary. While peeling is optional for some fruits, make sure all cut pieces are uniform in size for even drying results.
Set up your drying area in a well-ventilated space, protected from direct sunlight if needed. You'll need to guard against insects and animals during the drying process, and remember to bring your fruit indoors overnight to prevent moisture from evening dew.
Produce Brush Techniques
A sturdy produce brush serves as your essential tool for thorough fruit cleaning. When selecting your brush, choose one with soft to medium bristles specifically designed for produce, and make sure it's clean and well-maintained. Replace your brush regularly to prevent cross-contamination and maintain peak cleaning effectiveness.
You'll want to start by rinsing your fruits under cold running water to remove loose debris. Don't soak your produce, as this can lead to bacterial growth. Instead, hold the fruit under the running water while you work with your brush. Apply gentle pressure as you scrub, being careful not to break the skin or cause bruising.
Pay special attention to areas where dirt is visible, making certain you clean all surfaces thoroughly.
Once you've completed the brushing process, drain your cleaned fruits well. Place them in a clean container while you prepare for the next steps. You can now move on to peeling, slicing, or removing inedible parts like pits and seeds.
Remember to maintain consistent sizes when cutting to make sure of even drying in your solar dehydrator.
Equipment Cleanliness Steps
Essential preparation begins with stringent equipment cleanliness to guarantee safe food handling during the dehydration process.
You'll need to thoroughly inspect and select your fruits before starting any cleaning procedures. Choose ripe, firm fruits without decay, bruises, or mold, and make sure they're free from pests and diseases.
Start by washing your fruits under cool running water to remove dirt and contaminants. You'll want to use a brush for thick-skinned fruits like oranges to ensure thorough cleaning.
After washing, either pat the fruits dry with a clean towel or let them air dry completely before cutting.
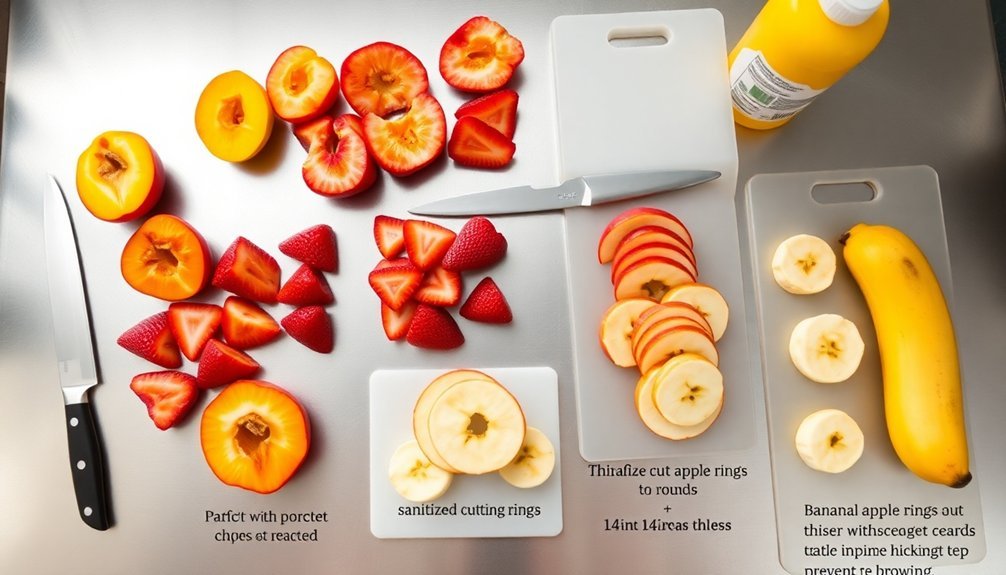
When you're ready to cut, slice the fruits uniformly, typically less than 1/2 inch thick, removing any seeds, pits, or cores.
For best results, you'll need to pretreat your fruits using solutions like ascorbic acid, citric acid, or a mixture of 1 part lemon juice to 4 parts water.
Soak the fruit pieces for 10 minutes in your chosen solution, then remove them with a slotted spoon and drain well before proceeding with the dehydration process.
Peeling Different Types of Fruits
Preparing fruits for solar dehydration starts with understanding their unique peeling requirements.
When handling apples and pears, you'll want to peel them to achieve better drying results. Though it's optional, removing the skin helps prevent tough texture and allows moisture to escape more efficiently during the dehydration process.
For stone fruits like apricots, you've got more flexibility. While you must remove the pits, peeling is your choice. If you're seeking faster drying times and more uniform results, go ahead and peel them. However, you can still achieve good results with the skin on, especially if you're not concerned about appearance.
When it comes to bananas and tropical fruits, you'll need to remove the skin as it's not typically consumed. Peeling guarantees even drying and better results once you've sliced the fruit.
For citrus fruits, you'll take a different approach. If you're drying the peels themselves, don't remove any additional layers. Instead, clean them thoroughly and dry them intact to preserve their natural oils and aromatic properties.
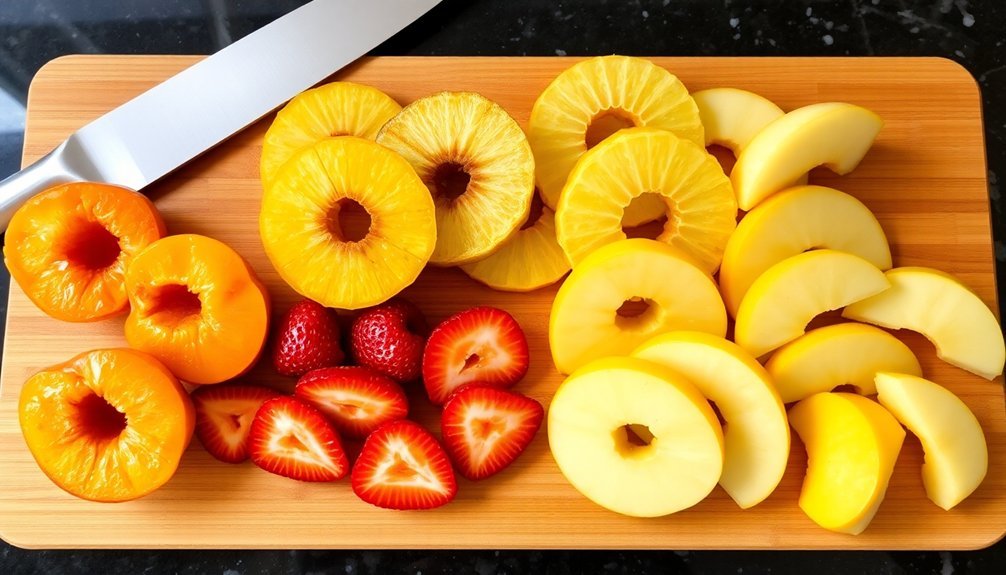
Proper Slicing Techniques
When you're slicing fruits for solar dehydration, maintaining uniform thickness around 1/8th of an inch guarantees even drying and consistent results.
You'll want to cut against the grain of firmer fruits while using a sharp knife with a steady grip to prevent slipping or accidents.
Keep your fingers tucked away from the blade as you work, and let the weight of the knife do most of the cutting work for safe, controlled slicing.
Uniform Size For Results
Success in solar food dehydration depends heavily on how you slice and prepare your fruits. When you're cutting fruits for dehydration, you'll need to guarantee each piece is uniform in size and thickness. This consistency is vital because it allows all pieces to dry at the same rate, preventing some from becoming overly dry while others remain too moist.
You'll want to cut your fruits into specific shapes that work best for each type. For instance, you can slice apples into rings, wedges, or chips of equal thickness, while bananas work well as coins or chips.
As you arrange the pieces on your drying trays, make sure they're in a single layer without touching or overlapping. This spacing allows proper air circulation around each piece.
Don't forget to pretreat your fruits before drying. You can use an acidic solution like lemon juice or ascorbic acid to maintain color and reduce oxidation.
Once your fruits are dried, you'll need to condition them by storing them loosely in airtight containers for several days, shaking daily to distribute any remaining moisture evenly. If you notice condensation forming, your fruits need additional drying time.
Cut Against The Grain
The proper slicing technique for fruit dehydration starts with cutting against the grain – a method that preserves texture and promotes even drying. When you cut your fruits this way, you'll maintain their natural flavor while making certain they don't break apart during the dehydration process.
It's crucial to use sharp tools like a mandoline or knife to achieve uniform thickness and proper orientation.
To achieve the best results, you'll need to adapt your cutting technique based on the fruit type. For instance, you should core apples before slicing them into 1/8 to 1/4 inch rings, while bananas require 1/8 inch slices after peeling.
Fruits with tough skins, like grapes and cherries, need their skin cracked before slicing.
- Cut fruits perpendicular to their fiber direction to maintain structural integrity
- Make sure all slices are of equal thickness for consistent drying times
- Use proper tools and cutting boards with guides to maintain consistent angles
Remember that proper cutting techniques will speed up your dehydration process through better air circulation and heat distribution. Your goal is to achieve uniform dryness across all pieces, which starts with consistent, against-the-grain cuts.
Safe Knife Handling Tips
Proper knife handling forms the foundation of safe fruit preparation for solar dehydration.
You'll need to maintain sharp knives, as dull blades increase your risk of accidents and give you less control while cutting fruit. Consider using a professional knife sharpening service to guarantee ideal cutting edges for your kitchen tools.
When slicing fruits, always use a stable cutting board and select the right knife for the specific fruit you're preparing.
Keep your fingers tucked in a claw position while holding the fruit, and rock the knife blade from front to back in a controlled motion. You'll want to position the fruit with a flat side down to prevent it from rolling during cutting.
Store your knives in a designated knife block or sturdy sheath when not in use, and never leave them loose in drawers or submerged in sink water.
When carrying knives through your kitchen, point the blade downward and maintain awareness of your surroundings. If a knife falls, step back and let it drop – never attempt to catch it.
Keep your cutting area clean and clutter-free to prevent accidents while preparing fruits for dehydration.
Natural Pretreatment Solutions
Natural pretreatment steps play an essential role in preserving your fruits' color, flavor, and nutritional value during solar dehydration. You'll find several effective solutions that you can easily prepare at home using common ingredients.
Lemon juice serves as one of the most accessible pretreatment options – simply mix one part juice with four parts water and soak your fruit slices for 10 minutes. If you're looking for alternatives, you can use ascorbic acid (vitamin C) mixed with water or citric acid solutions. These acidic treatments are particularly effective in preventing browning and maintaining the fruit's original appearance.
- For apples and pears: Use a mixture of lemon juice and water to prevent darkening and preserve the light color.
- For berries and grapes: Try fruit juice pretreatment to enhance flavor while maintaining color.
- For apricots and other stone fruits: Apply ascorbic acid solution for best results.
When applying these pretreatments, make sure you're coating all fruit pieces evenly using a slotted spoon.
You don't typically need to rinse the fruit afterward, but you should let excess solution drain off before moving forward with the dehydration process.
Chemical Pretreatment Methods

Chemical pretreatment methods offer up several scientifically proven solutions for preserving fruit quality during solar dehydration. You'll find these treatments particularly effective at preventing browning, retaining nutrients, and guaranteeing food safety during the drying process.
| Treatment Type | What You Need to Know |
|---|---|
| Sulfite Dip | Mix ¾-1½ tsp sodium bisulfite per quart of water; soak 5-15 mins; not recommended for asthmatics |
| Ascorbic Acid | Use powder or tablets in water solution; safer than sulfites but less effective; boosts vitamin C |
| Acidic Solution | Hot acidic bath suppresses enzyme activity; use citric or ascorbic acid mixtures |
| Sulfur Solutions | Prevents microbial growth; maintains vitamins A and C; can combine with other treatments |
| Combined Methods | Mix treatments for enhanced preservation; guarantees better food safety |
You'll want to choose your pretreatment method based on your specific needs. If you're concerned about browning, sulfite dips offer the longest-lasting protection. For those with health sensitivities, ascorbic acid provides a safer alternative. When food safety is your priority, sulfur solutions effectively combat harmful bacteria while preserving nutritional value. Remember to rinse and dry your fruit thoroughly after any chemical pretreatment.
Optimal Drying Temperatures
After preparing your fruits with the right pretreatment method, maintaining precise drying temperatures becomes your next key focus.
You'll want to keep temperatures between 120°F and 140°F for ideal results, as anything higher can cook your fruits instead of drying them, while lower temperatures might allow harmful bacteria to grow. The sweet spot for most fruits falls between 122°F and 131°F, guaranteeing proper dehydration without compromising quality.
When using a solar dehydrator, you'll need to monitor and control the temperature carefully.
Keep the rear door open to maintain proper airflow and prevent overheating, as solar dehydrators can reach up to 225°F on hot days. Remember that warm days of 85°F or higher work best for sun drying fruits.
For successful fruit dehydration, follow these essential temperature guidelines:
- Never exceed 140°F, as this can cook rather than dry your fruits
- Maintain consistent temperatures throughout the drying process to guarantee even results
- Check your dehydrator's temperature regularly, especially during peak sunlight hours, and adjust ventilation as needed
Humidity Control During Dehydration
While temperature control plays an essential role in fruit dehydration, managing humidity levels is equally important for success. You'll need to monitor the humidity carefully throughout the drying process using a hygrometer, as high humidity can slow down drying and potentially cause spoilage, while low humidity might lead to over-drying your fruits.
When using a solar dryer, you'll want to guarantee proper ventilation and air circulation. If you're using a direct solar dryer, be especially vigilant about humidity control since external conditions can greatly impact the drying environment. Remember to bring your fruit trays indoors during the evening to prevent rehydration from cool, moist air.
| Humidity Issue | Solution |
|---|---|
| High ambient humidity | Use indirect solar dryer |
| Moisture buildup | Increase ventilation |
| Evening dampness | Move trays indoors |
| Condensation in storage | Additional drying needed |
| Uneven moisture | Condition in airtight containers |
After drying, you'll need to condition your fruits by placing them in airtight containers for several days, checking regularly for condensation. If you spot any moisture inside the containers, return the fruit to the dryer for additional drying time. Use desiccant packets in your storage containers to maintain ideal humidity levels.
Air Circulation Requirements
Proper air circulation forms the backbone of successful solar food dehydration. You'll need to guarantee your solar dryer has adequate airflow through bottom intake vents and top exhaust vents to remove moisture-laden air effectively.
The natural convection process works by allowing cool air to enter from the bottom, heat up as it moves through the dryer, and exit through the top vents carrying moisture away from your fruits.
Your trays and racks play a significant role in maintaining ideal air circulation. Position them with even spacing and arrange fruits in a single layer, preventing them from touching each other. The mesh or screen material of your trays allows air to flow freely around each piece of fruit.
- Monitor air velocity using an anemometer to maintain the right balance – too much airflow can cool your dryer, while too little will slow down the drying process.
- Install solar-powered fans if natural convection isn't sufficient in your climate.
- Adjust vent openings throughout the day to control temperature and airflow, especially during peak sun hours.
Remember to protect your fruits from environmental contaminants by using transparent polycarbonate sheeting while still maintaining proper ventilation.
Common Fruit Preparation Mistakes
Many novice food dehydrators make critical mistakes during fruit preparation that can compromise their entire batch. One of the most common errors is cutting fruit slices too thick or unevenly, which leads to inconsistent drying and potential spoilage. You'll want to keep your slices under half an inch, with apple slices specifically at 1/4 inch thickness.
You're likely to run into problems if you skip the anti-browning treatment. While you might think it's just cosmetic, preventing oxidation helps preserve both flavor and nutritional value. Don't forget to soak your fruit in either a lemon juice solution (1 part juice to 4 parts water) or an ascorbic acid mixture for 10 minutes.
Another mistake is overlooking the importance of checking fruit skins. If you're drying fruits like peaches or plums whole or in halves, you'll need to crack their skins by briefly dipping them in boiling water followed by cold water. Without this step, moisture won't escape properly.
Similarly, if you're in a humid climate, skipping the sulfuring process can lead to inadequate preservation, so consider using a sodium bisulfite solution when necessary.
Safe Storage After Drying
Successfully storing your dehydrated fruits requires a critical conditioning period before long-term storage. After drying, you'll need to condition your fruits for 4-10 days by placing them in large containers filled two-thirds full. During this time, stir or shake the containers daily to redistribute moisture and check for any condensation, which signals the need for additional drying.
Once conditioning is complete, you'll want to package your dried fruits in airtight glass or plastic containers to prevent moisture and pest infiltration.
Before final storage, don't forget to treat your fruits for potential insect eggs by either:
- Heating them in the oven at 160°F for 30 minutes
- Freezing them at 0°F for 48 hours
- Checking thoroughly for any signs of infestation
For maximum shelf life, store your sealed containers in a cool, dark place, or better yet, in your freezer or refrigerator.
You should label each container with the date and contents, and plan to use your dried fruits within a year. Remember to regularly inspect your stored fruits for any signs of mold or pest activity, ensuring they remain safe to eat.
Quality Testing Dried Fruits
Essential quality testing of your dried fruits involves four critical components: chemical analysis, microbiological evaluation, sensory assessment, and label verification. You'll need to guarantee your dried fruits meet safety standards by testing for SO2 levels through titration or chromatographic methods, while checking for pesticides and heavy metals. For microbiological safety, conduct agar plating to detect harmful bacteria, yeasts, and molds.
| Test Type | What to Check |
|---|---|
| Chemical | SO2 levels, pesticides, heavy metals |
| Microbial | Bacteria, yeasts, molds, pathogens |
| Sensory | Color, texture, aroma, taste |
| Label | Ingredients, nutrition, dates |
| Storage | Packaging integrity, moisture levels |
Your sensory evaluation should focus on visual inspection for discoloration or mold, smell for off-odors, taste for proper sweetness and acidity, and texture assessment for appropriate leatheriness. Don't forget to verify your labels for accurate ingredient lists, nutritional information, best-before dates, and origin details. If you're claiming special characteristics like organic or gluten-free status, guarantee your documentation supports these claims. Remember to check that your packaging meets size and weight regulations while protecting the product's integrity.
Frequently Asked Questions
Can Dried Fruits Be Rehydrated for Use in Baking or Cooking?
Yes, you can easily rehydrate dried fruits for baking and cooking. Just soak them in water, juice, or hot liquid until they're soft. It'll take about 1-2 hours, depending on the fruit's size.
How Long Can Pretreated Fruits Sit Before Starting the Drying Process?
You'll want to start drying your pretreated fruits immediately, but if needed, they can sit for up to 10 minutes. If you must wait longer, store them in a sealed container in the refrigerator.
Does Altitude Affect Solar Drying Time for Pretreated Fruits?
Yes, altitude will affect your drying time. You'll find it takes longer at higher altitudes due to lower air pressure and humidity. Don't rush by increasing temperature, as this can cause case hardening.
Should Fruits Be Rotated or Flipped During the Solar Drying Process?
Yes, you'll need to rotate your fruit trays 180 degrees daily and flip individual pieces as needed for even drying. This prevents hot spots and guarantees uniform dehydration throughout your fruits during solar drying.
Can Different Types of Fruits Be Dried Together at the Same Time?
You can dry different fruits together if they have similar drying times. However, you'll need to keep fruits with varying thicknesses separate and guarantee proper air circulation between pieces on your dehydrator trays.
In Summary
You'll find that proper fruit preparation is essential for successful solar dehydration. Always wash, slice uniformly, and pretreat fruits that brown easily. Don't skip important steps like peeling thick-skinned fruits or removing pits. Remember to maintain adequate air circulation and test for dryness before storage. With these preparation techniques mastered, you're ready to create delicious, shelf-stable dried fruits at home.


Leave a Reply