To repair your leaky oven seal, you'll need to first inspect for visible damage like cracks, tears, or deformation. Gather basic tools including screwdrivers, pliers, and cleaning supplies, along with a replacement gasket that matches your model. After disconnecting power, remove the old seal by locating attachment points around the door frame, then clean the surface thoroughly. Install the new gasket by carefully aligning it in the door's groove and securing fasteners evenly without overtightening. Test the seal by checking for gaps and proper door alignment. Following a detailed step-by-step process will guarantee your repair's success and restore your oven's efficiency.
Understanding Oven Door Seals

Oven door seals serve as the vital barrier between your oven's interior and the kitchen environment.
These seals, typically made from high-temperature silicone rubber or woven fiberglass, guarantee your oven maintains consistent cooking temperatures while keeping heat, smoke, and steam safely contained.
You'll find several types of seals in modern ovens, including braided fiberglass with ceramic fibers and molded rubber compounds. Many manufacturers choose silicone adhesive to securely attach these seals to the oven frame.
Each type offers specific benefits, with silicone being the most common due to its flexibility, durability, and non-toxic properties.
The seal's primary functions include heat retention, energy efficiency, and maintaining cooking consistency.
When working properly, your oven's seal helps the appliance heat up quickly and maintain steady temperatures, resulting in better-cooked food and lower energy bills.
Understanding these components is important before attempting any repairs or replacements.
Recognizing Seal Damage
When your oven's seal begins to fail, several telltale signs will alert you to potential problems.
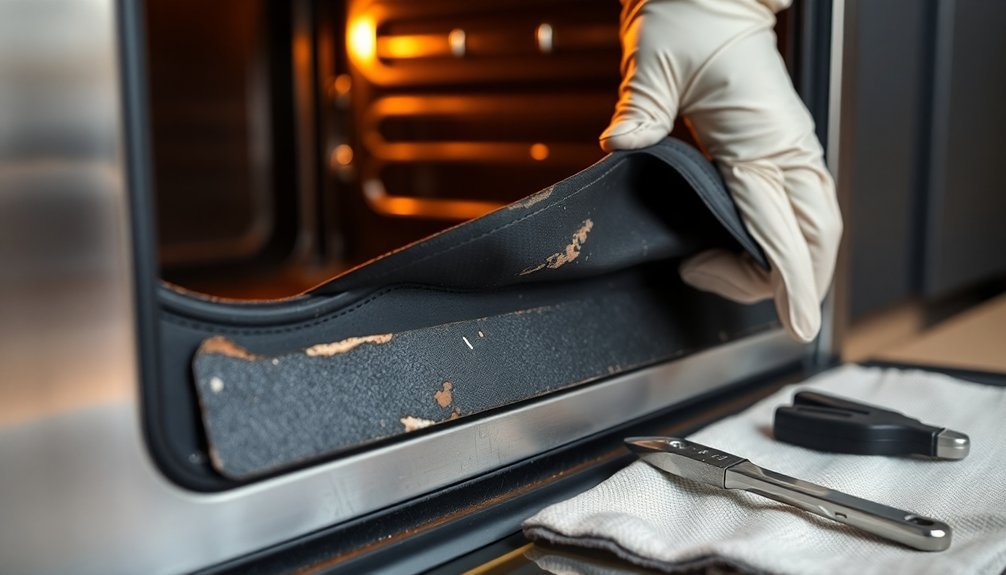
You'll notice visible damage like cracks, tears, or missing pieces in the gasket material. The seal might appear deformed or show significant wear around its edges.
Your cooking performance will suffer, and you'll spot problems with heat retention and energy efficiency. A faulty seal means your oven must work harder to maintain set temperatures. If you're experiencing any of these issues, inspect your oven seal carefully:
- Steam or smoke escaping around the door edges while cooking
- Longer cooking times and uneven heating of food
- Visible gaps between the door and oven frame
- Hot spots on the exterior of the oven door
Check for these warning signs regularly to maintain your oven's efficiency and prevent energy waste.
Early detection of seal damage allows for timely repairs before more serious issues develop.
Gathering Required Tools

Before starting your oven seal repair project, you'll need a specific set of tools to guarantee a successful replacement. Getting a kit with rounded metal connectors is essential for proper installation. Gather your tools into three main categories: hand tools, cleaning supplies, and measurement equipment.
| Essential Tools | Cleaning Items | Additional Supplies |
|---|---|---|
| Flathead screwdriver | Mild soap | Replacement seal |
| Needle-nose pliers | Non-abrasive cleaner | Tape measure |
| Adjustable pliers | Clean cloths | Utility knife |
| Standard pliers | Scrubbing sponges | Marking tool |
You'll use screwdrivers and pliers to remove the old seal, while cleaning supplies facilitate a proper surface for the new installation. Don't forget measuring tools to ensure precise fitting of the replacement seal. If your specific model requires it, you might also need high-temperature silicone sealant and a sealant gun for proper adhesion.
Removing Old Seal
Before you start working on your oven's seal, verify it's completely cool and disconnected from the power supply.
You'll need to locate all attachment points of the old seal, which are typically found around the door frame or inside the oven cavity.
After removing the old seal, thoroughly clean the surface to remove any residue, verifying proper adhesion for the new seal.
Safety First: Power Off
The three most critical safety steps for repairing your oven's seal start with powering off the appliance.
You'll need to switch off the power at the mains, verify the oven has completely cooled down, and disconnect it from the power source to prevent any electrical hazards.
Before you begin working on your oven seal, make certain you've created a safe working environment and have all necessary protective gear ready.
Follow these essential safety precautions:
- Clear your workspace of any clutter and verify proper lighting
- Put on protective gloves to handle materials safely
- Keep cleaning supplies and tools within easy reach
- Check that you're working in a well-ventilated area
Once you've completed these safety steps, you can confidently move forward with removing the old seal.
Find Seal Location Points
Now that you've established a safe working environment, locating your oven's seal points requires careful observation and attention to detail.
First, check your oven's frame and door to find the gasket, which typically sits in a channel along the frame or attaches directly to the door.
Look for the attachment method, which could be pins, clips, screws, or form-fitted designs. You'll need to identify these points to properly remove the old seal.
Check your owner's manual for specific guidance on your model, or locate the model number behind the main oven door for reference.
If you can't find documentation, examine the corners carefully – they often reveal how the gasket is secured.
Most seals are either held by visible hardware or tucked into a continuous channel around the frame.
Clean After Removal
Once you've removed the old seal, proper cleaning of the surface area becomes essential for ideal adhesion of the new gasket. Start by pulling out any remaining metal flanges and wiping away old seal residue with a clean cloth.
You'll need rubbing alcohol to remove stubborn residue, but avoid harsh abrasive cleaners that could damage the surface.
- Clean both the seal groove and surrounding area thoroughly with mild detergent if needed.
- Wipe down all metal fittings and insertion points where the new seal will connect.
- Verify the surface is completely dry to prevent moisture interference.
- Inspect the entire area for any remaining debris, grease, or food particles.
Test the cleaned surface by running your finger along the seal path to detect any remaining residue before proceeding with the new installation.
Installing New Seal

Start by aligning your new gasket carefully into the oven door's groove, making sure any metal pins or hooks line up with their corresponding holes.
You'll need to firmly press the gasket into place and secure any clips or fasteners that were previously removed.
Once installed, test the door's seal by closing it slowly to confirm the gasket sits flush against the oven frame without any visible gaps or loose sections.
Align New Gasket Correctly
Proper alignment of your new oven gasket begins with identifying the channel or groove where it'll be installed. Before starting, confirm you've got the correct gasket type and size for your oven model.
Check that the material matches your original gasket, whether it's fiberglass or rubber, to guarantee peak performance.
- Start from the top center or one end of the channel to maintain even installation.
- Press the gasket firmly into place, working your way around each corner.
- Use pliers to tuck ends into larger holes or push them together if needed.
- Check for gaps and misalignments as you progress.
If your gasket has specific fasteners like pins or clips, align these during installation.
When you're done, run your hand along the seal to verify proper seating. The door might feel stiff initially but will become more flexible with use.
Secure Clips and Fasteners
Before securing your new oven gasket, carefully inspect all the original fastening points where clips and screws will need to be reinstalled.
Replace each clip and screw in its proper location, working systematically around the door frame to guarantee even tension on the gasket.
Start at one end and work your way around, making sure each fastener is tight but not overtightened, as this could damage the new gasket.
If you're dealing with a pin-style gasket, align each pin with its corresponding hole, pressing firmly until you hear or feel it snap into place.
Once all fasteners are secured, test the door's movement to verify it opens and closes smoothly.
The gasket should create a uniform seal without any gaps or loose sections that could compromise your oven's efficiency.
Test Door Seal Fit
Testing your newly installed oven seal guarantees peak performance and energy efficiency.
You'll need to verify that the gasket fits properly and creates an airtight barrier between the door and frame. Close the door firmly and check for any visible gaps or uneven areas where heat might escape.
- Press the gasket firmly into its track around the entire door perimeter, ensuring it's seated securely and evenly.
- Pull the oven door gently – you should feel significant resistance, indicating a proper seal.
- Run your hand along the seal's edge while the door is closed to detect any spots where air might leak.
- Inspect the corners carefully, as these are common areas where gaps can form.
If you notice any issues, readjust the seal immediately before using your oven.
Maintenance and Testing
Regular maintenance of your oven seal guarantees peak performance and prevents heat loss during cooking.
Clean the gasket with mild soap and water using a soft cloth, and tackle stubborn grime with a soft-bristle toothbrush. Always dry the seal thoroughly after cleaning.
You'll want to inspect your oven seal regularly for signs of damage.
Run your fingers along the gasket's perimeter to check for cracks, breaks, or areas where it's becoming brittle or soft. Avoid using harsh chemicals or abrasive cleaners that can damage the seal.
To test the seal's effectiveness, close the oven door and run your hand along the edges to detect any gaps or air leaks.
Make sure the door's alignment and latches are functioning properly, as these affect the seal's performance.
Frequently Asked Questions
How Long Does a Typical Oven Door Seal Last Before Needing Replacement?
You'll typically need to replace your oven door seal every 3-5 years, but it depends on how often you use your oven and how well you maintain it. Regular cleaning and gentle handling extend its lifespan.
Can I Use Silicone Sealant Instead of a Manufacturer-Specific Oven Seal?
While you can use silicone sealant as a temporary fix, it's not recommended as a permanent replacement for a manufacturer's oven seal. You'll get better performance and safety using the proper manufacturer-specific seal.
Will a Damaged Oven Seal Affect the Accuracy of Cooking Temperatures?
Yes, your damaged oven seal will considerably affect temperature accuracy. You'll experience inconsistent cooking temperatures as heat escapes through the damaged seal, making it difficult for your oven to maintain the temperature you've set.
Is It Safe to Use the Oven While Waiting for a Seal Replacement?
You shouldn't use your oven with a damaged seal. It's unsafe due to gas leaks, heat escape, and carbon monoxide risks. You'll also waste energy and get poor cooking results while waiting for replacement.
Can Extreme Temperature Changes Cause Premature Seal Deterioration?
Yes, you'll notice that extreme temperature fluctuations can severely damage your rubber seals. They'll deteriorate faster than with constant temperatures because the repeated heating and cooling cycles stress the material's chemical bonds, causing premature failure.
In Summary
You'll find that replacing your oven door seal isn't as complex as it may seem. With the right tools and careful attention to detail, you can restore your oven's efficiency and prevent heat loss. Remember to test the new seal thoroughly and maintain it by keeping it clean and damage-free. When properly installed, your new oven seal will improve cooking performance and help reduce energy costs.


Leave a Reply