You'll discover endless possibilities for outdoor baking with these clever DIY pan hacks. Create custom shapes using heavy-duty aluminum foil, doubled up for stability. Transform orange peels into natural baking vessels for a subtle citrus kick. Repurpose cast iron skillets and Dutch ovens for excellent heat retention over campfires. Make portable pans by molding foil around existing containers, and use ceramic mugs or tuna cans for individual portions. Line your makeshift pans with parchment paper or silicone mats for easy food release. Position your setup in wind-protected areas and control flame size for even cooking. These simple techniques are just the beginning of your outdoor culinary adventures.
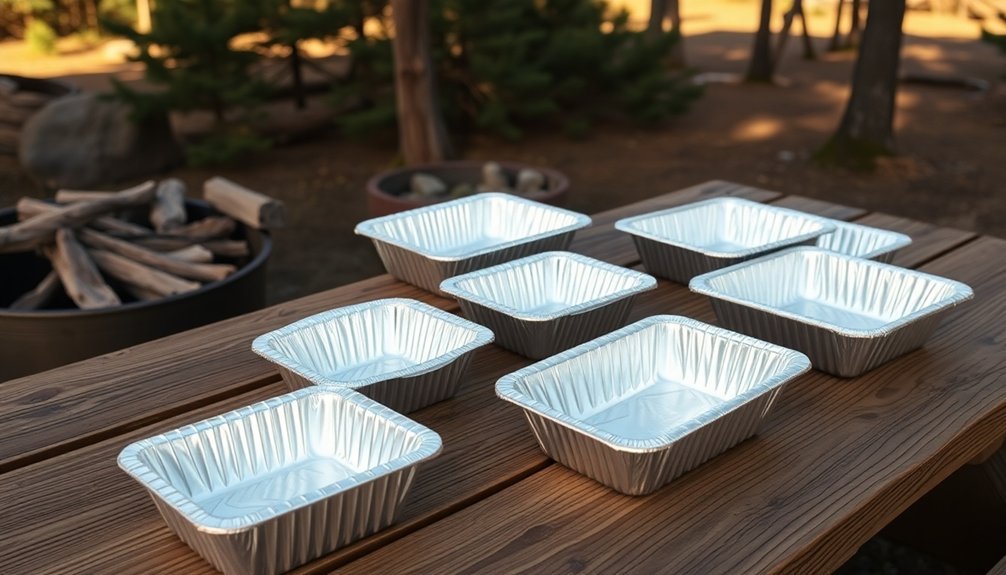
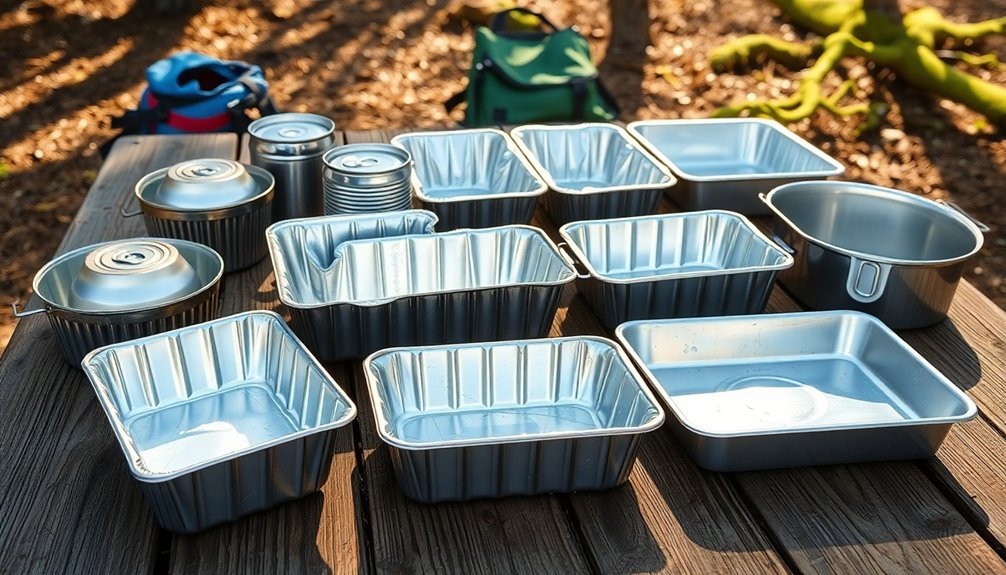
Custom Foil Pan Shapes
Ever wanted to create uniquely shaped cakes without buying specialty pans? You can craft custom-shaped foil pans using simple household aluminum foil.
For a heart-shaped pan, fold a long foil strip into a 2-4 inch high band, create the point by folding it in half, and join the top ends to complete the heart shape.
You'll find that geometric shapes like triangles and squares are equally manageable. Just shape the foil carefully and reinforce it with extra layers for stability. The heavy gauge aluminum construction of standard foil makes it strong enough to hold most batters securely.
To guarantee success, mold your foil around household items like bread pans or ramekins for consistent shapes. Don't forget to add rolled foil supports to brace the walls and prevent collapse during baking.
Remember to spray with non-stick coating or line with parchment paper before pouring in your batter.
Aluminum Emergency Baking Solutions
While aluminum bakeware offers quick solutions for emergency baking needs, it's important to address potential health risks from direct food contact.
You'll want to protect your food from aluminum leaching, especially when cooking acidic or salty dishes.
When you're in a pinch and need to use aluminum cookware, line your pans with parchment paper or silicone mats.
These barriers prevent direct contact while still allowing even heat distribution. Stoneware and glass bakeware are safer cooking alternatives. You can also create custom-sized baking spaces by making foil walls, secured with folded strips as braces.
Don't forget to line these temporary walls with parchment paper too.
For long-term safety, invest in silicone mats – they're BPA-free, reusable, and perfect for various baking tasks from cookies to pizza.
They'll save you money while keeping your food safe.
Natural Material Pan Alternatives
Moving beyond temporary aluminum solutions, natural material bakeware offers superior safety and durability for your kitchen.
You'll find cast iron pans provide exceptional heat retention and develop a natural non-stick surface when properly seasoned. They'll even boost your iron intake through cooking. Choosing cookware labeled PFAS-free ensures your food stays chemical-free during preparation.
For a lighter option, ceramic and porcelain bakeware distribute heat evenly and resist thermal shock, making them ideal for outdoor cooking.
If you're concerned about chemicals, both glass and stainless steel provide non-toxic alternatives that won't react with your food.
Glass excels at moisture retention for even baking, while stainless steel resists rust and offers lifetime durability.
These natural materials not only enhance your baking results but also guarantee you're cooking with safe, sustainable options that'll last for years.
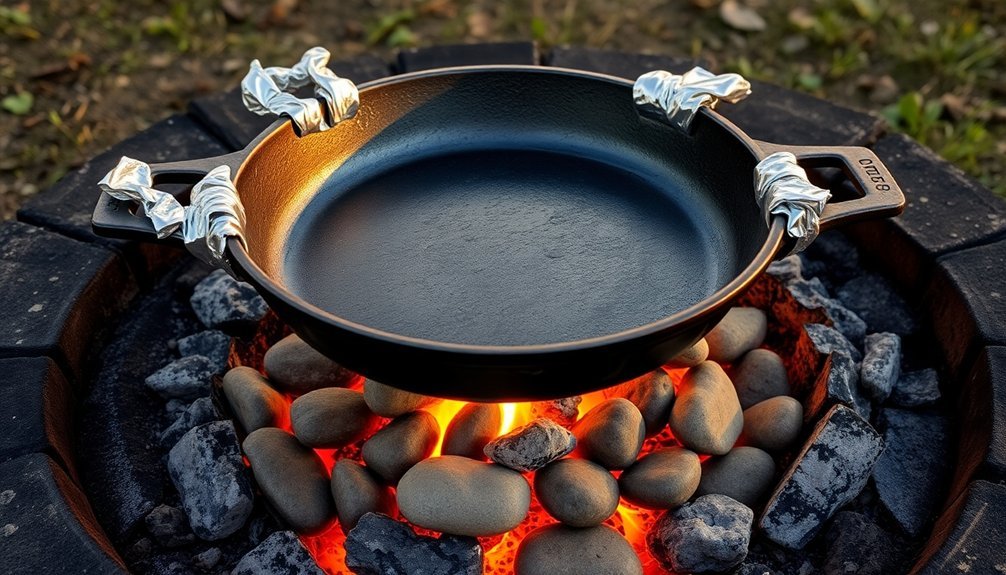
Campfire Pan Improvisation Techniques
You'll find quick foil pan assembly to be an essential skill when cooking over a campfire, as heavy-duty aluminum foil can be shaped into makeshift baking pans by folding and crimping the edges.
Your existing camp cookware, from dutch ovens to cast iron skillets, can pull double duty as baking vessels when placed on a stable platform of rocks or logs above the coals. For optimal heat control and stability, consider using a tripod setup that allows you to adjust the height of your cookware above the fire.
Quick Foil Pan Assembly
Whether you're camping in the wilderness or facing an emergency cooking situation, creating a makeshift foil pan can be a lifesaver. You'll need heavy-duty aluminum foil and a sturdy stick with a forked end as your basic materials. Start by stretching the foil across the fork, securing it firmly on both sides to create a stable cooking surface.
- Apply butter or oil to prevent food from sticking
- Use multiple foil layers for extra durability
- Confirm the fork spacing accommodates your food portions
- Rotate the pan regularly while cooking for even heat distribution
Hold your improvised pan over the campfire using fire-resistant gloves or tongs, and adjust the cooking time based on your food's requirements. This simple yet effective method lets you prepare hot meals when traditional cookware isn't available.
Repurposing Camp Cookware
Beyond makeshift foil pans, smart repurposing of everyday items can expand your campfire cooking capabilities.
You'll find treasure in old cookie tins, which you can transform into perfect spice and utensil holders for your outdoor kitchen.
Turn wine boxes into protective storage by lining them with soft material, ideal for delicate cookware.
Don't toss those old jeans – they're perfect for creating custom storage bags. Simply cut the legs, sew the bottom closed, and add a zipper for instant cookware protection.
When you're ready to cook, utilize natural materials to craft cooking rigs. Create a dingle stick by carving notches in a sturdy branch, or fashion a cooking crane from forked sticks to suspend your pots at the perfect height over your campfire.
Heat-Efficient Pan Design Methods
You can enhance your baking pan's heat efficiency by creating a double-wall design using two nested pans with a small air gap between them.
Adding layers of aluminum foil between the walls helps reflect and retain heat more effectively, similar to commercial insulated bakeware.
For best results, confirm the inner pan sits slightly elevated from the outer pan using small metal spacers or folded strips of aluminum foil.
Double-Wall Pan Construction
While traditional baking pans rely on single-wall construction, double-wall designs offer superior heat efficiency through innovative insulation methods.
You'll find these pans use materials like vermiculite between the walls, creating a barrier that reduces heat loss and speeds up cooking time by up to 50%.
You can create your own double-wall pan using these proven methods:
- Convert existing pots by adding insulation between custom-fitted walls
- Use brazing techniques to join thin aluminum sheets, though this requires skill
- Modify inexpensive cooking pans with simple wind-resistant modifications
- Apply space-inspired technology concepts for maximum heat retention
The benefits are significant – you'll save energy, cook faster, and maintain even heat distribution.
Double-wall construction also helps preserve nutrients in your food while making your cookware more durable and resistant to warping.
Heat-Retaining Foil Layers
Building on the double-wall pan concept, heat-retaining foil layers offer a simpler yet effective way to enhance your baking pan's thermal efficiency. You'll want to use heavy-duty aluminum foil and create multiple layers to maximize heat retention. When lining your pan, guarantee smooth contours in the corners for even heat distribution.
| Foil Layer Function | Benefits |
|---|---|
| Primary Contact | Direct heat conduction to food |
| Heat Distribution | Even cooking throughout |
| Insulation | Prevents heat loss |
| Moisture Barrier | Maintains proper humidity |
| Easy Removal | Simplifies food handling |
For outdoor cooking, you can twist foil into a cone shape to create a makeshift heat core, particularly useful for deep cakes. Remember to grease the foil's surface when the recipe calls for it, guaranteeing your baked goods don't stick.
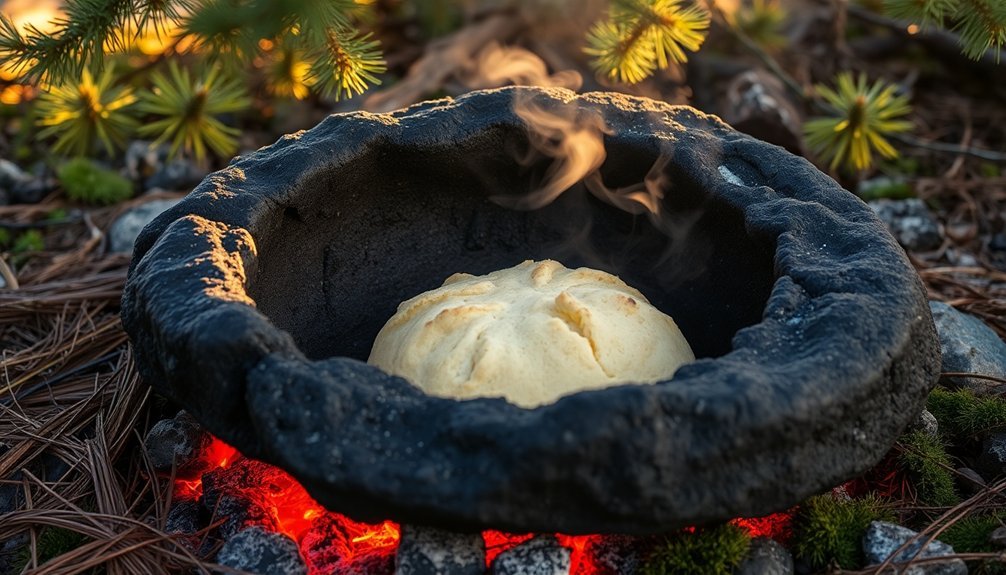
Orange Peel Baking Vessels
Resourceful bakers have discovered that orange peels make excellent natural baking vessels, particularly for outdoor cooking adventures.
Select oranges with thick peels, carefully remove the flesh, and save the top portion as a lid. You'll want to fill these natural molds about three-quarters full with your favorite cake or muffin batter, then wrap them tightly in foil.
- Place your wrapped orange vessels directly on hot coals for 10-12 minutes
- Test for doneness with a clean knife or toothpick
- Rotate the packages to guarantee even baking
- Allow space at the top for the batter to rise
The orange peel not only serves as a convenient container but also infuses your baked goods with a subtle citrus flavor.
You can experiment with various batters, from chocolate cake to blueberry muffins, making this technique versatile for outdoor baking.
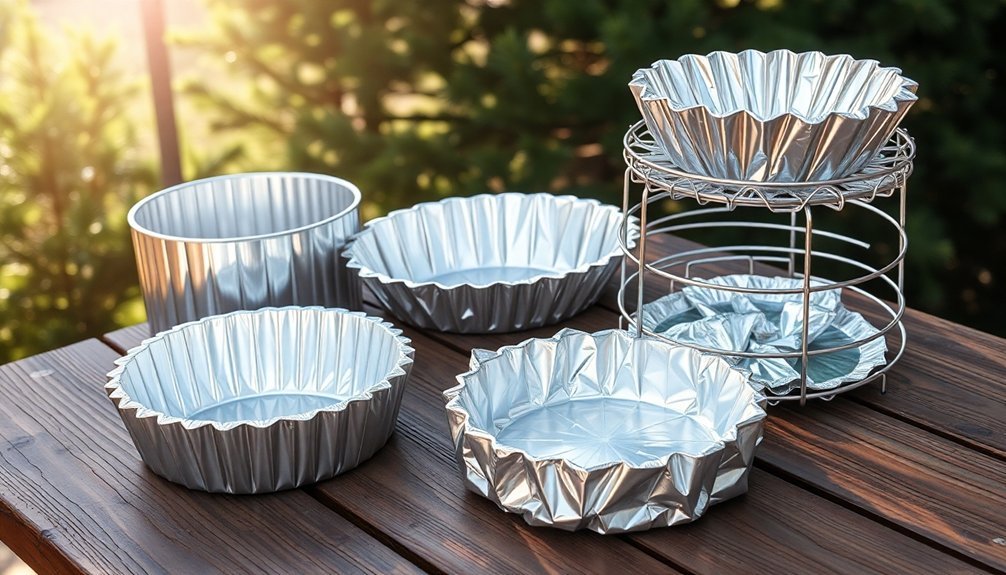
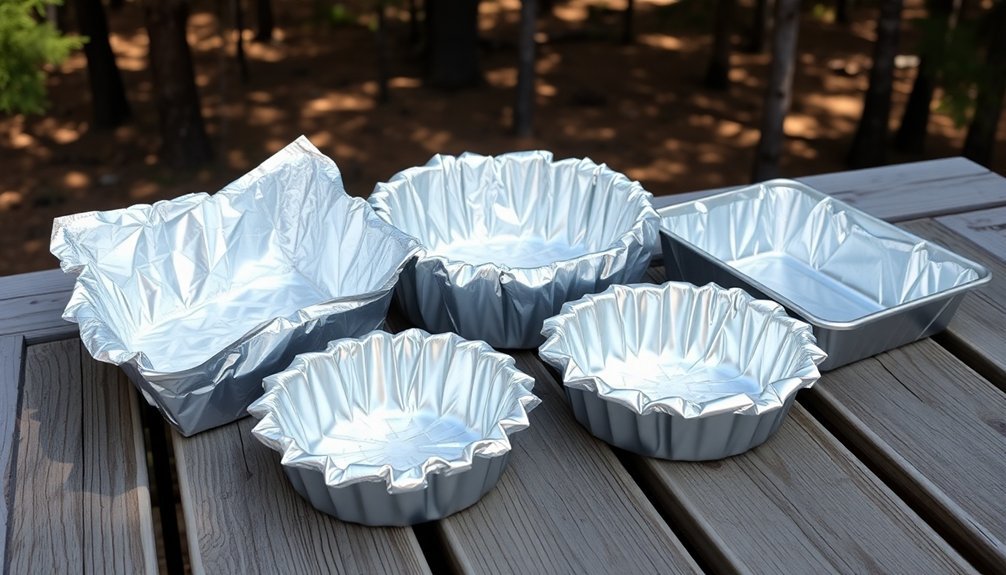
Portable Pan Creation Tips
You'll find that heavy-duty aluminum foil can transform into sturdy makeshift baking pans with just a few strategic folds and crimps.
Creating custom shapes is as simple as molding the foil around existing containers or using your hands to form walls and corners for your desired dimensions.
For extra stability, double-layer your foil and reinforce the edges by rolling them outward, making your portable pan suitable for various outdoor baking adventures.
Foil Molding Basics
Creating portable baking pans with aluminum foil offers a flexible solution when standard cookware won't suffice.
You'll need heavy-duty aluminum foil cut to twice the width and length of your food item. Start by forming a T-shape with your foil sheets, then crimp and fold the edges to create secure walls around your food.
- Build support walls by rolling strips of foil into thick cylinders.
- Secure all corners by folding ends away from the food area.
- Check for gaps and patch with extra foil pieces as needed.
- Line with parchment paper to prevent sticking.
For best results, verify your foil mold is sturdy enough to hold its shape throughout cooking.
You can customize the size to fit your specific needs, whether you're grilling a brisket or baking desserts outdoors.
Quick Shape-Shifting Techniques
When standard baking pans aren't available, everyday household items can transform into versatile baking vessels with minimal effort. You'll find bread loaf pans perfect for tiny sheet cakes, while oven-safe tuna cans work great for small desserts. For single servings, try ceramic mugs or ramekins.
| Item | Shape-Shifting Use |
|---|---|
| Bread Pan | Mini Sheet Cakes |
| Tuna Can | Individual Rounds |
| Ceramic Mug | Single Portions |
| Oatmeal Container | Template for Parchment |
| Ramekin | Brownie Sundaes |
Create custom shapes using parchment paper by cutting strips and folding them lengthwise for stability. Secure with staples around your chosen template, then place on a lined baking sheet. Don't forget to enhance portability by double-panning dense cakes and using a water bath for delicate ones.
Eco-Friendly Outdoor Baking Equipment
Outdoor baking enthusiasts can now embrace eco-conscious equipment that combines sustainability with functionality.
You'll find that eco-friendly materials like stainless steel, ceramic, and glass offer durability while minimizing environmental impact.
- Choose locally produced equipment like the Städler Made Outdoor Oven, which reduces transportation emissions while offering versatile cooking options for pizzas and other dishes.
- Opt for Corten steel outdoor ovens that develop a protective rust layer, ensuring longevity.
- Invest in cast iron skillets and Dutch ovens that work perfectly over campfires and provide multiple cooking options.
- Use reusable silicone baking mats and StasherBags that can handle high temperatures and eliminate single-use waste.
Maintenance is straightforward – most eco-friendly equipment requires only warm water and mild soap, helping you avoid harsh chemicals while preserving their quality.
Quick-Assembly Temporary Pans
Beyond traditional eco-friendly equipment, temporary baking solutions offer practical alternatives for unexpected cooking needs. You'll find that creating quick-assembly pans is simpler than you might think, using common household items like foil and paper towels.
| Method | Materials Needed | Best Used For |
|---|---|---|
| Insulated Strips | Foil + Paper Towels | Cake Pan Sides |
| Heatproof Pads | Double Foil + Paper | Oven Rack Protection |
| Disposable Pans | Foil Containers | Smoker Cooking |
| Pan Liners | Single Foil Sheet | Easy Clean-up |
You can create these temporary solutions by layering materials strategically. For insulated strips, wrap dampened paper towels in foil. When making heatproof pads, sandwich paper towels between foil layers. Don't forget to adjust cooking times and temperatures when using these DIY alternatives, and always verify your temporary pans fit your cooking equipment properly.
Wilderness Pan Adaptation Strategies
Adapting baking techniques for wilderness cooking requires strategic material choices and thoughtful heat management.
You'll need to select heat-retentive metals like cast iron and create a layered setup that promotes even cooking in outdoor conditions.
- Position your cooking setup in a wind-protected area and place non-flammable materials like pebbles or stones at the base for better heat distribution.
- Use crumpled aluminum foil to elevate your baking container and prevent bottom burning.
- Control your flame size based on your pan's thickness – lower flames for thin metals, higher for thick ones.
- Cover your container with a well-fitted lid to trap heat and guarantee uniform cooking.
Remember to take into account resource availability and environmental impact when selecting your baking method and cleaning up afterward.
Frequently Asked Questions
Can I Reuse DIY Foil Pans Multiple Times for Different Dishes?
Yes, you can reuse foil pans multiple times if you clean them properly and avoid high heat damage. Just wash them gently with soapy water, dry thoroughly, and check for wear before each use.
How Do I Prevent My Makeshift Pans From Collapsing During Transport?
Place your foil pan on a sturdy flat tray, form tight rims by crimping edges, and use multiple layers of heavy-duty foil. You'll want to center it carefully and support the bottom completely during transport.
What's the Maximum Temperature DIY Baking Pans Can Safely Withstand?
You'll need to stay under 400°F for most DIY pans. If you're using aluminum foil or disposable aluminum pans, don't exceed 500°F. For safety, it's best to keep temperatures moderate.
Are Staples Safe to Use When Creating Custom Foil Pan Shapes?
You shouldn't use staples in custom foil pans as they pose serious safety risks. They can puncture the foil, contaminate food with metal fragments, and create hazardous cooking conditions. Use folding techniques instead.
How Long Can Baked Goods Stay Fresh in DIY Pans Outdoors?
You shouldn't leave baked goods in DIY pans outdoors for more than 2-4 hours. They'll quickly lose freshness due to temperature fluctuations and moisture exposure. Store them in airtight containers indoors for best results.
In Summary
You'll find these DIY baking pan hacks invaluable for your next outdoor cooking adventure. Whether you're crafting custom foil shapes or using natural materials, you've now got multiple solutions for baking away from your kitchen. Put these techniques to work on your next camping trip or backyard cookout. Remember, with a bit of creativity and these adaptable methods, you'll never be without a proper baking solution outdoors.


Leave a Reply